This card was made for Craft Roulette. #188 whose parameters included a gift card, coffee shop colors, go wild element and number(s).
Have a friend who finds it hard to get going without coffee? This is the card for them complete with a coffee gift card.
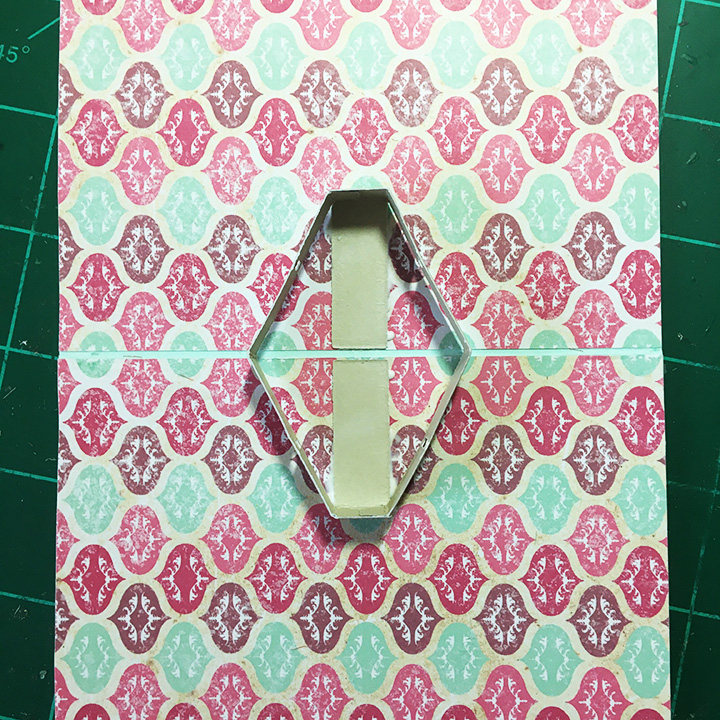
It is made with Karen Burniston’s Coffee Cup Pop-Up that includes tabs to hold a gift card on the back side of the cup. The sweet dragon having his morning cuppa on the card front and the knight in shiny armor atop the coffee cup are also Karen Burniston dies.
Cardbase: Cut from green cardstock one 5×7-inch rectangle and one 5×7.5-inch rectangle. Score and fold 1/2-inch on the 5×7.5-inch rectangle to have a 5×7-inch rectangle with a tab. Glue the tab to the other green piece to make a 5×7-inch top fold card. Cut decorative papers to cover panels inside and out.
Dragon: (Watch the assembly video for the Knight and Dragon die set first.) I cut the dragon from two shades of green cardstock and inked some shading on him. I used the die stencil feature for his eyes, mouth and wings. His red cup is from the Coffee Charms die set.
Knight: (Watch the assembly video for the Knight and Dragon die set first.) I cut two bodies for the knight gluing them back-to-back but sandwiching the red plume behind the helmet first. Add his shield and sword before gluing on his gloves.
Coffee Cup: (Watch the assembly video towards the bottom of the link page Coffee Cup Pop-Up before starting.) I chose to use patterned paper with names of coffee drinks for the body of the cup, white cardstock for the cup lid and kraft cardstock for the cup band. The band die embossed the ridges on it, and I enhanced the ridges with brown ink. Yellow ink was used to shade the cup lid. I used the circle dies in the die set for the logo.
Sentiments: The “Go Wild!” is cut from brown paper using the die set of the same name by Karen Burniston. Th yellow banner inside says “and Slay the Day with Excalibur coffee,” which was computer generated.
Thank you for reading this blog post. I hope this inspires you and makes you smile. Please like and leave comments 😊
Cardbase: I started with a purchased 5×7 cardbase and cut it on its scored fold-line to make two panels that I reattached with paper tape at the short edge sides to make a top fold card. I used tape on both sides of the cardbase. Next, I covered all four panels with decorative papers.
Banners: Three colors of solid cardstock came in the paper collection, and I cut a nested set of banner shapes using the five largest dies in the Banners – Crosshatch set from each color. After playing with mixing and matching the various color combinations, I settled on my choices and glued the frames onto the cardbase allowing some of the patterned papers to show through.
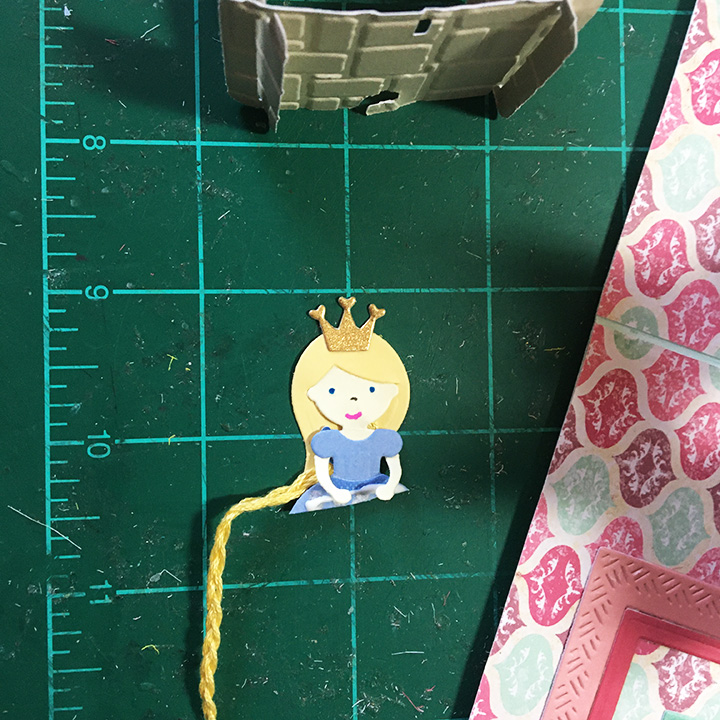
Princess and Knight: The princess, I had made some time ago, from scraps using the Princess and Mermaid die set. I braided three strands of yellow embroidery floss that matched the princess’ hair color and glued it between her hair and the back of her dress. The knight was cut from two types of silver foil cardstock and some blue scraps using the Knight and Dragon die set. (You can watch the assembly video for these dies by clicking on their dies and looking for video on the link page towards the bottom of the website page.)
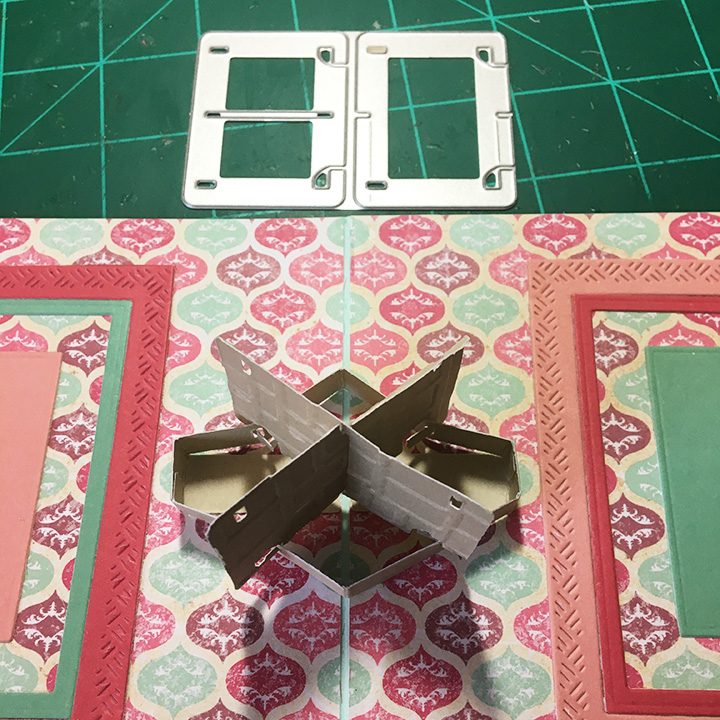
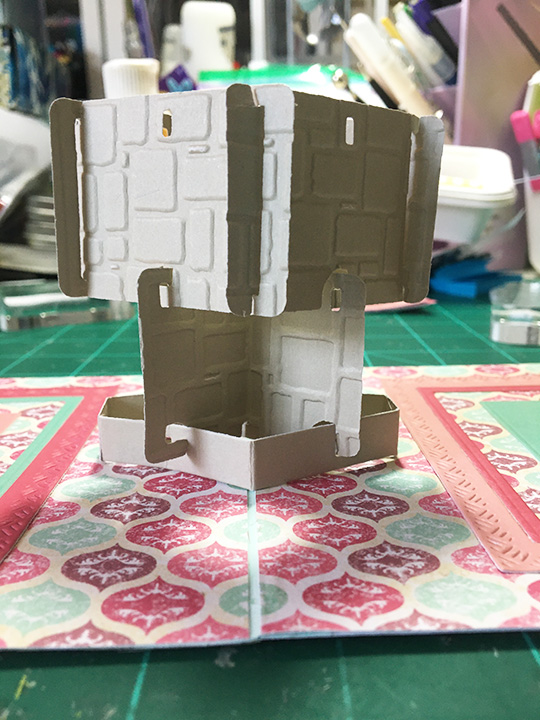
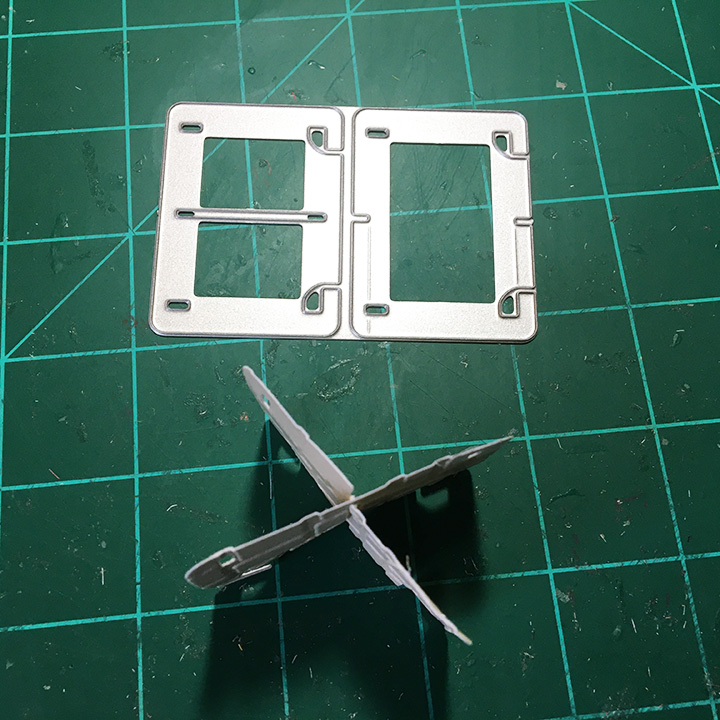
Tower: For the four-story tower, I cut each of the card panel dies twice from heavy gray cardstock using theHouse of Cards Pop-Up die set. Next, I embossed each card using a cobble stone embossing folder. I cut the two base pieces and glued the small tabs to the other piece to for a six-sided polygon. The long tabs I glued inside the card along the fold. (This base is much like Karen Burniston’s palm tree or Christmas tree bases and the attachment of what goes on top of them involves tabs poked through holes. For an assembly video check the bottom of the page linked.)
To build the tower assemble two “Xs” and two squares. Attach one “X” to the base, then attach a square followed by an “X.” Loosely attach the last square and place the princess in it with temporary tape. Close card and if the princess sticks-out of the card, you will need to cut a window in one panel of the top square. (I cut a lip/tab that folded over and was glued to give strength to the card.) You will have to trim off the lower half of the princess to fit in the window and the card. Glue her onto the window lip making sure her gown does not cover the notch used to attach the square to the tower. Make sure her long braid does not hamper the opening and closing of the tower.
Glue the knight to the small side of the tower base making sure he is not attached to any of the playing card panels. Test opening and closing the card to look for catch-points before the glue dries.
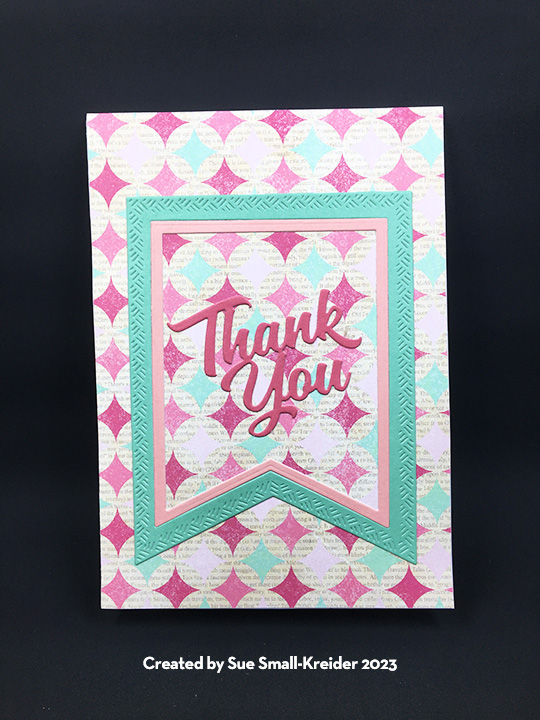
Sentiments: “Thank You” is die-cut using a die set of the same name. The inside sentiment “For coming to my aid” was computer generated, printed on thin printer paper and then die cut with a banner die. A blank banner was also cut from printer paper for a personal message.
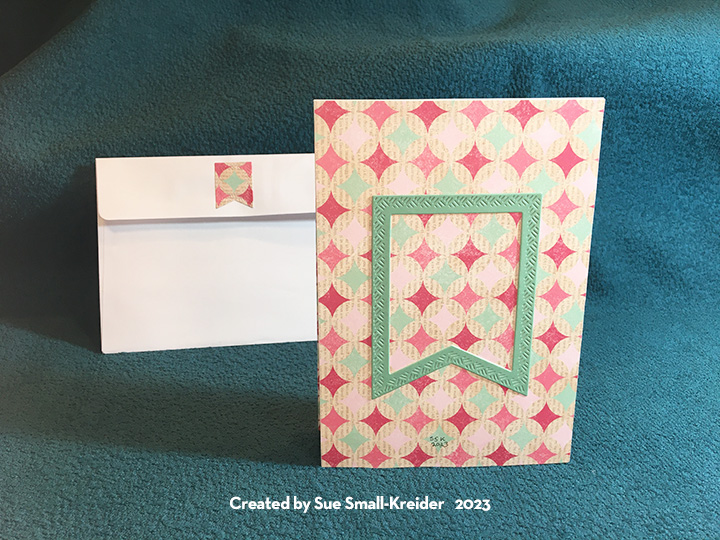
Envelope: The smallest banner in the die set was used to cut the printed paper banner glued to the back envelope flap. It hints at the heraldry to come inside.
Thank you for reading this blog post. I hope this inspires you and makes you smile. Please like and leave comments 😊
One circle the size of the castle from green card stock
One circle at least a half inch larger all round the size of the castle from blue paper
There are two ways to create the card base – one using two single side flaps in the center of the card acting as the hinge with the top black 9 x 4 piece, and the second way using a single piece folded to form the 9x 4 card base. (I will be showing the first way in photos.) Glue top-flaps to short sides of the green card base. With these flaps closed, glue the two side flaps to the center of card base. Glue the final top-fold flap to front side of the two center flaps.
Castle – Lightly ink the embossed tower and wall pieces with a grey or black Distress Ink. Folded the six score lines on the castle piece.
Adhere all decorative pieces to front and back of castle piece except for back/inside short wall and back/inside drawbridge tower pieces. (You will adhere these pieces once the castle is installed to card base so they can cover over the green and twine pieces.)
Glue tab to undecorated side of castle to form a six-side circle.
Fold both the green circle and the blue circle in half and cut along fold. Glue one half of blue circle to center of the center flaps along the center fold. Adhere the other side of blue circle to other side of fold allowing a small gap along the fold so that the card can open easily. Center the green circle pieces over the blue circle and tape the green circle at sides using removable tape. Using the pop-up die with the nubs, center the nubs over the fold or gap on the green circle and tape. Move the taped green circle with die taped to it to die cutting machine. Remove all the tape from the die and green circle after cutting. Fold up the cut tabs in the circle. Glue the green circle on to the blue circle with the tabs up.
Match the drawbridge tab to the inside of the castle and glue in place with the door/bridge open. Thread twine through top holes in tower. Adhere the solid tab to the inside of castle opposite of drawbridge opening. Glue brown door to top of drawbridge matching up holes. Thread twine through drawbridge holes and glue to underside of bridge and then adhere bridge open to blue circle. Glue remaining decorative pieces to inside of castle to hide the green tabs and twine.
From scrap green cardstock cut rectangles to hide the blue showing from where tabs fold up. (An alternative would be to cut circle slightly smaller than the green circle of a thin paper that would mimic grass or stone of a castle floor to cover the holes.)
(If your tallest tower hangs out when the card is closed, you can trim the tower some and reglue the flag. I decided that I could live with the hint of the flag showing.)
Knight, Princess and Dragon – Assemble figures following package directions. To attach the figures and trees to the card, first glue any decorative background papers to the back of the three flaps. Layout the position of the figures and trees with angles platforms making sure none of the figures will show when the card is closed. Adhere the figures to platforms and then to the card base following the die package instructions.
Card Front – Adhere a starry night paper panel to black front card base and the other piece to the back side of card base hiding the flaps’ tabs. With card closed, glue black side of front panel to center flaps.
Secure the inside of black panel to card base with washi tape. Glue “ing” to “wish” to form the word “wishing.” Adhere sentiments to front of card.
A personal message can be added above and below the castle.
The finished card will fit into a #10 business envelope.
Hope this pop-up card has put a smile on your face and provided some inspiration for your crafting. 😊
Patterned papers, pearlescent and solid colored cardstock
Gold and red foiled paper
#10 Business envelope
Washi tape – grass pattern
Don’t forget to come join in the fun at the Dies R Us Challenge Blog. There’s a new challenge theme offered on the 1st and 15th of each month and one lucky randomly drawn winner will receive a gift voucher prize to the Dies R Us Store.
For your convenience, all the important Dies R Us links are provided below.


