A FUNN Winter Greeting Card

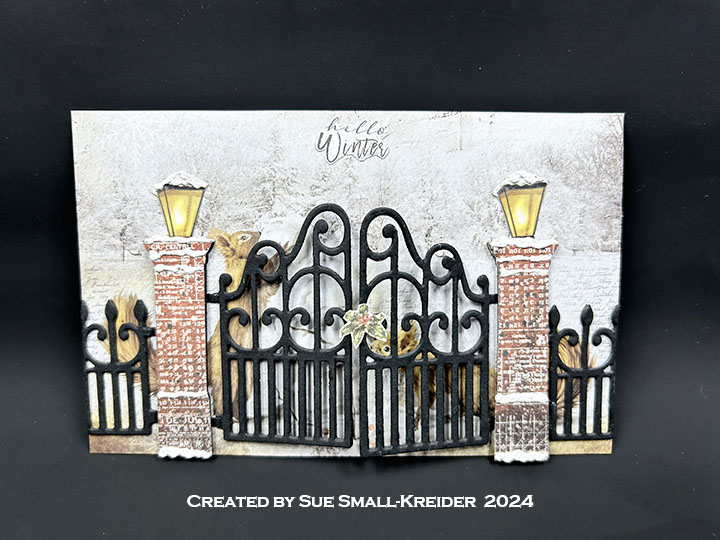
This card was made for Craft Roulette #242 whose parameters included a gatefold card, produce aisle colors, fence element, and crumpled paper.

Watch the process video to see how I made this card.

Cardbase: The cardbase is 4×6-inches of double sided patterned paper.

Sentiment: “hello Winter” is a fussy cut sentiment from the paper collection. The back side of the card has space to write a personal message.

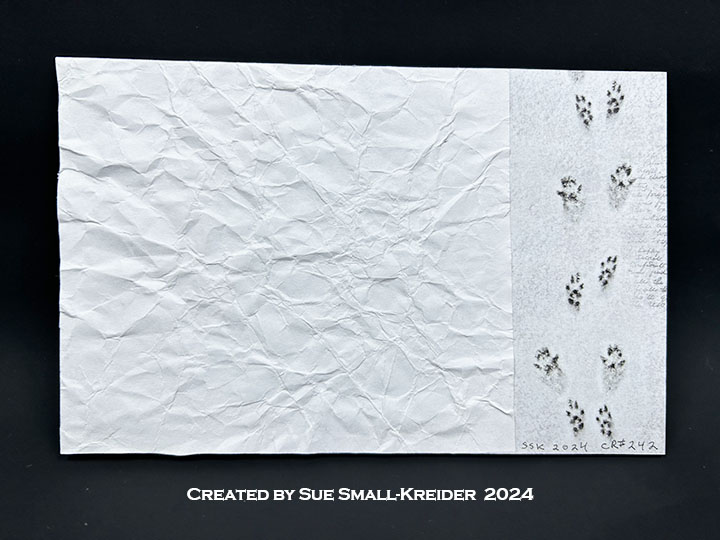
Envelope: This card fits into an A6 envelope with it’s back flap covered with patterned paper to hint at the playful squirrels inside the envelope.

___________________________________

Thank you for experiencing this blog post.

I hope this inspires you and makes you smile.

Please like and leave comments 😊

___________________________________

Disclaimer: Karen Burniston products are provided free of charge by the manufacturer for review and use. All other items were personally purchased. Compensated affiliate links used where or when possible, meaning I will receive a small percentage commission from these manufacturers at no cost to you. This will allow me to add more content to my YouTube channel and help out a lot. Thank you.

Materials Used:

Dies

  • Leane Creatief – LeCrea’Combi Dies – Garden Gate

Papers

  • Ciao Bella Paper – 6×6-inch Double-Sided Papers – Memories Of A Snowy Day
  • Black Cardstock
  • White Copier Paper

Ink

  • Pigma – Mircon 005 Fine Tip Pen – Black

Adhesives

Tools

  • Die Cutting Machine
  • Paper Trimmer
  • Stamping Blocks as paperweights
  • Scissors
  • Paper Masking Tape

Miscellaneous

  • Nellie’s Choice – Effect Snow

Swing Gate Fold

Hi it’s Sue here from the Dies R Us Design Team with another interactive swing gatefold card.

I based this card off of a swing card I made in last week’s blog post. You can get the specific instructions on how to make the bench swing by clicking here.

After cutting a 3 inch square opening on a 5 inches x 6 inches piece of heavy white cardstock, ink blend a soft blue sky all over.

Using two pieces of heavy white cardstock 3 inches x 3 1/2 inches, cover with tiny flowered washi tape (you could use patterned paper instead). Next die cut the gate and fence pieces to fit a 3 inch on each side. Before gluing the fence pieces down, use some of the leafy vine from a birdhoue die set to grow up around the fence.

Once the fence and gate pieces are glued to the 3 x 31/2 pieces score and glue the ¼ inch tabs to the back of the 5 x 6 inch base. Cover the back of the base card with washi tape/patterned paper.

Next glue the swing posts and roof over the cut-out 3 inch square blue inked side. To decorate the posts, glue on more of the leafy vines. Make the bench swing as described in last weeks blog. Attach with tape the threaded chains to the back side of the roof, making sure the bench is hanging even. With the swing in place, glue the second post and roof piece over the 3 inch cut square, matching up the post and roof edges. Glue on dark blue roof pieces to front and back of card.

Back of card

Decorate the scene with trees, birds, squirrels and grass. The swing pillows are cut using the pillow dies from a sofa die set.

You can write a message inside the gates or on the back of the card.

Hope this fun card has put a smile on your face and provided some inspiration for your crafting.

SUPPLIES Used from Dies R Us:

Dies

Inks

Miscellaneous

Other Supplies:

  • Flowered washi tape
  • White embroidery floss
  • Striped and colored paper scraps
  • Black fine tip pen

Don’t forget to come join in the fun at the Dies R Us Challenge Blog. There’s a new challenge theme offered on the 1st and 15th of each month and one lucky randomly drawn winner will receive a gift voucher prize to the Dies R Us Store.  

 For your convenience, all the important Dies R Us links are provided below.

click below for:

STORE

CHALLENGE BLOG

FACEBOOK

INSPIRATION BLOG

FRIENDS OF DIES R US PINTEREST PAGE

Vested Tags

Cards for men can be fun to make when they use a small die set by Leane Creatief which includes a suit jacket, a vest, shirt collar, two ties and a BBQ apron as well as a tag box. The box makes up to a little over 4 ½ inches tall by 1 ¾ inches wide and 3/8 inches deep. Perfect for tucking a note, tickets to a sporting event, or folded money.

(I purchased this die from Dies R Us when they had one of their special European dies sales, but it sold out quickly. You can get some lovely dies from around the world in these sales, but you must act quickly when you see one you like.)

For the card background I used two Poppystamps border dies to create a layered set of circles using oatmeal cookie and a dark brown scrap of cardstock for the layers under the plaid paper. Oatmeal cookie was used to cut the tags out of and a cream piece of Recollections cardstock was used to make a mini slimline card base (5 ½ inches x 3 ½ inches).

The “Happy Birthday” sentiment was cut once from a light color and once from a dark brown scrap and glued together a bit off set to give depth. A third layer was cut and glued to the back not be seen, but to raise the words up.

The vest was cut from a plaid paper. The buttons and pockets were stenciled on through the die. The tag is attached using foam squares.

A mustache was stamped using an older Sizzix stamp set in a dark brown on the back of the envelope.

Thank you for reading this post. Please like, comment, and follow this blog. 🌞

Supplies:

Dies

Stamps

Papers

Inks

Miscellaneous