Watch the process video to see how I made this card.
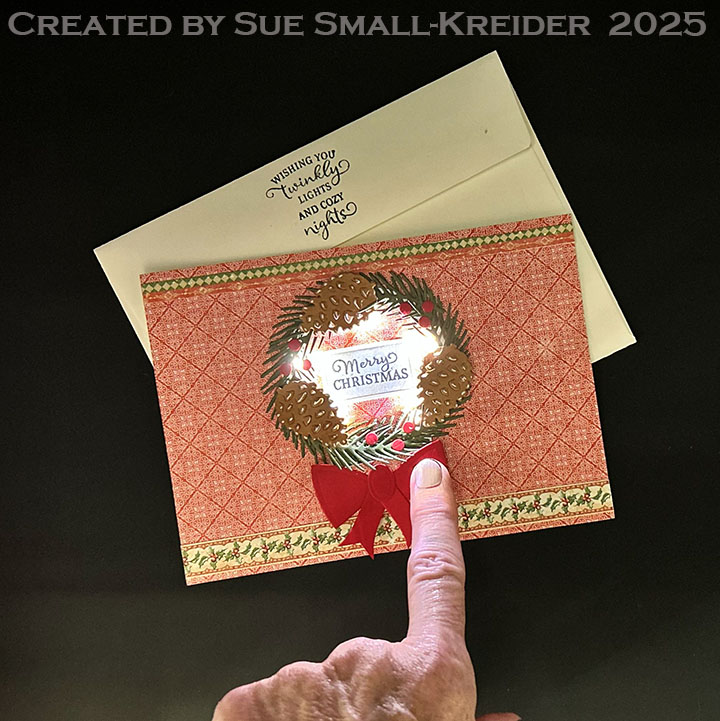
Cardbase: Using a purchased A6 cardbase and envelope, adhere decorative paper to the card front. Save strips of decorative paper to decorate the card front and back.
Card Back
Lighted Wreath: Use a battery powered circle light to build the wreath onto. Cut 12-13 small pine branches from the Pine Cones die set from green cardstock. (I found that adding shims and using a metal die-cutting plate worked the best with my die-cutting machine to get crisp cuts.) Cut from light brown thin cardstock three of the small pine cone backs and three small pine cone fronts. Follow the video above for assembly suggestions and how to make a large red bow to cover the battery and push button using the Dog and Cat Playful Add-Ons set.
Sentiments: All the sentiments of “Merry Christmas” and “Wishing you twinkly lights and cozy nights” are part of the Christmas Wishes stamp set and cut out using the Greeting Labels set.
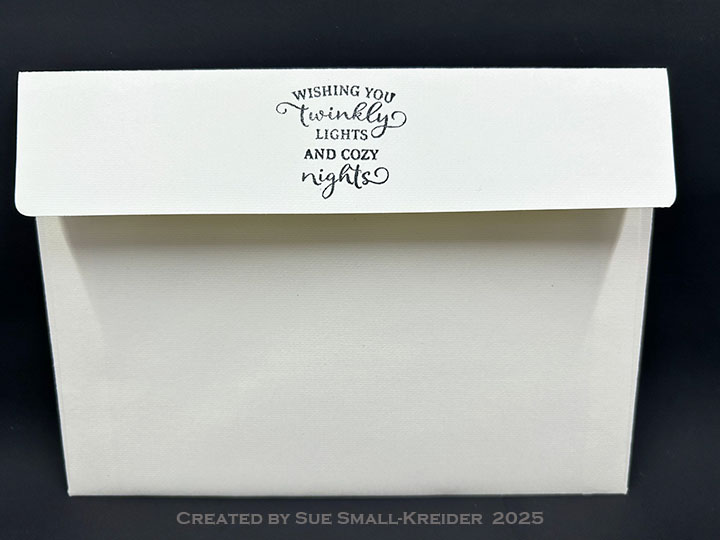
Envelope: The card fits into an A6 (4.75x 6.5-inches) size envelope.
___________________________________
Thank you for experiencing this blog post.
I hope this inspires you and makes you smile.
Please subscribe, like and leave comments 😊
___________________________________
Disclaimer: Karen Burniston products are provided free of charge by the manufacturer for review and use. All other items were personally purchased. Compensated affiliate links used where or when possible, meaning I will receive a small percentage commission from these manufacturers at no cost to you. This will allow me to add more content to my YouTube channel and help out a lot. Thank you.
This card was made for Craft Roulette #252 whose parameters included a card for a teenager, morning colors, fairy (fairies), and bow(s). I choose to interpret fairy as fairy lights and bow as a bow of a ship.
Watch the process video to see how I made this card.
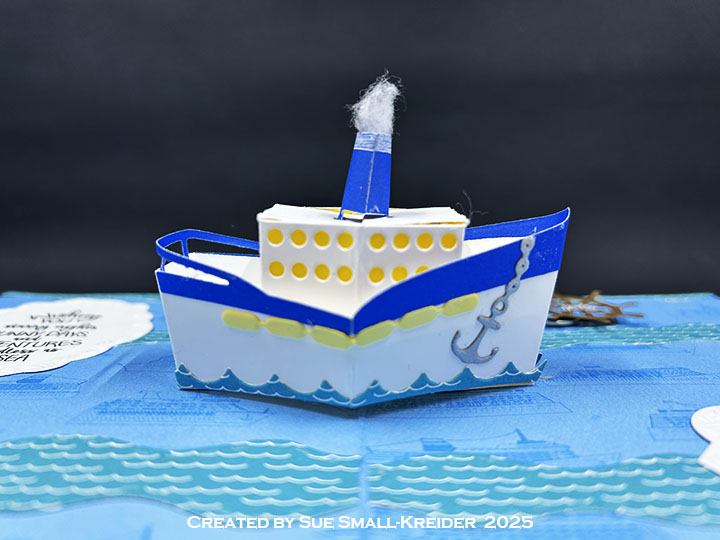
Cardbase: My double sided paper from Carta Bella was cut into a 6.5×10-inch rectangle and folded in-half. The wave decorations were cut using Karen Burniston’s Ocean Edges die set.
Cruise Ship Pop-Up: The cruise ship is made with two die sets by Karen Burniston – Boat Pop-Up and Cruise Ship Add-ons. (You can watch assembly videos for both sets by clicking on their links and going to the bottom of the linked pages.)
Pear Blossom Press Twinkle Lights were used to light-up the ship and the ship’s wheel (from Karen Burniston’s Cruise Charms die set with Pear Blossom Press’ “push” stamp) covers the battery and indicates where to press to turn on the lights.
Sentiments: The “Wishing you…” sentiment is from Karen Burniston’s Cruise Greetings stamp set and the “HBD!” is from Craft Roulette’s Funn Friends #02 stamp set. The sentiments are stamped in black ink on labels cut from Karen Burniston’s Rectangles and Labels – Crosshatch and Labels – Crosshatch die sets. You can download the paperclip slip.
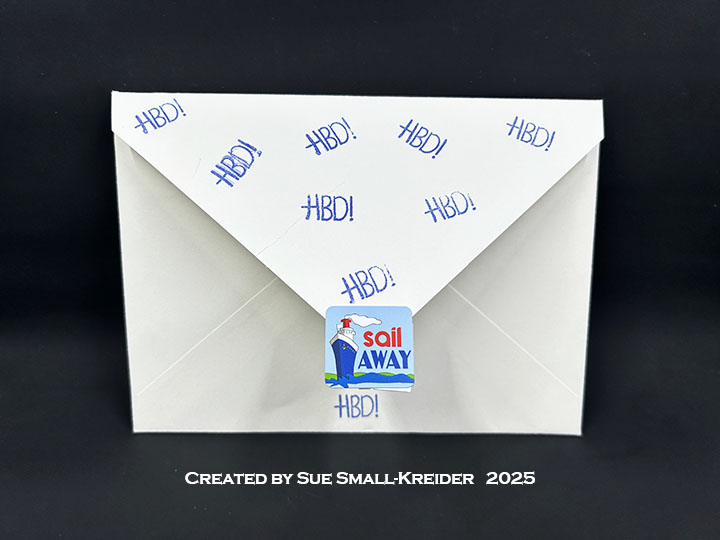
Envelope: The card fits into an A7 (5x 7-inches) size envelope with “HBD!” stamped all over the back flap and sealed with a sticker from the paper collection.
___________________________________
Thank you for experiencing this blog post.
I hope this inspires you and makes you smile.
Please like and leave comments 😊
___________________________________
Disclaimer: Karen Burniston products are provided free of charge by the manufacturer for review and use. All other items were personally purchased. Compensated affiliate links used where or when possible, meaning I will receive a small percentage commission from these manufacturers at no cost to you. This will allow me to add more content to my YouTube channel and help out a lot. Thank you.
I’m using Spellbinders’ APG Die of the Month for May 2022 – Pop-Up 3D Vignette – What’s Bakin’ Oven and a Pear Blossom Press One Light to create this light-up oven.
Watch video above for a tutorial on how to make the card.
Sentiments: The banner greeting of “Happy Christmas” was made using a BetterPress plate and die set.
Envelope: The card fits into an A7 envelope stamped with a sentiment “Warm Wishes” from Hero Arts.
___________________________________
Thank you for experiencing this blog post.
I hope this inspires you and makes you smile.
Please like and leave comments 😊
___________________________________
Disclaimer: Karen Burniston products are provided free of charge by the manufacturer for review and use. All other items were personally purchased. Compensated affiliate links used where or when possible, meaning I will receive a small percentage commission from these manufacturers at no cost to you. This will allow me to add more content to my YouTube channel and help out a lot. Thank you.
Materials Used:
Dies
Elizabeth Craft Designs – Metal Dies – Let’s Bake – 1994
Hero Arts – My Monthly Hero Kit – May 2022 – Kitchen Dies
Spellbinders – APG Die of the Month -May 2022-Pop-Up 3D Vignette – What’s Bakin’ Oven
Spellbinders – BetterPress Press Plate & Die Set – Mistletoe Greetings
Stamps
Hero Arts – My Monthly Hero Kit – May 2022 – Clear Stamps
Pear Blossom Press – Clear Stamps – PBP-01
Spellbinders – BetterPress Press Plate & Die Set – Mistletoe Greetings
Papers
Bazzill – 8.5×11 Cardstock – Tiara -18-1002
Bazzill – 12×12 inch Solid Cardstock – Nautral
Grafix – 8.5×11 Dura-Lar Acetate .005 – Clear Film
Cart Drawer:The cart is based around the Slider Box. Watch the assembly video before die-cutting pieces. I used kraft brown 65 lb. cardstock for the box and drawer. A piece of striped satin ribbon was used as a drawer pull.
A Bam Box (see assembly video) is what pops up the green hands and message of “BOO!” which are from the Halloween Elements die set. There is space to place a special treat in the drawer over the pop-up. When the treat is picked-up the pop-up hands will make a grab at the gift recipient.
Cart Base:The cart’s frame made by die-cutting two of the Fancy Label Accordion panels and removing the center pivot panel and side tab to create a square frame. Fold in half. Glue the u-shape together. I took the two smallest of the off-cuts from the die cut to make the cart handles. (Glue the pieces back-to-back for stability.) Glue handles on to slider box at open end before adhering the u-shape frame to slider box.
Roof Frame: The striped roof awning is cut from some digital striped paper using the large scalloped edged rectangle in the Rectangles and Labels – Crosshatch set. It is held up by a frame made by die-cutting two of the Fancy Label Accordion in white cardstock and cutting off the center pivot panel and side tab. Fold each of the frames at 2 3/4-inches. Glue the frames on to the sides of the cart base, lining up the bottom edge of the white frame to the inside edge of the blue cart frame.
Cut two strips of brown cardstock 1 1/2-inches long by 1/2-inch wide. Fold each strip in half. Pinch the top halves of the roof frames towards each other to form triangular frame. Glue the frame together with the two strips.
Pumpkins:The Halloween Border die set has a row of pumpkins that are the right size to layer onto the cart sides with glue and foam squares.
Jack-O-Lantern: The four-sided jack-o-lantern lights up with an EZ-Light. I created a cube from two strips of clear packaging each folded in half and creased with a bone folder and then folding each half to the middle and creasing so that each strip has four sections to it. Weave one strip over the other to form a cube. Snake the coil of wires of the EZ-Light into the center of the cube.
Position the lighted cube and control piece onto the cart and secure with double sided tape or foam tape. Cut a rectangle of 1 1/2 x 7/8 inches from kraft brown cardstock, center over the control piece and stamp “push here” on the end that has the button.
The large pumpkin die from the Autumn Elements was used to cut out four pumpkins for the jack-o-lantern. The face was cut out using the face insert die from the Halloween Elements set. The pumpkins were inked blended and the ridges outlined with a thin black pen. A green marker was used to color the stems. To lessen light leakage, an orange square was attached to the top of the clear plastic cube and the pumpkin faces attached with foam squares. As part of the final decorations. A small pumpkin from the Skeleton and Bat set was added to the top of the jack-o-lantern.
Roof and Sign: For the roof, the scalloped rectangle from the Rectangles and Labels – Crosshatch set was used with orange and white striped cardstock. (I created my own digital paper.) The sign was created by cutting two of the sentiment oval from the Halloween Charms from black cardstock and glued them onto orange cardstock and fussy cut around the oval frame.
A strip of white cardstock 5-inches long by 1/2-inch wide was folded in half and then the folded end was sandwiched between the two ovals and the ovals glued together. (You now have the equivalent of a large paper brad with two legs.) A slit was cut in the roof fold center for the legs of the sign to slide through and be glued to the underside of the roof.
Cut two of each of the bird dies in the Halloween Elements from black cardstock. Glue the bodies together leaving the legs free. Use the legs as the tabs to glue the birds to the roof ridge on either end of the roof.
Wheels: For the wheels I made a template using middle plain and crosshatched circles from the Circles – Crosshatch set. Cut the plain circle from scrap paper and the place the crosshatch circle die in the middle of the paper circle. Trace around the center of crosshatch die. Fold the paper in half, then half again and once more in half to come up with eight sections of the circle. Using a see-through ruler, mark and draw 5mm wide spokes interesting in the middle of the circle.
Die-cut from dark brown cardstock two plain circles. (Because my cardstock was thin, I cut four circles and glue two together before cutting the spokes.) On the back side of the circles use the paper template to trace the triangles that need to be cute out using a craft knife and straight edge.
Die cut two 1/2 inch circles from black cardstock. (I used the burner dies from the Oven Pop-up set because it was handy. You could use other dies to cover the wheel axle.) Adhere half rounded pearls over the black circles, glue each gem circle to the center of the wheels to make the axle caps.
Glue wheels onto cart’s front posts. Add large pumpkins to hide the cart leg behind the wheel. Additional pumpkins cut from the Autumn Elements (large pumpkin) and Halloween Elements (medium pumpkin) and two black cats from the Skeleton and Bat set, were added to the cart legs.
Finished Measurements: This is a card/gift box is designed to be hand-delivered and measures approximately 8-inches high, 6 1/2-inches wide and 3-inches deep.
Thank you for reading this blog post. I hope this inspires you and makes you smile. Please like and leave comments 😊
It’s time for the Karen Burniston Design Team Challenge for September. We were asked to use the Holiday House for a specific holiday. I have chosen Valentine’s Day.
I have been wanting to combine Karen Burniston’s House of Cards Pop-up set with some EZ-Lights for some time now. By using elements of the Holiday House die set – windows, door, gable string of lights – I was able to create a two-story house of cards that lights up. I also experimented with creating some double-sided coated cardstock using clear heat embossing powder.
Cardbase: I started with a purchased A6 (4.5 x 6.25 inches) cardbase with matching envelope. Because the cardbase was a wide side fold and I needed a short side fold, I cut the cardbase apart on the fold and used a narrow strip of cardstock to hinge the two pieces together which created a small gusset to accommodate the thickness of the pop-up inside. I cut two 4.5 strips of decorative paper with a patchwork design to cover the cardbase inside and out. Cutting the strips in half at 6-inches, I could adhere the four panels inside and out matching the design at the hinge. I trimmed on a paper cutter the edges to make a 4.5×6 inch card that will easily fit into the envelope with its thickness.
Coated Cardstock: After watching Jennifer McGuire do heat embossing on a full sheet of cardstock, I decided to try coated the thickest red cardstock I had (110 lb.) on both sides. I used a clear ink pad to coat my cardstock on one side and sprinkled clear embossing powder over it and used a heat tool to fix the powder into a coating. I repeated this several times on each side of the cardstock. The color darkened and the cardstock became thicker. The finish is not a smooth one, but rather bumpy like a stucco finish. (I found when I die cut the coated cardstock, the coating along the edges became opaque and, in some cases, chipped off. If I do this technique again, I will try doing only one coat of heat embossing.)
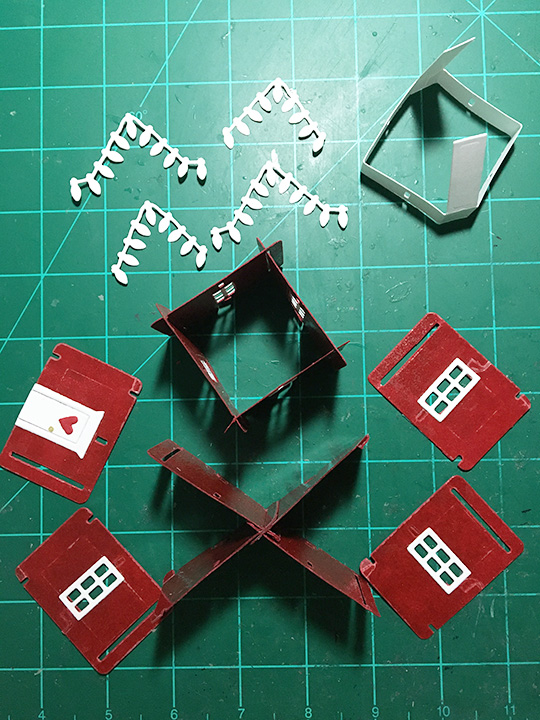
Windows and Door: Because the window dies in the Holiday House set cut two at once, I ended up die-cutting a window frame to act as my pattern to mark around on the back of the red card pieces and then cut out with a craft knife. I built my house of cards first, deciding which panels would need windows cut into them, and then removed them from the house, keeping the second story pieces separate from the end pieces. I cut the seven windows into the individual cards. The doorframe and door were glued on to the last end piece and a tiny, red heart from the holiday house set was glued to the front door.
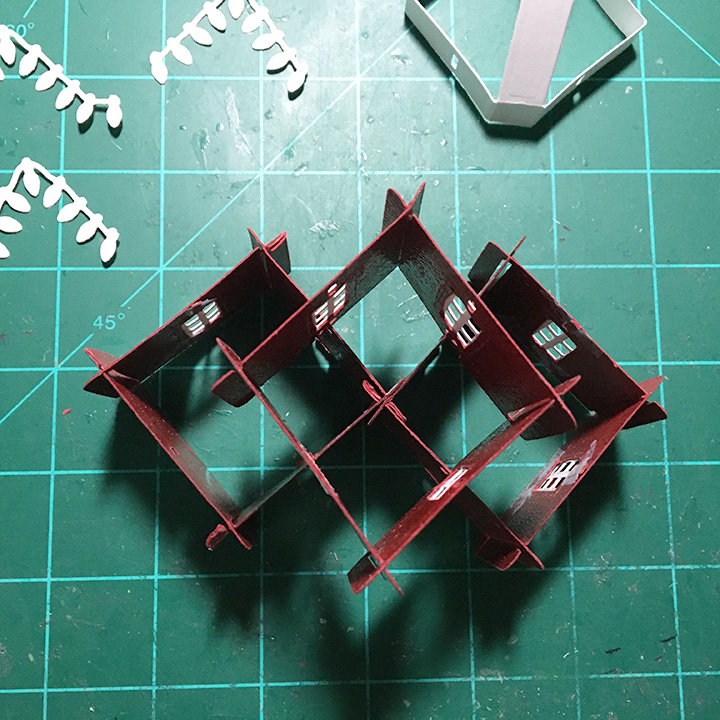
House of Cards: Watch the video at the bottom of the linked page for the House of Cards set before starting. (I played with some practice card pieces I had cut to find the house shape I wanted to use.) Cut three of 4-card die. Cut windows into the seven selected pieces. The house starts with four cards creating an X. (Make sure the golf club cut outs are all facing out on the X. I made them facing in and the house wants to slip loose from the base after opening and closing a few times.) Make a square for the second story from four window pieces. Add the remaining three window panels and door panel to the ends of the X.
Attach the square over the center of the X. Attach the whole house to the white base. (It is easier to add the lights at this point before the gable pieces are added. See instructions below.) Glue the white base to cardbase.
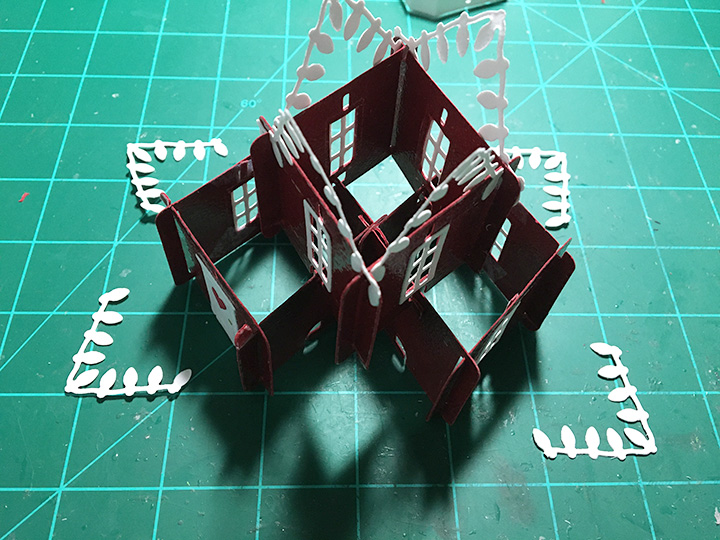
Once the lights are adhere to the inside of the house (I ended up having one wire on the outside of the house by accident) cut eight of the gable lightblubs from the Holiday House set. Trim four of the pieces to have just nine lightblubs in the gable (that two lighblubs off each end before they turn) and four of the pieces to 11 lightblubs (thats trimming just one lightblub off each end.)
Glue the longer pieces to the opposite sides of the square looping the end lightblubs over the card joints. Add one longer piece to each end of the first story of the house. Use the remaining shorter pieces to fill in the sides still needing gable pieces.
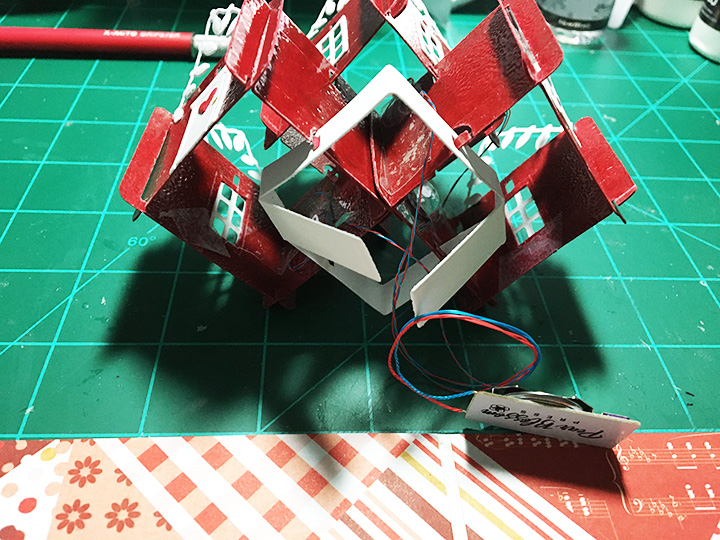
Lights:EZ-Lights are just what they say – easy to install in a card. For the house of cards, I snaked the three wires that end in a light, up through the center x-structure before I glued the white base into the card. Once the white base was attached to the card base, I played with the positioning of the wires and battery/switch plate. I used clear packing tape to secure the light wires onto the walls of the house. (If the coating on the cards had allowed glue, I would have glued a red square of cardstock over the wires.)
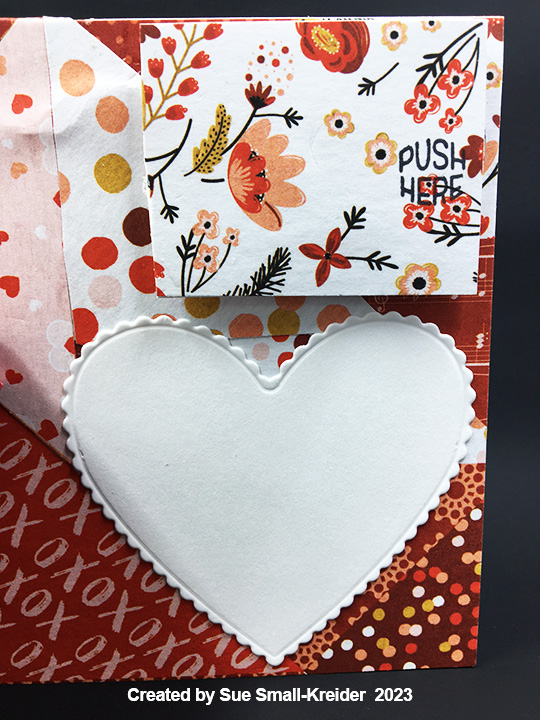
(I found the best position of the plate is almost to the top edge of the card.) To attach the battery/switch plate to the card base, I sandwiched it between double layers of thin foam tape and then took a rectangle of card stock with decorative paper and covered the plate. (Before I attached the rectangle, I stamped a “push here” on the location of where the switch was.) Next, I cut triangles from the decorative paper to glue over the exposed wires on the cardbase.
Sentiments: To make the phrase “You make Home Sweet,” I used the “You” from the Thank You set along with the Home Sweet Home set. I spelled out the word “make” from the Mini Alphabet set. The “You are the Light of my Life” was computer generated and cut with the scalloped heart from the Crosshatch Hearts set. A white scalloped heart was also cut using the same die as a place for a personal message.
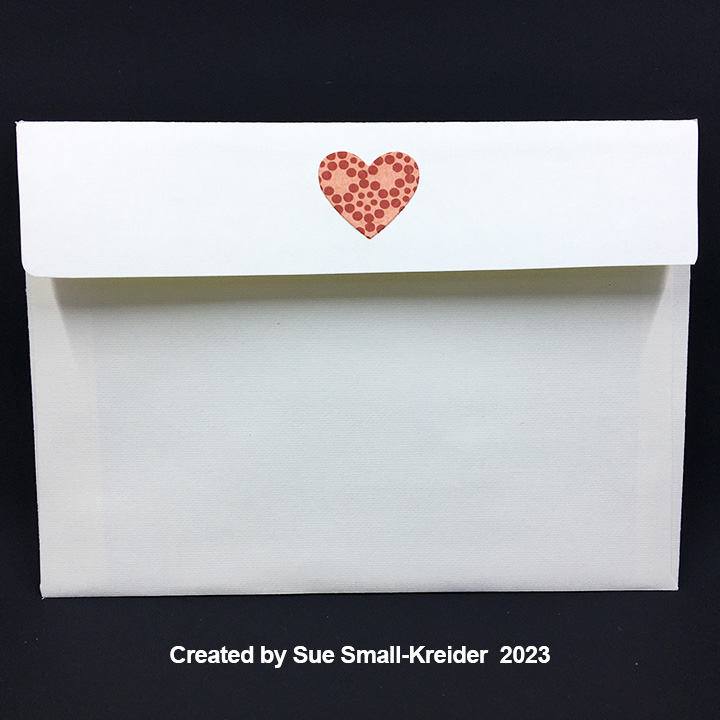
Envelope: A small heart from the Crosshatch Hearts set was cut from decorative paper and glued to the envelope flap to hint at what is inside.
Thank you for reading this blog post. I hope this inspires you and makes you smile. Please like and leave comments 😊