Lighted Christmas Wreath Card

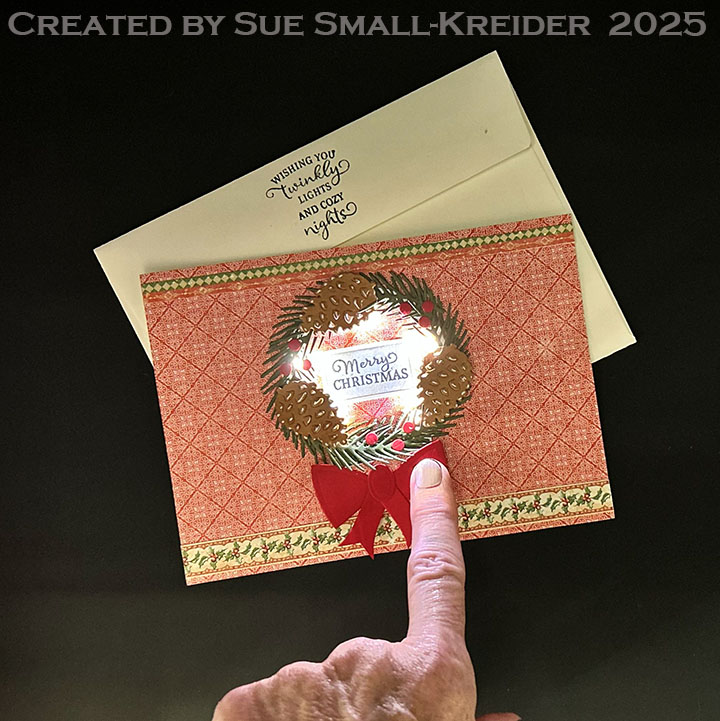
This lighted wreath card will brighten someone’s day. It was made with dies and stamps from Karen Burniston’s Fall releases and include the Pine Cones, Greeting Labels and Dog and Cat Playful Add-Ons die sets along with Christmas Wishes stamp set.

Watch the process video to see how I made this card.

Cardbase: Using a purchased A6 cardbase and envelope, adhere decorative paper to the card front. Save strips of decorative paper to decorate the card front and back.

Lighted Wreath: Use a battery powered circle light to build the wreath onto. Cut 12-13 small pine branches from the Pine Cones die set from green cardstock. (I found that adding shims and using a metal die-cutting plate worked the best with my die-cutting machine to get crisp cuts.) Cut from light brown thin cardstock three of the small pine cone backs and three small pine cone fronts. Follow the video above for assembly suggestions and how to make a large red bow to cover the battery and push button using the Dog and Cat Playful Add-Ons set.

Sentiments: All the sentiments of β€œMerry Christmas” and β€œWishing you twinkly lights and cozy nights” are part of the Christmas Wishes stamp set and cut out using the Greeting Labels set.

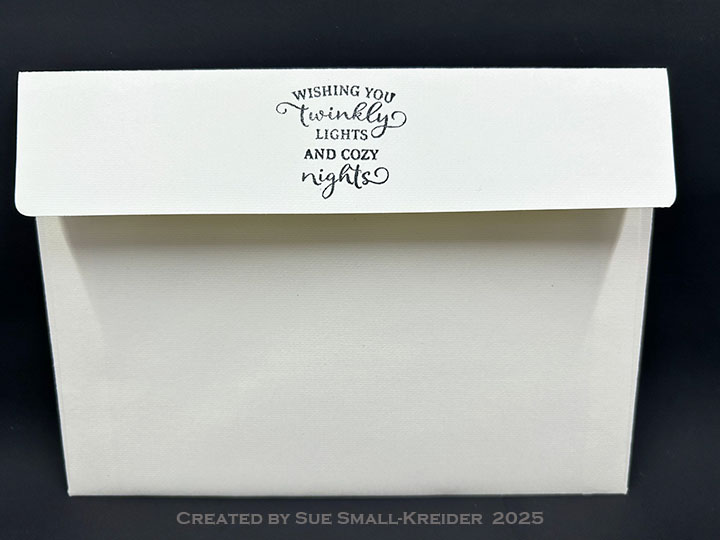
Envelope:  The card fits into an A6 (4.75x 6.5-inches) size envelope.

___________________________________

Thank you for experiencing this blog post.

I hope this inspires you and makes you smile.

Please subscribe, like and leave comments 😊

___________________________________

Disclaimer: Karen Burniston products are provided free of charge by the manufacturer for review and use. All other items were personally purchased. Compensated affiliate links used where or when possible, meaning I will receive a small percentage commission from these manufacturers at no cost to you. This will allow me to add more content to my YouTube channel and help out a lot. Thank you.

Materials Used:

Dies

Stamps

Papers

  • Bazzill – 8.5×11 Textured Cardstock – Rain Forest
  • Graphic 45 – 8×8 Double-Sided Cardstock – Joy to the World – Hallelujah!
  • Light Brown, Red and White Cardstock
  • Park Lane Paperie – A6 Cardbase and Envelope – Ivory

Ink

Adhesives

Tools

  • Die Cutting Machine
  • Paper Trimmer
  • Stamping Platform
  • Stamping Block
  • Scissors
  • Needle Nose Pliers
  • Sponge Dauber
  • Paper Masking Tape
  • We R Memories – QuickStick

Miscellaneous

  • Pear Blossom Press – Halo Light Combo

Shelf Cards – Christmas desserts

This card was made for Craft Roulette #241 whose parameters included a z-fold card, scarecrow colors, bake element, and crinkle inkle technique. This card is also the fourth day in my shelf card series.

Watch the process video to see how I made this card.

Cardbase: The cardbase is an A2 size but is 1/2-inch thick. The z-fold base is made from a 5 1/2×11-inch rectangle folded at 5 1/2-inches and 2 3/4-inches. The buffet easel is made from two rectangles (4 1/4×6 1/2-inches and 4 1/4×3 3/4-inches) each scored and folded at 1/2 and 1-inch of the 4 1/4-inch side. Watch video for how to fold and glue.

Lights: Watch video for how to install the EZ-lights.

Sentiment: β€œMerry Christmas” is die cutting three layers of cardstock and PoppyStamps dies. It is popped-up on think foam squares to act as the easel stopper. The card back is left blank for a personal message.

CRX Sheet: The Card Recipient Experience (CRX) Sheet is a set of instructions on how to open and set-up the card and turn on the lights.

Envelope: This card will be hand delivered or mailed in a box.

___________________________________

Thank you for experiencing this blog post.

I hope this inspires you and makes you smile.

Please like and leave comments 😊

___________________________________

Disclaimer: Karen Burniston products are provided free of charge by the manufacturer for review and use. All other items were personally purchased. Compensated affiliate links used where or when possible, meaning I will receive a small percentage commission from these manufacturers at no cost to you. This will allow me to add more content to my YouTube channel and help out a lot. Thank you.

Materials Used:

Dies

  • Anna Griffin – Metal Dies – Slimline 3D Mantle & Fireplace
  • Honey Bee Stamps – Honey Cuts – Lovely Layers – Hoosier Cabinet Holiday Add-On
  • Paper Discovery – Die Set by Olga Direktorenko – Cosy Kitchen 2D Perfect Kitchen Die Set
  • PoppyStamps – Craft Dies – Lavish Merry Christmas

Stamps

  • Pear Blossom Press – Clear Stamps – PBP-01

Papers

  • Memory Box – 8.5×11 inch Woodgrain Embossed Kraft Paper
  • Recollections – 8.5×11 inch 65 lb. Cardstock – Christmas Collection – Poinsettia
  • Stampin’ Up – 8.5×11 Thick Basic White Cardstock
  • Stamperia – 12×12 inch Double-Sided Papers – Winter Botanic
  • Brown Cardstock

Ink

  • Ranger – Tim Holtz – Distress Ink- Aged Mahogany
  • StazOn – Solvent Ink – Jet Black
  • American Crafts – Metallic Marker – Gold
  • Pigma – Mircon 01 Fine Tip Pen – Black
  • Sakura – Gelly Roll Pen – Medium – White
  • Sharpie – Permanent Marker – Ultra Fine Tip – Black, Brown

Adhesives

Tools

  • Die Cutting Machine
  • Paper Trimmer
  • Bone Folder
  • Score Board
  • Stamping Blocks
  • Scissors
  • Ice Pick
  • Piercing Tool
  • Pencil
  • Craft Mat
  • Sponge Daubers
  • Paper Masking Tape
  • Metal Ruler
  • Tweezers
  • We R Memories – QuickStick
  • Cello Bag from packaging

Miscellaneous

  • Red Organza Ribbon 1/2-inch wide
  • Pear Blossom Press – EZ-Lights
  • Heart Shaped Paper Dolie

A Light-Up Christmas Card

This card was made for Craft Roulette #238 whose parameters included collage, Italian restaurant colors, short element and diagonal lines.

Watch the video to see how I made this card.

Cardbase: I used a 11 x 4 1/4-rectangle folded in half to form a top-fold A2 (4 1/4 x 5 1/2-inch) card. The top panel was folded in half to form the easel.

Lights: Use one Pear Blossom Press Halo Light attaching to the front of the easel cardbase with double-sided tape. Cut a piece of white cardstock to cover the battery and button. Stamp the “Press Here” over where button is and attach with double-sided tape to battery case.

Wreath: Cut at least 20 pine tree branches from different shades of green. Cut a circle frame using the fourth and fifth larges circle dies and glue the pine branches around the circle. Attach the wreath to halo light with foam squares. Decorate with red dots and robin cut from decorative papers.

Sentiments: β€œWishing you a season of cheer” is from a new Karen Burniston stamps set Season of Cheer. The “Press Here” stamp is from Pear Blossom Press.

Envelope: The card fits into an A2 (4 1/4 x 5 1/2-inch) size envelope.

___________________________________

Thank you for experiencing this blog post.

I hope this inspires you and makes you smile.

Please like and leave comments 😊

___________________________________

Disclaimer: Karen Burniston products are provided free of charge by the manufacturer for review and use. All other items were personally purchased. Compensated affiliate links used where or when possible, meaning I will receive a small percentage commission from these manufacturers at no cost to you. This will allow me to add more content to my YouTube channel and help out a lot. Thank you.

Materials Used:

Dies

Stamps

Papers

  • Stamperia – 12×12 Double-Sided Papers- Winter Botanic
  • White Cardstock
  • Fraser Papers for William House – A2 Envelope – Genesis Text Milkweed Smooth

Ink

  • Hero Arts – Alcohol-Marker Friendly Ink Pad – Intense Black
  • Pigma – Mircon 01 Fine Tip Pen – Black

Adhesives

Tools

  • Die Cutting Machine
  • Paper Trimmer
  • Bone Folder
  • Stamping Platform
  • LDRS – Stampendable Stamping Tool
  • Scissors
  • Paper Masking Tape

Miscellaneous

  • Pear Blossom Press – Halo Light