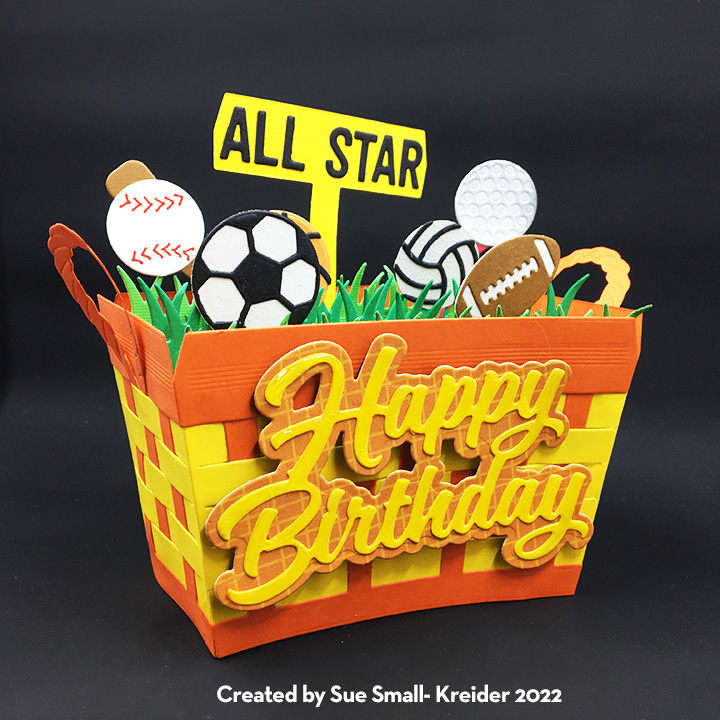
This card was made for Craft Roulette #320 whose parameters were: z-fold card, Summer vacation colors, game(s) element and add a cat random. I used Karen Burniston dies and Crackerbox Stamps for this A7 (5×7-inch) card and envelope.

Watch the process video to see how I made this card.
Cardbase: I took a purchased A7 (5×7-inch) white cardbase and folded the front panel at 2-inchs from the corner for a z-fold cardbase. Next, I cut panels of green textured paper and covered the three inside panels and used a leftover scrap to cover the left half of the front of the card.
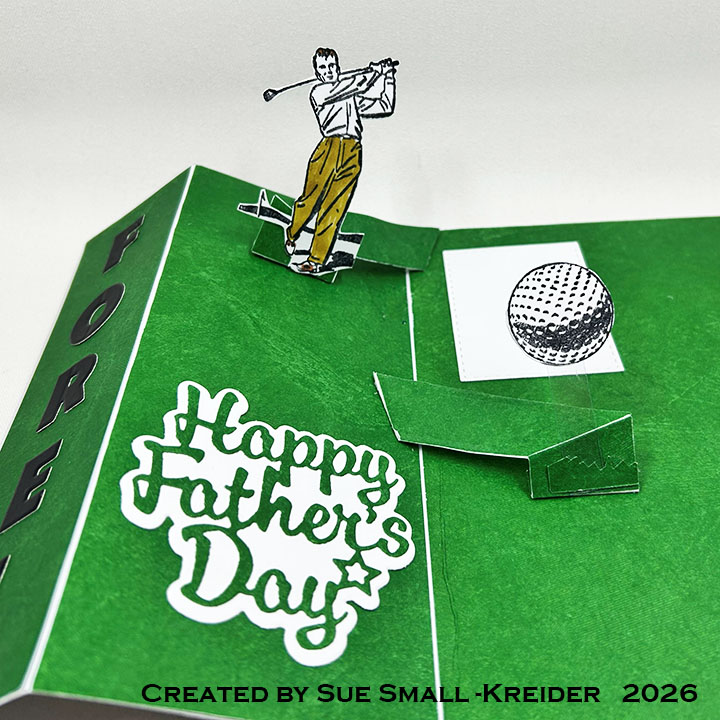
Golfer Pop-Up: Stamp golfer on white cardstock in black and color in pants and hair and shoes. Rough cut the shape of golfer and glue green paper to back side. Fussy cut the golfer. Die cut two of the Flip Frame Pop-Up arm mechanism from white 65lb. cardstock. Cut one more mechanism arm from the green paper. (Watch assembly video at bottom of linked page for Flip Frame Pop-Up.) Set aside one of the white arms for the golf ball in next step. With the remaining white arm, train the folds as shown in the video above. Cut apart the green arm into sections to cover the exposed sides of the white arm. (The two largest sections go on the top of mechanism and save the tab pieces to cover the back sides of the tabs once the mechanism is glued into the cardbase.) Glue in the arm at the top of the main inside fold of cardbase. Glue the golfer to the front face of the mechanism as shown in the videos, making sure that golf club doesn’t stick out of the fold close card.
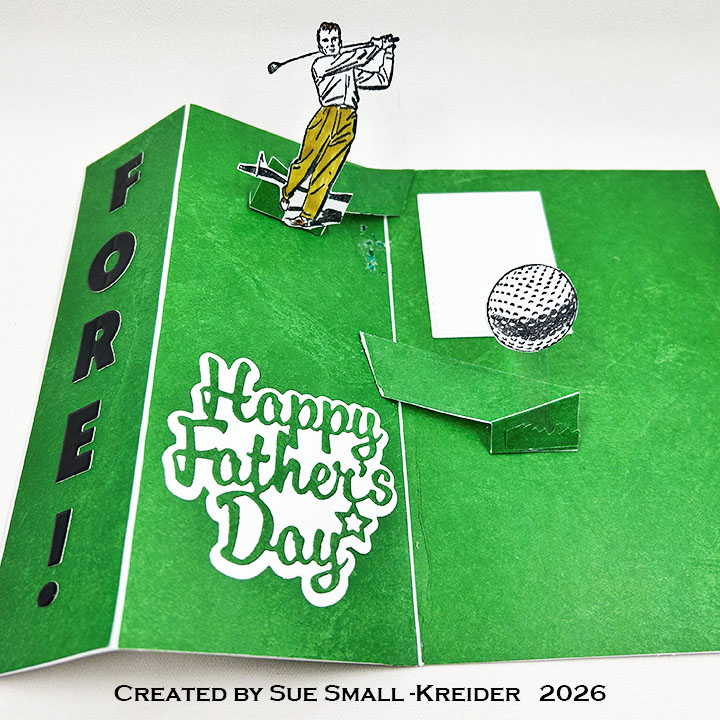
Golf Ball Pop-Up: Cut one of the Flip Frame Pop-Up arm mechanism from the backside of the green paper. Train the folds of the reserved white arm backwards from the arm used for the golfer. Cover the arm using the green paper arm sections as done in the last step for the golfer’s mechanism. Stamp two golf balls on white cardstock and fussy cut out. Cut a strip of clear acetate (plastic) about 3/8-inch by 2-inches. With the stamped sides out, sandwich, using double-sided tape, the acetate strip between the two balls. Set aside. Practice laying-out where the second mechanism arm will be glued into the card so that the golfer won’t become a catch-point for the second mechanism. (I didn’t do this step and ended up having to remove the second arm. You can see the divots from that mistake to the right of the golfer’s feet.) Once the arm mechanism is glued and dry. Test fit the ball strip and determine the length of the plastic strip so that the ball fits inside the card. Attach strip to front of arm mechanism with double-sided tape. (You can add a grassy decoration piece over the base of the strip.)
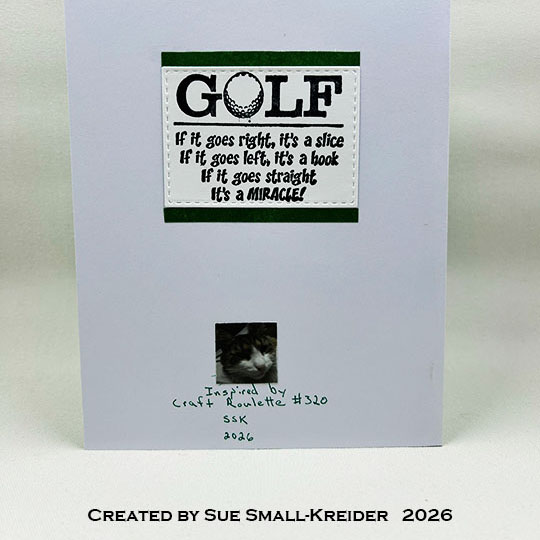
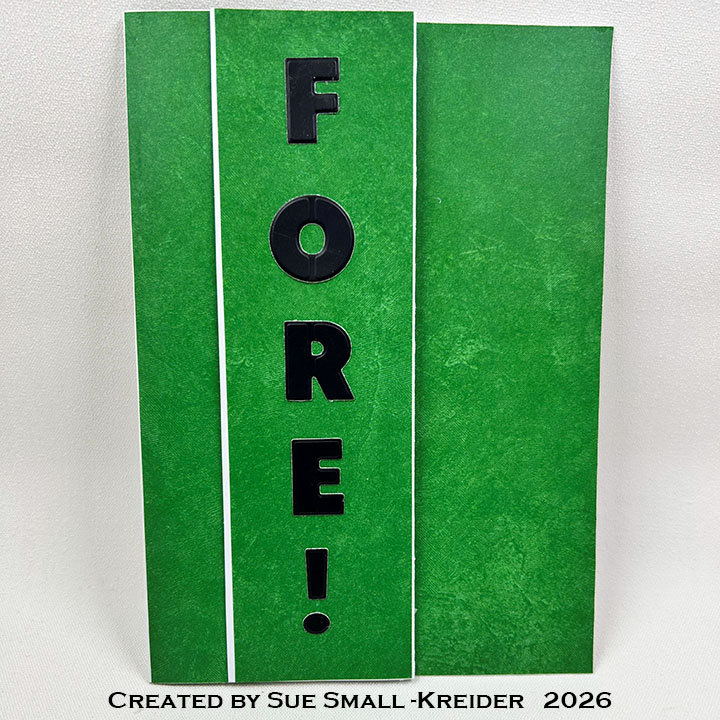
Sentiments: The outside sentiment of “FORE!” is made up of die-cut letters from Karen Burniston’s Alphabet dies. Inside the sentiment is made with her Happy Father’s Day shadow and word dies. The white label for a personal message is from the Flip Frame Pop-Up set. The funny golf sentiment on the card back is from Crackerbox Stamps.
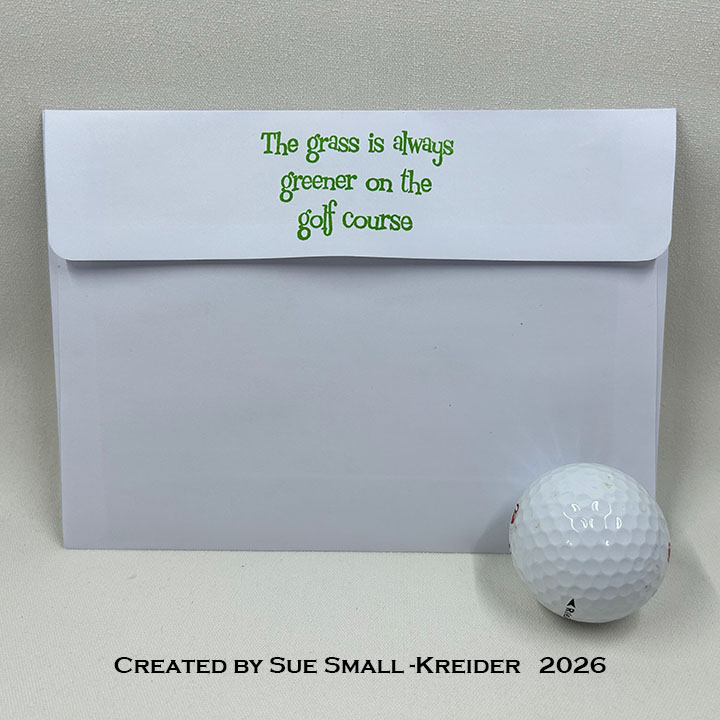
Envelope: The card fits into an A7 (5×7-inches) envelope with “The grass is always green on the golf course” stamped on the back flap in green ink. Stamp is from Crackerbox Stamps.
___________________________________
Thank you for experiencing this blog post.
I hope this inspires you and makes you smile.
Please subscribe, like and leave comments 😊
Follow my YouTube channel, Instagram and Pinterest as well.
___________________________________
Materials Used:
Dies
- Karen Burniston in cahoots with Riley and Company – Happy Father’s Day – 1164
- Karen Burniston in cahoots with Riley and Company – Flip Frame Pop-Up – 1134
- Karen Burniston in cahoots with Riley and Company – Alphabet – 1053
Stamps
Papers
- The Paper Studio – 12×12 Patterned Paper – Texture – Green
- The Paper Studio – 8.5×11 Cardstock -65lb – White
- Black Packaging Cardstock
- Acetate Strip
- A7 Envelope – White
Ink
- Memento – Fade-Resistant Dye Ink – Tuxedo Black
- Green Gel Pen
- Simon Says Stamp! – Pawsitively Saturated Ink – Fairway
- Stampin’ Up – Stampin’ Blends Marker – Dark Wild Honey & Light Copper Clay
Adhesives
- Neutral PH Adhesive by LINECO
- Fine-Tip Glue Bottle
- Double-Sided Tape – 1/4-inch wide
Tools
- Bone Folder
- Die Cutting Machine
- Microfiber Cloth
- Ruler
- Scoring Board
- Scrapbook.com – Magic Mat
- Scissors
- Scrapbook.com – Mint Tape
- Stamping Blocks as paper weights
- Tweezers
- We R – Precision Press Mini – Stamping Platform