Sandy Dunes Birthday Card

I just got the July 2025 Simon Says Stamp Card Kit with the theme of Windows on the World. Using the Landscapes stencil from the kit, made this sand dunes scene Birthday card.

Cardbase: Start with a 4.25 x 11-inch piece of cardstock and fold in half to form a side-fold A2 (4.25×5.5-inch) card.

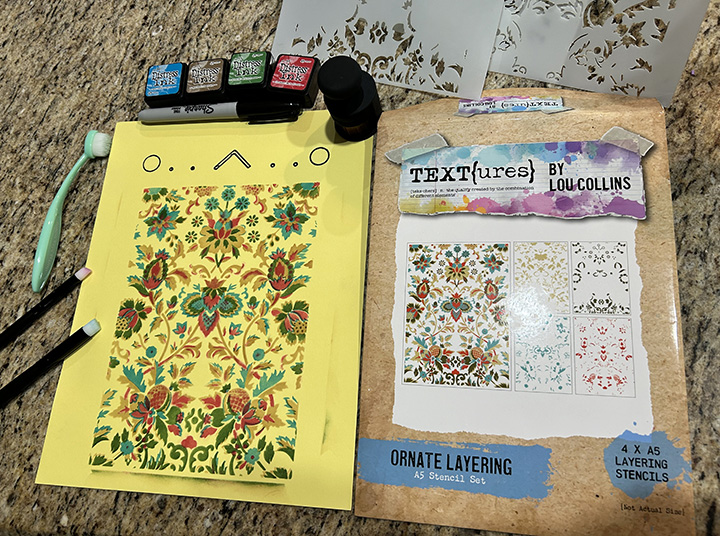
Stenciled Scene: Using the stencil by sticking the 4.25×5.5-inch white cardstock panel through the water patterns slots, I worked my way from the bottom up to build water waves coming ashore, then the sand dunes and finally the cloudy sky. The water used the two darker shades of blue while the sky used the lightest blue. The stencil includes three birds in flight, which I stenciled on using a fine tipped black marker.

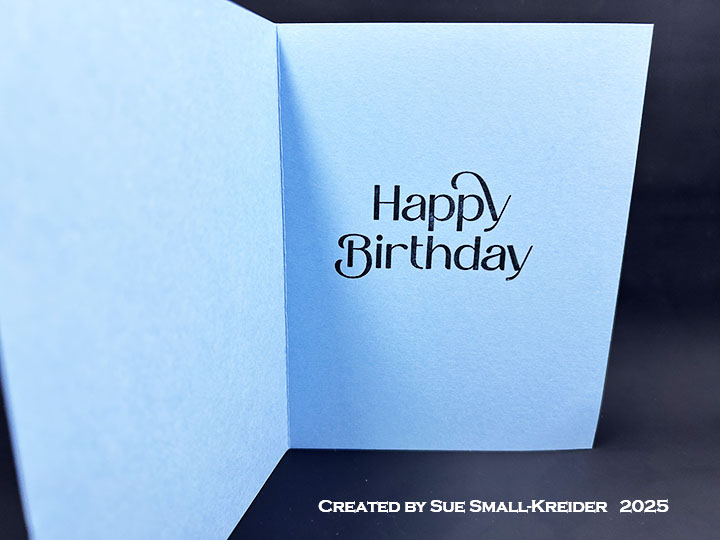
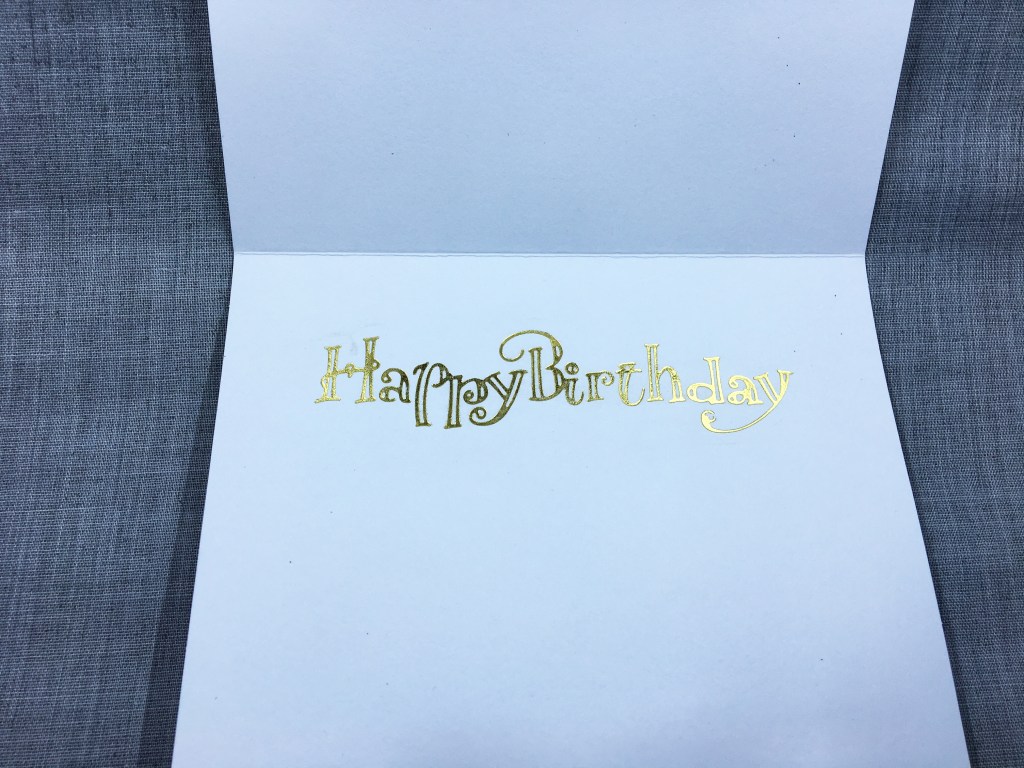
Sentiments:  All the sentiments come from the Through The Window stamp set.

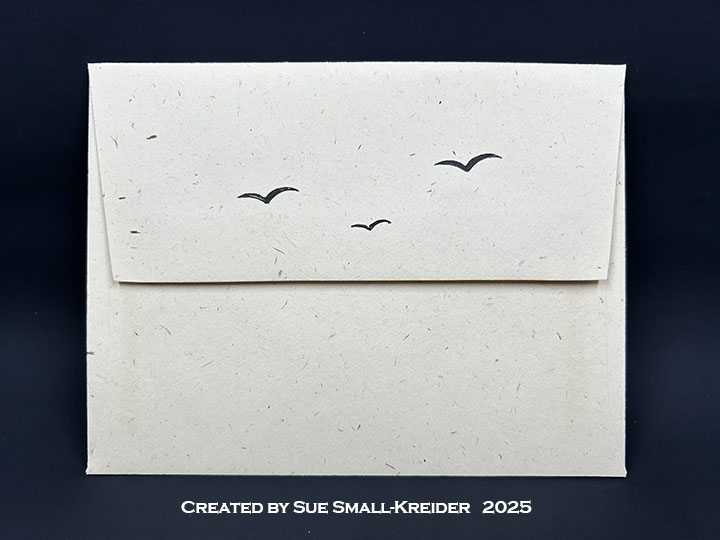
Envelope:  The card fits into an A2 (4.25x 5.5-inches) size envelope stenciled with the three birds on the back flap.

___________________________________

Thank you for experiencing this blog post.

I hope this inspires you and makes you smile.

Please like and leave comments 😊

___________________________________

Disclaimer: Karen Burniston products are provided free of charge by the manufacturer for review and use. All other items were personally purchased. Compensated affiliate links used where or when possible, meaning I will receive a small percentage commission from these manufacturers at no cost to you. This will allow me to add more content to my YouTube channel and help out a lot. Thank you.

Materials Used:

Stencils

  • Simon Says Stamp! – 6×6-inch Plastic Stencil – Landscapes

Stamps

  • Craft Roulette – Clear Stamps – Through The Window

Papers

  • SpellBinders – 8.5×11-inch -100lb Cardstock – Raindrop
  • White Cardstock
  • Fraser Papers for William House – A2 Envelope – Genesis Text Husk Smooth

Ink

  • Memento – Fade Resistant Dye ink – Tuxedo Black
  • Pigma – Mircon 03 Fine Tip Pen – Black
  • Stampin’ Up – Classic Stampin’ Pad – Azure Afternoon, Balmy Blue, Crumb Cake, Pacific Point

Adhesives

Tools

  • Die Cutting Machine
  • Paper Trimmer
  • Stamping Platform
  • LDRS – Stampendable Stamping Tool
  • Stamping Blocks used as paperweights
  • Scissors
  • Paper Masking Tape
  • We R Memories – QuickStick

Gilded Pop-up Birthday Cards

Needing some birthday cards and wanting to try out some brass colored Shimmer Relief Paste from Altenew, I made these stenciled-with-paste, card fronts and embellished them with ribbon and a Karen Burnistonhello” two-piece die cut.  Inside is a Karen Burniston pop-up greeting and a Craft Roulette inspired verse.

Cardbase: I used purchased A7 (5×7-inch) cardbases that I stenciled the fronts with Shimmer Relief Paste and stencils by Honey Bee Stamps (Scattered Seeds) and Scrapbook.com (Hearts). The card backs feature a single balloon from the Big Birthday Charms die set.

Pop-Up: Watch the assembly video for the Katherine Label. Stamp the verse inside the card before adding the mechanism. (I found that gluing the bottom word onto the mechanism worked best to avoid catchpoints, including the two added balloons.)

Sentiments:  All the inside die cut sentiments used on the card come Karen Burniston designs including the Katherine Label mechanism that pops the “Happy Birthday” up with its Big Birthday Charms balloons. The stamped verse is from Craft Roulette’s Funn Sentiments #01.

Envelope:  The card fits into an A7 (5x 7-inches) size envelope stamped with “HBD” on the back flap from Craft Roulette’s Funn Sentiments #01.

___________________________________

Thank you for experiencing this blog post.

I hope this inspires you and makes you smile.

Please like and leave comments 😊

___________________________________

Disclaimer: Karen Burniston products are provided free of charge by the manufacturer for review and use. All other items were personally purchased. Compensated affiliate links used where or when possible, meaning I will receive a small percentage commission from these manufacturers at no cost to you. This will allow me to add more content to my YouTube channel and help out a lot. Thank you.

Materials Used:

Dies

Stencils

  • Honey Bee Stamps – 6×6-inch Plastic Stencil – Scattered Seeds
  • Scrapbook.com – 6×8-inch Plastic Stencil – Hearts

Stamps

  • Craft Roulette – Clear Stamps – Funn Sentiments #01

Papers

  • Blues and Orange Foiled Cardstock
  • Gold Matte Paper – Junk Mail
  • Black, Kraft and White Cardstock
  • Park Lane Paperie – A7 (5×7-inches) Cardbases and Envelopes – Kraft

Ink

  • Memento – Fade Resistant Dye ink – Tuxedo Black
  • Nuvo – Aqua Shimmer Brush – Glitter Gloss
  • Pigma – Mircon 005 Fine Tip Pen – Black

Adhesives

Tools

  • Die Cutting Machine
  • Paper Trimmer
  • Stamping Platform
  • LDRS – Stampendable Stamping Tool
  • Stamping Blocks used as paperweights
  • Scissors
  • Plastic Knife
  • Paper Masking Tape

Miscellaneous

  • Artistry by Altenew – Shimmer Relief Paste – Brass
  • Ribbons – White & Gold 1/2  – 3/4-inch wide

Dress-Shaped Card

This card was made for Craft Roulette #268 whose parameters included a card for a student, modern colors, clothing element, and abstract blob(s). I made an A9  shaped-card of encouragement for a student of life.

Watch the process video to see how I made this card.

Cardbase:  Using a 5.5×8.5 sheet of paper fold in half- long ways and draw one side of a dress. Cut the dress out and use as a pattern to trace for two dresses on an 8.5×11 sheet of cardstock. Add tabs to shoulders of one dress as hinges to create the shaped card.   

Sentiments:  All the sentiments are stamped using rubber stamps from Riley & Company’s Funny Bones collection, except for the “Go Girl Go” which was die cut using Karen Burniston’s Mini Alphabet die set.

Envelope:  The card fits into a catalog envelope (6×9-inches).

___________________________________

Thank you for experiencing this blog post.

I hope this inspires you and makes you smile.

Please like and leave comments 😊

___________________________________

Disclaimer: Karen Burniston products are provided free of charge by the manufacturer for review and use. All other items were personally purchased. Compensated affiliate links used where or when possible, meaning I will receive a small percentage commission from these manufacturers at no cost to you. This will allow me to add more content to my YouTube channel and help out a lot. Thank you.

Materials Used:

Dies

Stamps

  • Riley & Co. – Funny Bones – Rubber Stamp – Whatever You Do – RWD-822
  • Riley & Co. – Funny Bones – Rubber Stamp – Life is Better – RWD-464

Stencils

  • Honey Bee Stamps – Stencil set – Winter Wonder Scene Builder – HBSL-11

Papers

  • White 80lb. Cardstock

Ink

  • Sunbird Spark – Velvety Dye Ink – Ochre, Olive Grove, Puya

Adhesives

Tools

  • Die Cutting Machine

Miscellaneous

  • Mint Green Ribbon

Stenciling Fun

I played with the March 2025 Spellbinders’ Stencil of the Month set – Mosaic & Quilted Memories and the Embossing Folder of the Month – Mosaic Memories to create some birthday cards.

Watch the process video to see how I made these cards.

All cards are A2 size (4.25×5.5-inches).

Voilet Mosaic: This card used – Stencil of the Month – Mosaic Memories – SOM-MAR25, Embossing Folder of the Month – Mosaic Moments – EOM-MAR25, BetterPress Press Plate & Die Set – Cheers To You Sentiments, BetterPress Press Plate & Die Set – Make A Wish Sentiments, Distress Inks – Shaded Lilac & Wilted Violet, Purple gems, Lilac cardstock and White cotton paper.

Blue Violet Mosaic: This card used – Stencil of the Month – Mosaic Memories – SOM-MAR25, Embossing Folder of the Month – Mosaic Moments – EOM-MAR25, BetterPress Press Plate & Die Set – Make A Wish Sentiments, Distress Inks – Shaded Lilac & Wilted Violet, Blue gems, Light Blue & Lilac cardstock and Grey cotton paper. (Blue sentiment strip “Have the best day ever” is a heat embossed with a blue sparkle powder. Stamp set unknown.)

Violet Quilted:  This card used – Stencil of the Month – Quilted Memories – SOM-MAR25, BetterPress Press Plate & Die Set – Fancy Sentiment Strips, Distress Inks – Shaded Lilac, Yellow gems, Lilac cardstock and White cotton paper.

Posey Quilted:  This card used – Stencil of the Month – Quilted Memories – SOM-MAR25, BetterPress of the Month Press Plate & Die Set – Paint The Town-BPOM-NOV24, Distress Inks – Milled Lavender, Yellow gems, Lilac & Purple cardstock and White cotton paper. (Purple sentiment banner is hot foiled in black foil using an unknown “Happy Birthday” Glimmer plate but cut using Fancy Sentiment Strips die.)

Red Quilted:  This card used – Stencil of the Month – Quilted Memories – SOM-MAR25, BetterPress Press Plate & Die Set – Make A Wish Sentiments, Distress Inks – Lumberjack Plaid, Mustard Seed & Spiced Marmalade, Yellow cardstock, White cotton paper and a red satin bow.

___________________________________

Thank you for experiencing this blog post.

I hope this inspires you and makes you smile.

Please like and leave comments 😊

___________________________________

Disclaimer: Karen Burniston products are provided free of charge by the manufacturer for review and use. All other items were personally purchased. Compensated affiliate links used where or when possible, meaning I will receive a small percentage commission from these manufacturers at no cost to you. This will allow me to add more content to my YouTube channel and help out a lot. Thank you.

Materials Used:

Press Plates & Dies

  • Spellbinders – BetterPress Press Plate & Die Set – Cheers To You Sentiments
  • Spellbinders – BetterPress Press Plate & Die Set – Fancy Sentiment Strips
  • Spellbinders – BetterPress Press Plate & Die Set – Make A Wish Sentiments
  • Spellbinders – BetterPress of the Month Press Plate & Die Set – Paint The Town-BPOM-NOV24

Stencils

  • Spellbinders – Stencil of the Month – Mosaic & Quilted Memories – SOM-MAR25

Embossing Folders

  • Spellbinders – Embossing Folder of the Month – Mosaic Moments – EOM-MAR25

Papers

  • Blue, Lilac, Purple, White and Yellow 65 lb. Cardstock
  • Crafter’s Companion – 4.25×5.5 250 gsm Cotton Paper – Cream, Grey, White
  • Scrapbook.com – 8.5×11 110 lb. Cardstock – Neenah Solar White
  • Fraser Papers for William House – A2 Envelope – Genesis Text Milkweed Smooth

Ink

  • Pigma – Mircon 01 Fine Tip Pen – Black
  • Ranger – Tim Holtz – Distress Ink – Milled Lavender, Shaded Lilac, Wilted Violet
  • Spellbinders – BetterPress Ink – BetterPress Black

Adhesives

Tools

  • Die Cutting Machine
  • Paper Trimmer
  • Gelli Arts – 8×10-inch Gel Plate
  • Bone Folder
  • Score Board
  • Scissors
  • Pencil
  • Paper Masking Tape
  • We R Memories – QuickStick

Miscellaneous

  • Red Satin Ribbon Bow
  • Adhesive Backed Gems- Blue, Purple, Yellow

Kindness Personified – A Thank You Card

This card was made using stamps and dies from the February 2025 Scrapbook and Cards With Love event. I designed this card before the event as a thank you card.

Cardbase:  Cut a 8.5×5.5-inch rectangle from white cardstock. fold to make a side-fold A2 (4.25×5.5-inch) card base. Cut a 4.25×5.5-inch rectangle of white cardstock and emboss it using the brick stencil.

(Use the embossing sandwich for a die as recommended for your die cutting machine.) Then glue the brick panel to the front of card.

Coffee Cup:  Stamping the coffee cup on a lightweight white cardstock in red ink. Stamp the dots on the lower half of the cup also in red. Using a blending brush and stencils, color in the handle and shade the top, sides and bottom of the cup leaving most of the center white. Die cut out the cup. Adhere to card front using thin foam squares (or one layer of foam tape.)

Flowers:  Stamp the floral bouquet onto lightweight white cardstock and color using the stencil set and sponge daubers to color with Distress Inks. Die cut out the bouquet. Adhere to card front using thick foam dots (or two layers of foam tape.) Add highlights to the bouquet with a glitter gloss pen.

Sentiments:  Die cut the “You are” from dark purple and its shadow from white. Glue together.  Stamp on the inside “kindness” in black and “made with love” on the card back in red.

Envelope:  The card fits into an A2 (4.24×5.5-inch) envelope with flowers stamped on the back flap.

___________________________________

Thank you for experiencing this blog post.

I hope this inspires you and makes you smile.

Please like and leave comments 😊

___________________________________

Disclaimer: Karen Burniston products are provided free of charge by the manufacturer for review and use. All other items were personally purchased. Compensated affiliate links used where or when possible, meaning I will receive a small percentage commission from these manufacturers at no cost to you. This will allow me to add more content to my YouTube channel and help out a lot. Thank you.

Materials Used:

Dies

  • Scrapbook and Cards Today’s With Love Feb. 2025 workshop kit – Dies

Stamps

  • Scrapbook and Cards Today’s With Love Feb. 2025 workshop kit – Clear Stamps

Stencil

  • Scrapbook and Cards Today’s With Love Feb. 2025 workshop kit – Stencils

Papers

  • Recollections – 8.5×11 65 lb. Cardstock – White
  • Purple Cardstock
  • Fraser Papers for William House – A2 Envelope – Genesis Text Milkweed Smooth

Ink

  • Memento – Fade Resistant Dye ink – Rose Bud, Tuxedo Black
  • Ranger – Tim Holtz – Distress Ink- Abandon Coral, Fossilized Amber, Mowed Lawn, Rustic Wilderness, Saltwater Taffy, and Seedless Preserves
  • Pigma – Mircon 005 Fine Tip Pen – Black
  • Nuvo – Aqua Shimmer Brush Marker – Glitter Gloss

Adhesives

Tools

  • Die Cutting Machine
  • Paper Trimmer
  • Stamping Platform
  • LDRS – Stampendable Stamping Tool
  • Stamping Blocks
  • Scissors
  • Craft Mat
  • Sponge Daubers
  • Paper Masking Tape
  • Blending Brush

A Jungle Postage Stamp Thank You Card

This card was made for Craft Roulette #240 whose parameters included a card for a helper, cereal box colors, jungle element, and a paper sack.

I choose to make a thank you card with a paper sack for an itty-bitty gift, stenciling tropical flowers and a large moth that you might see in a jungle. (Please note that after I completed the process video, I decided to add some cancellation stamps to the front of the card. So they are not mentioned in the video, but they are Waffle Flower stamps.)

Watch the process video to see how I made this card.

Cardbase:  Cut a 5.5 x 8.5-inch piece of white cardstock and fold in half to form a 4.25×5.5 top-fold A2 size card.

Sentiments:  The front sentiment “Cheers to you” is from a BetterPress plate and die set while the inside foiled “Thank You” is a Spellbinders Glimmer plate die cut with a Waffle Flower Postage Collage rectangle die. The “Itty-bitty gift stamped on the paper sack is from the Craft Roulette Stamp set.

Envelope:  The card fits into an A2 (4.25x 5.5-inches) size envelope with an extra moth stamp on the back flap.

___________________________________

Thank you for experiencing this blog post.

I hope this inspires you and makes you smile.

Please like and leave comments 😊

___________________________________

Disclaimer: Karen Burniston products are provided free of charge by the manufacturer for review and use. All other items were personally purchased. Compensated affiliate links used where or when possible, meaning I will receive a small percentage commission from these manufacturers at no cost to you. This will allow me to add more content to my YouTube channel and help out a lot. Thank you.

Materials Used:

Dies

  • Spellbinders – Glimmer Plate – Everyday Sentiments – GOM-FEB19
  • Spellbinders – BetterPress Plate – Cheers To You – BP-162
  • Waffle Flower – Steel Craft Die – Postage Collage Die
  • Waffle Flower – Steel Craft Die – Postage Collage Moth Die

Stamps

  • Craft Roulette – Clear Stamps – Funn Sentiments #01
  • Waffle Flower – Clear Stamps – Postage Collage

Stencil

  • Waffle Flower – Plastic Stencil – Postage Collage Coloring Stencil
  • Waffle Flower – Plastic Stencil – Postage Collage Moth Stencil
  • Waffle Flower – Plastic Stencil – Postage Collage Poinsettia Stencil

Papers

  • White Cardstock
  • Fraser Papers for William House – A2 Envelope – Genesis Text Milkweed Smooth

Ink

  • Simon Says Stamp – Premium Dye Ink – Mint
  • Simon Says Stamp – Pawsitivity Saturated Ink – Aegean, Bubblegum, Fairway, Lemonade, Sweets
  • Stampin’ Up – Classic Ink Pad – Basic Grey, Gray Granite, Smoky Slate
  • Pigma – Mircon 01 Fine Tip Pen – Black

Adhesives

Tools

  • Gel Plate
  • Die Cutting Machine
  • Spellbinders – BetterPress Letter Press System
  • Spellbinders – Glimmer Hot Foil System
  • Paper Trimmer
  • Bone Folder
  • Stamping Blocks
  • Scissors
  • Craft Mat
  • Paper Masking Tape
  • Blending Brush
  • Detail Blending Brushes (Altenew & Kat Scrappiness)

An Art Deco Birthday card

This card was made for Craft Roulette #230 whose parameters included shaped card, peacock colors, tall element and XOXO.

Watch the video below to learn how I made the card.

Cardbase: I made a side-fold A2 cardbase by folding a 4 1/4 x 5 1/2-inch rectangle in half and stenciled the front on a separate panel. The tiny gold gems where glued on as the last decoration.

Sentiments: The banner sentiments were made using the Spellbinders BetterPress letterpress system and Cheers to You press plates and dies. The inside of the card is blank for a personal message.

Envelope: Envelope flap was stenciled with the same stencil and inks.

Here are two more cards I made at the same time using the same inks and stencil sets, but different BetterPress press plate – Mistletoe Greetings. (“Merry everything” sentiment inside is from Scrapbook and Cards Today’s Jolly Holiday workshop kit.)

___________________________________

Thank you for experiencing this blog post.

I hope this inspires you and makes you smile.

Please like and leave comments 😊

___________________________________

Disclaimer: Karen Burniston dies are provided free of charge by the manufacturer for review and use. All other items were personally purchased. Compensated affiliate links used where or when possible, meaning I will receive a small percentage commission from these manufacturers at no cost to you. This will allow me to add more content to my YouTube channel and help out a lot. Thank you.

Materials Used:

Dies

  • Spellbinders – BetterPress Press Plates & Dies – Cheers to You Sentiments
  • Spellbinders – BetterPress Press Plates & Dies – Mistletoe Greetings

Stencils

  • PinkFresh – Stencils – Art Deco
  • Spellbinders – Stencil of the Month – March 2024 – Dynamic Backgrounds

Press Plates

  • Spellbinders – BetterPress Press Plates – Cheers to You Sentiments
  • Spellbinders – BetterPress Press Plates – Mistletoe Greetings

Stamps

  • Scrapbook and Cards Today’s Jolly Holiday workshop kit – Clear Stamps

Papers

  • White Cardstock
  • Spellbinders -BetterPress Double Weight Cotton Card Panels – 220 lb. – Porcelain
  • Sliver Cardstock Scrap Swags
  • Fraser Papers for William House – A2 Envelope – Genesis Text Milkweed Smooth

Ink

  • Spectrum Noir – Shimmer Gold Series Pearlescent Pigment Ink – Secret Garden
  • Spectrum Noir – Shimmer Silver Series Pearlescent Pigment Ink – Starlight Sky & Tropic Blue
  • Spellbinders – BetterPress Ink – BetterPress Black
  • Pigma – Mircon 01 Fine Tip Pen – Black

Adhesives

Tools

  • Bone Folder
  • Stamping Platform
  • LDRS – Stampendable Stamping Tool
  • Paper Trimmer
  • We R Memories – QuickStick
  • Gel Plate
  • Blending Brush
  • Paper Masking Tape

Miscellaneous

  • Craftstash – Gold Half Gems

Playing With New Cardmaking Tools

I just got a lovely shipment from Craftstash of papercrafting tools. Included in the package were a layered tapestry stencil set by Lou Collins in her TEXT{ures} brand and a Creative Craft Products gift box maker scoring board with ball tool. Below is a stenciled pillow gift box that I made with these tools.

Stenciling: The four layering stencils in Lou Collins’ Ornate Layering A5 Stenciling Set creates a multi-color tapestry design in the William Morris style. Because I don’t have a stenciling platform or jig that works with the stencils, I taped the first stencil onto the center of my 8 1/2 x 11-inch piece of cardstock and used a marker to trace the jig holes at the top of the stencil onto the cardstock, so I could line-up the various stencils each time. I used a variety of small ink blending brushes to ink in each stencil. I found the small detail brushes worked well as did the larger surface brush on all areas of the stencils. (Sorry I don’t know the brands of the various brushes I used.)

Pillow Box: I used the stenciled piece of cardstock to create a pillow box for a gift card using the Creative Craft Products gift box maker scoring board with ball tool. First I trimmed the cardstock to the 15cmx15cm recommended size and then sandwiched the cardstock between the acetate and scoring board and taped the edges of the acetate at the corners. Next, I used the small end of ball tool to trace over the red pillow box template lines and then turn the cardstock 180 degrees to mark the opposite end’s eye shaped fold/cut lines. After trimming off the excess cardstock, I adhered the side tab to the other edge with double-sided tape.

__________________________________________

Thank you for reading this blog post.

I hope this inspires you and makes you smile.

Please like and leave comments

__________________________________________

There’s Always Room for Cake

There is always room for indulgence on one’s birthday. This card is inspired by the Daisy Mae Designs bakery and sweet shops collection of stamps and stencils.

I created the gingham stenciled background with the striped stencil inked one way for the vertical stripes and then turned once to ink the horizontal stripes in coral ink. The doily is inked with the green pistachio through a stencil. The cake was stamped with a permanent black ink and then colored with watercolor pencils and mixed using a waterbrush.

Sentiments stamped on the front of the card come from the Daisy Mae stamp set while the inside sentiment is a Spellbinders’ foiling plate.

The envelope’s back flap was stamped using a mask to stamp just the fruit atop the cake and the spayed with gold mica mist.

Hope this card brings a smile to your face. 😊 Please like and leave a comment.

Supplies:

Stamps/Stencils

Inks/Watercolors

Papers

Foiling

Miscellaneous