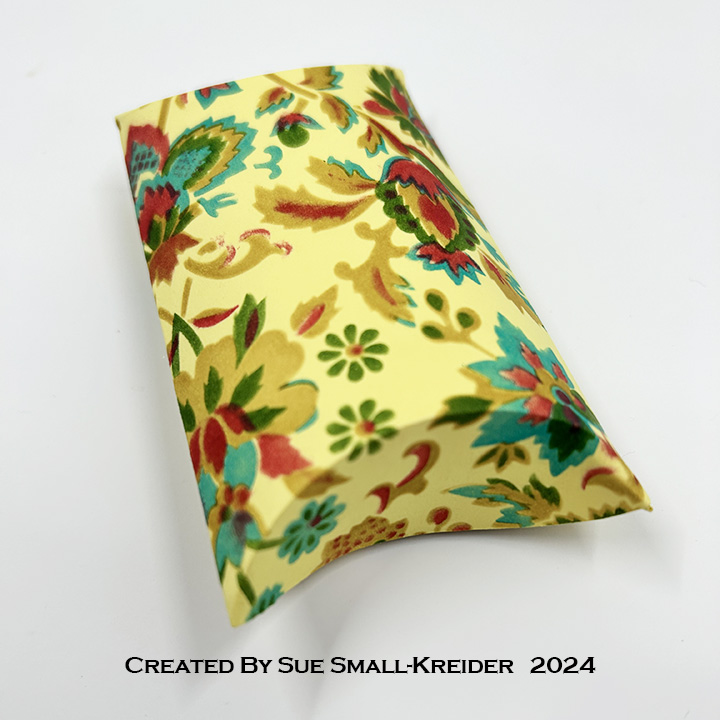
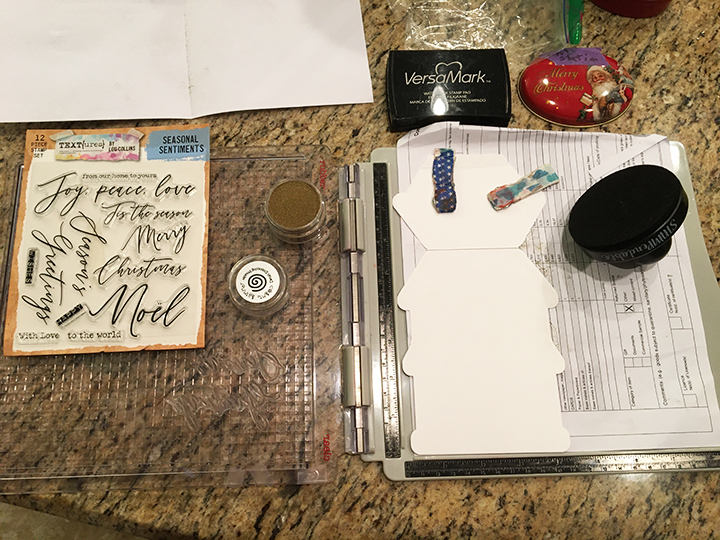
I just got a lovely shipment from Craftstash of papercrafting tools. Included in the package were a layered tapestry stencil set by Lou Collins in her TEXT{ures} brand and a Creative Craft Products gift box maker scoring board with ball tool. Below is a stenciled pillow gift box that I made with these tools.
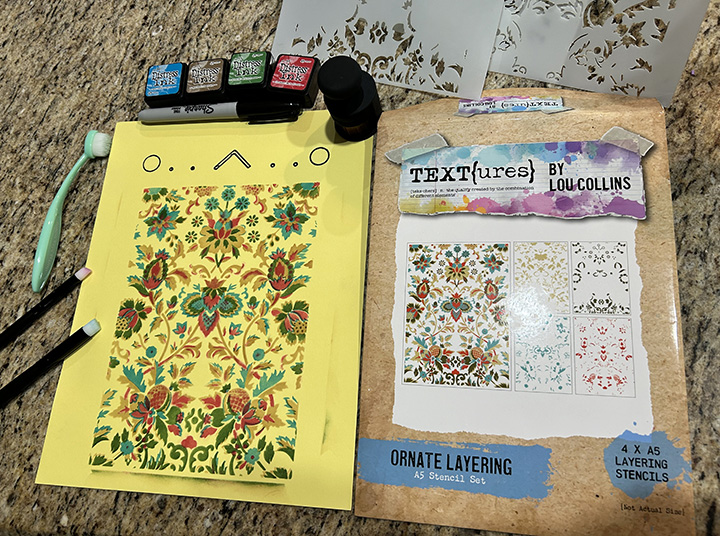
Stenciling: The four layering stencils in Lou Collins’ Ornate Layering A5 Stenciling Set creates a multi-color tapestry design in the William Morris style. Because I don’t have a stenciling platform or jig that works with the stencils, I taped the first stencil onto the center of my 8 1/2 x 11-inch piece of cardstock and used a marker to trace the jig holes at the top of the stencil onto the cardstock, so I could line-up the various stencils each time. I used a variety of small ink blending brushes to ink in each stencil. I found the small detail brushes worked well as did the larger surface brush on all areas of the stencils. (Sorry I don’t know the brands of the various brushes I used.)
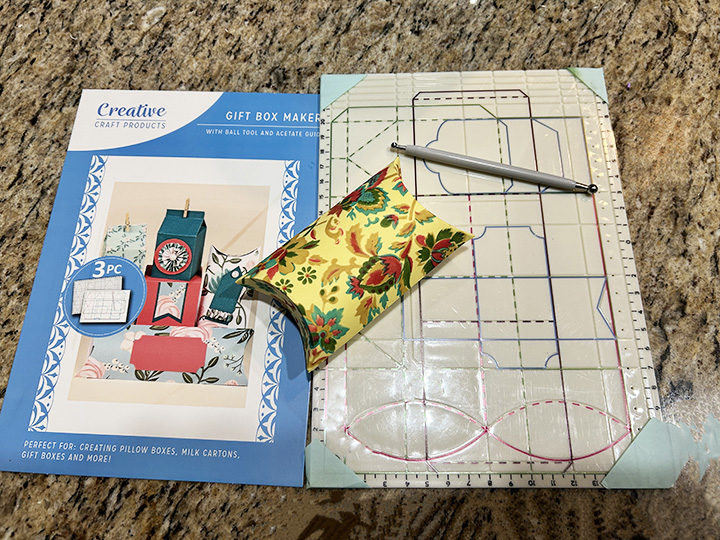
Pillow Box: I used the stenciled piece of cardstock to create a pillow box for a gift card using the Creative Craft Products gift box maker scoring board with ball tool. First I trimmed the cardstock to the 15cmx15cm recommended size and then sandwiched the cardstock between the acetate and scoring board and taped the edges of the acetate at the corners. Next, I used the small end of ball tool to trace over the red pillow box template lines and then turn the cardstock 180 degrees to mark the opposite end’s eye shaped fold/cut lines. After trimming off the excess cardstock, I adhered the side tab to the other edge with double-sided tape.
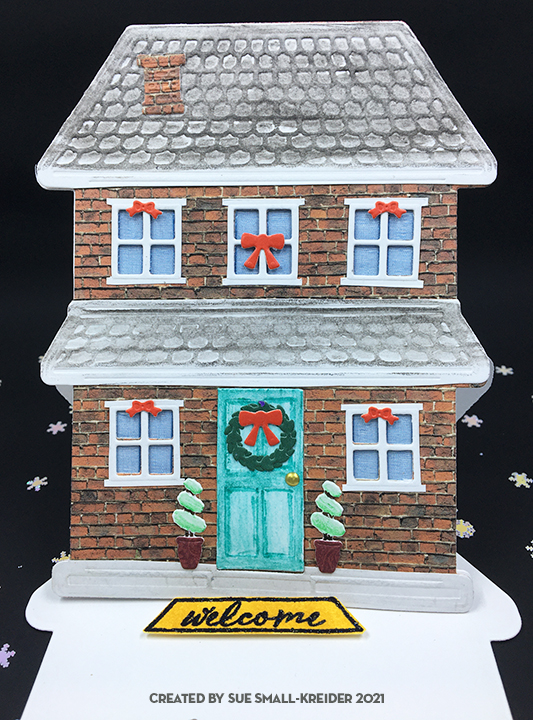
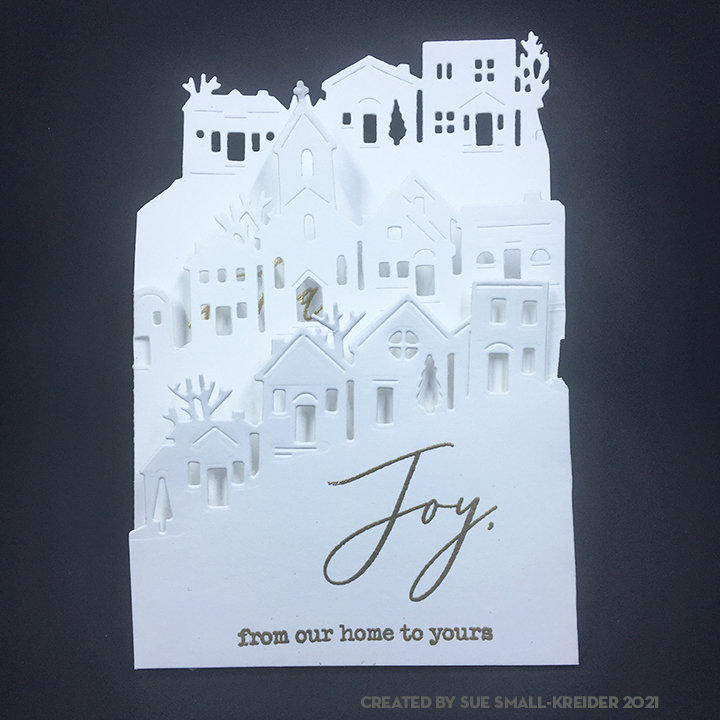
“From our home to yours” is a sentiment that is often seen during the winter holidays. House cards are one of my favorite types of cards to make. The cards shown in today’s blog were made using new Creative Expressions Craft Dies by Sue Wilson.
To die cut a large solid die like the house front, it is best to angle it so that it goes through the die cutting machine at a diagonal rather than straight across. (See picture below.)
For the red brick house, I used leftover stenciled cardstock that was stenciled with Distress Ink in Fired Red Brick, a brick stencil and a small make-up brush (I find these inexpensive contour make-up brushes from Dollar Tree work as well as the expensive ink brushes.)
For the brown brick house, I used a digital image of a brick wall to create a tiled pattern to print on an 8 ½ x 11 sheet of white cardstock using a computer and ink jet printer.
The windows, door and roofs were all cut from lightweight white cardstock and then fussy cut. The roof and door were colored with watercolor pencils and a water brush and allowed to dry under the dies’ plastic packaging so they would be flat. Once the door was dry, I added a drop of a gold Nuvo drop for the door knob and set it aside to dry overnight.
Solid colored scraps of red and green papers were used for the bows and wreath. The topiary trees were cut from white cardstock and colored with watercolor pencils. Their pots are cut from scrap patterned paper.
To glaze the windows, I used shiny organza ribbon glued to the back of the house die-cut. (I had ¼ inch wide ribbon so had to use two stripes for each window. You could use wider ribbon.) After the ribbon has set, the decorated house front was glued to a solid house frame cut with the largest die in the set. The top of the this die has a non-cutting edge which has to be hand-cut.
The tiny decorations can be attached at this stage in the assembly.
While the die set is designed to cut a tent fold card, I decided to make it an easel card using a 5 ¼ inch by 11-inch sheet of heavy white cardstock to score and fold along the long edge at 3 inches and at 3/8 inches. I then die-cut the base, folded at the 3 inches scoring with the non-cutting top of the house die at the fold. (See photo below for how the easel base looks opened up after being cut.)
Next, I used a stamping platform, clear VersaMark watermark ink to stamp the inside greeting after rubbing clean the cardbase with an anti-static powder pad. (I like to use the round stamping tool Stampendable with my stamping platform for uniform pressure on my stamps. I also use scrap copier paper under my items being stamped to add more pressure and to keep the platform clean.) The greeting from Lou Collins’ Text{ures} Seasonal Sentiments set was heat embossed with my favorite gold detail embossing powder from Cosmic Shimmer.
To adhere the house to the easel base, fold the short roof piece closed and add glue to the 3/8 inch tab. Position the house front to match-up with folded base and press at the tab area to adhere to glued tab. Open card up to see if positioned correctly, before attaching welcome mat (stamped and heat embossed from a retired Stampin’ Up front door stamp set) with foam tape.
I used two more stamps from the Text{ures} Seasonal Sentiments set on the envelope flap with Stampin’ Up’s Crumb Cake ink, which looks very much like gold embossing on the cream-colored envelope.
Thank you for reading. If you enjoyed this blog post, please like it and follow the blog. 😊
One Christmas I got to experience Christmas in San Francisco with its hillside houses. Another Christmas I was driving through up-state New York on snowy streets where the houses are all on hillsides. This card evokes these memories for me.
It took several tries experimenting with the three dies in this Hero Arts die set. I finally figured out the positioning on an 11-inches by 5 3/8 inches card. The card is folded at 3 5/8 inches and 7 5/16 inches. I used a bone folder to burnish my folds.
The card sat on my desk for a few weeks until I found the right sentiment stamps. When my copy of Creative Stamping, issue 101 arrived with Lou Collins’ Text{ures} brand Seasonal Sentiments stamps, I knew they would be perfect when heat embossed in gold on the all-white card.
I remembered to wipe the card with an anti-static bag the first time I stamped and heat embossed the card, but I forgot to wipe the last panel before I stamped and there are a few tiny stray gold specks. (Moral of the story – always wipe the space that you will be applying embossing powder to before you stamp.)
To finish this clean and simple card, I chose a cream A2 size envelope and stamped the flap with the words “Happy Wishes” and heat embossed in gold. The stamps are from the same stamp set as the card.
Thank you for reading. If you enjoyed this blog post, please like it and follow the blog. 😊
Dies
Hero Arts – Fancy Dies – Tri-fold Edge, Village
Stamps
Text{ures} by Lou Collins – Seasonal Sentiments from Creative Stamping, issue 101, November 2021
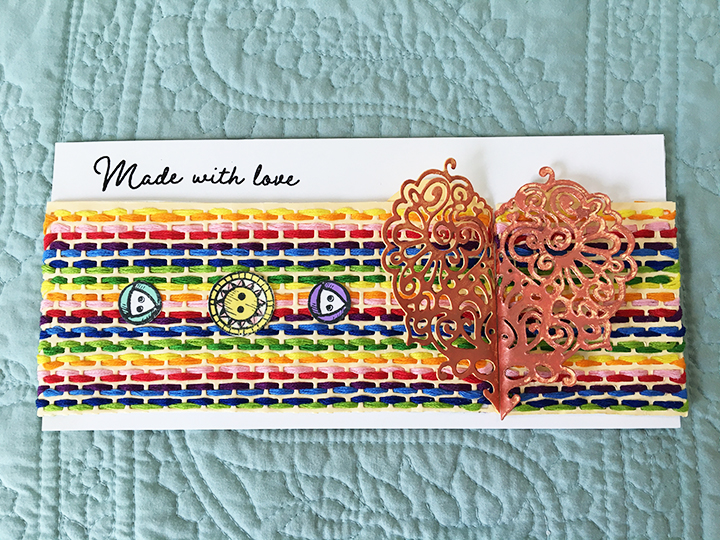
“Beautiful things come together one stitch at a time,” is the sentiment of this friendship card made with a new Lou Collins Text{ures} die and stamps along with some vintage stamps and heart die.
The Fabric Edging Die Set has a die that cuts a course woven strip of hessian or burlap which I used as the base for weaving embroidery floss in bright rainbow colors for the flaps of this asymmetrical-gatefold slimline card. Once the weaving was completed, I covered the back of the weaving with white cardstock cut ½ inch longer than the woven panel to use as a tab to glue to the 8 ½ inches x 4 inches rectangular card base.
For the lacy heart, two hearts were cut using the lace heart die by Moda Scrap of Elizabeth Craft Designs. Each heart is folded in half and the lacy side covered in Persian Red Nuvo Embellishment Mousse.
The solid part of the folded heart is glued to the inside of the flaps lining up the tips of the heart halves to make a whole heart when card is closed.
Before gluing the flaps to the card base, I stamped, and heat embossed the two sentiments in black detail embossing powder.
On the front of the card are three stamped and watercolored buttons from the Fun Stampers Journey Button Bliss set.
The envelope back is stamped with another sentiment from the same stamp set in a dark blue ink.
Hope you enjoyed this quick card. If so, please comment and like and follow this blog. 😊