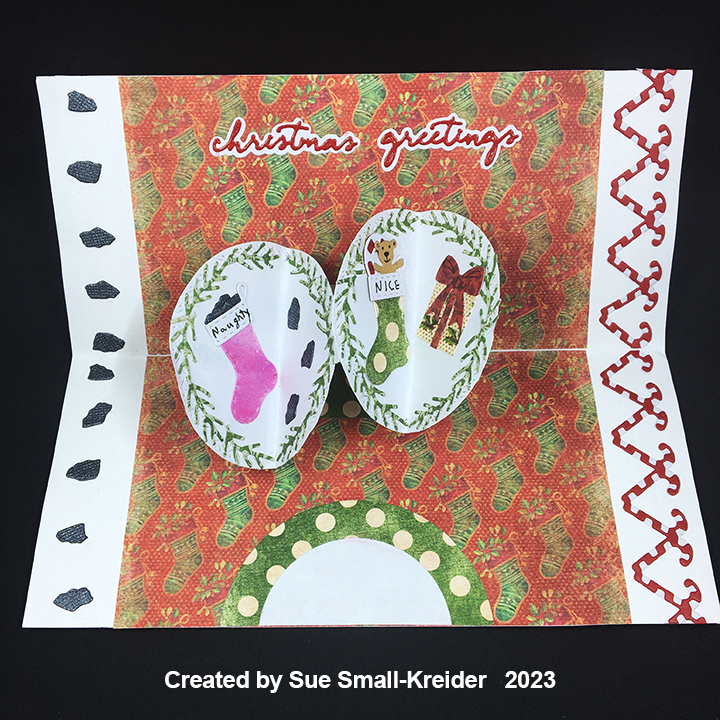
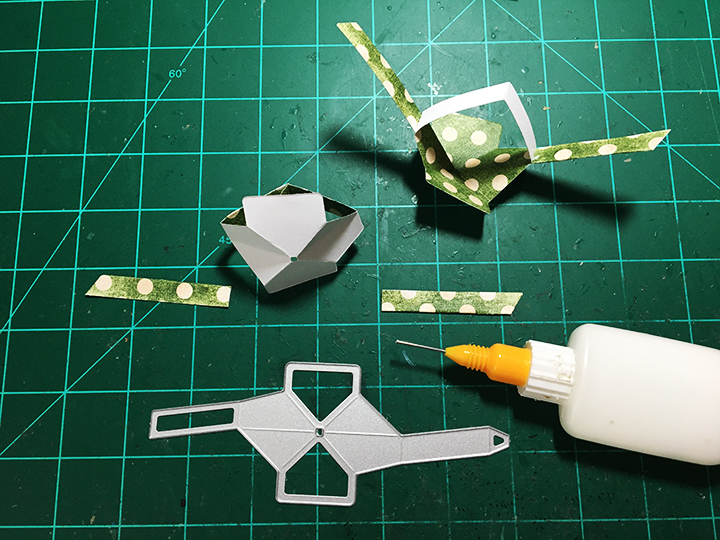
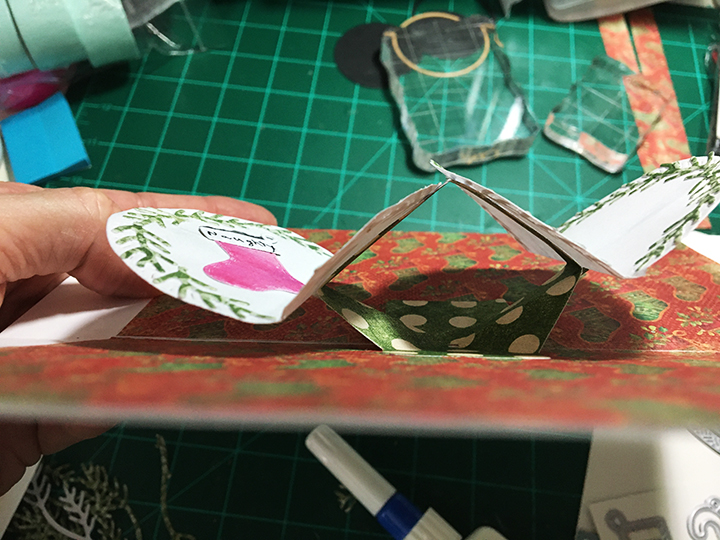
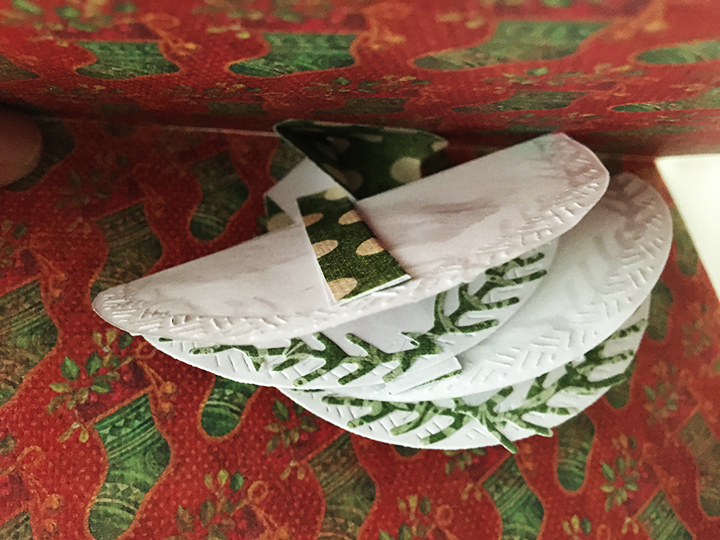
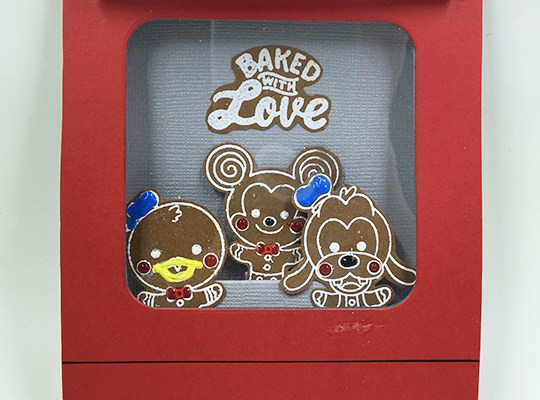
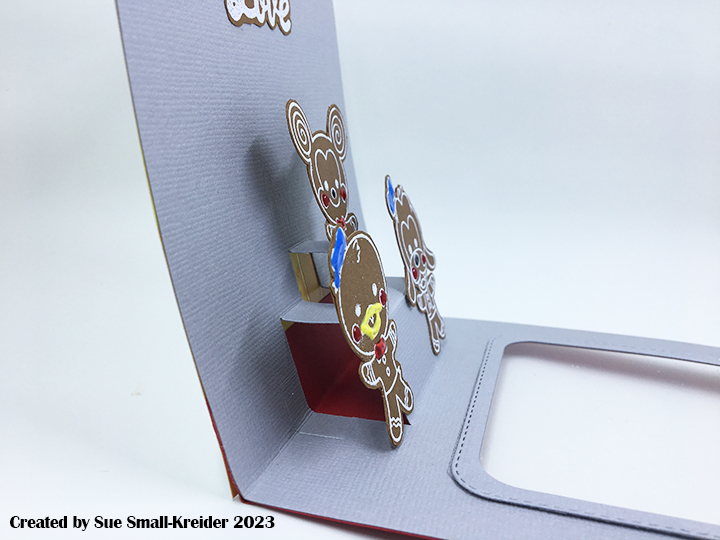
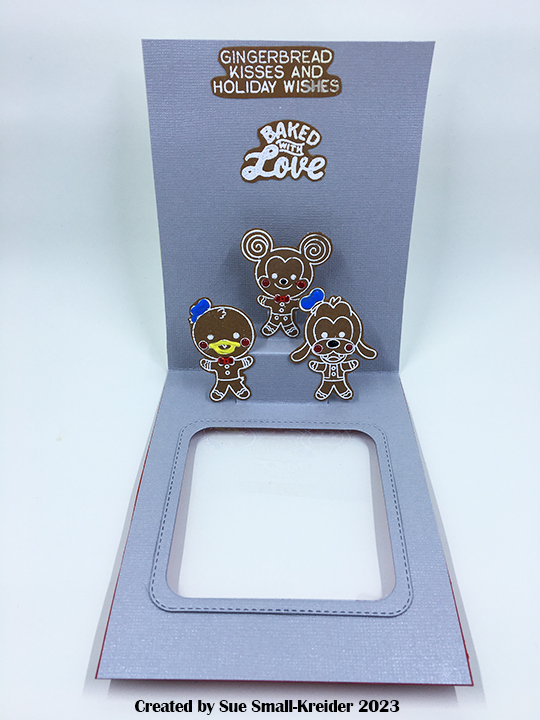
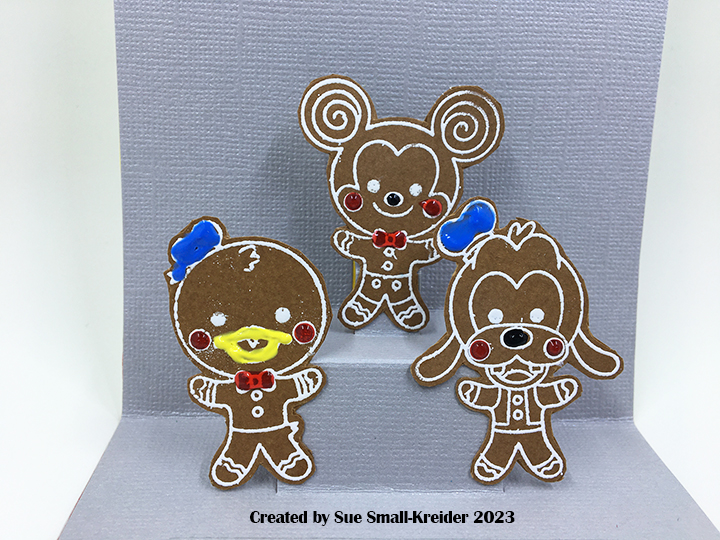
Drop-Down Oven Door Card

This card was inspired by Craft Roulette episode #191 whose parameters were a drop-down card, supper table colors, seasons element (Christmas), and shiny.

It also takes inspiration from Karen Burniston’s Oven Pop-Up.

It uses the Mini Pops-Pop-Up tiered platform die by Karen Burniston, Gingerbread Pals stamps by Kindred Stamps and Nested Rounded Corners Square Small Stitched dies by Rubbernecker Stamps.

Thank you for reading this blog post. I hope this inspires you and makes you smile. Please like and leave comments 😊

Materials Used:

Dies

Stamps

  • Kindred Stamps – Clear Stamps – Gingerbread Pals

Papers

  • White and Red Cardstock
  • Bazzill – 8.5×11 Textured Cardstock – Tiara -18-1002
  • Silver Foil Cardstock
  • Grafix – 8.5×11 Acetate .0075 – Clear

Ink & Embossing Powder

  • Simon Says Stamp – Premium Pigment Ink – White
  • Hero Arts – Embossing Powder – White
  • Pigma – Mircon 01 Fine Tip Pen – Black

Adhesives

Tools

  • Die Cutting Machine
  • Scissors
  • Bone Folder
  • Stamping Platform
  • LDRS – Stampendable Stamping Tool
  • Stamping Cloth
  • Kat Scrappiness – Anti-Static Tool
  • Heat Tool

Miscellaneous

  • Nuvo – Jewel Drops – Holly Berries
  • Nuvo – Crystal Drops – Gloss- Berry Blue
  • Nuvo – Crystal Drops – Gloss- Ebony Black
  • Scrapbook.com – Pops of Color – Gloss- Sunshine

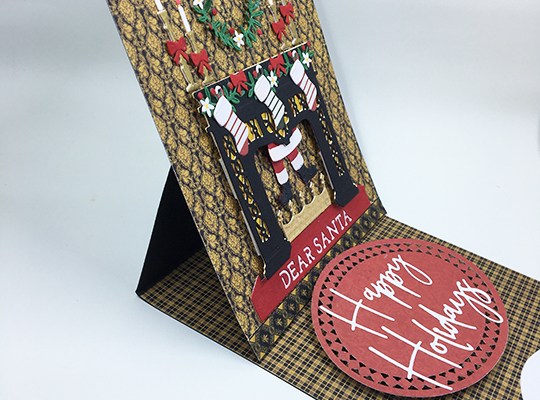
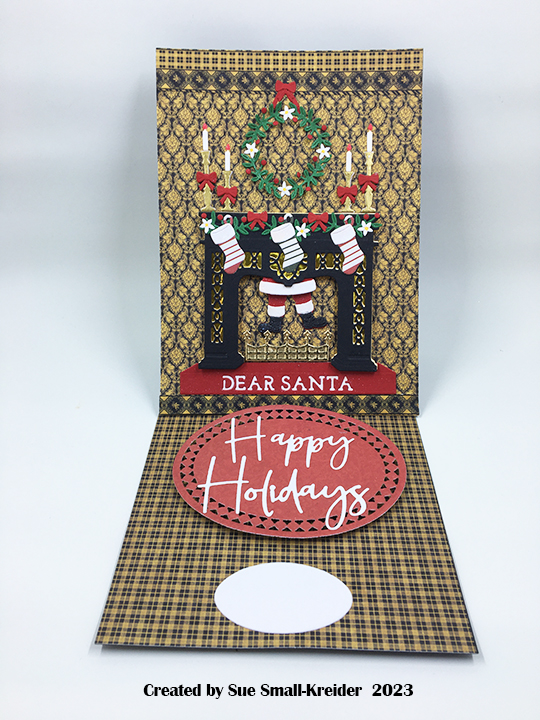
Dear Santa I Can Explain…

With Santa shimmering down the chimney with his legs swinging left and right, this card became my submission for Craft Roulette episode #191 whose parameters were a drop-down card, supper table colors, seasons element, and shiny.

I had started this card earlier in the week after discovering Spellbinders Large-Die-Of-the-Month set for October 2021, but hadn’t finished the easel stop/sentiment. It is part of my Fireplace series.

Cardbase: Cut one 5×7-inch rectangle from heavy black cardstock. Cut another piece from black using the template pictured below. Train the folds of the larger piece. This will be the bottom base with easel arm. Glue the tab on the easel arm to the back of the 5×7 piece making sure when the card is folded shut that the top 5×7’s edges are aligned with the bottom piece. Cover the card front with decorative paper as well as the bottom panel. I added decorative borders for quarter floor molding and picture rail near the ceiling top.

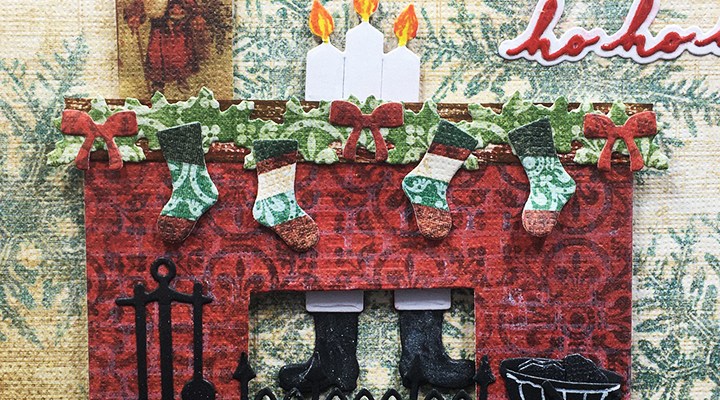
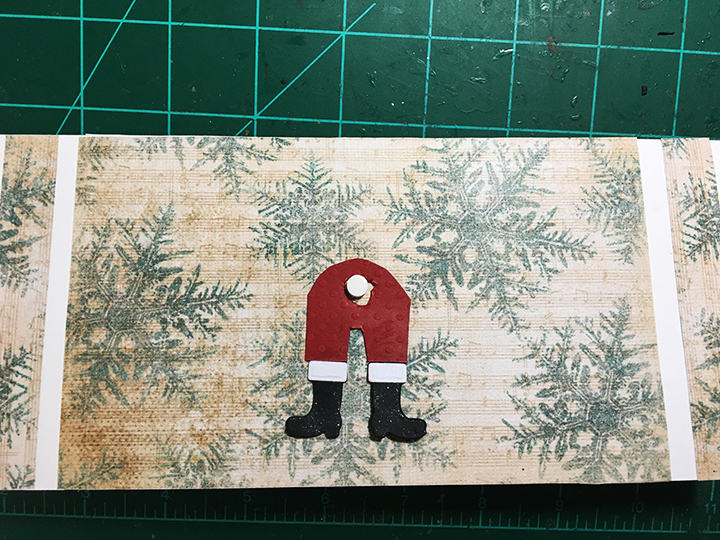
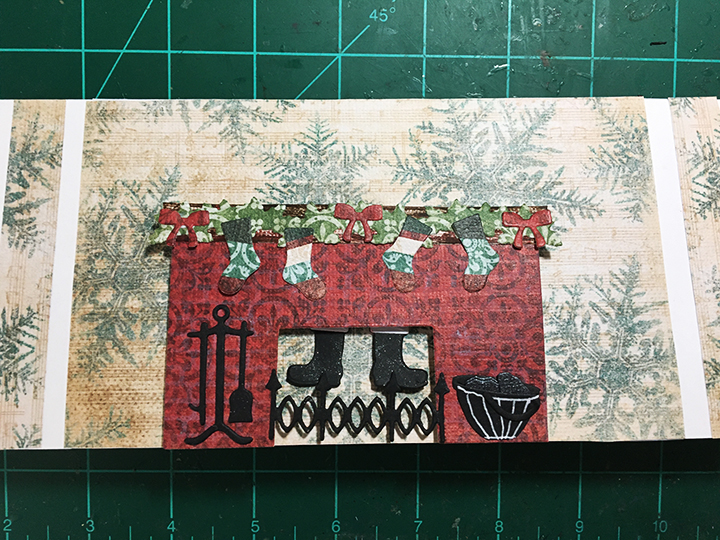
Fireplace and Santa: Watch the assembly video. I used two layers of cardstock for the fireplace and four layers for the candlesticks. The foam dot I used was thick, so I used two layers of foam tape to keep the fireplace higher than Santa. Glitter gloss was brushed over all of Santa as well as the fur on the stockings’ tops. The gold foil in the fireplace decorative panels is from an envelope liner.

Decorations: The set comes with dies for the greenery, tiny flowers and berries as well as the bow. I used a red glitter pen for the candle flames and a yellow marker for the flower centers.

Sentiments: The fireplace set comes with four messages. I choose “Dear Santa” to die-cut into the red hearth piece which is backed with a solid white hearth piece. Glitter gloss was applied to the red hearth. To create the easel stopper, cut an oval rug and pop it up on foam dots. Glue die-cut “Happy Holidays” onto oval. Because of my dark background paper, I added a smaller white oval for a personal message.

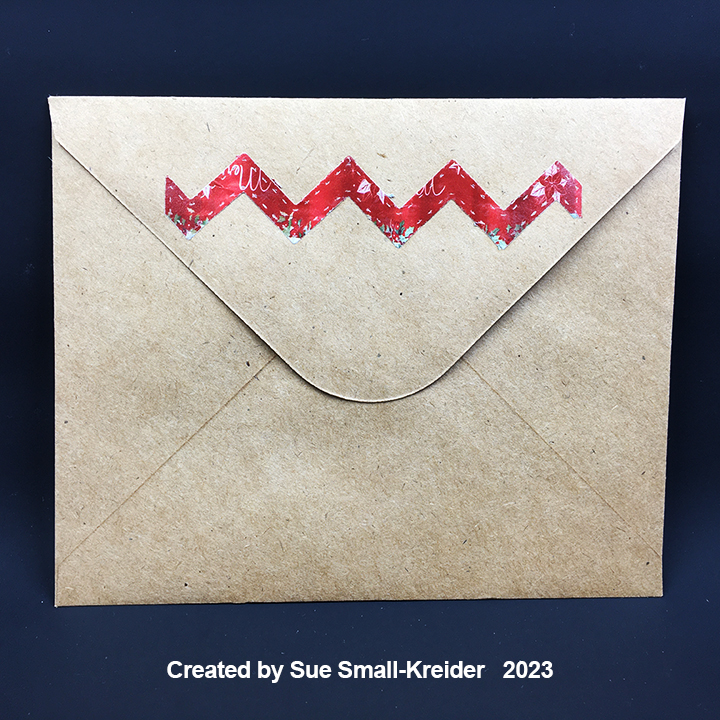
Envelope: I decorated the back flap of the envelope and the card back with decorative paper scraps.

Thank you for reading this blog post. I hope this inspires you and makes you smile. Please like and leave comments 😊

Materials Used:

Dies

Papers

  • Graphic 45 – 8×8 Double-Sided Paper Pad – Warm Wishes Collection – Glad Tidings and Winter Wonder
  • My Mind’s Eye – 6×6 Double-Sided Paper Pad –Cozy Christmas
  • White, Black, Red and Cream Cardstock
  • Gold Foil Cardstock from packaging
  • Gold Foil from envelope liner

Ink

  • Stampin’ Up – Stampin’ Blends Marker – Dark Daffodil Delight
  • Scrapbook.com – Glitter Brush – Red
  • Nuvo – Aqua Shimmer – Glitter Gloss

Adhesives

  • Neutral PH Adhesive by LINECO
  • Fine-Tip Glue Bottle
  • Foam Dots
  • Foam Tape

Tools

  • Die Cutting Machine
  • Pokey Tool
  • We R Memories – QuickStick
  • We R Memories – Scoring Board and Trimmer
  • Scissors

The Red Robin of Christmas

This card was made for Craft Roulette #189 whose parameters included an A2 sized card using forest colours, elements starting with “H” and postage stamp(s) and/or cancellation mark(s).

I used Woodware’s Christmas Robin stamp set designed by Francoise Read as well as her Christmas Postmarks set for this A2 (4.25×5.5-inch) side-fold card with matching envelope.

The robin image was stamped on green cardstock with watermark ink and heat embossed with clear powder. I stamped a second image on white cardstock and heat embossed it with red powder. The red image, I fussy cut leaving the cancellation marks attached to the robin’s leg. The “R” tag I cut out and popped-up with foam squares as well as tying a red string to it.

The red robin was glued over the green one and red Nuvo Drops were used to add dimension to the berries.

The green card front was mounted on a fern and white flower printed paper before being attached to the kraft cardstock cardbase.

The sentiment included in the robin stamp set of “Wishing you a wonderful Christmas full of joy,” was stamped in black inside the card with a snowflake.

Christmas Postmark stamps were inked in green ink to the card back and envelope flap.

Thank you for reading this blog post. I hope this inspires you and makes you smile. Please like and leave comments 😊

Materials Used:

Stamps

  • Woodware Craft Collection – Clear Stamps – Christmas Robin – FRS1012
  • Woodware Craft Collection – Clear Stamps – Christmas Postmarks – FRM069

Papers

  • Craft Consortium – 6×6 Double-Sided Paper Pad – Hackney & Co – The Emporium
  • Bazzill – 8.5×11 Heavyweight Cardstock – Gumdrop
  • White Cardstock
  • A2 Cardbase and Envelope – Kraft

Ink

  • Stampin’ Up – Classic Stampin’ Pad – Shaded Spruce
  • Memento – Fade-Resistant Dye ink – Tuxedo Black
  • Versamark – Watermark Stamp Pad

Embossing Powders

  • Simon Says Stamp – Fine Detail Embossing Powder – Clear
  • Nuvo – Embossing Powder – Crimson Red

Adhesives

Tools

  • Stamping Platform
  • LDRS – Stampendable Stamping Tool
  • Stamping Cloth
  • Sponge Dauber
  • Scissors
  • Kat Scrappiness – Anti-Static Tool
  • Heat Tool

Miscellaneous

  • Red String
  • Nuvo – Vintage Drops – Postbox Red

Aquarium Holidays Card

This card was made for Craft Roulette #190 whose parameters included a fancy fold card, aquarium colors, November element and 3-item cluster.

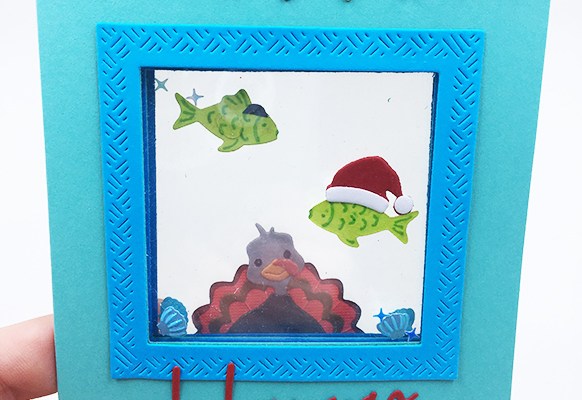
My first thought with these parameters was to a card I had made may years ago featuring a cat looking through a goldfish bowl using Karen Burniston dies. My next thought was how to incorporate a November element. Turkey instead of cat was my answer. While the accordion/pivot card is a fiddly sort of card to assemble, I wanted a quicker version, hence the Z-fold cardbase with squares cut into them and fish with sequin shells and stars sandwiched in between sheets of acetate.

Cardbase: cut one 5 1/2-inch by 8 1/2-inch rectangle of blue cardstock and another rectangle from the same cardstock that is 5 1/2-inch by 4 3/4-inch. Score and fold the large rectangle in half to a 5 1/2-inch by 4 1/4-inch side fold card. Score and fold a 1/2-inch tab along the long edge of the smaller rectangle. Adhere the tab to one of the long edges of the other piece to form a z-fold three panel card.

Windows: Keeping the large rectangle piece of the card base fold in half, I used a 2.4-inch square die to cut through the first panel and mark where I needed to place the die to cut the second panel. I unfolded the cardbase and folded the tabbed panel back against the middle panel that had the markings of where the square die should go. Using the markings to place the die I cut the second panel’s window and made markings for where the die should be placed for the third panel’s window. After cutting the third panel, I took the square die and the next largest die with crosshatching and taped them together to form a die that would cut a frame to go around the windows. Cut six of these frames from darker blue cardstock.

Cut six squares of clear acetate or plastic film and adhere them with thin double-sided tape to the backsides of the frames. Attach frames to one side of the card base. Flip cardbase and adhere fish and decorations with glue dots to acetate making sure the placement works when the card is folded closed. When happy with the placement of aquarium items, attach the remaining three frames to sandwich the items inside the aquarium windows.

Fish: I used the fish from the Camping Charms to cut two fish from green cardstock. Then I traced their fins and scales with a green marker on both sides and then finished each side with a coat of glitter gloss. For the headwear I free-hand cut the yamaka from black and die cut the Santa hat from the Christmas Animals set.

Turkey: Because the turkey is seen from both the front and the back, I made sure to use colored cardstock that was the same on both the front and back. I only had to cut two of the decorative feather arch pieces. The beak and wattle are all cut with the same die, so I cut from orange and colored the wattle red with a marker. Textured metallic cardstock was used for the body, head and beak and wattle.

Lights: Since my family starts putting up Christmas light on Thanksgiving weekend, the light strands above the turkey and the fish with a Santa hat have multicolored lights while the lights above the fish with a black yamaka on his head has blue and white lights commonly used for Hanukkah in America. I used the light strand die from the Christmas Borders 1 set cutting the die in a variety of colors and using the black and green ones as my base strands and then snipping off other colors light blub part and gluing to the base strand. Finally, I covered the bulbs with Glossy Accents to make them look light glass blubs.

Sentiment: The sentiment is from Spellbinders and cuts in five separate pieces -H ol idays and H appy. The two words are on the front and back of each panel so that the is a continuous “Happy Holidays” being read. Thanksgiving panel in brown, Hanukkah in blue and Christmas in red.

Thank you for reading this blog post. I hope this inspires you and makes you smile. Please like and leave comments 😊

Materials Used:

Dies

Papers

  • My Colors – 12×12 Textured Metallic Cardstock – Black Bear
  • My Colors – 12×12 Textured Metallic Cardstock – Carrot Stick
  • Bazzill – 8.5×11 Textured Metallic Cardstock – Tiara
  • Blues, Green, Red, Black, Brown, Orange, Yellow and Cardstock
  • Grafix – 8.5×11 Acetate .0075 – Clear

Ink

  • Sharpie – Permanent Marker – Ultra Fine Tip – Red and Green
  • Pigma – Mircon 01 Fine Tip Pen – Black
  • Nuvo – Aqua Shimmer – Glitter Gloss

Adhesives

Tools

Miscellaneous

  • Buttons Galore & More – Shimmerz Embellishments – Splash -RZ109
  • Ranger – Glossy Accents

Santa’s Helpers

This card was made for Craft Roulette #187 whose parameters included a card made with cardstock and not-cardstock, Santa’s workshop colors, collar(s) element and zig-zags.

As a simple Christmas card with a pieced paper background and sentiments from the paper pad. This was a quick card to make in less than two hours. I started with the Carta Bella Letters to Santa paper pad and a mail-order catalog page of a red Christmas shower curtain to die cut three different colors of chevron background die. After separating all the pieces into a tray, I took the woodgrain frame and glued it to an A2 (4.25-inches by 5.5-inches) kraft card base. Alternating the colors, I filled in the frame.

The two sentiment cards or toppers were cut from the paper pad. Santa’s helpers with their collars was popped-up on the card front with foam dots. Small dots of translucent red Nuvo Drops were added to the elves’ shoe and hat tips. Santa’s face with “Merry Christmas” greeting were added to the card inside.

An extra red zig-zag stripe of red decorates the envelope flap.

Thank you for reading this blog post. I hope this inspires you and makes you smile. Please like and leave comments 😊

Materials Used:

Dies

  • Divinity Designs – Metal Die – Chevron Background – CBD474

Papers

  • Carta Bella – 6×6 Double-Sided Paper Pad – Letters To Santa
  • A2 Cardbase and Envelope – Kraft

Adhesives

  • Neutral PH Adhesive by LINECO
  • Fine-Tip Glue Bottle
  • Foam Dots

Tools

  • Die Cutting Machine
  • Pokey Tool
  • Scissors
  • Paper Cutter

Miscellaneous

  • Nuvo – Jewel Drops – Holly Berries

Gingerbread Shaker Christmas Card

Making a gingerbread house always involves candy and white icing. Half the fun of making a gingerbread creation is sampling the construction elements.

This Christmas card is one that I hope the recipients won’t try and taste the ingredients. I used Queen & Co.’s Holiday House Kit to make this shaker card. In the kit you get dies to decorate the foam shaker base with pre-cut acetate window cover as either a gingerbread house or a Victorian house. I chose to use polymer clay shaker elements that are from Queen & Co. but not included in the kit. (There are solid color shaker beads included in the kit as well as stamps.)

Cardbase:  I used a purchase brown kraft cardstock and matching envelope in an A7 size. The card I cut it down to a 6×4 3/4-inch side-fold card so that there would be room in the envelope for the foam shaker. The front panel was covered with a 4 1/2×5 3/4-inch piece of patterned red paper from the Queen & Co. Happy Holly Days mat stack. The inside white panel is the same size cut from white copier paper.

House: Brown patterned paper from Queen & Co. Homemade Holiday mat stack was use for the gingerbread house and man. The white icing and candies were cut from white cardstock and made sparkly with a wash of a glitter gloss aqua brush. The stripes on the candy can were drawn on with a red marker while the round peppermint candies have a die to cut the red swirl. Gum drops on the roof ridge were cut using a die in the kit and brushed with glitter gloss. The tiny peppermint candies are polymer clay shaker elements from Buttons Galore More.

Once the house front is made, position the foam frame on the cardbase to allow for the gingerbread man and candy cane to hang off the house, but not the card. Adhere foam to cardbase. Add strips of leftover foam to the inside of the frame to section off areas where the windows are.  Add shaker elements to the sections. Place the acetate piece over the foam frame to seal in the elements. Color the exposed sides of white foam with a brown marker. Using double-sided tape, attach the decorated house front to the acetate piece.

Decorations: Glue candy pieces to decorate the house. The gingerbread man is cut in two pieces – bottom white with glitter gloss and the top from the brown patterned paper. Attach the man with thin foam squares to fit over the polymer clay candies.

Sentiment: The inside sentiment is a clear stamp included in the kit stamped in red ink.

Envelope: A gingerbread man from a Joanna Sheen card making kit was stamped in dark brown ink and brushed over with glitter gloss on the back flap.

Thank you for reading this blog post. I hope this inspires you and makes you smile. Please like and leave comments 😊

Materials Used:

Dies

Stamps

  • Craft Essential Series issue 09 – Joanna Sheen Cardmaking Collection
  • Queen & Co. – Holiday House Kit – Sentiment Stamps

Papers

  • Queen & Co. – 6×6 Mat Stack of Double-Sided Papers – Homemade Holiday
  • Queen & Co. – 6×6 Mat Stack of Double-Sided Papers – Happy Holly Days
  • White Cardstock
  • American Crafts – A7 Cardbase and Envelope – Kraft

Shaker

  • Queen & Co. – Holiday House Kit – Foam Frames
  • Queen & Co. – Holiday House Kit – Acetate
  • Queen & Co. – Polymer Clay Shaker Elements – Holiday Fusion Fudgy

Ink

  • Stampin’ Up – Classic Stampin’ Pad – Early Espresso and Real Red
  • Sharpie – Permanent Marker – Ultra Fine Tip – Red
  • Stampin’ Up – Stampin’ Write Dual tipped Marker – Chocolate Chip
  • Nuvo – Aqua Shimmer – Glitter Gloss

Adhesives

  • Neutral PH Adhesive by LINECO
  • Fine-Tip Glue Bottle
  • Double-Sided Tape -1/8-inch wide
  • Queen & Co. – Holiday House Kit – Foam Shaker Frame and Foam Scraps
  • Thin Foam Squares

Tools

  • Die Cutting Machine
  • We R Memories – QuickStick
  • Stamping Platform
  • LDRS – Stampendable Stamping Tool
  • Stamping Cloth
  • Scissors

Stamping Up Some Fall Fun

Last week I went to a cardmaking class using stencils taught by Donna Butler and had a chance to catch-up with some crafty friends I hadn’t seen in a while. Here are the cards I made.

EMBOSSED FALL LEAVES CARD

We embossed the stencil first into the top panel and then inked the piece. Inside and on the envelope we masked off a portion of the stencil to single out various elements.

SUNFLOWER CARD

Using several shades of ink easily created these striking flowers with 4-part layered stencils.

SNOWFLAKE CARD

Thank you for reading this blog post. I hope this inspires you and makes you smile. Please like and leave comments 😊

Merry & Bright Shiny Baubles

The large tree ornaments in Karen Burniston’s new Christmas Borders 1 are very mid-century modern and are the inspiration for this retro pop-up Christmas card.

The card uses decorations from three of the new die sets in the September 2023 release – Christmas Borders 1, Stocking Pop-Up, and Small Script – Christmas along with Karen’s Christmas Tree Pop-Up and Circles – Crosshatch.

Cardbase: I used a white purchased A6 (4.75×6.5-inch) cardbase and covered the outside of it with a single piece of printed rice paper using lots of glue and a brayer to smooth the paper down and adhere it to the cardstock. Inside, I cut two 4.75×6.5-inch panels of green printed paper and glued them close to the center fold but leaving a tiny gap at the fold. The white gap was colored in with an olive-green marker to match the paper.

Ornament Borders: For the ornament borders, I cut four of the main border die from the Christmas Border1 die set from a white shimmer cardstock. I also cut four of the ornament cap die from matte gold cardstock. I cut the borders to fit the width of the card. (Seven ornaments fit.) Using permanent markers to individually color the ornament balls, they allowed some of the metallic shimmer to come through the ink. Glue the gold caps to the ornaments.

Stocking: The red and white stocking comes from the Stocking Pop-Up die set as does the holly and berries. I used the stencil feature on the holly to draw leaf veins and Nuvo Drops to add dimension to the berries.

Pop-Up Tree: Watch the assembly video located towards the bottom of the linked page before starting on the tree. I used two circles from the Circles – Crosshatch set to make the tree skirt. I folded both circles in half and on the smaller white circle, I used the small die in the Christmas Tree Pop-Up set to cut the two tabs that work the pop-up mechanism for the tree. The die is centered over the fold. Cut both circles in half on the fold lines. Glue the circles onto the inside of the card leaving the tabs unglued and in the open position.  Cut the tree base from red, fold and attach to the white mechanism tabs inside the card.

Cut the four tree greenery pieces and decorate with the string of lights border from the Christmas Borders 1 die set. (I cut seven stands of green lights to use as the base and then two strands each of blue, red and yellow. For the different colored light bulbs, cut the bulbs off the colored strands and glue to the green base.) Make sure that you trim away any light strand pieces from the tree’s assembly slots.

Assemble tree as shown in the video and attach to red base.

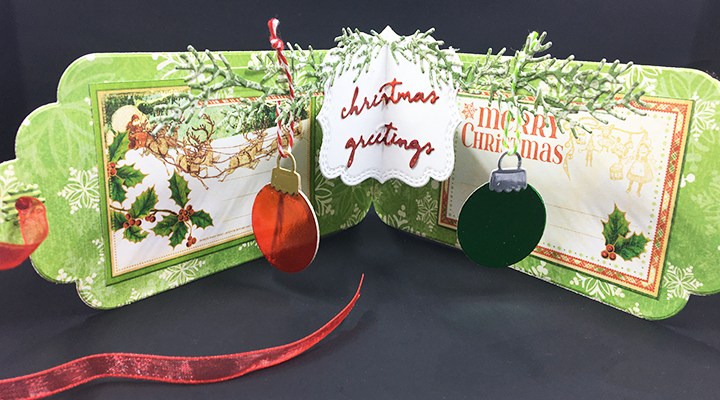
Sentiments: On the stocking is the word “jolly” from the new word set –Small Script – Christmas. The “j” is dotted with a Nuvo Drop in red. Inside the card “Christmas greetings” uses both the shadow and script dies in contrasting green and red cardstock. A large white gift box with red bow serves a place for a personal message. The stitched rectangle and bow are from the Stocking Pop-Up die set.

Envelope: On the back of the envelope stamped in red and green are three small light bulbs and the words “Merry & Bright.” I used paper tape to mask half the sentiment to stamp in red and then masked the other half to stamp in green.

Thank you for reading this blog post. I hope this inspires you and makes you smile. Please like and leave comments 😊

Materials Used:

Dies

Stamps

  • Woodware – Clear Stamps designed by Francoise Read – Snowman Light Bulb

Papers

  • Stamperia – Rice Paper – Classic Collection – Holly & Berries
  • Hallmark Cards PLC – Forever Friends Retro Collection – 8×8 Stack – A Christmas Tale
  • Recollections – 8.5×11 White Gold Shimmer Cardstock
  • Matte Gold Cardstock
  • Green, White, Black and Red Cardstock
  • Park Lane Paperie – A6 Cardbase and Envelope – White

Ink

  • Stampin’ Up – Classic Stampin’ Pad – Emerald Green and Real Red
  • Sharpie – Permanent Marker – Fine Tip – Olive
  • Sharpie – Permanent Marker – Ultra Fine Tip – Light Blue, Lime Green, Racer Red, Yellow
  • Pigma – Mircon 01 Fine Tip Pen – Black

Adhesives

Tools

  • Die Cutting Machine
  • We R Memories – QuickStick
  • We R Memories – Scoring Board and Trimmer
  • Stamping Platform
  • LDRS – Stampendable Stamping Tool
  • Stamping Cloth
  • Scrap Paper To Color On
  • Scissors
  • Brayer

Miscellaneous

  • Nuvo Vintage Drops – Postbox Red

Baking Gingerbread

The fragrance of spices and fresh baked gingerbread herald the Christmas season. Decorating a gingerbread house is often a group activity for families. This card is intended to evoke these kinds of memories.

Karen Burniston’s September 2023 release of new dies include the following dies used on this card: Oven Pop-Up, Oven Extras, Christmas Borders 1, Christmas Borders 2 and Small-Script – Christmas. Also included in the card are Karen’s Tiny House Pop-Up and Gingerbread Tiny House Add-Ons.

Cardbase: I used a white purchased A6 (4.75×6.5-inch) cardbase and covered the outside of it with two 4.75×6.5-inch panels of golden striped paper. Inside, I cut 4.75×6.5-inch panels of pink patterned paper and glued them close to the center fold but leaving a tiny gap at the fold. The white gap was colored in with a pink marker to match the paper on the inside of the card.

Stove: While the Oven Pop-Up is designed to be 3D, it can be trimmed and used as a flat piece by cutting off the stove top section and using the utensil handle as the burners. The oven window is backed with a silver baking sheet glued and taped to the back of the oven door. (Before I die-cut the oven, I covered the red cardstock with clear packing tape to get a shiny effect.) The handle and knobs were cut, folded and colored as you would for a pop-up version of the oven.

Decorations – Card Front: For the baking elements on the front of the card, all of them except the mixer are in the Oven Pop-up set. The mixer is in the Oven Extras set. The plates that the cookies are on are the burner circles for the stove top. I covered a piece of red cardstock with clear packing tape before cutting out all the red elements. For the white mixing bowl and plates, I used a glitter gloss to make them sparkle.

Gingerbread House: Watch the assembly video for the Gingerbread Tiny House Add-Ons located at the bottom of the linked page before cutting out pieces. I covered all the edges of the tiny house base before adhering the gingerbread panels with glitter gloss to make shiny frosting. You can die-cut tiny candy dots and gum drops to decorate the house. I opted to use translucent red Nuvo Drops to decorate the roof. For all the candy canes on the card come from the Christmas Borders 2 set.

Decorations – Inside: For all of the red and white candy decorations, I first assembled the candies and then added Glossy Accents to give them shine and dimension. (The candy canes on the back of the card I used clear packing tape on red cardstock which kept the white a crisp white rather than the pinkish white of the of the inside candy.) While the fence of candy canes is from the Christmas Borders 2 set, the peppermint candies are from the Gingerbread Tiny House Add-Ons set. The borders of gingerbread men are from the Christmas Borders 1 set which has a stencil feature to add the white icing decorations.

Sentiments: The “ho ho ho” and “Christmas greetings” are all from the Christmas Small Script word set. The shadows were cut from white and the words from red cardstock covered with clear packing tape to have a shiny appearance. A white label cut using the Crosshatch Rectangles and Labels is a place to write a personal message.

Envelope: Another strip of gingerbread men was cut using the Christmas Borders 1 set and glued to the back flap of the envelope.

Thank you for reading this blog post. I hope this inspires you and makes you smile. Please like and leave comments 😊

Materials Used:

Dies

Papers

  • Carnation Crafts – A4 Double-Sided Paper – Merry & Bright
  • Park Lane Paperie – Holographic Cardstock – Silver
  • White, Kraft, Black and Cream Cardstock
  • A6 Cardbase and Envelope – White

Ink

  • Pigma – Mircon 01 Fine Tip Pen – Black
  • Farber-Castell – Pitt Artist Pen- Bullet Nib – White-101 Marker – Snow
  • Nuvo – Aqua Shimmer – Glitter Gloss

Adhesives

Tools

Miscellaneous

  • Ranger – Glossy Accents
  • Nuvo Jewel Drops – Holly Berries