Stamping Up Some Fall Fun

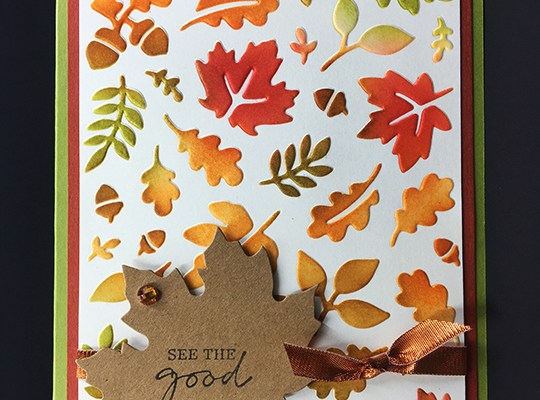
Last week I went to a cardmaking class using stencils taught by Donna Butler and had a chance to catch-up with some crafty friends I hadn’t seen in a while. Here are the cards I made.

EMBOSSED FALL LEAVES CARD

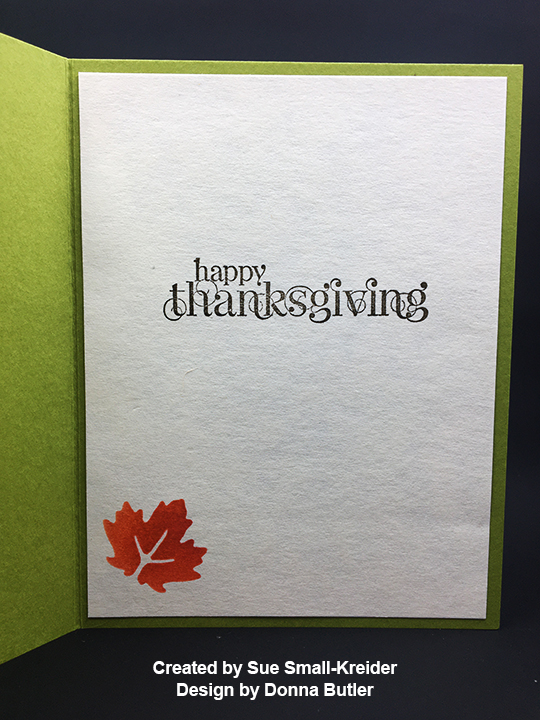
We embossed the stencil first into the top panel and then inked the piece. Inside and on the envelope we masked off a portion of the stencil to single out various elements.

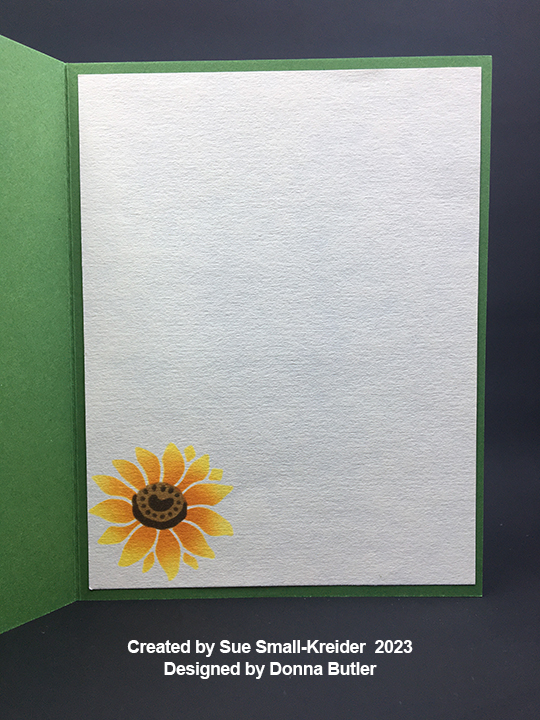
SUNFLOWER CARD

Using several shades of ink easily created these striking flowers with 4-part layered stencils.

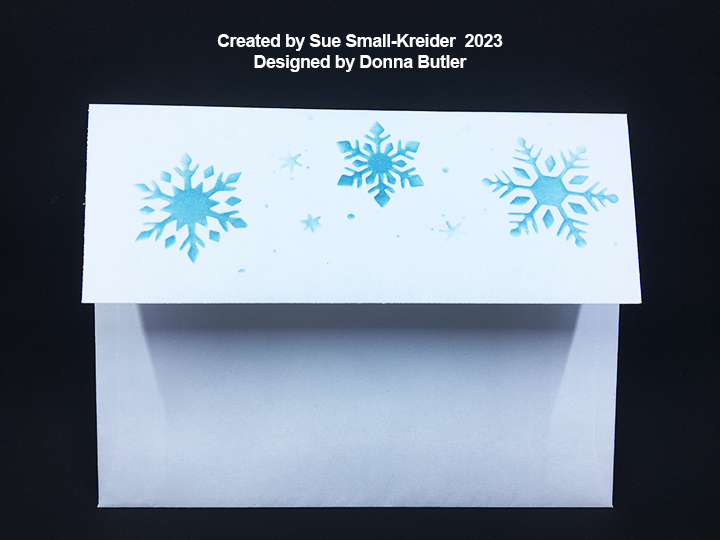
SNOWFLAKE CARD

Thank you for reading this blog post. I hope this inspires you and makes you smile. Please like and leave comments 😊

Merry & Bright Shiny Baubles

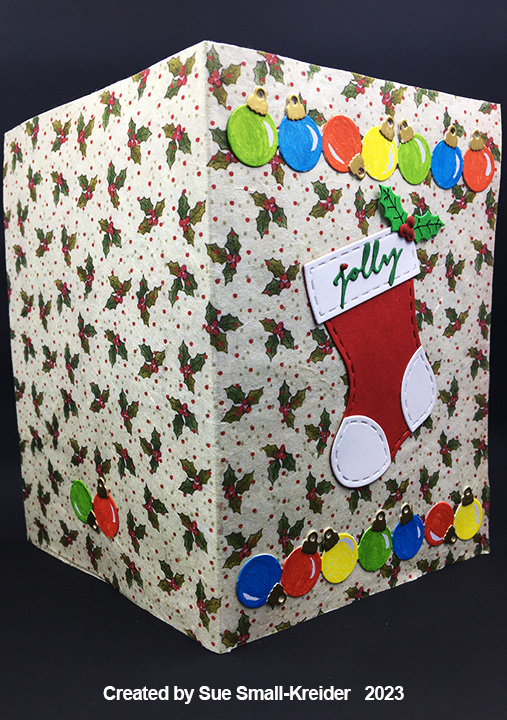
The large tree ornaments in Karen Burniston’s new Christmas Borders 1 are very mid-century modern and are the inspiration for this retro pop-up Christmas card.

The card uses decorations from three of the new die sets in the September 2023 release – Christmas Borders 1, Stocking Pop-Up, and Small Script – Christmas along with Karen’s Christmas Tree Pop-Up and Circles – Crosshatch.

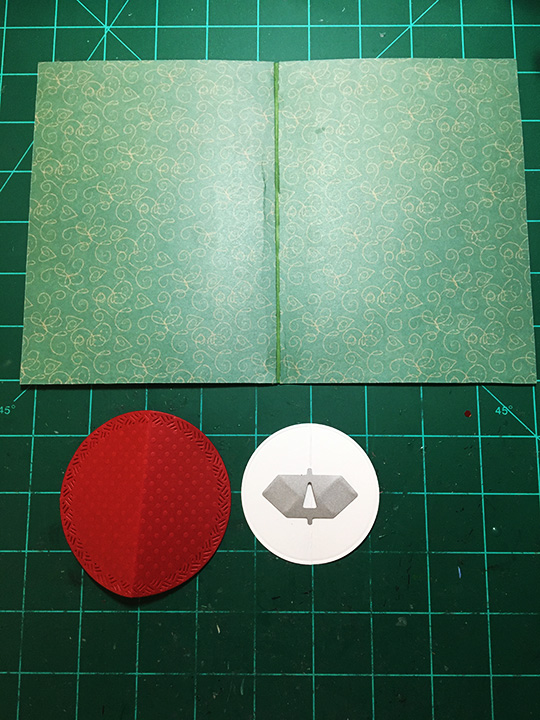
Cardbase: I used a white purchased A6 (4.75×6.5-inch) cardbase and covered the outside of it with a single piece of printed rice paper using lots of glue and a brayer to smooth the paper down and adhere it to the cardstock. Inside, I cut two 4.75×6.5-inch panels of green printed paper and glued them close to the center fold but leaving a tiny gap at the fold. The white gap was colored in with an olive-green marker to match the paper.

Ornament Borders: For the ornament borders, I cut four of the main border die from the Christmas Border1 die set from a white shimmer cardstock. I also cut four of the ornament cap die from matte gold cardstock. I cut the borders to fit the width of the card. (Seven ornaments fit.) Using permanent markers to individually color the ornament balls, they allowed some of the metallic shimmer to come through the ink. Glue the gold caps to the ornaments.

Stocking: The red and white stocking comes from the Stocking Pop-Up die set as does the holly and berries. I used the stencil feature on the holly to draw leaf veins and Nuvo Drops to add dimension to the berries.

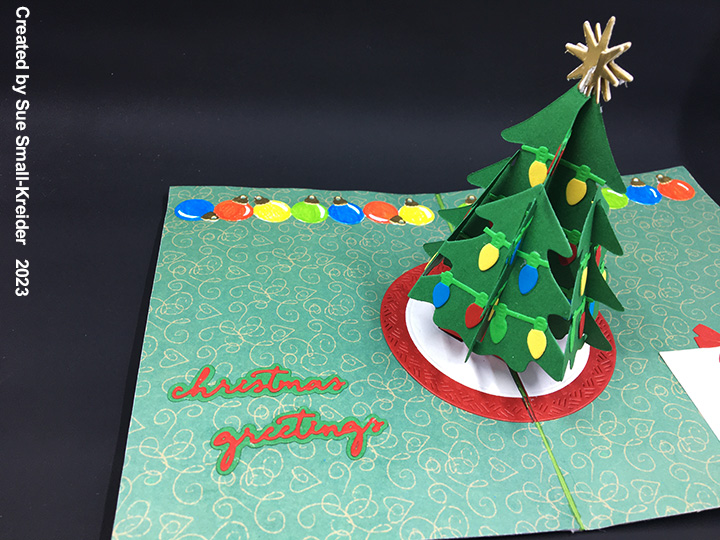
Pop-Up Tree: Watch the assembly video located towards the bottom of the linked page before starting on the tree. I used two circles from the Circles – Crosshatch set to make the tree skirt. I folded both circles in half and on the smaller white circle, I used the small die in the Christmas Tree Pop-Up set to cut the two tabs that work the pop-up mechanism for the tree. The die is centered over the fold. Cut both circles in half on the fold lines. Glue the circles onto the inside of the card leaving the tabs unglued and in the open position.  Cut the tree base from red, fold and attach to the white mechanism tabs inside the card.

Cut the four tree greenery pieces and decorate with the string of lights border from the Christmas Borders 1 die set. (I cut seven stands of green lights to use as the base and then two strands each of blue, red and yellow. For the different colored light bulbs, cut the bulbs off the colored strands and glue to the green base.) Make sure that you trim away any light strand pieces from the tree’s assembly slots.

Assemble tree as shown in the video and attach to red base.

Sentiments: On the stocking is the word “jolly” from the new word set –Small Script – Christmas. The “j” is dotted with a Nuvo Drop in red. Inside the card “Christmas greetings” uses both the shadow and script dies in contrasting green and red cardstock. A large white gift box with red bow serves a place for a personal message. The stitched rectangle and bow are from the Stocking Pop-Up die set.

Envelope: On the back of the envelope stamped in red and green are three small light bulbs and the words “Merry & Bright.” I used paper tape to mask half the sentiment to stamp in red and then masked the other half to stamp in green.

Thank you for reading this blog post. I hope this inspires you and makes you smile. Please like and leave comments 😊

Materials Used:

Dies

Stamps

  • Woodware – Clear Stamps designed by Francoise Read – Snowman Light Bulb

Papers

  • Stamperia – Rice Paper – Classic Collection – Holly & Berries
  • Hallmark Cards PLC – Forever Friends Retro Collection – 8×8 Stack – A Christmas Tale
  • Recollections – 8.5×11 White Gold Shimmer Cardstock
  • Matte Gold Cardstock
  • Green, White, Black and Red Cardstock
  • Park Lane Paperie – A6 Cardbase and Envelope – White

Ink

  • Stampin’ Up – Classic Stampin’ Pad – Emerald Green and Real Red
  • Sharpie – Permanent Marker – Fine Tip – Olive
  • Sharpie – Permanent Marker – Ultra Fine Tip – Light Blue, Lime Green, Racer Red, Yellow
  • Pigma – Mircon 01 Fine Tip Pen – Black

Adhesives

Tools

  • Die Cutting Machine
  • We R Memories – QuickStick
  • We R Memories – Scoring Board and Trimmer
  • Stamping Platform
  • LDRS – Stampendable Stamping Tool
  • Stamping Cloth
  • Scrap Paper To Color On
  • Scissors
  • Brayer

Miscellaneous

  • Nuvo Vintage Drops – Postbox Red

Baking Gingerbread

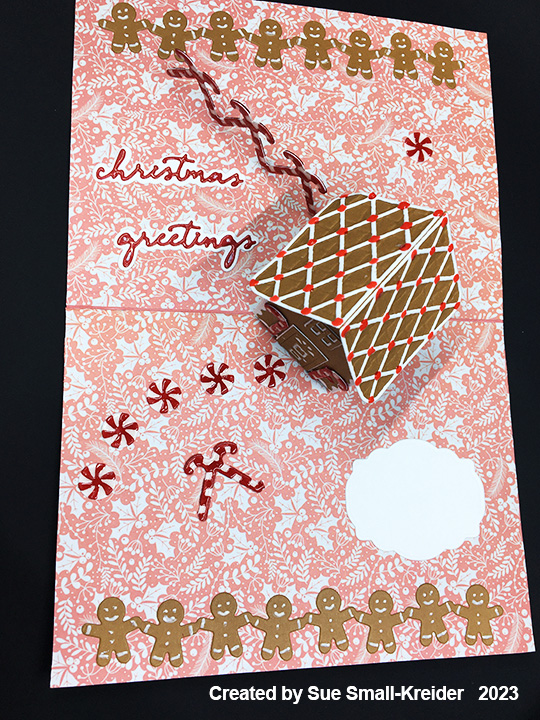
The fragrance of spices and fresh baked gingerbread herald the Christmas season. Decorating a gingerbread house is often a group activity for families. This card is intended to evoke these kinds of memories.

Karen Burniston’s September 2023 release of new dies include the following dies used on this card: Oven Pop-Up, Oven Extras, Christmas Borders 1, Christmas Borders 2 and Small-Script – Christmas. Also included in the card are Karen’s Tiny House Pop-Up and Gingerbread Tiny House Add-Ons.

Cardbase: I used a white purchased A6 (4.75×6.5-inch) cardbase and covered the outside of it with two 4.75×6.5-inch panels of golden striped paper. Inside, I cut 4.75×6.5-inch panels of pink patterned paper and glued them close to the center fold but leaving a tiny gap at the fold. The white gap was colored in with a pink marker to match the paper on the inside of the card.

Stove: While the Oven Pop-Up is designed to be 3D, it can be trimmed and used as a flat piece by cutting off the stove top section and using the utensil handle as the burners. The oven window is backed with a silver baking sheet glued and taped to the back of the oven door. (Before I die-cut the oven, I covered the red cardstock with clear packing tape to get a shiny effect.) The handle and knobs were cut, folded and colored as you would for a pop-up version of the oven.

Decorations – Card Front: For the baking elements on the front of the card, all of them except the mixer are in the Oven Pop-up set. The mixer is in the Oven Extras set. The plates that the cookies are on are the burner circles for the stove top. I covered a piece of red cardstock with clear packing tape before cutting out all the red elements. For the white mixing bowl and plates, I used a glitter gloss to make them sparkle.

Gingerbread House: Watch the assembly video for the Gingerbread Tiny House Add-Ons located at the bottom of the linked page before cutting out pieces. I covered all the edges of the tiny house base before adhering the gingerbread panels with glitter gloss to make shiny frosting. You can die-cut tiny candy dots and gum drops to decorate the house. I opted to use translucent red Nuvo Drops to decorate the roof. For all the candy canes on the card come from the Christmas Borders 2 set.

Decorations – Inside: For all of the red and white candy decorations, I first assembled the candies and then added Glossy Accents to give them shine and dimension. (The candy canes on the back of the card I used clear packing tape on red cardstock which kept the white a crisp white rather than the pinkish white of the of the inside candy.) While the fence of candy canes is from the Christmas Borders 2 set, the peppermint candies are from the Gingerbread Tiny House Add-Ons set. The borders of gingerbread men are from the Christmas Borders 1 set which has a stencil feature to add the white icing decorations.

Sentiments: The “ho ho ho” and “Christmas greetings” are all from the Christmas Small Script word set. The shadows were cut from white and the words from red cardstock covered with clear packing tape to have a shiny appearance. A white label cut using the Crosshatch Rectangles and Labels is a place to write a personal message.

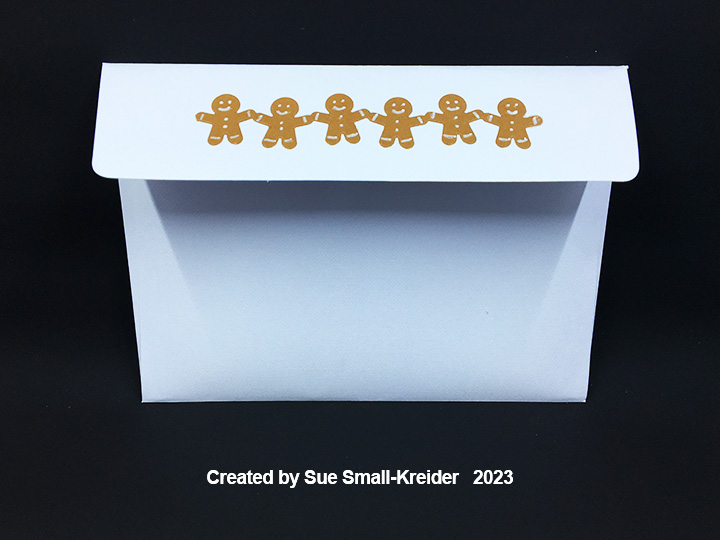
Envelope: Another strip of gingerbread men was cut using the Christmas Borders 1 set and glued to the back flap of the envelope.

Thank you for reading this blog post. I hope this inspires you and makes you smile. Please like and leave comments 😊

Materials Used:

Dies

Papers

  • Carnation Crafts – A4 Double-Sided Paper – Merry & Bright
  • Park Lane Paperie – Holographic Cardstock – Silver
  • White, Kraft, Black and Cream Cardstock
  • A6 Cardbase and Envelope – White

Ink

  • Pigma – Mircon 01 Fine Tip Pen – Black
  • Farber-Castell – Pitt Artist Pen- Bullet Nib – White-101 Marker – Snow
  • Nuvo – Aqua Shimmer – Glitter Gloss

Adhesives

Tools

Miscellaneous

  • Ranger – Glossy Accents
  • Nuvo Jewel Drops – Holly Berries

Santa Coming Down The Chimney

This is the eighth card in the Fireplace Christmas Card series.

Santa’s coming. Can you hear him on the rooftop? He’s sliding down the chimney.

For this card I used Karen Burniston dies to create an accordion card with a pop-out fireplace with Santa’s boots dangling in the fireplace opening. (Before starting, please watch the assembly video for the Fancy Label Accordion located near the bottom of the linked page.)

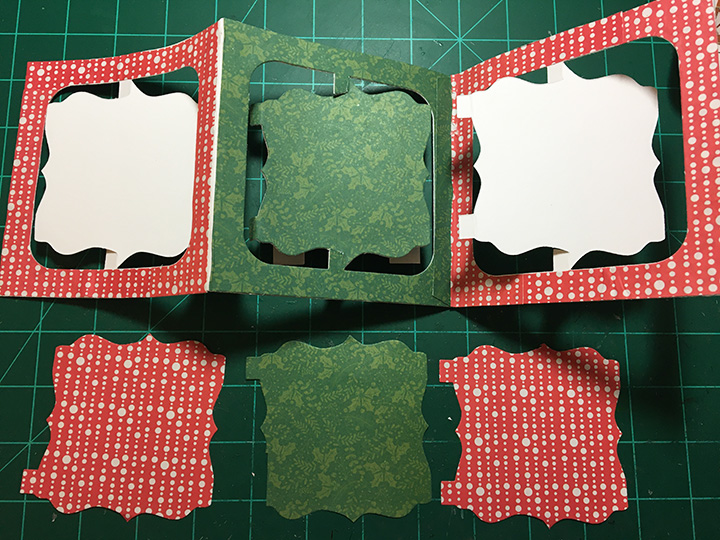
Cardbase: I cut three Fancy Label Accordion panels from heavy white cardstock. I also cut four of the same panels from red decorative paper and two panels from green decorative paper. The green paper panels I adhered to a cardstock panel. (I realized I needed to cut one more green panel to cover the tabs when all the panels are glued together.)

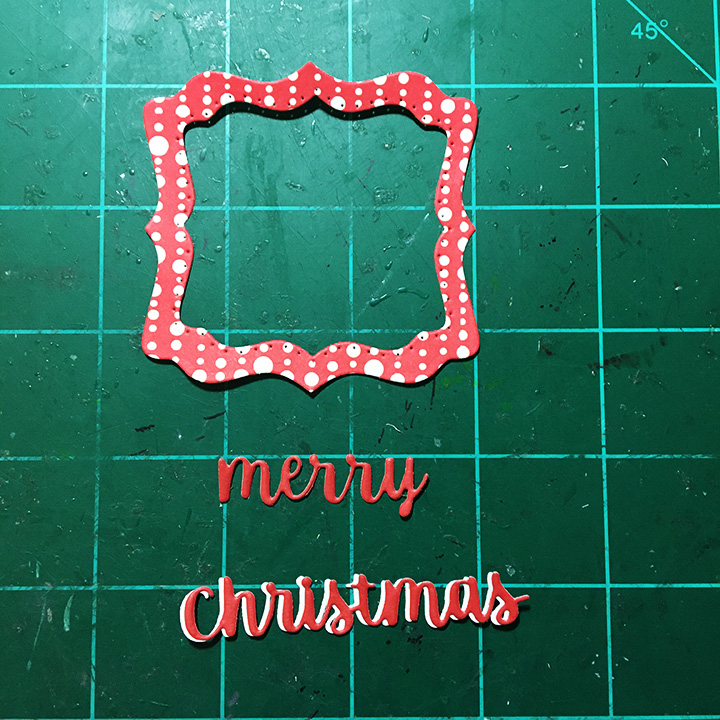
The red panels I trimmed out the center label at the pivot points. Using the largest and second largest label dies in the set to cut a frame, I cut borders from two of the red center labels. For the back personal message label I used the largest of the label dies to cut a frame that went to the edge of the white label.

Fireplace: I cut the fireplace front and mantel pieces using the Fireplace Pop-Up. For the fireplace I glued a brick decorative paper to white cardstock and die-cut it using the embossing feature. I then trimmed off a 5/8-inch from each side of the fireplace so it would fit into the card. The mantel piece was cut from white and ink blended.

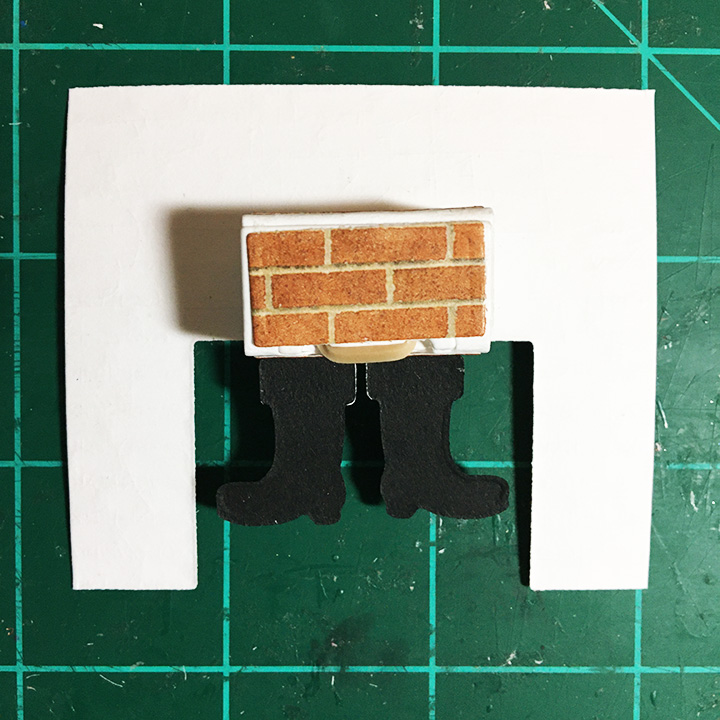
Bam Box and Boots: Because I was using a different mechanism than the fireplace mechanism, I recommend watching the assembly video for the small bam box. I tried both sizes of bam box, but you need to use the smaller one to get the fireplace to fit on the label and not catch when the card is folded closed. Glue three of the four decorative panels to the bam box. Before you add the rubber band to the bam box, cut the teardrop shaped holes for the boots (circled in red in photo below) using a sharp pointed piercing tool and scissors. (I used an old ice pick or awl.) If you plan to glue the bam box arched side to the fireplace, cut the holes in the panel just below it as shown in the photo circled in red. Attach the boots by slipping the tabs through the holes.

Assemble the bam box as usual.

I did not attach the fourth decorative panel on my card since I knew the arched side would be glued to the back of the fireplace. Test the placement of the bam box on both the fireplace and the pivot label before the glue sets.  Once the fireplace is attached to the panel, attach the mantel with the wider side glued to the fireplace.

Card Back: Every time I make an accordion card, I forget to save the decorative frame papers to glue on last, to cover the tabs that get glued as the card is assembled. This time I did it to the middle green panel.

Sentiments: “Ho Ho Ho” comes from cutting down the “Hooray!” in Word Set 4 while “Merry Christmas” is from Word Set 3. The Santa face is from the Gnome and Santa die set.

To get the word” Christmas” to stand-out from the red border paper I cut an additional “Christmas” in white and off set it behind the red word.

Envelope: The red “Merry Christmas” on the envelope flap and its green border are stamps from Anna Griffin.

CRX Sheet: The card recipient experience (CRX) sheet explains how to close the fireplace. it is a free download.

Thank you for reading this blog post. I hope this inspires you and makes you smile. Please like and leave comments 😊

Other Holiday Fireplace Cards by designer/brand

Materials Used:

Dies

Stamps

  • Anna Griffin – Treasury of Stamps & Dies – AG691T

Papers

  • Carnation Crafts – A4 Double-Sided Paper – Merry & Bright
  • Craft Consortium– A4 Solids Double-Sided Paper Pad – Candy Christmas
  • Paper Studio – 8.5×11 Paper – Brick Wall
  • Red, Pink, Black and White Cardstock
  • A7 Envelope – Cream

Ink

  • Ranger – Tim Holtz – Distress Ink- Walnut Stain and Aged Mahogany
  • Stampin’ Up – Classic Stampin’ Pad – Cherry Cobbler and Emerald Envy
  • Marker – Ultra Fine Tip –Blue and Pink

Adhesives

Tools

Miscellaneous

Gatefold Fireplace

This is the seventh card in the Fireplace Christmas Card series.

Waiting for the grandchildren to arrive to decorate the tree. It’s that peaceful moment when the dog is asleep before the fire and the chairs are ready for tired bodies.

For this card I used two Paper Discovery die sets by Olga Direktorenko – Timeless Room and Elegant Room as well as the Timeless Room embossing folder. These sets are available in limited quantities from Craftstash. Olga is an amazing designer of scene dies and stamps who lives in Ukraine.

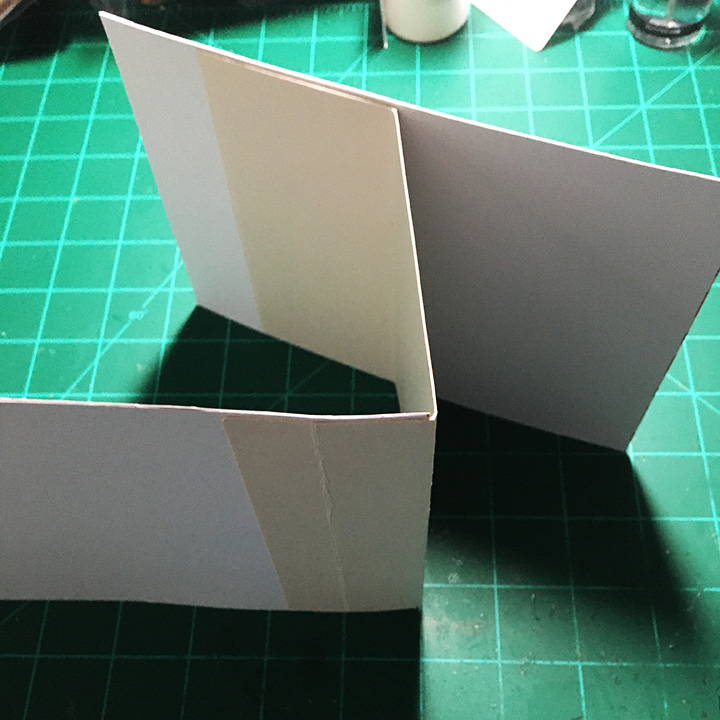
Cardbase: A purchased A7 (5×7 inches) gatefold cardbase and matching envelope were used for this card. The inside was covered in a red and white striped wallpaper with embossed floor moldings made using the Timeless Room embossing folder. A red rug is in the center bottom. The outside has wreath paper from the same 6×6 paper pad as the striped paper.

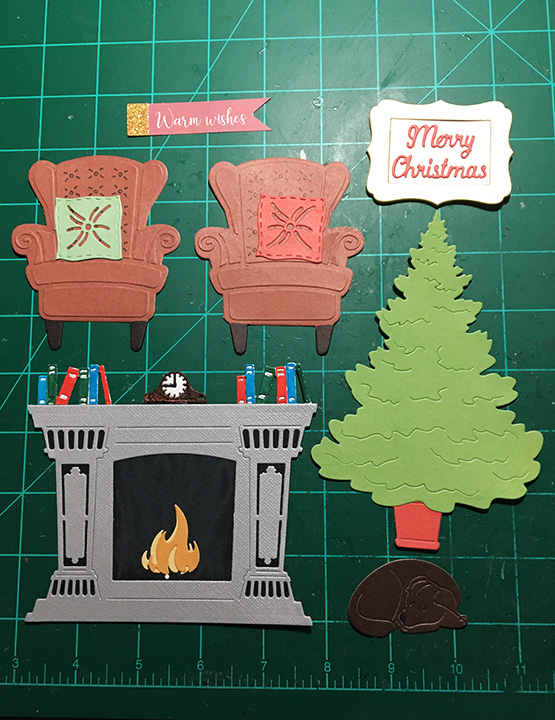
Fireplace: The fireplace die cuts a detailed image that needs to be backed with black paper to make the details stand out.                                     The final touch is the snoozing chocolate labrador retriever in front of the fire.

Chairs: The chair die in the Timeless Room set has an outline die and then one other die that cuts all the detailed pieces that make up the dimensional chair. The seat back die has a stencil feature for tufting which I used with a fine-tipped black marker to add this detail to the chair. The cushions are from the same set. When attached to the inside flaps of the card, the chair extend slightly over the edge, but card covered by the tree on the card front when the card is closed.

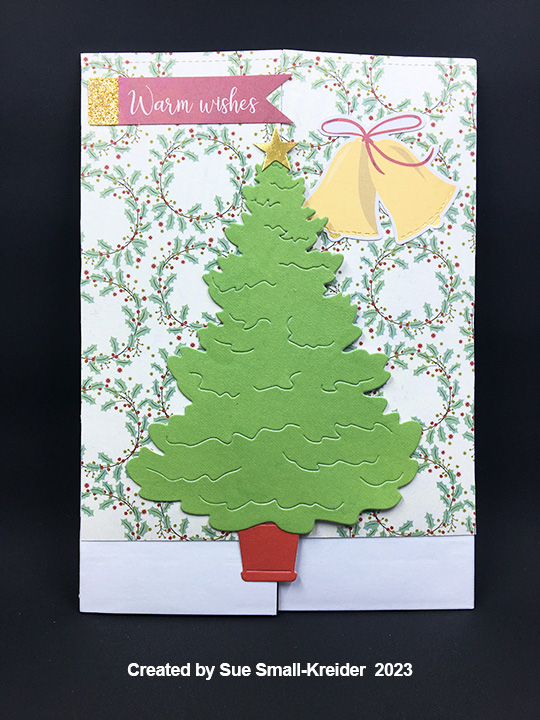
Card Front: An evergreen tree sits in a red pot waiting to be decorated. The tree is from the Elegant Room set while the pot is from the Timeless Room set. The left half of the tree is glued to the left card flap. The yellow bells were added to balance out the banner. Both are from a Spellbinder’s Christmas card kit.

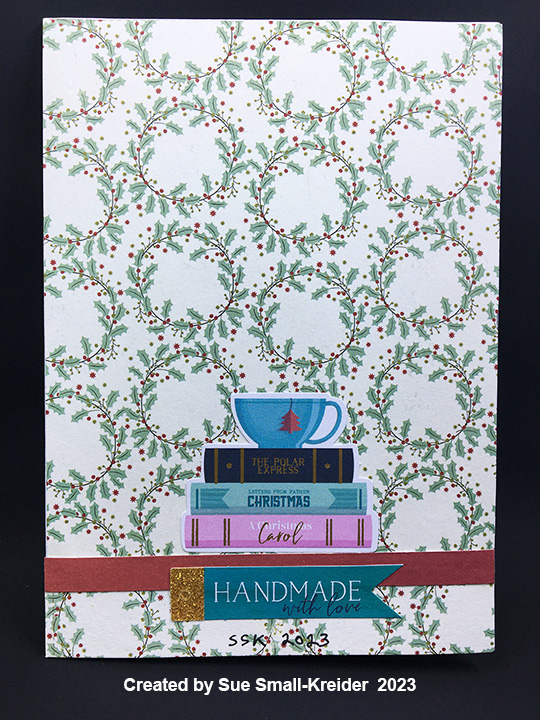
Card Back: A red strip covers the seam where the two pieces of paper meet. Ephemera from a Spellbinder’s Christmas card kit was used to decorate the back including a stack of Christmas themed books and a banner stating, “Handmade with love.”

Sentiments: The front banner “Warm Wishes” is from a Spellbinder’s Christmas card kit. “Merry Christmas” is part of the Elegant Room set and includes the frame. The two white ovals over the chairs are spaces to write personal messages.

Envelope: The back flap is decorated with yellow bells from a Spellbinder’s Christmas card kit.

Thank you for reading this blog post. I hope this inspires you and makes you smile. Please like and leave comments 😊

Other Fireplace Cards by designer/brand

Materials Used:

Dies & Embossing Folders

Papers

  • My Mind’s Eye – 6×6 Double-Sided Paper Pad – Cozy Christmas
  • Craft Consortium – A4 Solids Double-Sided Paper Pad – Candy Christmas
  • Spellbinders – Mega Holiday Cardmaking Kit – Christmas – All Aboard
  • Bazzill – 8.5×11 Textured Cardstock – Tiara -18-1002
  • Matte Gold Cardstock
  • Black and White Cardstock
  • Park Lane Paperie – A7 Gatefold Cardbase and Envelope – White

Ink

  • Ranger – Tim Holtz – Distress Crayon- Hickory Smoke
  • Sharpie – Permanent Marker – Ultra Fine Tip – Black, Blue, Brown, Green and Red

Adhesives

Tools

Magical Fireplace

This is the sixth card in the Fireplace Christmas Card series.

Fireplaces have a bit of magic in them on Christmas eve. This easel card plays into the magic complete with an elf sitting on the mantel shelf.

Hero Arts made the Stamp & Cut XL Fireplace set that was used to make this card along with Graphic 45 patterned paper Lets Get Cozy.

Cardbase: Starting with a purchased A7 cardbase, I cut it along its fold to have two pieces of 5×7 inch rectangles. Next, I cut a piece of the heavy weight pink cardstock 7.5-inches by 4.25-inches and folded at 2-inches and at 5.5-inches. (You may need to change the fold in the easel arm as I did, but you can cover the extra fold line with decorative paper.)

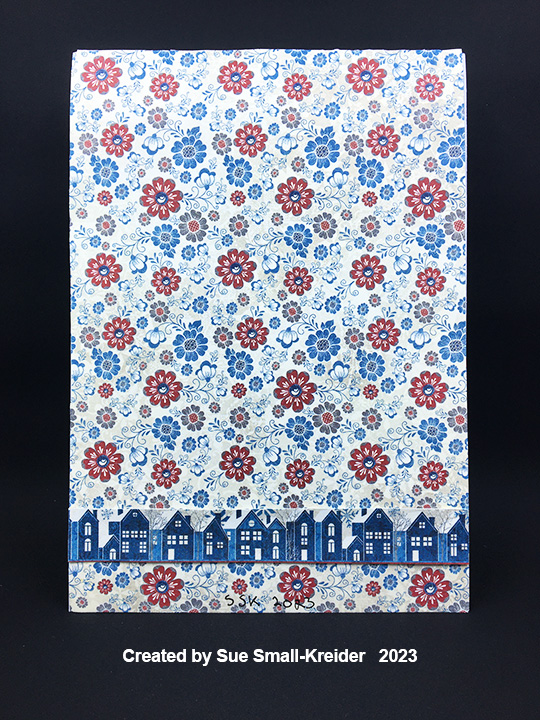
One tab was glued to the top of a cardbase panel and the other tab will be glued to the base of the other panel once it is decorated as the card front. Cover the bottom card base panel with a carpet like patterned paper. Also cover the back side of the case base with patterned paper. (I choose a wallpaper-like floral print and put a house border along the bottom edge to ground the back of the card.)

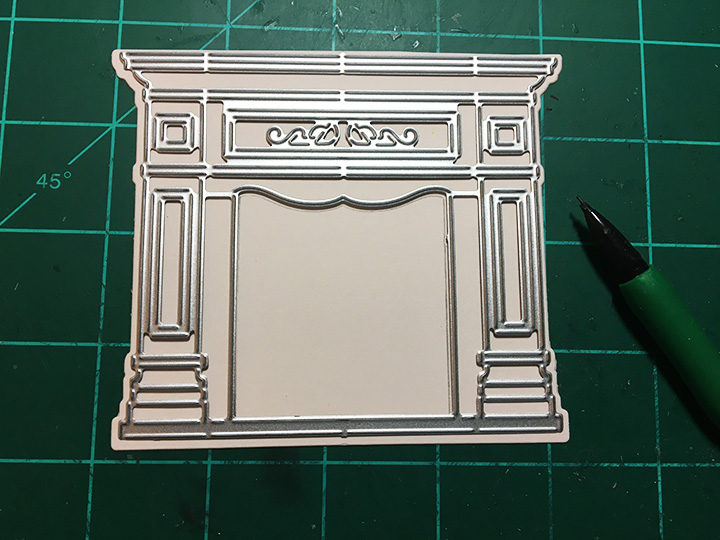
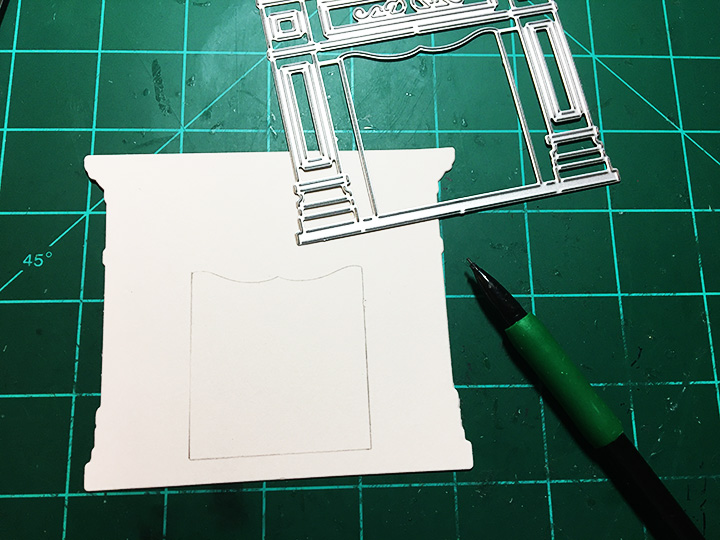
Fireplace: While designed to be a single layer die-cut, the fireplace can be cut multiple times to create a more 3D effect. The dies need to be clipped to separate the main outline of the fireplace from the mantel piece and the stocking from the rest of the piece. Cut one outline piece and one mantel piece from heavy blush pink cardstock. You will have to cut the mantel piece from the cardstock at its connecting points with a kraft knife. Cut another mantel piece to fussy cut the scalloped inner opening that frames the firebox. (I like to cut this piece to include some of the columns.)

On the outline piece, trace the firebox opening with a light pencil using the mantel piece die.

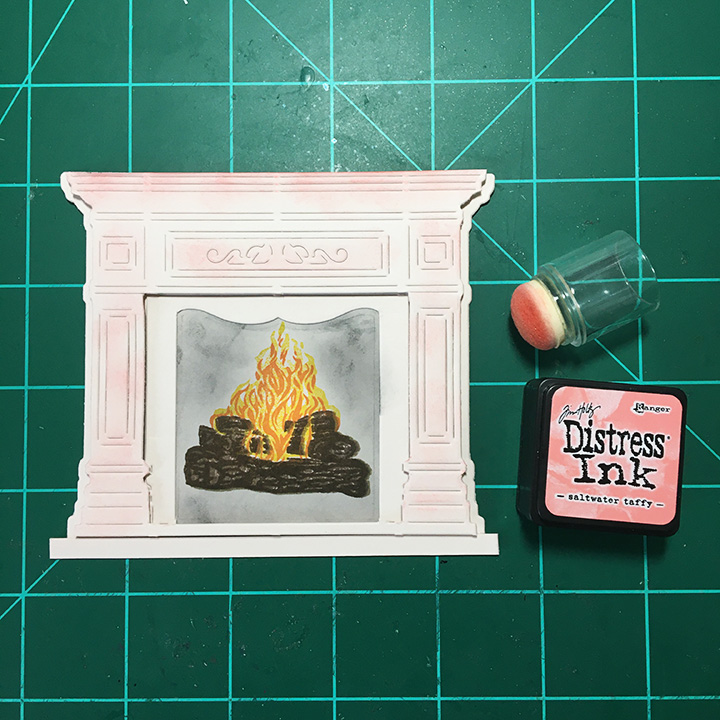
Using the layering stamps with two shades of brown ink for the logs and yellow and orange ink for the flames, create the burning logs within the penciled firebox. Using a blending brush, ink up the firebox to make sooty walls. Glue the inner firebox frame around the inked firebox. Use foam squares on the back of the mantel piece to adhere it to the outline piece. Blend some color onto the mantel piece.

Decorations: There are a number of decoration stamps in Fireplace Stamp & Cut set. I stamped both candles, the elf, tallest tree and the pinecones in greenery onto white heavy cardstock and heated embossed them before coloring with watercolor pencils. Next, I fussy cut them out leaving a long tab at the bottom of each to attach them to the fireplace I glued the tabs to the backside of the mantel piece and place foam squares on the backs of the pieces. The stockings were also stamped, heat embossed and watercolored. They are glued to the front of the mantel piece.

Sentiments: All of the sentiments were stamped, and heat embossed onto cardstock. The “ho ho ho” was stamped on pink cardstock to go at the base of the fireplace as if the sounds were coming down the chimney into the firebox. Crosshatch dies were used to cut out the larger sentiments of “Warm wishes” on a rug and “Merry Christmas” on a wall plaque. A second white rug was added for a personal message. The first rug is popped up on foam squares to act as an easel stop while the second rug is glued down for the ease of writing a message.

Envelope: The back flap of the envelope is stamped with a green elf to hint at the magic to come.

CRX Sheet:  With many interactive cards, the recipient needs instructions on how to open and set-up the card. I create CRX sheets (card recipient experience) to include in the envelope. You can download for free the easel/double easel CRX sheet.

Thank you for reading this blog post. I hope this inspires you and makes you smile. Please like and leave comments 😊

Other Fireplace Cards by designer/brand

Materials Used:

Dies

Stamps

  • Hero Arts – Stamp & Cut XL – Clear Stamps – Fireplace – DC295

Papers

  • Graphic 45 – 8×8 Double-Sided Paper Pack – Let’s Get Cozy
  • Recollections – 8.5×11 Cardstock 110 lb – Rose Petals
  • White Cardstock
  • Park Lane Paperie – A7 Cardbase and Envelope – White

Pigments: Ink, Watercolors & Embossing Powder

  • Simon Says Stamp – Pawsitively Saturated Ink – Aegean
  • VersaMark – Watermark Stamp Pad
  • Ranger – Tim Holtz – Distress Ink- Black Soot and Saltwater Taffy
  • Hero Arts – My Monthly Hero Mini Stamp Cubes – Cup O’Joe, Lemon Drop and Creamsicle
  • My Favorite Things – Premium Dye Ink – Milk Chocolate
  • Sharpie – Permanent Marker – Ultra Fine Tip – Red
  • Crafter’s Square – Metallic Marker – .05 In Point – Gold
  • Nuvo – Highly Pigmented Watercolor Pencils – Elementary Tones and Brilliantly Vibrant
  • Recollections – Detail Embossing Powder – Ebony

Adhesives

Tools

  • Die Cutting Machine
  • We R Memories – QuickStick
  • Stamping Platform
  • LDRS – Stampendable Stamping Tool
  • Stamping Cloth
  • Sponge Dauber
  • Ink blending Brush
  • Craft Mat
  • Scissors
  • Heat Tool
  • Kat Scrappiness – Anti-Static Tool
  • Water Brush
  • Kraft Knife

Burning Logs TV

This is the fifth card in the Fireplace Christmas Card series.

In the good old-days of the 1950s and 1960s, the winter holidays meant snow, winter sports like ice skating on a homemade ice ring made in the backyard of 2×4 boards and a few inches of water frozen. On Christmas day the TV stations broadcast images of burning logs to replace the normal programing.

This card commemorates those childhood memories using dies by Hero Arts along with basic dies and stamps by other companies.

Cardbase: I used a purchase A7 (5×7 inch) cardbase and envelope. I covered the inside with papers that represent wallpaper and carpeting. The card back is also covered with patterned paper. Because I used 6×6 inch patterned paper and some designs I only had one piece, I placed borders of contrasting paper.

Pop-Up: I wanted this television set to pop-up inside the card, so once it was assembled, I made my own pop-up cube from scrap carpeting patterned cardstock (I would have used the wallpaper, but I had no more of it.) The pop-up cub is made from strip 2.5×7 inches, folded at .5-inches, 3-inches, 3.5-inches and 4-inches, and the .5-inch tab is glued onto the carpet panel inside the card, butted up against the fold and the other 3-inch end of the strip glued to the wallpaper panel.  The TV is glued to the front of the pop-up.

TV: As with many Hero Arts dies, you have to cut them multiple times and then fussy cut with scissors the decorative pieces such as the TV knobs, speaker box and legs. I cut the knobs, speaker and screen frame from a textured metallic gray cardstock and legs from woodgrain paper.

The whole television I cut once from black and twice from a thick cardstock in my junk mail recycling. The junk mail pieces I glued together. On the back of the black piece, I attached a piece of clear acetate using thin double-sided tape. Next, I trimmed the excess acetate. (Don’t attach black front to junk mail back piece until burning log screen is attached.)

White cardstock that was colored with markers and covered with glitter gloss was used for the flames while recycled kraft cardboard packaging was what the logs were cut from. Once the burning logs were assembled, they were glued to star patterned paper TV screen piece. Place a piece of wide clear packing tape over the backside of the junk mail piece and place the finished screen inside the junk mail frame. Glue the black front to the junk mail piece.

Attach the TV to the pop-up inside card. Play with the antenna placement so they won’t show when the card is closed. (I cut the antenna once from silver foiled packaging and once from the thick junk mail cardstock and glued together.)

Card Front: For this layered mat front, I used a 5×7 inch rectangle of holographic snowflake cardstock that I cut a 4×5.25 inch crosshatch rectangle out of the center. A 4.25 x 5.5 inch piece of glitter cardstock was covered with a snowflake pattern plate attached with 1/8-inch wide double-sided tape. The open places in the center of some snowflakes had stickiness from the tape adhesive and was covered with an anti-static brush and powder.

Skaters: Hero Arts makes a paper doll die-cut series complete with a variety of hair and facial expressions as well as clothing and accessories. These mid-century styles ice skaters use the Winter Accessories set along with the basic Hero Lifestyle Forms and Faces sets. Markers were used to color the clothing.

Sentiments: Two die cut sentiments were used on this card. On the front is “Up To Snow Good” a pieced die set by Riley & Company. I cut it once from heavy white cardstock and colored the letters with a blue metallic marker. I used glue to attach all pieces to the snowflake pattern plate. Inside the card is “Happy holidays” a die set by Simon Says Stamp. The lavender rug inside the card is a place for a personal message.

Envelope: To hint at what is to come, the back flap of the envelope was stamped with an Art Impressions’ sentiment stamp in blue ink.

Thank you for reading this blog post. I hope this inspires you and makes you smile. Please like and leave comments 😊

Other Fireplace Cards by designer/brand

Materials Used:

Dies

Stamps

  • Art Impressions – Unmounted Rubber Stamp – Scrapbook.com Exclusive – Sending a Flurry of Holiday Wishes! – 5085
  • Hero Arts – Fancy Dies – Hero Lifestyle Faces – CM500

Papers

  • Bazzill – 8.5×11 Textured Cardstock – Tiara -18-1002
  • Crate Paper – 6×6 Single-Sided Patterned Paper Pad – Cool Kid
  • Grafix – 8.5×11 Acetate .0075 – Clear
  • Honey Bee Stamps – 6×8.5 Double-Sided Paper Pad – Grain and Grunge
  • Hot Off the Press – 8.5×11 Holographic Cardstock – Snowflakes Blue – HOTP-10460
  • Recollections – 8.5×11 White Gold Shimmer Cardstock
  • Thick Smooth Cardboard Junk Mail
  • Thick Kraft Cardstock Packaging
  • Blue Glitter Cardstock
  • White, Black, Blue, Lavendar and Cream Cardstock
  • Park Lane Paperie – A7 Cardbase and Envelope – White

Ink

  • Stampin’ Up – Classic Stampin’ Pad – Misty Moonlight
  • Memento – Fade-Resistant Dye ink – Tuxedo Black
  • Ranger – Tim Holtz – Distress Watercolor Pencil – Kitsch Flamingo
  • Crafter’s Square – Metallic Marker – Blue and Silver
  • Sharpie – Permanent Marker –Fine Tip – Black, Red and Yellow
  • Sharpie – Permanent Marker – Ultra Fine Tip – Brown
  • Nuvo – Aqua Shimmer -Glitter Gloss
  • White Gel Pen

Adhesives

Tools

  • Die Cutting Machine
  • We R Memories – QuickStick
  • Stamping Platform
  • LDRS – Stampendable Stamping Tool
  • Stamping Cloth
  • Scissors
  • Kat Scrappiness – Anti-Static Tool