Holiday Hearth

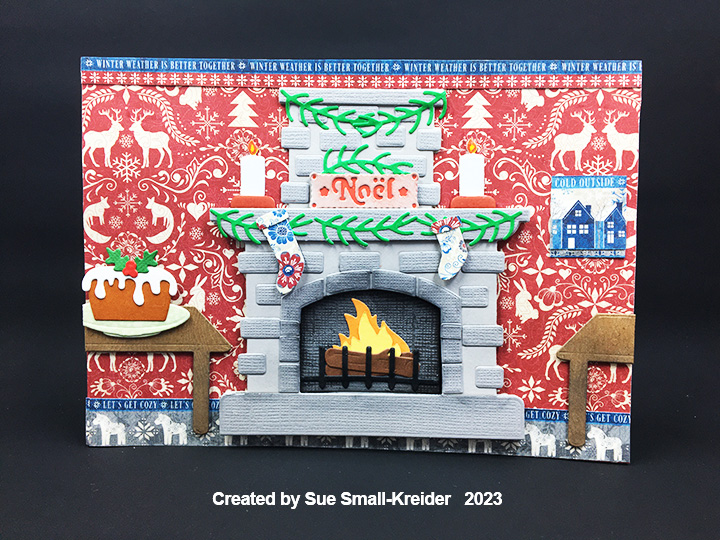
This is the first card in the Fireplace Christmas Card series.

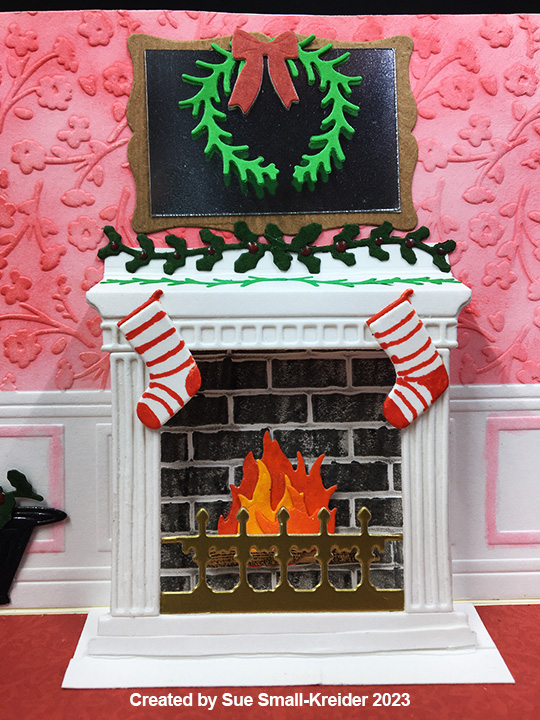
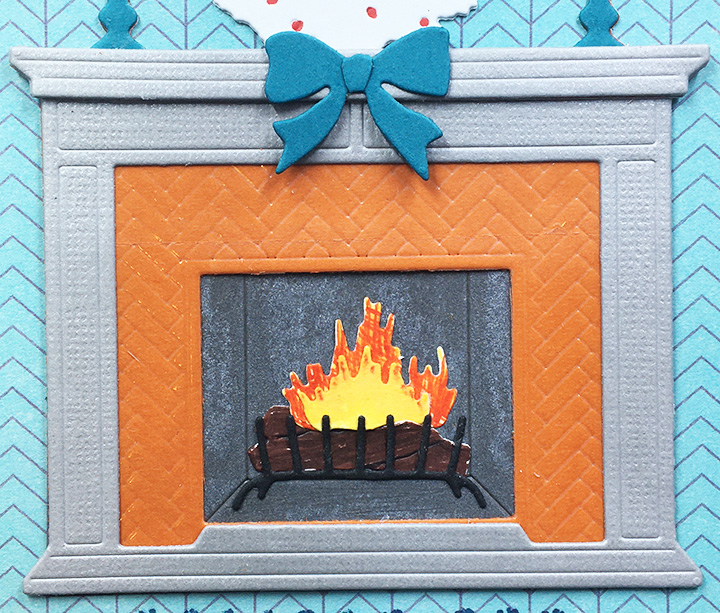
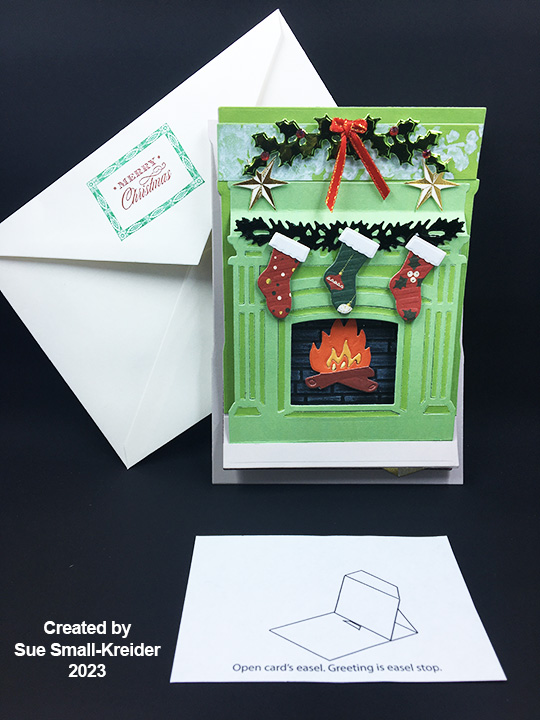
For this turn-of -the century fireplace easel card, Anna Griffin’s Holiday Hearth Easel die set is the star of the make along with some of her stamps and foiled embellishments.

Review the printed instruction sheet included in the fireplace die set before starting card.

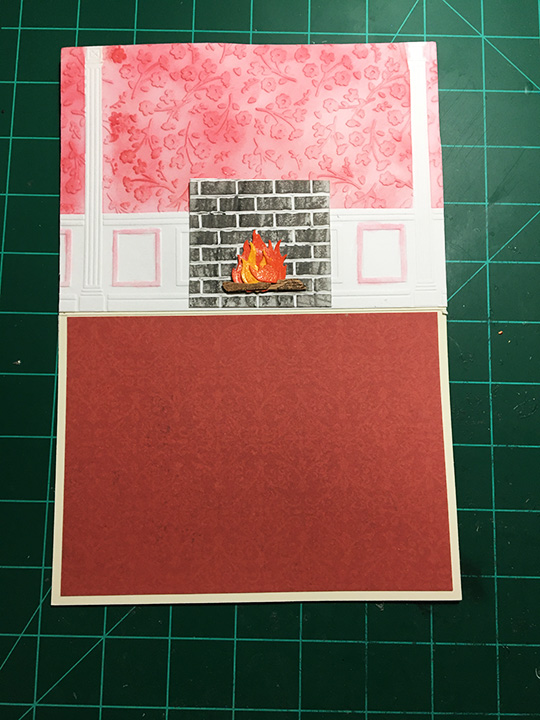
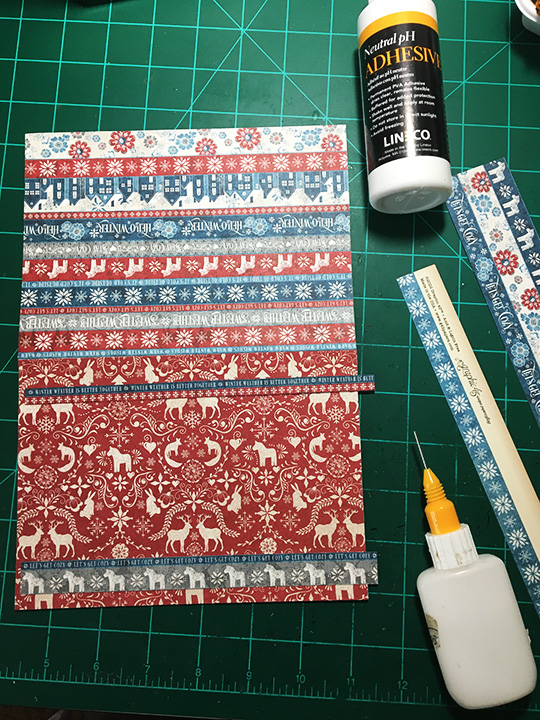
Easel Base:  The easel base die cuts in one piece which I cut out in a heavy weight gray cardstock. I added a maroon carpet to the base using the fireplace outline die on a 6×6 inch piece of patterned paper.

Fireplace Mantelpiece:  The mantelpiece die cuts a detailed fireplace front. Because I used a double-sided cardstock that had different shades of green on each side, I was able to save the waste pieces and adhere them back inside the die-cut piece with the use of tape on the backside.

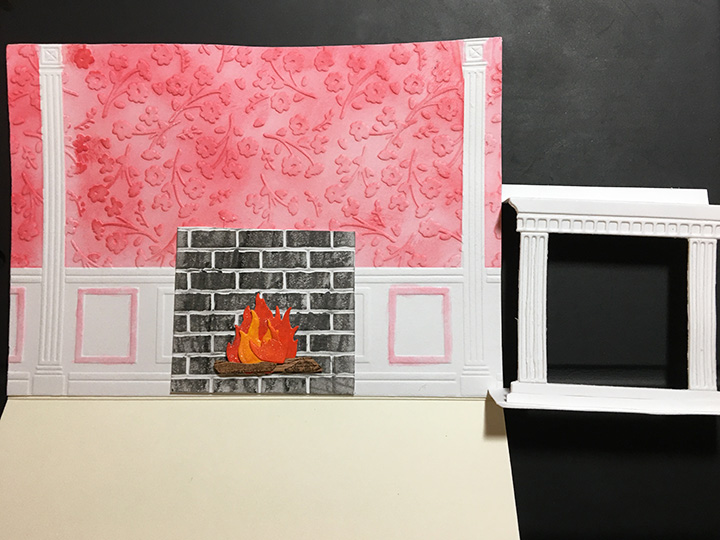
I die-cut the fireplace outline or back twice. Once from gray and once from light green. On the light green piece, I cut-off the bottom flap (and saved it to be stenciled in white to act as wallpaper above the mantel.) I also die-cut just the bottom flap of the fireplace in gray to become the hearthstone that will slide under the easel stopper. The green trimmed back piece was glued on top of the gray back piece. Next the bottom flap of the fireplace was adhered to bottom edge of the back piece and then covered with the gray hearthstone piece. Glue in black brick hearth and fire grate piece. Add glue to the back of the top fireplace tab and, with the entire fireplace flat, adhere to the back piece. Play with the positioning of the back piece on the easel base and then glue easel base tab to gray side of back piece.

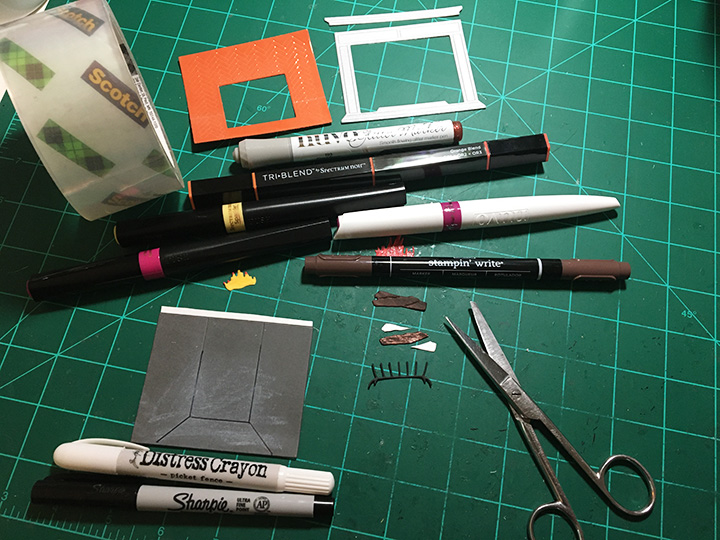
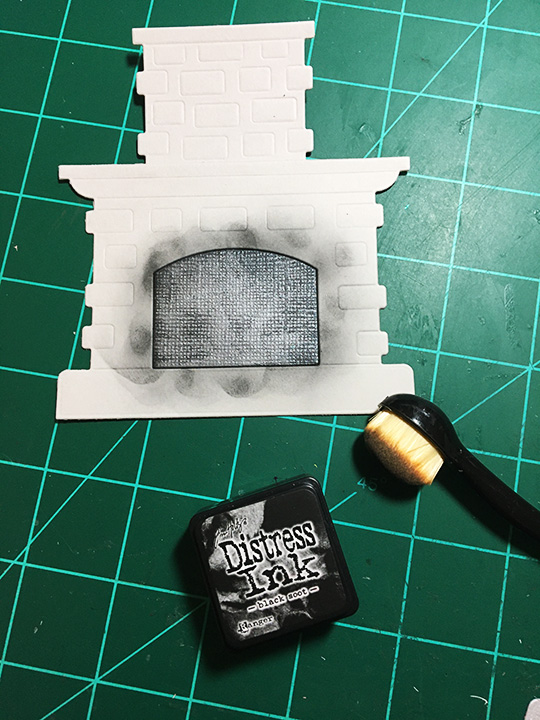
Fireplace Grate with Fire:  For the back of the fireplace hearth, I cut a 3.75-inch square of black cardstock which I embossed with a brick wall embossing folder. The bricks were lightly colored with a white Distress Crayon and blended to make a smokey backdrop to the fire. The burning logs piece was cut twice from brown (logs) and once from red, yellow and orange (fire) respectively. I used tape and glue to assemble the fire and logs. To position the burning logs, open the card into the easel position and adhere the piece onto the bricks with foam squares. (When the card is closed flat, the burning logs will look slightly high inside the firebox.)

Decorations:  The die set comes with a stocking die as well as dies for holly and greenery garlands. I cut the stockings from three different decorative papers and then cut the just the cuffs from white cardstock having to do some fussy cut trimming after the die cutting. The garlands are cut from two different shades of green mirror/foil cardstock. The holly garland has red adhesive gems added along with a tiny red ribbon bow. The dark greenery garland is glued onto the mantel edge. All other decorations are adhered with foam squares. Two gold foil stars sit on the mantel shelf and a gold wrapped present sits on the floor. Both are from Anna’s Present Pop-Up Kit.

Sentiments:  A dimensional sentiment sticker from Anna’s Present Pop-Up Kit was popped-up on an additional layer of foam squares to allow the fireplace gray hearthstone to slide under and act as an easel stopper. A blank foiled sticker from the same kit was added to the card base for a personal message that will be hidden when the card is set-up as an easel. The red “Merry Christmas on the envelope flap and its green border are stamps from Anna’s Treasury of Stamps & Dies.

CRX Sheet:  With many interactive cards, the recipient needs instructions on how to open and set-up the card. I create CRX sheets (card recipient experience) to include in the envelope. You can download for free the easel/double easel CRX sheet.

Thank you for reading this blog post. I hope this inspires you and makes you smile. Please like and leave comments 😊

Other Fireplace Cards by designer/brand

Materials Used:

Dies

Stamps

Embossing Folder

  • Altenew – Geometric 3D Embossing Folder 6×6 – Brick Wall – ALT6206

Stencils

  • Funky Fossil Designs – Windy Day

Papers

  • Craft Consortium – A4 Solids Double-Sided Paper Pad – Candy Christmas
  • Echo Park – 6×6 Double-Sided 65 lb Cardstock – Homegrown by Alisha Gordon & Kasie Fry
  • Reminisce – 6×6 Double-Sided Papers – Christmas Wishes
  • Light Green and Dark Green Mirror/Foil Cardstock
  • Black, Gray and White Cardstock
  • Anna Griffin – Present Pop-Up Kit – A7 Envelope – Ivory

Ink

  • Ranger – Tim Holtz – Distress Crayon – Picket Fence
  • Stampin’ Up – Classic Stampin’ Pad – Cherry Cobbler and Emerald Envy
  • Craft Smart –Acid Free Ink Pad – White

Adhesives

  • Neutral PH Adhesive by LINECO
  • Fine-Tip Glue Bottle
  • Clear Tape
  • Foam Squares

Tools

  • Die Cutting Machine
  • We R Memories – QuickStick
  • Stamping Platform
  • LDRS – Stampendable Stamping Tool
  • Stamping Cloth
  • Scissors
  • Fork

Miscellaneous

Sleighing It Accordion Style

It’s time for the Karen Burniston Design Team Challenge for August 2023 with the theme of ACCORDION dies.

I choose to use the Fancy Label Accordion die with the sleigh from the Sleigh Pop-Up and reindeer from the Christmas Animals set as add-ons similar to the new Cupcake or Fence Add-ons for the Landscape Rectangle Accordion set. I also used the snowflake frames from the Fancy Winter Frames set.

There are several ways of assembling this accordion card – prepare frames and attach them all together and then add the sleigh and reindeer – OR – prepare frames (adding snowflake frames to fronts of accordion frames only), make all the animals, sleigh and gifts and assemble each panel as you go adding the back snowflake frame pieces after you attach the accordion frames. The latter is the method I choose to follow. Watch the assembly videos for the Fancy Label Accordion and the Fence Add-ons (located towards the bottom of the linked pages.)

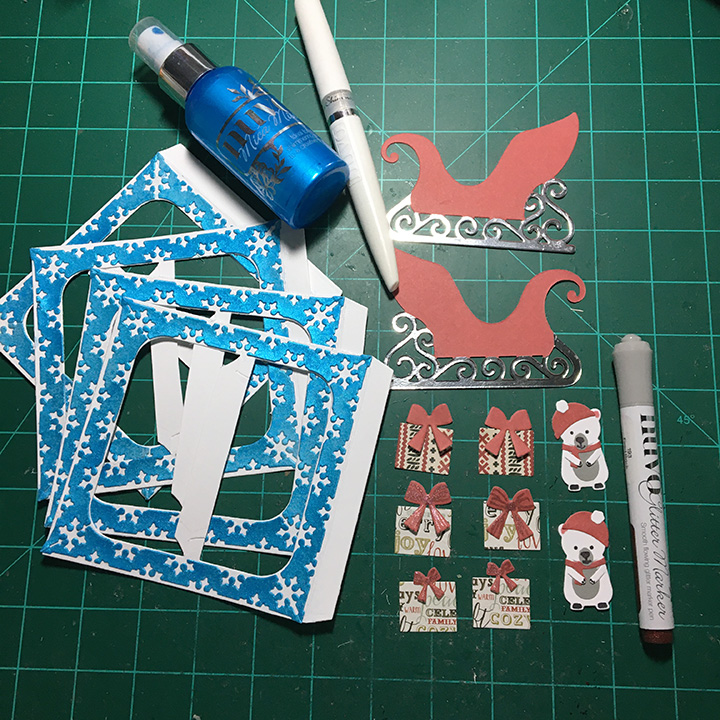
Frames: Cut four accordion frames from the Fancy Label Accordion set from heavy white cardstock. With scissors cut off the sides of the fancy label to form a pivot post on each accordion frame. Cut a total of 16 snowflake frames pieces from the Fancy Winter Frames set from blue cardstock. (I sprayed my frames with mica spray to get the metallic shiny frames.) Brush the accordion frame sides and the pivot post with glitter gloss. (I recommend doing both sides of the frame at this stage.) Glue blue snowflake frames onto the fronts only of the accordion frames. (Watch assembly video for the Fancy Winter Frames.)

Sleigh: Using red cardstock cut two sleighs. (If using decorative cardstock with a different pattern on each side, cut one red in reverse.) Cut two more of the lower portions, of the sleigh from silver foil cardstock making sure one is the reverse of the other. Fussy cut off just the sleigh runners. Glue runners to red sleigh bases.

Gifts: From the Sleigh Pop-Up set, cut a total of six gift boxes and four bows, making sure you have pairs of matching papers for each box and bow. (I used a glitter marker to add some accents to the bows.) Play with the layout of where the packages and bear will go in the sleigh and still fit inside the accordion frame.

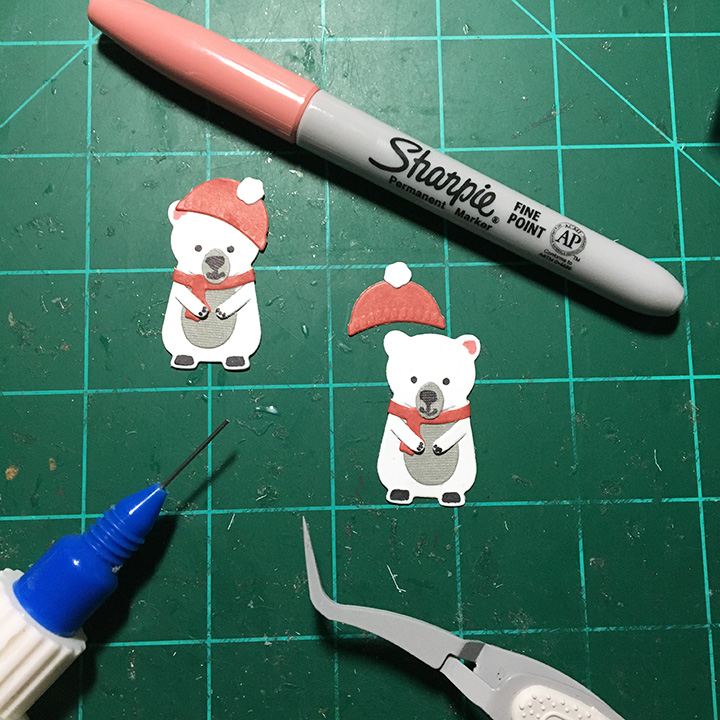
Bear: Cut two bears from white cardstock and two of the tummy and nose pieces from gray using the Winter Animals set. Cut from red two hats and scarves and two pompoms from white. Assemble as shown on the package. Use the main die to stencil the pink ears and black eyes, and the nose die to draw the mouth and nose in black. Assemble with the hat covering the opposite ear from the other bear.

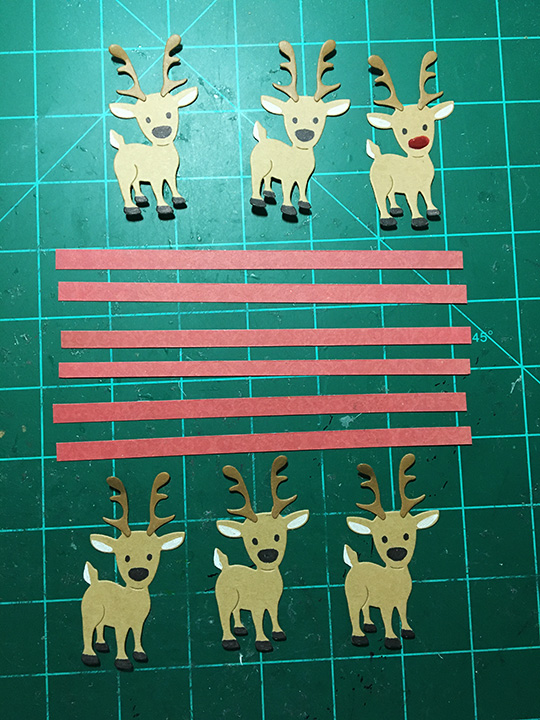
Reindeer: Cut 12 reindeer from brown cardstock and 12 pairs of antlers from darker brown cardstock using the Christmas Animals die set. With a fine tipped black marker use the reindeer die as a stencil to color hooves and faces of the six of the deer and a white gel pen to color the ears. Repeat with the remaining six reindeer, but on the reverse side. Color all the tail as shown on package with white gel pen. Glue on antlers to one set of six reindeer. You will glue the remaining six pairs of antlers on when you assemble the card matching up the fronts and backs of them. (I made one reindeer have a red nose by using red Nuvo drops.) Cut six strips of red cardstock 6-inchs long and 1/4-inches wide for the sleigh shafts that the reindeer will be harnessed to.

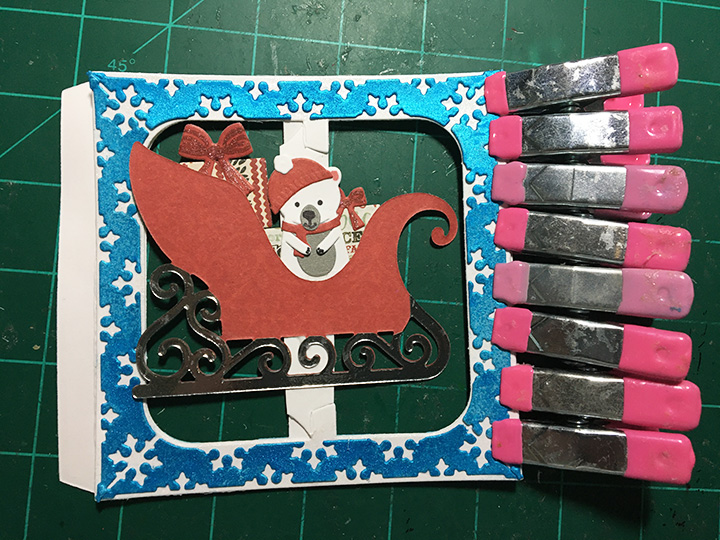
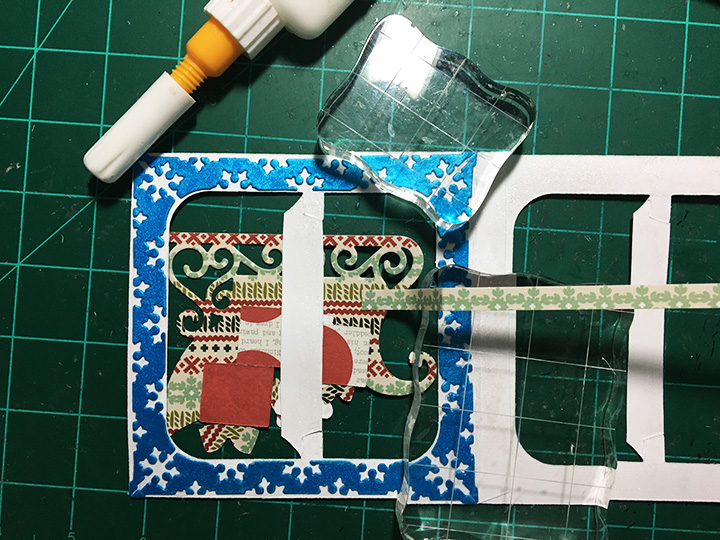
Assembly: Play with the layout of where the packages and bear will go in the sleigh and still fit inside the accordion frame. Glue the packages and bear to the back of sleigh. Start with the first frame and position the sleigh so that the front curling tip of sleigh is just inside the frame and a small portion of the back of the sleigh is over the other side of the accordion frame. (I placed my sleigh so that the shaft that will connect the sleigh to the reindeer will be approximately in the middle of the frame.) Glue the frame tab to the second frame. ( I used crafting clips to hold the frames together until the glue set-up.

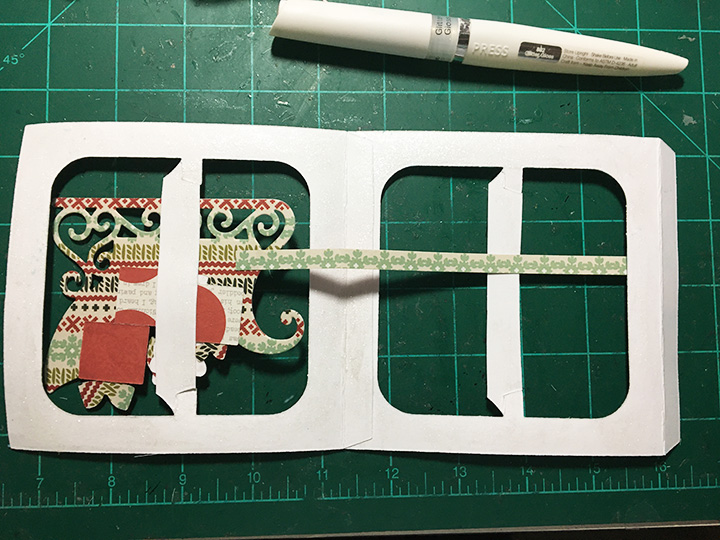
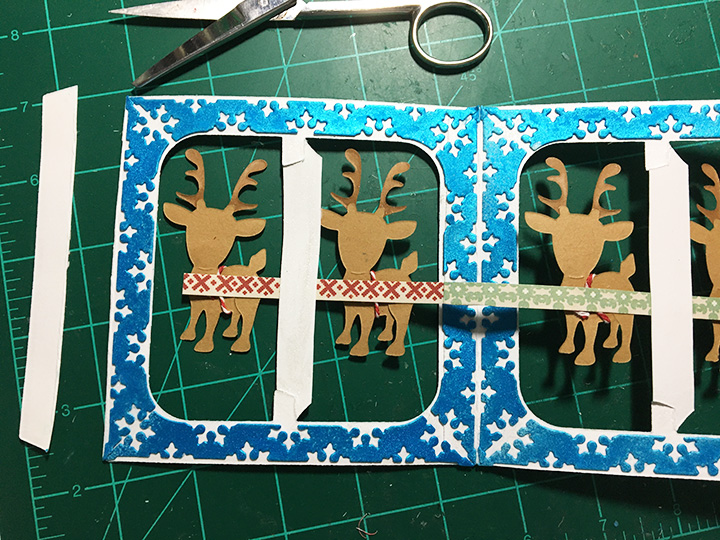
Flipping the two frames over, I glued a shaft onto the back of the sleigh making sure it was long enough to reach the edge of the next frame. Next, before I glued the blue frames on , I brushed all the accordion frame sides with a glitter gloss then I attached the blue snowflake frames to the back sides of the accordion frames covering over where the tab is. Use weights to keep the frames from curling as the glue dries.

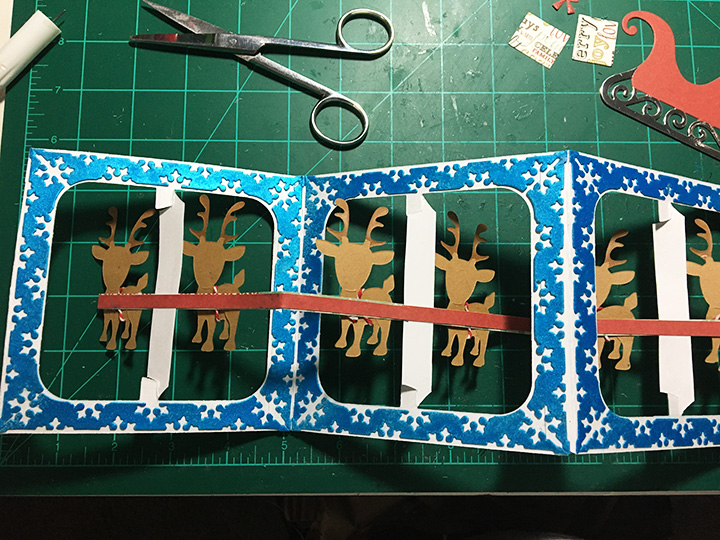
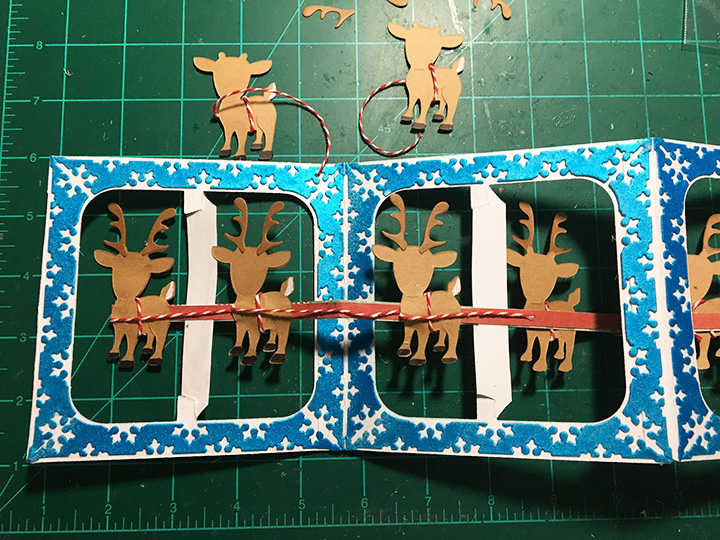
Cut two pieces of baker’s twine 6-inches long and ten pieces 5-inches long. (Use the 6-inch piece of twine for the rein deer that attach to the sleigh.) To make the harness on the reindeer start with the end of the twine on the back side going over the neck and back under the belly. Glue the end and bend to back of reindeer. Pull twine around the front of the animal and with a dot of glue, adhere the twine to the rear end of the reindeer. Glue the lead reindeer to to the second frame and glue the end of the harness twine to where it will be covered with the reindeer with with a 6-inch harness. Adhere second reindeer and wrap end of twine around the bear’s paw.

Add the next two frames following the same instructions for the second frame and reindeer. (In hindsight, I think it may be easier to assemble all the accordion frames together, adding one sleigh and attaching all the shaft pieces together. Then you can start adding the reindeer starting with Rudolph in the front, gluing down his twine harness, and adding the next reindeer and so on with each frame.)

When all the frames have been added with blue frames on both sides and front side of reindeer added, flip over and cut off the unused tab on fourth frame. Glue red shafts to the back side of shafts. (This covers the different patterned paper for my card, but also adds some strength to the folding mechanism.)

Glue the packages to the backs of the first packages matching them up. Then adhere the bear. Finally glue the sleigh in place matching up the edges and runner swirls. Use clips to keep the pieces in place until the glue dries.

Glue the remaining reindeer in place. Train all the folds. (I decided that the back side of the reindeer would look better with faces so I stenciled them on after the card was assemble.)

This card will easily fit into an A7 envelope, but it is thick, so a padded envelope or hand delivery is recommended.

Thank you for reading this blog post. I hope this inspires you and makes you smile. Please like and leave comments 😊

Click here to see other Accordion cards

Materials Used:

Dies

Papers

  • My Mind’s Eye – 6×6 Double-Sided Paper Pad – Cozy Christmas
  • White, Brown, Gray, and Light Blue Cardstock
  • A7 ivory Envelope

Ink

  • Sharpie – Permanent Marker – Fine Tip – Pink
  • Sharpie – Permanent Marker – Ultra Fine Tip – Black
  • Sakura – Gelly Roll Pen – Medium – White
  • Nuvo – Glitter Marker – Fired Brick – 193
  • Nuvo – Aqua Shimmer – Glitter Gloss
  • Nuvo – Mica Mist – Nebula Blue

Adhesives

Tools

Miscellaneous

  • Baker’s Twine – Red/White
  • Nuvo – Vintage Drops – Postbox Red

Vintage Christmas Cards – Room Scene

Recently I came across some family Christmas cards I had designed with the help of my father who owned a letterpress printing press and had cuts (think metal stamps on wooden blocks similar to rubber stamps on wood blocks) made of my drawings. The printing press held an 8×10-inch frame which held the cuts and metal type (letters). Paper was hand-fed into the press which had an electric motor connected with a leather belt which turned the press wheel. From about age 8 and on I earned pocket money running the press to add people’s names to their store-bought Christmas cards, “From the Desk of” notepads and other small print jobs from family and friends.

The five cards that I am sharing this week were created before the computer drawing program Auto-CAD was widely available to individuals. (I know we didn’t have access to digital type fonts that Apple computers offered around that time.) I used rulers, India ink pens and protractors to draw the pop-ups.

In 1985 I designed a pop-up room scene featuring a fireplace tabletop Christmas tree and a cat. I used rub-ons that were popular at the time to created graphics. All the straight lines were rub-ons as well as the letters on the garlands. I used a plastic drawing template for the circles and arcs. The cat was a sticker that had been reduced on a photocopier.

These postcards were hand-colored with watercolors and markers.

On the back of the postcard was the first of my CRX drawings that showed how the finished pop-up should look along with cutting and folding instructions.

I believe this was the last of the family designed Christmas cards as my father discovered Graphics3, a family-owned printing business in Jupiter, Florida that made 3D pop-up cards and began ordering from cards from them.

Here are other vintage Christmas cards:

  • Room Scene

Vintage Christmas Cards – Sleigh

Recently I came across some family Christmas cards I had designed with the help of my father who owned a letterpress printing press and had cuts (think metal stamps on wooden blocks similar to rubber stamps on wood blocks) made of my drawings. The printing press held an 8×10-inch frame which held the cuts and metal type (letters). Paper was hand-fed into the press which had an electric motor connected with a leather belt which turned the press wheel. From about age 8 and on I earned pocket money running the press to add people’s names to their store-bought Christmas cards, “From the Desk of” notepads and other small print jobs from family and friends.

The five cards that I am sharing this week were created before the computer drawing program Auto-CAD was widely available to individuals. (I know we didn’t have access to digital type fonts that Apple computers offered around that time.) I used rulers, India ink pens and protractors to draw the pop-ups.

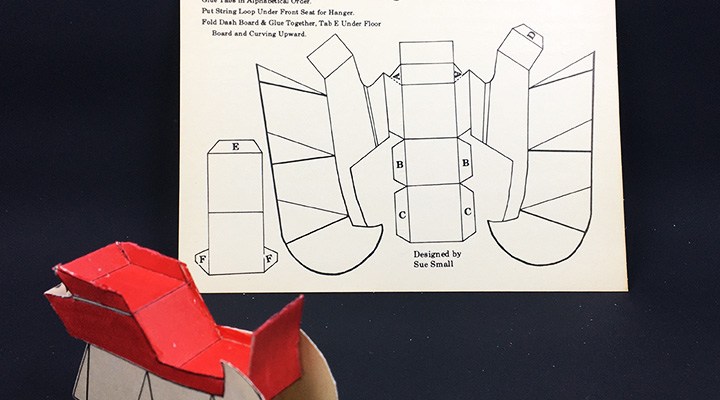
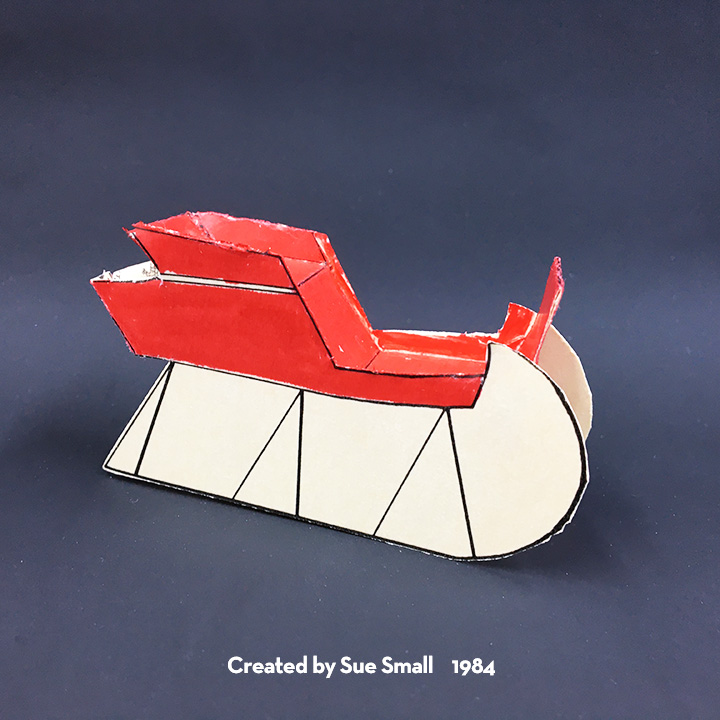
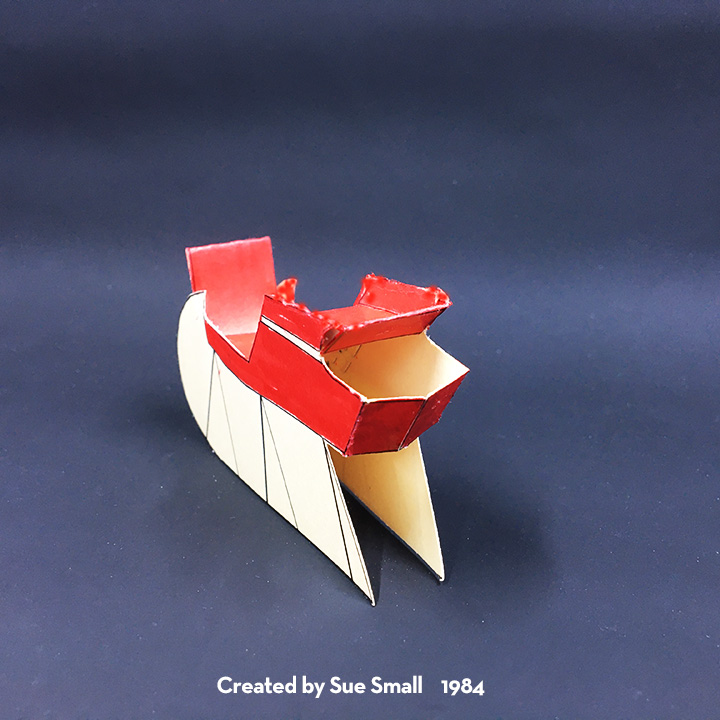
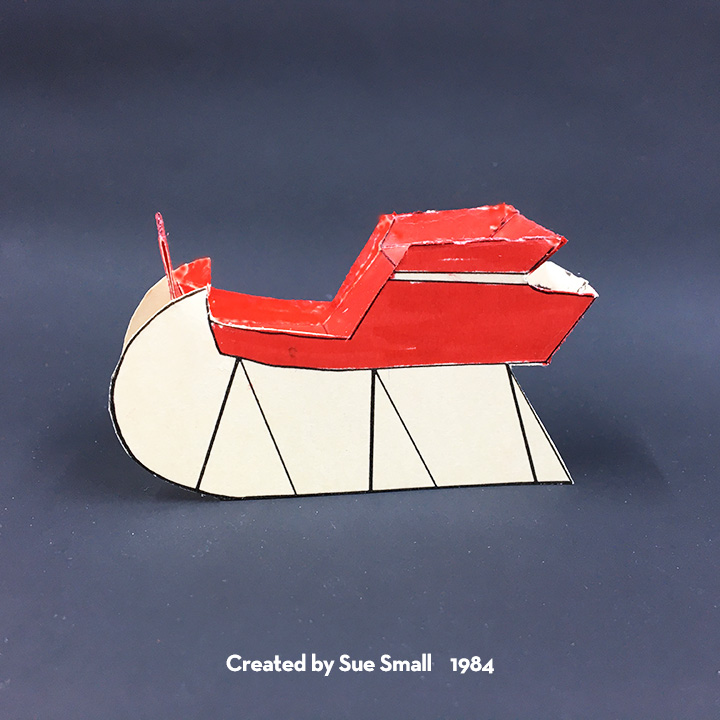
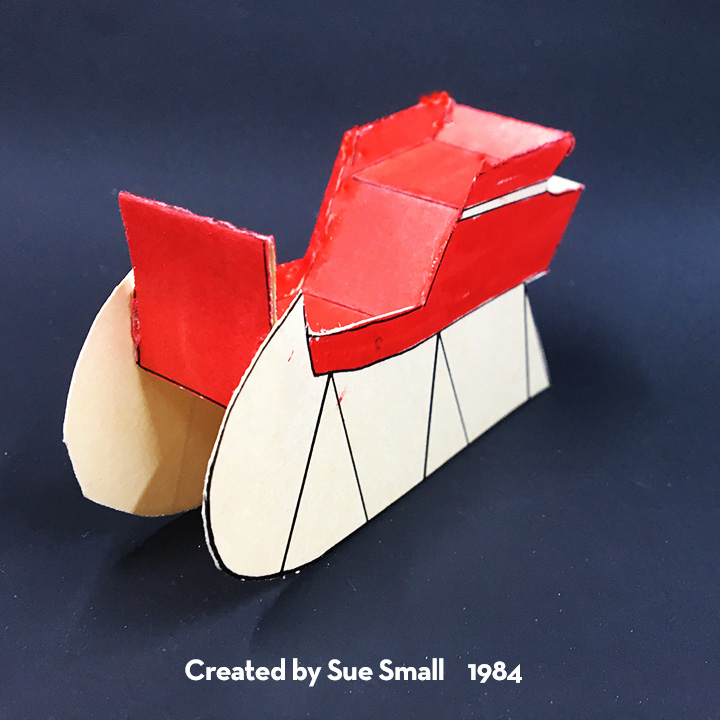
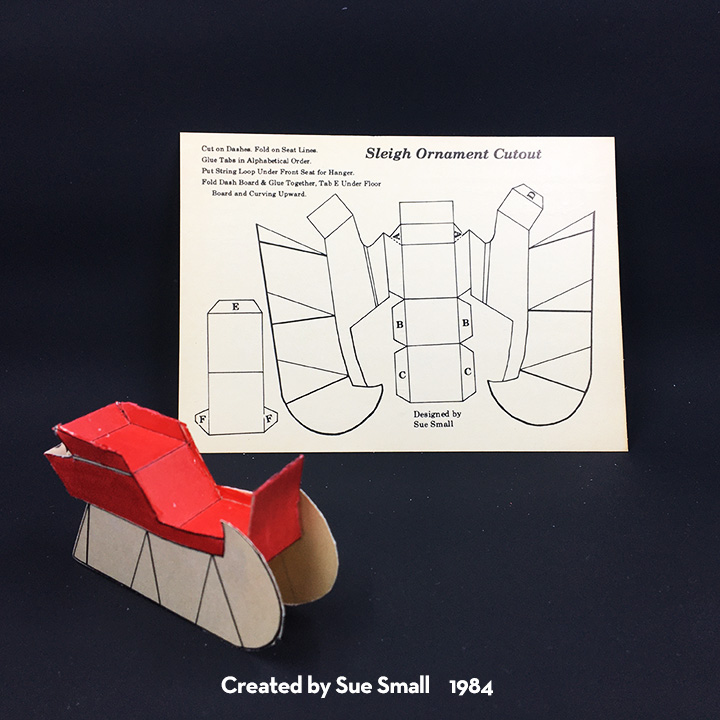
My siblings and I think the sleigh postcard was created around 1984 using an image found in a Dover Publications clip art book. (We didn’t document our source as it was an image in the public domain.)

The sleigh was manipulated on a photocopying machine. The image was cut-out twice and one image flipped on its back side and traced with an ink pen. A ruler and protractor were used to create the rectangular shapes and tabs that connected the sides. Rub-on lines were used to create the various thickness of lines and perfect corners.

The instructions, title and tab letters were printed using hand-set type and the cut and pasted onto the drawing. (You can see one of the “F” tabs shows the overlap of paper covering the line.)

These postcards were hand-colored using red makers. We printed 400+ of these cards starting in October.

A few of our friends said they had cut and assembled the sleigh.

Here are other vintage Christmas cards:

  • Sleigh

Vintage Christmas Cards – Fireplace

Recently I came across some family Christmas cards I had designed with the help of my father who owned a letterpress printing press and had cuts (think metal stamps on wooden blocks similar to rubber stamps on wood blocks) made of my drawings. The printing press held an 8×10-inch frame which held the cuts and metal type (letters). Paper was hand-fed into the press which had an electric motor connected with a leather belt which turned the press wheel. From about age 8 and on I earned pocket money running the press to add people’s names to their store-bought Christmas cards, “From the Desk of” notepads and other small print jobs from family and friends.

The five cards that I am sharing this week were created before the computer drawing program Auto-CAD was widely available to individuals. (I know we didn’t have access to digital type fonts that Apple computers offered around that time.) I used rulers, India ink pens and protractors to draw the pop-ups.

For the 1983 stand alone fireplace, I know I was influenced by the cardboard fake fireplaces that were popular Christmas decorations in my childhood. The mantel design may have come from family homes or other 1920’s bungalow style homes with brick fireplaces. It is a more complex assembly with many smaller pieces. I remember printing the instructions and tab names with hand-set type and then cutting and pasting them onto the drawing, before sending it all off to be made into a metal cut.

My father had a little more experience with creating the colors using rub-on sheets of dots to create the coloring of sections of the drawing. Using a photocopying machine, he reduced the size of the dots to make them more intense and he did a reverse of the dots and space in between for the fire. Then he had three cuts made – one for the black drawing, one for the green stockings and mantel greenery and the last one for the red bricks and fire.

For one postcard, it took four runs through the printing press. We printed 400+ of these cards starting in October.

A few of our friends said they had cut and assembled the tiny fireplace adding the suggest string loop to make it a Christmas ornament.

Here are other vintage Christmas cards:

  • Fireplace

Vintage Christmas Cards – House Box

Recently I came across some family Christmas cards I had designed with the help of my father who owned a letterpress printing press and had cuts (think metal stamps on wooden blocks similar to rubber stamps on wood blocks) made of my drawings. The printing press held an 8×10-inch frame which held the cuts and metal type (letters). Paper was hand-fed into the press which had an electric motor connected with a leather belt which turned the press wheel. From about age 8 and on I earned pocket money running the press to add people’s names to their store-bought Christmas cards, “From the Desk of” notepads and other small print jobs from family and friends.

The five cards that I am sharing this week were created before the computer drawing program Auto-CAD was widely available to individuals. (I know we didn’t have access to digital type fonts that Apple computers offered around that time.) I used rulers, India ink pens and protractors to draw the pop-ups.

The 1982 “From Our House To Your House” house box postcard was an outgrowth of my fascination with creating house boxes. I had been introduced to box making in a high school commercial art class where I created a blue and white farmhouse box for perfume. At college I expanded on the farmhouse box design by creating a cardboard embossing plate to add raised clapboard siding and roof shingles that was run through an intaglio press. In 1981 I had completed an internship at a historic house museum which was a red brick Victorian house.

The challenge with creating a house box on a postcard was how much would fit on a 5 3/4-inch x 3 3/4-inch postcard. I drew the box on an 8 1/2-inch x 11-inch sheet of paper and used a photocopying machine to reduce it in size.

My father was experimenting with a new technique for him using rub-on sheets of dots to create the coloring of sections of the drawing. He had three cuts made – one for the black drawing, one for the green roof, door wreath and greenery and the last one for the red bricks.

For one postcard, it took four runs through the printing press. We printed 400+ of these cards starting in October.

A few of our friends said they had cut and assembled the wee house box adding the suggest string loop.

Here are other vintage Christmas cards:

  • House Box

Vintage Christmas Cards – NO L Tree

Recently I came across some family Christmas cards I had designed with the help of my father who owned a letterpress printing press and had cuts (think metal stamps on wooden blocks similar to rubber stamps on wood blocks) made of my drawings. The printing press held an 8×10-inch galley or frame which held the cuts and metal type (letters). Paper was hand-fed into the press which had an electric motor connected with a leather belt which turned the press wheel. From about age 8 and on I earned pocket money running the press to add people’s names to their store-bought Christmas cards, “From the Desk of” notepads and other small print jobs from family and friends.

The five cards that I am sharing this week were created before the computer drawing program Auto-CAD was widely available to individuals. (I know we didn’t have access to digital type fonts that Apple computers offered around that time.) I used rulers, India ink pens and protractors to draw the pop-ups.

The NO L Tree card was a mash-up of another Christmas card my parents had done in the 1950s spelling out the alphabet but leaving a space where the “L” would have been, and a 3D triangle tree that I had made as a child which was made of two triangles cut with slits that allowed them to slide together. My father suggested having the sentiment in red ink be on two quadrants while the green alphabet be on the remaining two quadrants. We decided on different type fonts for the two sides.

Hand setting the type was a little challenging, but after several test runs, we found the proper placement. I think we created a cardboard template to trace the tree lines inside the card with a black pen.

Instructions on how to assemble the tree as well as the card title/subtitle and card credits were all made with hand-set type. To print one card, it took two runs of green ink, two runs of red ink and one run of black ink for a total of five runs and one hand tracing of the triangle lines. We would print 200+ cards each year and start printing in October.

My siblings and I think this card was made around 1980-1981.

Here are other vintage Christmas cards:

  • NO L Tree

Tired Santa

This is a holiday card for a busy Santa. It features the Bam Box dies from Karen Burniston’s December 2022 release. It also uses previously released die sets of the Fireplace Pop-up die set, Fireplace Extras 1, Fireplace Extras 2Gnome and Santa, Slim Frames and Family Room die set.

Card Base:  The card base is an A7 size (5 x 7 inches) with a top fold. The base was what I glued decorative papers to as well as attaching the fireplace pop-up mechanism.

Bam Box:  The bam box is a rubber band powered spring box that allows the sofa to pop-up. Watch the assembly video before assembling. Heavy weight cardstock is recommended and allowing glue to dry at each step will make for the best working bam box.

Chair:  A bam box is covered with the chair from the Family Room die set. The back of the chair is just the seat portion left flat. I cut a bam box decorative rectangle to cover the front base of the chair and hid the bam box. The pillow is attached as per assembly video directions. Santa is made from the Gnome and Santa set coloring the boots to look like socks and adding a pair of pants so his legs can stretch out onto the ottoman. Santa is glued to the pillow and his pants are glued to the Santa suit edge. The ottoman is just a bam box covered with decorative paper. (I originally was going to have a sofa in the scene as well, but decided on a chair and ottoman foot rest. The photos below depict the sofa assembly. The chair is made similarly.)

Fireplace and accessories:  For the fireplace cut two of the fireplace brick front – one in white and one in black as well as two of the lined mantle/hearth pieces – one white and one gray. The black brick is colored with a white crayon and the fire and logs are also cut twice and colored with watercolor pencils.

To assemble the fireplace, watch the assembly video first. You will need to attach the gray hearth and black brick pieces to the card base before adding the mechanism. There are two fireplace extra sets. I used the clock, fireplace fender and basket of logs from set 2 and the fireplace tools and candles from set 1. The tiny pop-up mechanisms for the objects on top of the mantel are from the fireplace die set. I also add strips of white cardstock to the wall on either side of the fireplace as floor moldings.

Rugs and Wall Decoration:  Using patterned papers that suggest wallpaper or carpeting make this type of card pop. The picture molding strip above the fireplace is a scrap trimmed off the patterned paper and the reverse side used. Slim Frames is the die set that the gold frame comes from while “Happy Boxing Day” and the calendar page are computer generated. The large green round rug is cut from the second largest circle crosshatch die. It can be used to write a personal message.

Card Front:  The card front uses a mat of silver glitter paper overlayed with the snowflake pattern plate cut from white handmade paper that has silver glitter swirls on it. The Holiday House is cut from papers used on the inside of the card. “SANTA” has been written on the door mat to hint at who is inside the card. “Happy Holidays” was cut three times with the top layer colored with silver gel pen.

Envelope: The back flap of the A7 brown kraft paper envelope has Santa’s sleigh and reindeer stamped in white to hint at what’s to come.

Thank you for reading this blog post. Please like and leave comments 😊

Materials Used:

Dies

Papers

  • Echo Park Paper Co. – 12 x12 Double-sided coated cardstock – A Perfect Christmas by Lori Whitlock – Berry Merry Christmas – APC135003
  • Echo Park Paper Co. – 12 x12 Double-sided coated cardstock – I Love Christmas by Lori Whitlock – Glad Tidings – ILC114009
  • American Crafts – The Color of memories 12 x12 Red Plaid Paper – 348968
  • Recollections – Signature Especial 12×12 Foil Paper – Silver Glitter -220520
  • White Glitter Handmade Paper
  • Colored scraps of cardstock
  • A7 Kraft Card and Envelope

Pens, Crayons & Inks

  • Pink, Red and Black Fine-Tipped Markers
  • Ranger – Tim Holtz – Distress Ink – Walnut Stain
  • Ranger – Tim Holtz – Distress Crayon – White
  • Simon Says Stamp – Premium Pigment Ink – White

Stamps

  • LeCrea Design by Leane de Graaf – Combi Stamps – Santa & Small Christmas Trees – 55.3707

Miscellaneous

A Merry Little Christmas

Sometimes you just need to cheer someone up at Christmas time.

This was a quick make for a friend who found out that they would be unable to be with family over the holiday weekend. It uses the Bam Box die set from Karen Burniston’s December 2022 release and a tag die from a previously release die set. The stitched star and circle were leftover from a previous project. They were die cut from Karen’s Circle Charm Pop-Up die set.

I cut seven of the bam box strips, 14 of the bam box decorative rectangles and two of each of the four different sized fancy circle labels in the set from green cardstock. Because I like to let the glue dry between before adding the rubber bands to bam boxes, I glue in stages. (In the photo the middle flaps have been glued.) (See website for assembly video and source of tiny rubber bands.)

Glue the decorative panels to the sides of each bam box for added thickness. (By sides I mean the sides that have the diagonal flap beside them. Not the side that has the smiley face or its parallel side.) These will be the sides seen between the layers of circles.

To assemble the tree, mark in pencil the location of the bam boxes on the top and bottom of each circle except one of the smallest. Add double-sided tape to the tops of the circles and bam boxes. (By top of the bam box I mean the side where the smiley face is glued to the last flap of the box.)

Alternate the direction of the diagonal inside flaps of the bam boxes, so that they make a zig-zag pattern when looked at from the side. By alternating the direction, the bam boxes will fold flat and the tree will flatten into an oval shape.

The stitched star and circle are thick (1/4 inch each) with the three strands of embroidery floss stitched through the punched holes that the die makes and a center hole made with a needle. They are backed with the smallest fancy circle label and glued to the top bam box on its side.

Sequins are glued to the edges of the circles to represent ornaments or colored lights.

The outer box is made of two 12 x 4 inches rectangles scored at 4 inches, 5 inches, 9 inches and 10 inches. The middle squares are glued together to form a cross. Using strips of the decorative paper for pull ribbons glued to the middle of each flap, I glued the remainder of the strips as decorative trim. Two adhesive-backed hook and ladder fasteners are the closures.

Thank you for reading this blog post. I hope it has provided some inspiration.

Materials Used:

Dies

Papers

  • Echo Park Paper Co. – 12 x12 Double-sided cardstock – A Perfect Christmas by Lori Whitlock – Snowflake Swirl – APC135009
  • Green Cardstock
  • White Cardstock Scraps

Miscellaneous