Cake Time Birthday Cards

Having just received the new Waffle Flower Cake Time Texture die and stencil set, I decide to make a batch of birthday cards.

I used purchased A2 (4.25×5.5-inch) plaid cardbases with white envelopes to start.
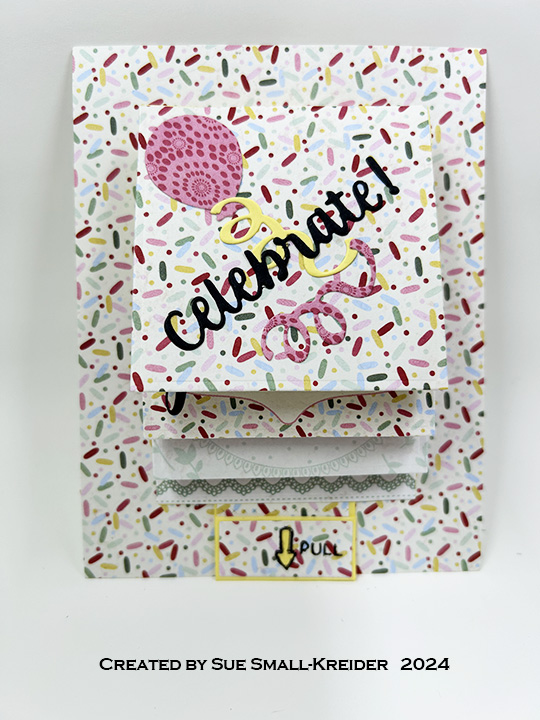
CARD

Front

  • Taking an 8.5×11-inch sheet of cream cardstock and cut into four 4.25×5.5-inch panels (I used 100 lb cardstock.)
  • Die-cut two of the panels in the center of panel with the texture die
Die-Cut Texture
  • Emboss the remaining panels using die-cutting machine’s embossing sandwich to emboss the die into the cardstock (I like the texture this gives to the panel, but it was harder to line-up the stencils.)
Embossed Texture
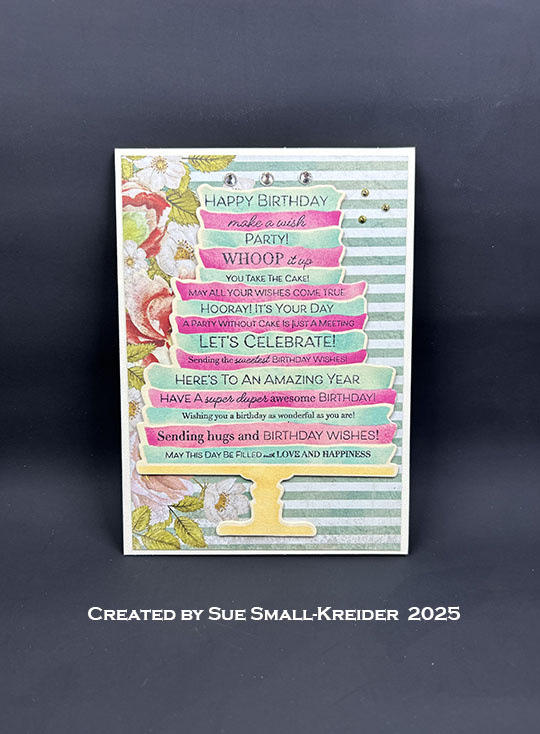
  • Using the five layered stencils, color the image with ink (I used a blue/orange/yellow color palette.)
  • Trim off the panel edges to the embossed die edge
  • Adhere to the center of card fronts (I used double-sided tape.)
  • Add black sentiment strips to front
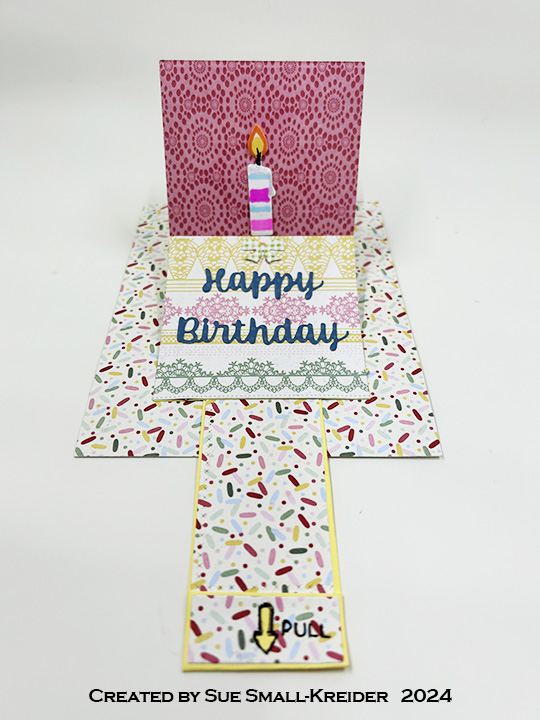
Inside

  • Die-cut four mechanism arms using Karen Burniston’s Katherine Label Pop-Up L-shaped die from cream colored cardstock (I used 65 lb weight cardstock.)
  • Watch the assembly video located at the bottom of the linked page for the Katherine Label Pop-Up
  • Die-cut from white cardstock four of Karen Burniston’s Happy Birthday Shadows
  • Die-cut from blue cardstock four of Karen Burniston’s Happy Birthday
  • Glue the words to shadow
  • Stamp the verse from the Craft Roulette’s Funn Sentiments #01 inside the cardbase just below the center of the panel
  • Glue in the pop-up mechanism
  • Attach the “Happy Birthday” to the box pop-up making sure there are no catchpoints and that the sentiment stays inside the card when closed
  • Add glitter gloss to “Happy Birthday” and the word Glitter in the stamped verse
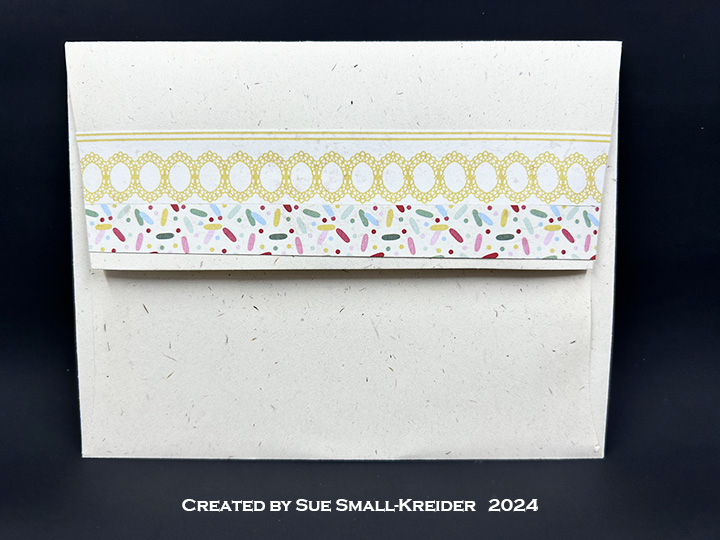
ENVELOPE

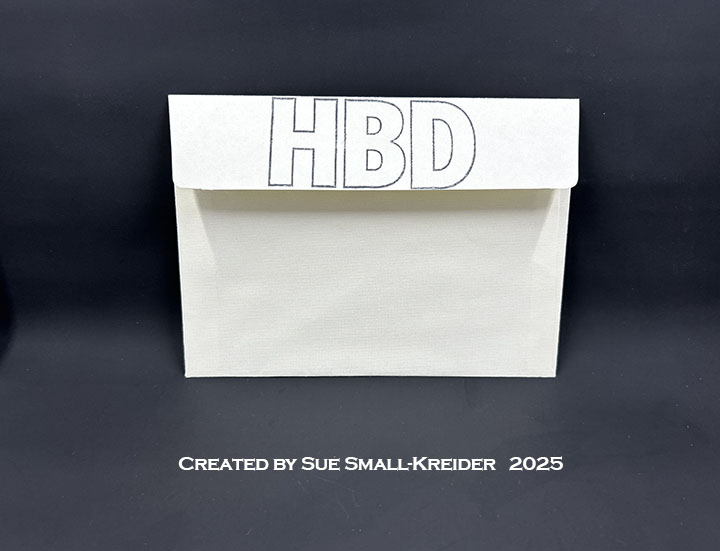
  • Stencil the envelope flap with the pennant using similar colors to the card
  • Stamp “HBD” over the stenciling using the Craft Roulette’s Funn Sentiments #01

___________________________________

Thank you for experiencing this blog post.

I hope this inspires you and makes you smile.

Please subscribe, like and leave comments 😊

___________________________________

Disclaimer: Karen Burniston products are provided free of charge by the manufacturer for review and use. All other items were personally purchased. Compensated affiliate links used where or when possible, meaning I will receive a small percentage commission from these manufacturers at no cost to you. This will allow me to add more content to my YouTube channel and help out a lot. Thank you.

Materials Used:

Dies

Stamps

  • Craft Roulette – Clear Stamps – Funn Sentiments #01

Stencils

  • Waffle Flower – Layering Stencils – Cake Time

Papers

  • Plaid Cardbase and Envelope
  • Blue, Cream and White Cardstock
  • Waffle Flower – Sentiment Strips – Cake Time

Ink

  • Catherine Pooler – Premium Dye Ink – All That Jazz, Blue Raspberry, Mandarin Spice, Sauna, Tiara
  • Nuvo – Aqua Shimmer Brush Marker – Glitter Gloss

Adhesives

Tools

  • Die Cutting Machine
  • Paper Trimmer
  • Stamping Platform
  • LDRS – Stampendable Stamping Tool
  • Scissors
  • Paper Masking Tape

Stenciled Cake Pop-Up Birthday Card

Here are two birthday cards I made using a stamp and coordinating die and stencils set from This Calls For Confetti and Karen Burniston’s Katherine Label Pop-Up and Happy Birthday word die sets.

Watch the process video to see how I made this card.

I made two versions of the card – one using patterned paper as a background and the other with a stenciled card front.  Both started with a purchased A6 (4.5×6.25-inch) cardbase with matching envelope. Both have the pop-up sentiment inside with the words, shadow and mechanism being cut from an additional cardbase and colored with the same Distress Ink colors used to stencil the cake.

Envelope:  The card fits into an A6 (4.5x 6.25-inches) size envelope stamped with a sentiment from Craft Roulette.

___________________________________

Thank you for experiencing this blog post.

I hope this inspires you and makes you smile.

Please like and leave comments 😊

___________________________________

Disclaimer: Karen Burniston products are provided free of charge by the manufacturer for review and use. All other items were personally purchased. Compensated affiliate links used where or when possible, meaning I will receive a small percentage commission from these manufacturers at no cost to you. This will allow me to add more content to my YouTube channel and help out a lot. Thank you.

Materials Used:

Dies

Stencils

  • Daisy Mae Designs – Dotty Stencil
  • This Calls For Confetti – Three Tier Cake Layering Stencil & Die

Stamps

  • Craft Roulette – Clear Stamps – Funn Sentiments #01
  • This Calls For Confetti – Clear Stamps – Alice’s Story Birthday Sentiments

Papers

  • Laserowe Love – 12×12 inch Double-Sided Paper – Vintage Trip by Renata Maslyk
  • Cream 65lb Cardstock
  • Park lane Paperie – A6 Textured Cardbases & Envelopes – Ivory

Ink

  • Memento – Fade Resistant Dye ink – Tuxedo Black
  • Pigma – Mircon 005 Fine Tip Pen – Black
  • Ranger – Tim Holtz – Distress ink – Dried Marigold, Peacock Feathers, Picked Raspberry

Adhesives

Tools

  • Die Cutting Machine
  • Paper Trimmer
  • Stamping Platform
  • LDRS – Stampendable Stamping Tool
  • Gelli Arts – Gel Plate
  • Scissors
  • Sponge Dauber
  • Paper Masking Tape
  • We R Memories – QuickStick

Miscellaneous

  • 3 Clear Rhinestones Flatback Gems
  • 3 Tiny Gold Flatback Gems

It’s A Party – Celebrate Your Birthday!

When needing a large number of birthday cards, making multiple inlay die-cut backgrounds is the way to go.

Watch the video below to see how I made these cards.

Cardbase:  I made eight A2 size cardbases by folding 8.5×5.5-inch rectangles of white cardstock in half.

Card Front: The card front uses Concord & 9th’s Party Hats inlay die along with the slice of cake from Karen Burniston’s Big Birthday Charms.

Sentiments:  The sentiments were stamped in black ink using the Craft Roulette’s Funn Sentiments #01 stamp set and Karen Burniston’s Celebrate, Happy Birthday and Shadow dies along with her Katherine Label Pop-Up die set.

Envelope:  The card fits into an A3 (4.25x 5.5-inches) size envelope stamped with a sentiment or a hand-drawn heart.

___________________________________

Thank you for experiencing this blog post. I hope this inspires you and makes you smile. Please like and leave comments 😊

___________________________________

Disclaimer: Karen Burniston products are provided free of charge by the manufacturer for review and use. All other items were personally purchased. Compensated affiliate links used where or when possible, meaning I will receive a small percentage commission from these manufacturers at no cost to you. This will allow me to add more content to my YouTube channel and help out a lot. Thank you.

Materials Used:

Dies

Stamps

  • Craft Roulette – Clear Stamps – Funn Sentiments #01

Papers

  • Craft Consortium – A4 Double-Sided Solid Colored Cardstock – Little Robin Redbreast
  • Craft Consortium – A4 Double-Sided Solid Colored Cardstock – ‘Tis the Season
  • Ink N’ Splatter – 6×6 Double-Sided Cardstock – Ladybug Days
  • Ink N’ Splatter – 6×6 Double-Sided Cardstock – Raspberry Crush
  • White Cardstock
  • Fraser Papers for William House – A2 Envelope – Genesis Text Milkweed Smooth

Ink

  • Memento – Fade Resistant Dye ink – Tuxedo Black
  • Pigma – Mircon 05 Fine Tip Pen – Black
  • Ranger – Letter It – Fineliner Pen – Yellow
  • Sakura – Gelly Roll Pen – Medium – White
  • Sharpie – Permanent Marker – Ultra Fine Tip – Red
  • Stampin’ Up – Stamp Write Marker – Chocolate Chip
  • Nuvo – Aqua Shimmer Brush Marker – Glitter Gloss

Adhesives

Tools

A FUNN LetterPress Birthday Card

This card was made for Craft Roulette #243 whose parameters included a a belly band, cottage colors, coat(s) element, and upcycled.

Watch the process video to see how I made this card.

Cardbase: The cardbase is a top-fold A2 (4.25×5.5-inch).

Sentiment: “Hooray it’s your birthday” are printed with the Spellbinder’s BetterPress system, specifically Paint The Town press plates on bisque cotton card panel with BetterPress Black ink. The inside sentiments of “Happy Birthday” and longer rhyme, come from the Craft Roulette Funn Sentiments #01 stamp set and stamped with Memento Tuxedo Black ink.

Envelope: This card fits into an A2 envelope with it’s back flap stamped with “HBD” also from the Craft Roulette stamp set.

___________________________________

Thank you for experiencing this blog post.

I hope this inspires you and makes you smile.

Please like and leave comments 😊

___________________________________

Disclaimer: Karen Burniston products are provided free of charge by the manufacturer for review and use. All other items were personally purchased. Compensated affiliate links used where or when possible, meaning I will receive a small percentage commission from these manufacturers at no cost to you. This will allow me to add more content to my YouTube channel and help out a lot. Thank you.

Materials Used:

Dies & Press Plates

  • Spellbinders – BetterPress of the Month – Paint the Town
  • Spellbinders – Cutting Dies – Party Time Cake

Stamps

  • Craft Roulette – Clear Stamps – Funn Sentiments #01

Papers

  • Recollections – 8.5×11 65 lb Cardstock – White
  • Spellbinders – 5.50×4.25″ (A2) BetterPress Cotton Card Panel – Bisque
  • Colorful Cardboard Packaging

Ink

  • Memento – Fade-Resistant Dye Ink – Tuxedo Black
  • Spellbinders – BetterPress Ink – Apricot, BetterPress Black, Clay, Coastal, Tuscan
  • Pigma – Mircon 005 Fine Tip Pen – Black
  • Sharpie – Permanent Marker – Ultra Fine Tip – Brown

Adhesives

Tools

  • Spellbinders – BetterPress System
  • Die Cutting Machine
  • Paper Trimmer
  • Stamping Platform
  • LDRS – Stampendable Stamping Tool
  • Stamping Blocks as paperweights
  • Scissors
  • Spellbinders – Best Ever Craft Tape
  • Paper Masking Tape
  • Archival Ink Cleaner
  • Micro Fiber Cloth

Miscellaneous

  • Nellie’s Choice – Effect Snow
  • Bakers Twine

Birthday Cake Easel Card

This card was made for Craft Roulette #233 whose parameters included a congratulatory card, hummingbird colors, best friend(s), and add leaves.

Watch the process video to see how I made this card.

Sentiments:  The “Happy Birthday” die cut comes from a papercrafting advent calendar purchased from Craftstash. I created a digital version of “Congrats on turning 29…Again!” and sized it to fit inside the Katherine Label die by Karen Burniston.

Envelope:  The card fits into an A2 (4.25x 5.5-inches) size envelope.

___________________________________

Thank you for experiencing this blog post.

I hope this inspires you and makes you smile.

Please like and leave comments 😊

___________________________________

Disclaimer: Karen Burniston products are provided free of charge by the manufacturer for review and use. All other items were personally purchased. Compensated affiliate links used where or when possible, meaning I will receive a small percentage commission from these manufacturers at no cost to you. This will allow me to add more content to my YouTube channel and help out a lot. Thank you.

Materials Used:

Dies

Stamps

  • Craft Roulette – Clear Stamps – The Basics (used to stamp the back of the card)

Papers

  • Cream, Gold, Greens, Orange, Red and Yellow Cardstock
  • Fraser Papers for William House – A2 Envelope – Genesis Text Milkweed Smooth

Ink

  • Hero Arts – Alcohol-Marker Friendly Ink Pad – Intense Black
  • Pigma – Mircon 01 Fine Tip Pen – Black

Adhesives

Tools

  • Die Cutting Machine
  • Stamping Blocks used as paperweights
  • Scissors
  • Paper Masking Tape

Day 8 of 12 Days of Christmas Ovens

It’s Day 8 of my 12 Days of Christmas Ovens.

I’m using Lawn Fawn’s Magic Picture Changer with its Oven Add-On dies along with two Lawn Fawn stamp sets – Sprinkled with Joy and A Creature Was Stirring.

Watch video above for a tutorial on how to make the card.

Cardbase: I used a side-fold A2 (4.25 x 5.5-inches) made of white cardstock.

Oven: I highly recommend googling “Lawn Fawn Magic Picture Changer Oven video” to watch assembly videos for this die set. There are lots of creative ways to assemble it.

Sentiments: Card front “Not a creature was stirring…” inside “(except in the kitchen).” are from the A Creature Was Stirring stamp set. “May your holidays be sprinkled with joy” is from the Sprinkled with Joy set.

Envelope: The card fits into an A2 envelope.

___________________________________

Thank you for experiencing this blog post.

I hope this inspires you and makes you smile.

Please like and leave comments 😊

___________________________________

Disclaimer: Karen Burniston products are provided free of charge by the manufacturer for review and use. All other items were personally purchased. Compensated affiliate links used where or when possible, meaning I will receive a small percentage commission from these manufacturers at no cost to you. This will allow me to add more content to my YouTube channel and help out a lot. Thank you.

Materials Used:

Dies

  •  i-crafter – Dies by Lynda Kanase – Classic Squares
  • Lawn Fawn – Custom Craft Dies – Magic Picture Changer – LF1903
  • Lawn Fawn – Custom Craft Dies – Magic Picture Changer Oven Add-On – LF2436
  • Spellbinders – Glimmer of the Month -Hot Foil Plates & Dies -Glimmering Build A Banner – GOM-SEP21

Stamps

  • Lawn Fawn – Clear Stamps – A Creature Was Stirring – LF2415
  • Lawn Fawn – Clear Stamps – Sprinkled With Joy – LF1214 

Embossing Folders

  • Stampin’ Up – Cut & Emboss Folder – Dotted Circles 3D

Papers

  • Bazzill – 8.5×11 Cardstock – Tiara -18-1002
  • Silver Foil Cardstock
  • Acetate/Clear Plastic Film
  • Black, Pink, Red and White Cardstock
  • Fraser Papers for William House – A2 Envelope – Genesis Text Milkweed Smooth

Ink

  • VersaMark – Watermark Stamp Pad
  • Recollections – Detail Embossing Powder – Snow
  • Hero Arts – Alcohol-Marker Friendly Ink Pad – Intense Black
  • Simon Says Stamp – Pawsitivity Saturated Ink – Aegean
  • Stampin’ Up – Classic Ink Pad – Cherry Cobbler
  • Creative Craft Products – Alcohol Markers – Dual Tipped – 15 Geranium, 26 Pastel Peach, 55 Emerald Green, 31 Dark Ye4llow, 33 Melon Yellow, 35 Lemon Yellow, 38 Pale Yellow, 95 Burnt Sienna, 97 Rose Beige, 135 Pale Cherry Pink, WG 1 Warm Grey & WG8 Warm Grey
  • Pigma – Mircon 01 Fine Tip Pen – Black
  • Sharpie – Permanent Marker – Ultra Fine Tip – Red
  • Sakura – Gelly Roll Pen – Medium – White

Adhesives

Tools

  • Die Cutting Machine
  • Bone Folder
  • Stamping Platform
  • Brutus Monroe – Stick & Stamp Mat
  • LDRS – Stampendable Stamping Tool
  • Kat Scrappiness – Anti-Static Tool
  • Heat Tool
  • Stamping Blocks used as paperweights
  • Scissors
  • Pencil
  • Tombow – Mono – Sand Eraser -512A
  • We R Memories – QuickStick
  • Tweezers
  • Craft Mat
  • Paper Masking Tape
  • Circle Hole Punch – 1-inch wide

Miscellaneous

  • Nuvo – Glitter Drops – White Blizzard

Day 7 of 12 Days of Christmas Ovens

It’s Day 7 of my 12 Days of Christmas Ovens.

I’m using Paper Discovery’s Cosy Kitchen dies and stamp sets for today’s Christmas oven card. Olga Direktorenko is the designer behind Paper Discovery, a Craftstash/Practical Publishing brand.

Watch video above for a tutorial on how to make the card.

Cardbase: I started with a 5 3/4 x 10 1/2-inch rectangle of white cardstock that was scored and folded at 2 5/8-inches, 3 5/8-inches, 6 7/8-inches and 7 7/8-inches.

Oven: I cut the oven and hutch out in two pieces so I could cut the hutch down a 1/4-inchto allow the card to fit in a 6×9-inch envelope. (See an earlier blog on how I first made this oven bridge card.)

Decorations: The copper kettle and utensils are stamped on orange foil cardstock with StazOn ink using the Paper Discovery Cooking Up A Storm set and fussy cut. The trolley tables are made with a die from Paper Discovery Cosy Kitchen -Baking Fun die set. The gingerbread house, Christmas pudding and bowls are from the Lawn Fawn A Creature Was Stirring stamp set. The wallpapers, borders and picture stamps are from Graphic 45’s T’was The Night Before Christmas paper collection.

Sentiments: I used sentiment stamps from three sets. On the back of the card – “This kitchen is seasoned with love” and “Eat, Drink & be merry” are from Paper Discovery’s Simply Food set. Heat embossed in white behind the oven doors are “Merry Christmas” and “Baked with Love” from the Greetery’s Bake Someone Happy set. Also behind an oven door is “Warm Wishes” from the My Hero Monthly kitchen kit. The “NOEL” banner is a shape die set by Scrapbook.com.

Envelope: The card fits into a 6×9 catalog envelope. The back flap are stamped with an Hero Arts sentiment and images from Lawn Fawn.

___________________________________

Thank you for experiencing this blog post.

I hope this inspires you and makes you smile.

Please like and leave comments 😊

___________________________________

Disclaimer: Karen Burniston products are provided free of charge by the manufacturer for review and use. All other items were personally purchased. Compensated affiliate links used where or when possible, meaning I will receive a small percentage commission from these manufacturers at no cost to you. This will allow me to add more content to my YouTube channel and help out a lot. Thank you.

Materials Used:

Dies

  • Paper Discovery – Dies – Cosy Kitchen – 2D Perfect Kitchen
  • Paper Discovery – Dies – Cosy Kitchen – Baking Fun
  • Scrapbook.com – Shape Dies – Holiday Banners

Stamps

  • Hero Arts – My Monthly Hero Kit – May 2022 – Clear Sentiment Stamps
  • Lawn Fawn – Clear Stamps – A Creature Was Stirring
  • Paper Discovery – Clear Stamps – Cosy Kitchen – Cooking Up A Storm
  • Paper Discovery – Clear Stamps – Cosy Kitchen – Simply Food
  • The Greetery – Clear Stamps – Bake Someone Happy

Papers

  • Graphic 45 – 8×8 Double-Sided Cardstock – ‘Twas The Night Before Christmas
  • Orange Foil Cardstock
  • White Brown Black Cardstock
  • 6×9-inch Catalog Envelope

Ink & Embossing Powder

  • VersaMark – Watermark Stamp Pad
  • Recollections – Detail Embossing Powder – Snow
  • Stampin’ Up – Classic Ink Pad – Cherry Cobbler
  • StazOn – Solvent Ink – Jet Black
  • Creative Craft Products – Alcohol Markers – Dual Tipped – 15 Geranium, 95 Burnt Sienna, & Pale Cherry Pink
  • Pigma – Mircon 01 Fine Tip Pen – Black
  • Sharpie – Permanent Marker – Chisel Tip – Black
  • Sharpie – Permanent Marker – Fine Tip – Black

Adhesives

Tools

  • Die Cutting Machine
  • Scoring Board
  • Bone Folder
  • Stamping Platform
  • Brutus Monroe – Stick & Stamp Mat
  • LDRS – Stampendable Stamping Tool
  • Kat Scrappiness – Anti-Static Tool
  • Heat Tool
  • Stamping Blocks used as paperweights
  • Scissors
  • Pencil
  • We R Memories – QuickStick
  • Tweezers
  • T-Ruler
  • Glue Eraser
  • Tombow – Mono – Sand Eraser -512A
  • Paper Masking Tape
  • Hole Punch – 3/16-inch

Day 3 of 12 Days of Christmas Ovens

It’s Day 3 of my 12 Days of Christmas Ovens.

I’m using dies by Elizabeth Craft Designs to create this Christmas oven card.

Watch video above for a tutorial on how to make the card.

Cardbase: Cut a 4 1/4 x8 1/2-inch rectangle of white cardstock and fold in half to form a 4 1/4-inch wide by 5 1/2-inch tall top fold A2 size cardbase. Cover the outside panels with decorative paper.

Oven: Use the Kitchen die set package image assemble the oven.

Cake: Cut one covered pot in brown and another in green. Cut off all the handles on each piece. Trim the lid off the green to make a plate for the cake to sit on. Add Nuvo drops for icing on cake top.

Sentiments: The sentiments on the front of the card are from The Greetery‘s Bake Someone Happy stamp set. The inside sentiment is from Scrapbook and Cards Today‘s Jolly Holiday workshop kit.

Envelope: The card fits into an A2 envelope. Its back flap is decorated with a Christmas cake made using the Let’s Bake die set.

___________________________________

Thank you for experiencing this blog post.

I hope this inspires you and makes you smile.

Please like and leave comments 😊

___________________________________

Disclaimer: Karen Burniston products are provided free of charge by the manufacturer for review and use. All other items were personally purchased. Compensated affiliate links used where or when possible, meaning I will receive a small percentage commission from these manufacturers at no cost to you. This will allow me to add more content to my YouTube channel and help out a lot. Thank you.

Materials Used:

Dies

  • Elizabeth Craft Designs – Metal Dies – Kitchen – 1993
  • Elizabeth Craft Designs – Metal Dies – Let’s Bake – 1994

Stamps

  • The Greetery – Clear Stamps – Bake Someone Happy
  • Scrapbook and Cards Today’s Jolly Holiday workshop kit – Clear Stamps

Papers

  • Graphic 45 – 8×8 Double-Sided Cardstock – Let’s Get Cozy
  • Silver Foil Cardstock
  • White, Red, Green, Brown and Black Cardstock
  • Fraser Papers for William House – A2 Envelope – Genesis Text Milkweed Smooth

Ink

  • Hero Arts – Alcohol-Marker Friendly Ink Pad – Intense Black
  • Stampin’ Up – Classic Ink Pad – Cherry Cobbler
  • Sharpie – Permanent Marker – Fine Tip – Red
  • Sharpie – Permanent Marker – Ultra Fine Tip – Black & Green
  • Sakura – Gelly Roll Pen – Medium – White

Adhesives

  • Neutral PH Adhesive by LINECO
  • Fine-Tip Glue Bottle

Tools

  • Die Cutting Machine
  • Stamping Platform
  • Brutus Monroe – Stick & Stamp Mat
  • LDRS – Stampendable Stamping Tool
  • Stamping Blocks used as paperweights
  • Scissors
  • Paper Masking Tape

Miscellaneous

  • Nuvo Dream Drops – Golden Shimmer

Birthday Treats

This card was made for Craft Roulette #215 whose parameters included for Project – Happy Birthday, petting zoo colors, scoop element and tab(s).

This card uses Karen Burniston’s die sets of Big Birthday Charms, Waterfall Card, Sweet Treats Charms, and Word Set 2 – Birthday. The Confection paper collection by Authentique is also a star of this card.

Cardbase: Use a 5.5 x4.25-inch white piece of cardstock and cover front with confetti sprinkles patterned paper. Die cut half round notch from Waterfall Card die set at center bottom of short side of card.

Waterfall: Watch the assembly video at the bottom of the linked page for the Waterfall Card. I cut the mechanism pieces (pull strip and base) from yellow cardstock. The largest square die was used to cut four double-sided patterned paper pages. Assemble waterfall as shown in video.

Food Pop-Ups: Cut and assemble the ice cream cone from the Sweet Treats Charms set. The slice of cake and large candle are made using the Big Birthday Charms set. Cut off the charm loops on both. Cake icing has Glossy Accents clear gel on it. Candle flames have glitter gloss on them.

Cut small strips of patterned cardstock and fold in half and then fold the ends to the center fold to form a pop-up cube to glue into the first two pages. Once these pop-up cubes’ glue has dried, attach the food elements to cubes. The large candle is popped-up with two strips of cardstock behind it.

Sentiments: “Celebrate!” and “Happy Birthday” are from Word Set 2. The balloons and streams are from the Big Birthday Charms set. The quote by Iris Murdoch was in the paper collection. The back of the pull tab was stamped with “Inspired by Craft Roulette. Made by” and signature and CR episode listed.

Envelope: The back flap of the envelope is decorated with leftover strips of patterned paper.

__________________________

Thank you for reading this blog post.

I hope this inspires you and makes you smile.

Please like and leave comments 😊

__________________________

Materials Used:

Dies

Stamps

  • Craft Roulette – Clear Stamps – The Basics

Papers

  • Authentique – 12×12 Double-Sided Cardstock – Confection Paper Pack
  • Black, Blue, Brown, White and Yellow Cardstock
  • Silver Mirror Cardstock
  • A2 Envelope – Cream with flecks

Ink

  • Hero Arts – Alcohol-Marker Friendly Ink Pad – Intense Black
  • Creative Craft Products – Dual Tip Alcohol Markers -mWG1 – Warm Grey
  • Pigma – Mircon 01 Fine Tip Pen – Black
  • Sharpie – Permanent Marker – Ultra Fine Tip – Blue, Green, Orange and Red
  • Spectrum – Tri-Blend Alcohol Markers – Bright Pink, Ice Blue and Orange
  • Stampin’ Up – Stampin’ Blends Markers – Light Daffodil Delight
  • Nuvo – Aqua Shimmer – Glitter Gloss

Adhesives

  • Neutral PH Adhesive by LINECO
  • Fine-Tip Glue Bottle

Tools

  • Die Cutting Machine
  • Stamping Blocks
  • Scissors
  • We R Memories – QuickStick
  • Craft Clips

Miscellaneous

  • Nuvo – Cream Drops – Golden Shimmer
  • Ranger – Glossy Accents