Watch video above for a tutorial on how to make the card.
Cardbase: Cut a 4 1/4 x8 1/2-inch rectangle of white cardstock and fold in half to form a 4 1/4-inch wide by 5 1/2-inch tall top fold A2 size cardbase. Cover the outside panels with decorative paper.
Oven: Use the Kitchen die set package image assemble the oven.
Cake: Cut one covered pot in brown and another in green. Cut off all the handles on each piece. Trim the lid off the green to make a plate for the cake to sit on. Add Nuvo drops for icing on cake top.
Sentiments: The sentiments on the front of the card are from The Greetery‘s Bake Someone Happy stamp set. The inside sentiment is from Scrapbook and Cards Today‘s Jolly Holiday workshop kit.
Envelope: The card fits into an A2 envelope. Its back flap is decorated with a Christmas cake made using the Let’s Bake die set.
___________________________________
Thank you for experiencing this blog post.
I hope this inspires you and makes you smile.
Please like and leave comments 😊
___________________________________
Disclaimer: Karen Burniston products are provided free of charge by the manufacturer for review and use. All other items were personally purchased. Compensated affiliate links used where or when possible, meaning I will receive a small percentage commission from these manufacturers at no cost to you. This will allow me to add more content to my YouTube channel and help out a lot. Thank you.
Materials Used:
Dies
Elizabeth Craft Designs – Metal Dies – Kitchen – 1993
Elizabeth Craft Designs – Metal Dies – Let’s Bake – 1994
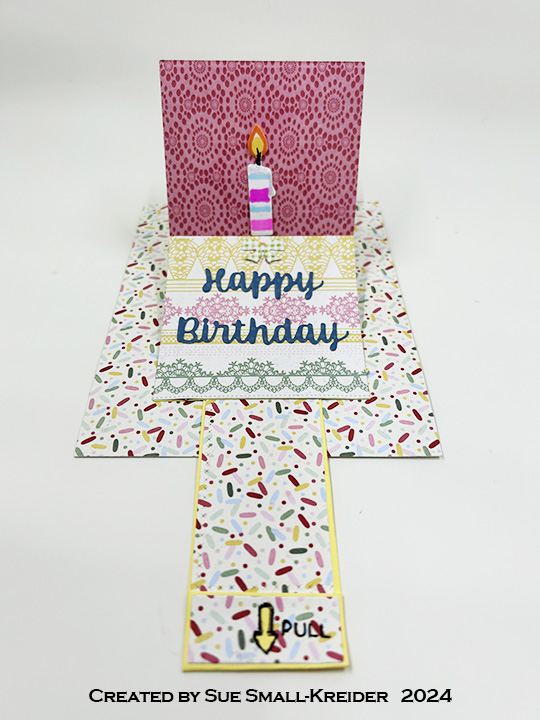
Cardbase: Use a 5.5 x4.25-inch white piece of cardstock and cover front with confetti sprinkles patterned paper. Die cut half round notch from Waterfall Card die set at center bottom of short side of card.
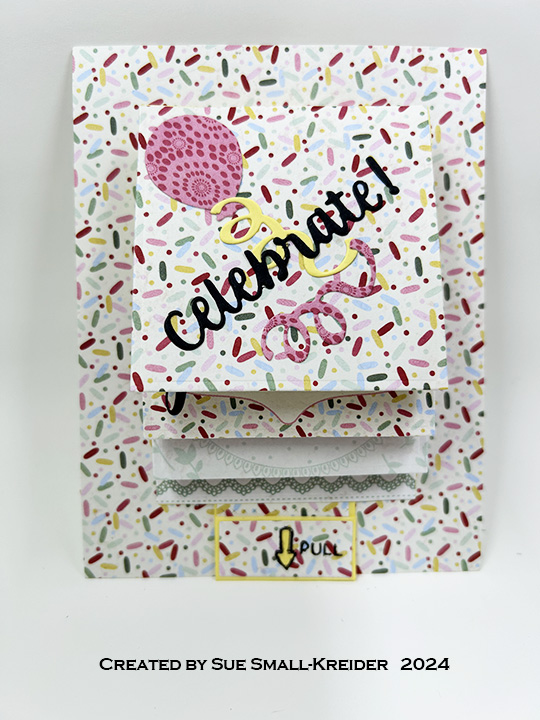
Waterfall: Watch the assembly video at the bottom of the linked page for the Waterfall Card. I cut the mechanism pieces (pull strip and base) from yellow cardstock. The largest square die was used to cut four double-sided patterned paper pages. Assemble waterfall as shown in video.
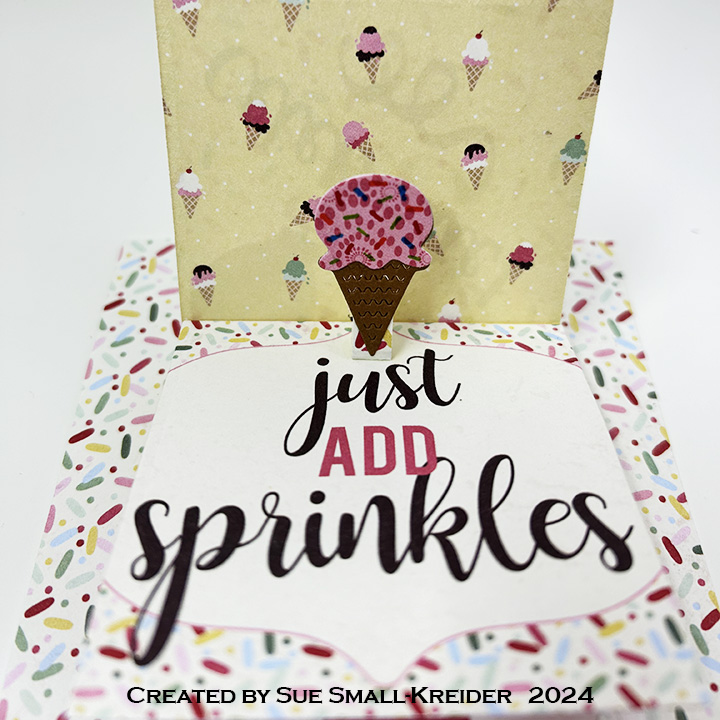
Food Pop-Ups: Cut and assemble the ice cream cone from the Sweet Treats Charms set. The slice of cake and large candle are made using the Big Birthday Charms set. Cut off the charm loops on both. Cake icing has Glossy Accents clear gel on it. Candle flames have glitter gloss on them.
Cut small strips of patterned cardstock and fold in half and then fold the ends to the center fold to form a pop-up cube to glue into the first two pages. Once these pop-up cubes’ glue has dried, attach the food elements to cubes. The large candle is popped-up with two strips of cardstock behind it.
Sentiments: “Celebrate!” and “Happy Birthday” are from Word Set 2. The balloons and streams are from the Big Birthday Charms set. The quote by Iris Murdoch was in the paper collection. The back of the pull tab was stamped with “Inspired by Craft Roulette. Made by” and signature and CR episode listed.
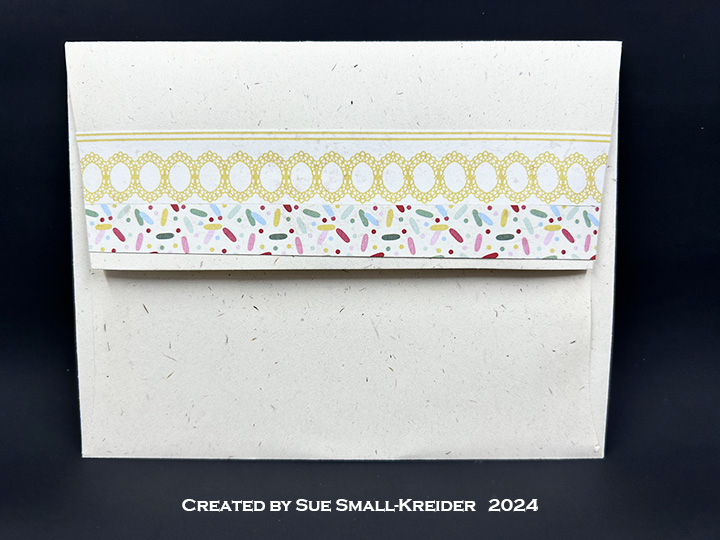
Envelope: The back flap of the envelope is decorated with leftover strips of patterned paper.
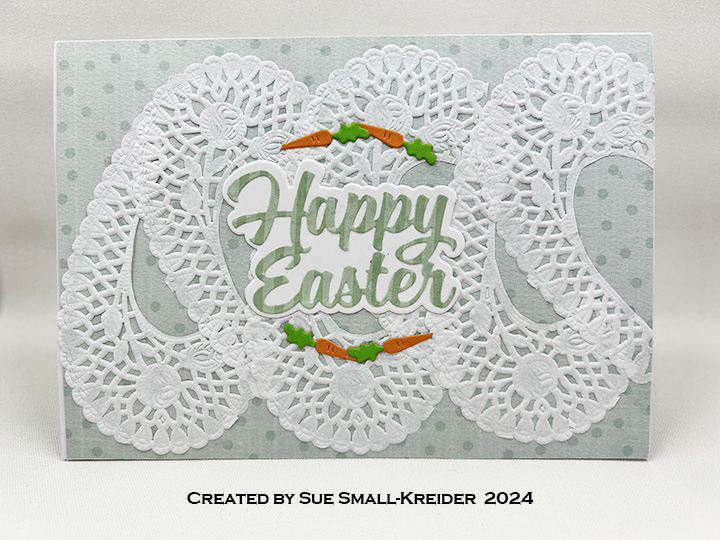
I got this cute bunny mug die set on sale after Easter from Teaspoon of Fun. This Pixi Dust Designs die set has 22 dies to make the bunny face mug, a carrot, a cake slice and a macaroon.
Cardbase: Use an A2 (4 1/4 x 5 1/2-inches) side-fold horizontal card base (I used a purchased kraft cardbase and matching envelope.) cover the four panels with double-sided papers.
Bunny Mug: Cut the mug, large ears, eyes, cheeks and teeth from white cardstock. Cut nose and two inner ear piece from pink. From black, cut inner eye and eyelash circles. Use a pale-yellow ink to color teeth. Glue pieces together. With a fine-tipped black pen, add dots for whiskers on cheeks Also use black pen to outline cheeks, teeth and mug shape. Glue mug to card front and trim away cardbase around top half of mug.
Carrot: Cut the two carrot dies from different shades of orange. And the carrot top from green. Assemble with whole carrot piece on the bottom and then the carrot piece with three vs and top off with carrot greens. Use a fine-tipped black pen to add fine lines to add rounded shaping to the carrot and greens. Make two carrots.
Carrot Cake: Cut cake from brown and three icing pieces and thin oval from white. Lightly shade the icing piece with a pale-yellow ink. Add orange dots to brown cake piece. Glue the two ripple lines first using makes on cake piece and then attach the top icing piece.
It’s time for the Karen Burniston April 2024 Design Team Challenge with the theme of Thirst Quencher. I chose lemonade as my thirst quencher and a card theme of a summer fete (festival or fair).
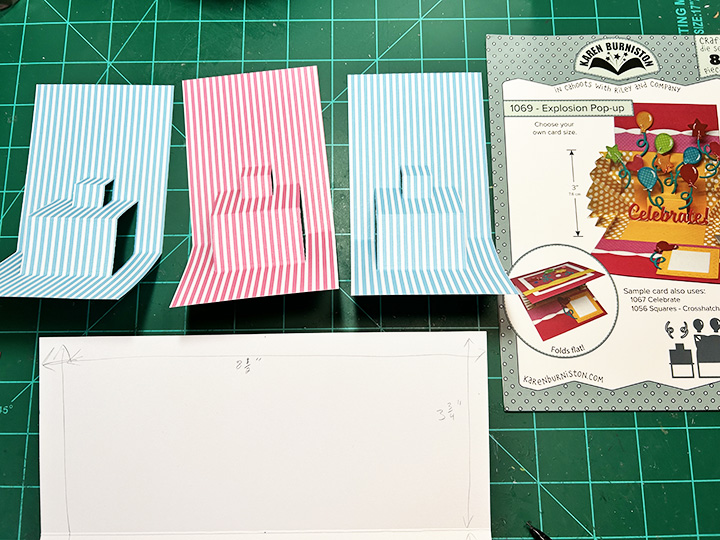
At a fete, there are generally small booths selling baked goods, drinks and other trinkets or handicrafts, so my card is a slimline (3 3/4 x 8 1/2-inch) card with three food booths using Karen Burniston dies.
Cardbase: Start with an 8 1/2 x 7 1/2-inch rectangle of a thick cardstock. (I used white.) Score at 3 1/2-inches and fold in half to create a top-fold 3 3/4 x 8 1/2-inch card base.
Booths: Cut three 6×3-inch panels of striped paper. (If you have longer than 6-inch striped paper cut them 7 1/2×3-inches.) Score and fold each panel at 3 3/4-inches. Using the pop-up center die from the Explosion Pop-Up, center the die on the fold of each panel. Train the folds as directed in the assembly video for the die set located at the bottom of the linked page. Glue pop-up panels inside card with the long side attaching to the inside top panel. Cover the bottom panel with grassy patterned paper. (I cut strips of the 6×6-inch patterned paper 1-inch wide to go through the pop-ups and cover over the striped paper.) I used a border print card layer to created the tablecloths on each booth table.
Posts and Banners: The posts are cut from glossy white cardstock using the Street Lantern die with the scrolling arms cut off. The pendant banners are made using the die from the Twist Panel Pop-Up set and threading them onto baker’s twine. The twine was wrapped around the knob top of a post before gluing it in place. (The two ends of twine can be taped to the front of the card to be covered over by the front panel.) The green bows that cover the looped twine on the posts are from the Street Lantern Pop-Up set. (I found it helped with the opening and closing of the card to place a small drop of glue at the top back center of each pendant to keep them from becoming catch-points, but still allowing them some dimension.) I used computer generated “Pies,” Lemonade” and “Cakes” printed on coiper paper and cut out with the banner label from the Lorna Label Pop-Up set.
Card Front: You will need to create a panel to hide the banner twine ends under. Cut a 3 3/4 x 8 1/2-inch of blue cardstock and a 3 3/8x 8 1/4-inch rectangle of dotted printed paper. Glue the dotted paper on top of the blue cardstock with an even border all around. Cut ten fishtailed banners from decorative paper using the die from the Twist Panel Pop-Up set. Cut the letters and shadows to spell out “SUMMER FETE” using the Mini Alphabet die set. Glue the letters onto the shadows and shadows onto the banners being careful not to cover the holes at the top of the banners.
Thread the two words on two separate pieces of twine. Die cut the “Enjoy the” from different colors using the Enjoy The Ride set. Once the placement of the words and banners have been established, tape the banner twine ends to the back of the panel. Glue the words and banners down onto the panel. Attach panel to cardbase front. (I used glue and double-side ½-inch tape.)
Pies: I created four pies using two different die sets. The top view lattice cherry pie and the key lime pie were created using the pie dies in the Baking Borders set. (I brushed the cherry pie red with a red glitter brush pen for some shine.) The horizontal pies were made with the pie die from the Picnic Elements set with the base piece cut from red and the crust cut from brown. All pie crust were inked with a light brown ink. The horizontal pie crusts had their slits inked red with an ultra-fine tipped red marker. I attached the horizontal pies using a foam square and a pop-up cube from a strip of white cardstock. (You could use the pop-up cube from the Oven Extras die set instead of making your own.)
Lemonade: The pitcher and glasses of lemonade were created from clear vellum with yellow cardstock behind. All the pieces were cut using the Picnic Elements die set. The pitcher is adhered to the pop-up base with a foam square and a drop of glue. The glasses are attached to a strip of clear packaging plastic with double sided tape all along the strip. The strip was threaded through the pop-up base and attached to the backside of the pop-up. (I covered the exposed adhesive on the strip with anti-static powder.)
Cakes: For these small cakes, I used the cupcakes in the Baking Borders set. I left the border base layer attached and trimmed off the excess behind the frosting. The bottom row has its center cake glued to the pop-up base while the upper row is attached to a pop-up cube.
Message Labels: The two white scalloped labels inside the card are for a personal message and are cut using the die from the Twist Panel Pop-Up set. (I did two to hide the seams of my patterned paper.)
Envelope: The card will fit into a #10 business size envelope.
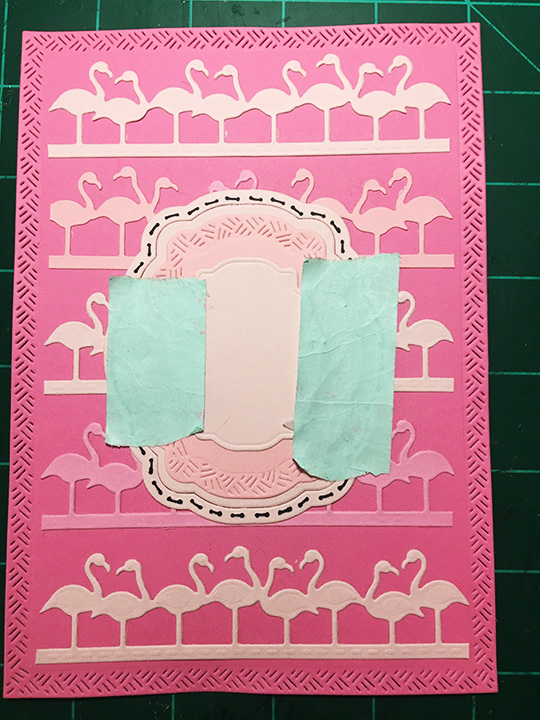
To make the cake I used some textured iridescent cardstock which had a slick surface to it that only allowed double-sided tape to be used as an adhesive. I watched the assembly video before putting together the cake. The easiest way to assemble the flamingo cake is to stick together each layer, adhering the flamingo border as you go, and then putting together the full cake. (I used a strip of 1/4-inch wide double-sided tape along the bottom strip of flamingos doubled-over to adhere the birds to the cake.)
The Rectangle and Labels set has a variety of fancy label shapes that I used as mats on the front of the card as well as the inside for a personal greeting space and the cake tray.
(I did use one extra fancy label from the Label Charms Pop-Up set for the top layer on the inside of the cardbecause the shinny paper was recycled junk mail with words that needed to be covered up.)
For the inside decorations I put dots of glue in a random pattern and sprinkled large glitter over them. The “Happy Birthday” sentiment and it’s shadow are also by Karen Burniston. The front sentiment was computer generated.
I like to decorate the backs of my cards with leftover pieces. The envelope flap has a die-cut of the large flamingo charm with its loop trimmed off.
Thank you for reading this blog post. I hope it gives you inspiration and makes you smile. Please like and leave comments 😊
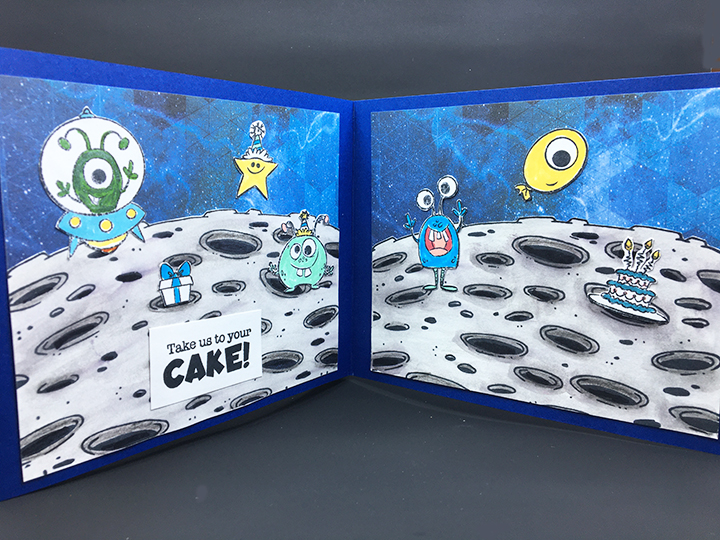
Sometimes we just feel like being out there in space when it comes to celebrating birthdays. This interactive space themed birthday card is made with Whimsy Stamps “Over The Moon” stamp set and kinetic dies.
Having watched Jennifer Dove’s video on Whimsy Stamps kinetic dies, I proceeded in making a similar card to the one she made, but I expanded the card into a tri-fold card letting the viewer find the cake.
Because this was the first time, I had used the kinetic dies, I made a few mistakes – the first being I have the rocket moving backwards when you first pull the strip. My second mistake was that I should have used thicker cardstock or cut two and glued together for the pull strip. And my third mistake was allowing the moon to warp when I watercolored it.
I stamped the images with black Memento Fade-Resistant Dye Ink onto white cardstock. The images are colored with Spectrum Noir Sparkle GlitterBrush-Pens and a Faber-Castell white India ink pen. Once dry, the images were fussy cut and ready to use for decorations.
The moon background was colored using Nuvo Watercolour Pencils in gray and black tones as well as a black Spectrum Noir Sparkle Glitter Brush Pen. I used a heat tool to dry the second and third moon backgrounds which did not warp as badly as the first moon which I let air dry overnight.
I recommend watching the assembly video for all the steps in assembling the No-See Kinetic mechanism. Because I followed the video’s directions forgetting that my rocket image went the opposite direction from the one in the video, my rocket goes backwards. Doubling up the foam tape is a must so that it matches the height of the foam dot.
The navy blue card base is made up of two panels 5 1/2 x 6 1/2 inches with tabs scored and folded at 1/4 inches on the short side. The tabs are then glued to a 5 1/2 x 6 inches panel to create the tri-fold card base.
My card uses all the stamps in the set for the three panels. It would be an ideal card for a child.
The card fits folded into an A7 envelope which is stamped on the back with the last of the three sentiments included in the stamp set – “I’m over the MOON for you!”
Thank you for reading. If you enjoyed this blog post, please like it and follow the blog. 😊
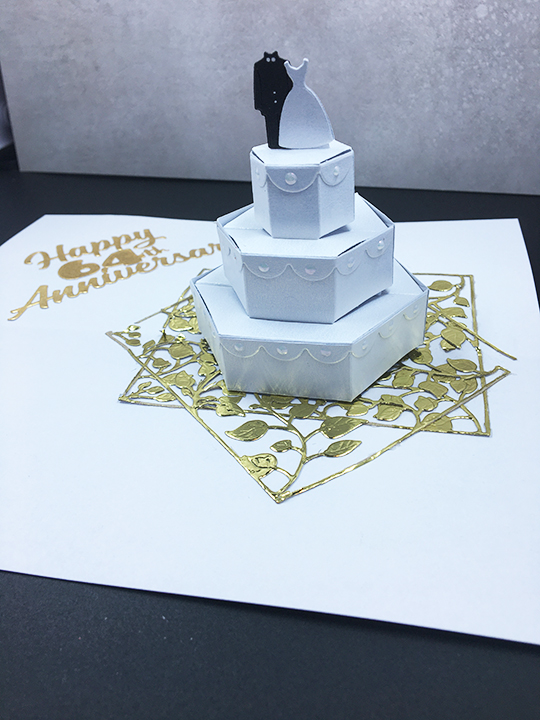
It is wonderful when people get to celebrate 64 years of marriage, so a special card is needed.
This card is primarily made with Karen Burniston dies focusing on the Cake Pop-Up in a 3 3/4 inch x 8 3/4 inch card base. (I used a green leafy coated card stock for the base.)
Cut out two of each of the cake tier pieces, two of the three scalloped edging pieces and two of the bride and groom piece. (I used shimmer cardstock for all but the groom pieces.) Fold tier pieces on scored lines as shown in the photos. Glue each tier together following the video photos.
It is easier to decorate the cake before attaching it to the card. (I added some embellishment drops to the scalloped edges that needed to dry overnight.) Glue one set of bride and groom together on to tab at cake top. Glue the second set on to back side of cake top. Adhere the scalloped edging on to each tier of cake, starting and stopping each scalloped piece at the center fold of each tier.
Use two rectangular foiled gold leaf die-cuts for the cake platter, cutting them in half where they go over the fold. Glued each layer down.
Align the cake center fold with the card base fold on top of the platter+. Place glue on the lowest tier’s folded tabs and glue in place. Fold card closed and firmly press cake to card base. Wait until glue has set to open.
The sentiments for the card front are Karen Burniston’s Word Set 12 -Anniversary and Happily ever after. The heart on the front with “Happily Ever After” is covered with Nuvo Glitter Drops in red. The “64th”was cut using a numbers die from The Greetery and the “th” was cut from one of the word dies in a Hunkydory-Moonstone die set.
Thank you for reading this blog. Please like and follow Ully Cat’s World blog. 😊
Hi, it’s Sue here from the Dies R Us Design Team with an interactive wedding card.
This card is primarily made with Karen Burniston dies focusing on the Cake Pop-Up in a 3 3/4 inch x 8 3/4 inch card base. (I used a green leafy coated card stock for the base and coordinating mosaic tile cardstock inside.)
Cut out two of each of the cake tier pieces, two of the three scalloped edging pieces and two of the bride and groom piece. (I used shimmer cardstock for all but the groom pieces.) Fold tier pieces on scored lines as shown in the photos. Glue each tier together following the photos.
It is easier to decorate the cake before attaching it to the card. (I added some embellishment drops to the scalloped edges that needed to dry overnight.) Glue one set of bride and groom together on to tab at cake top. Glue the second set on to back side of cake top. Adhere the scalloped edging on to each tier of cake, starting and stopping each scalloped piece at the center fold of each tier.
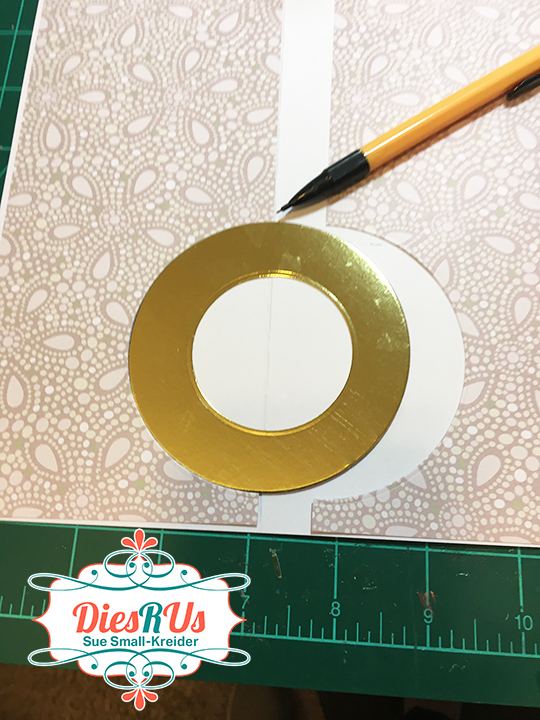
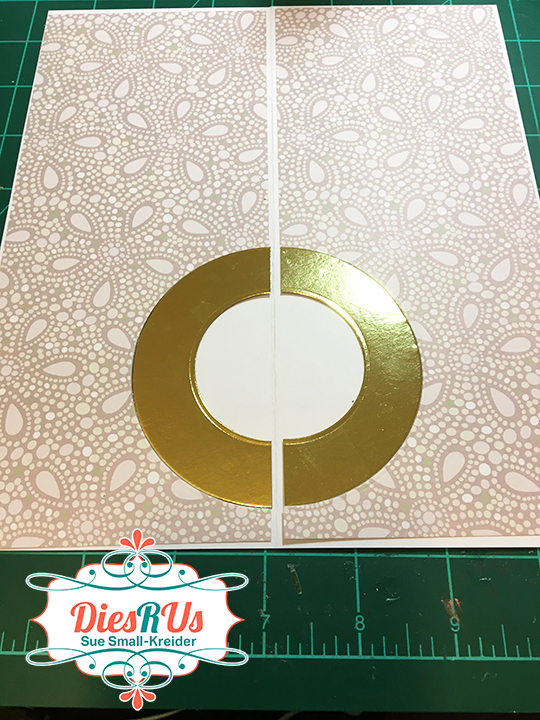
Cut a 3 1/2 inch circle from gold mirror and then cut a 2 inch circle from the center of the larger circle. Cut in half and glue on either side of the card base fold. (Because I used inside decorative panels, I cut out the 3 1/3 circle from my panels so the card would have no catch points and lessen the bulk of the card.) Play with the layout of your decorative pieces before gluing the cake to the gold circle. Align the cake center fold with the card base fold. Place glue on the lowest tier’s folded tabs and glue in place. Fold card closed and firmly press cake to card base. Wait until glue has set to open.
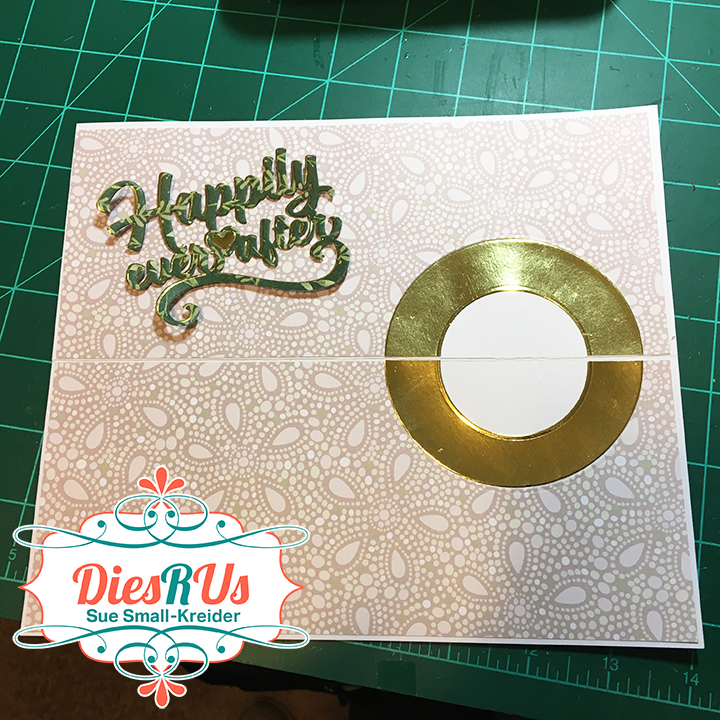
The sentiments for the card front are Karen Burniston’s Word Set 12 -Anniversary and Happily ever after that I cut twice so that I could off-set the gold and green letters and to be able paper piece the gold heart into the green words. The gold borders on the card front are from another Karen Burniston dies set of Party Border Blends.
Hope this fun card has provided some inspiration for your crafting. 😊