Happily Ever After

Hi, it’s Sue here from the Dies R Us Design Team with an interactive wedding card.

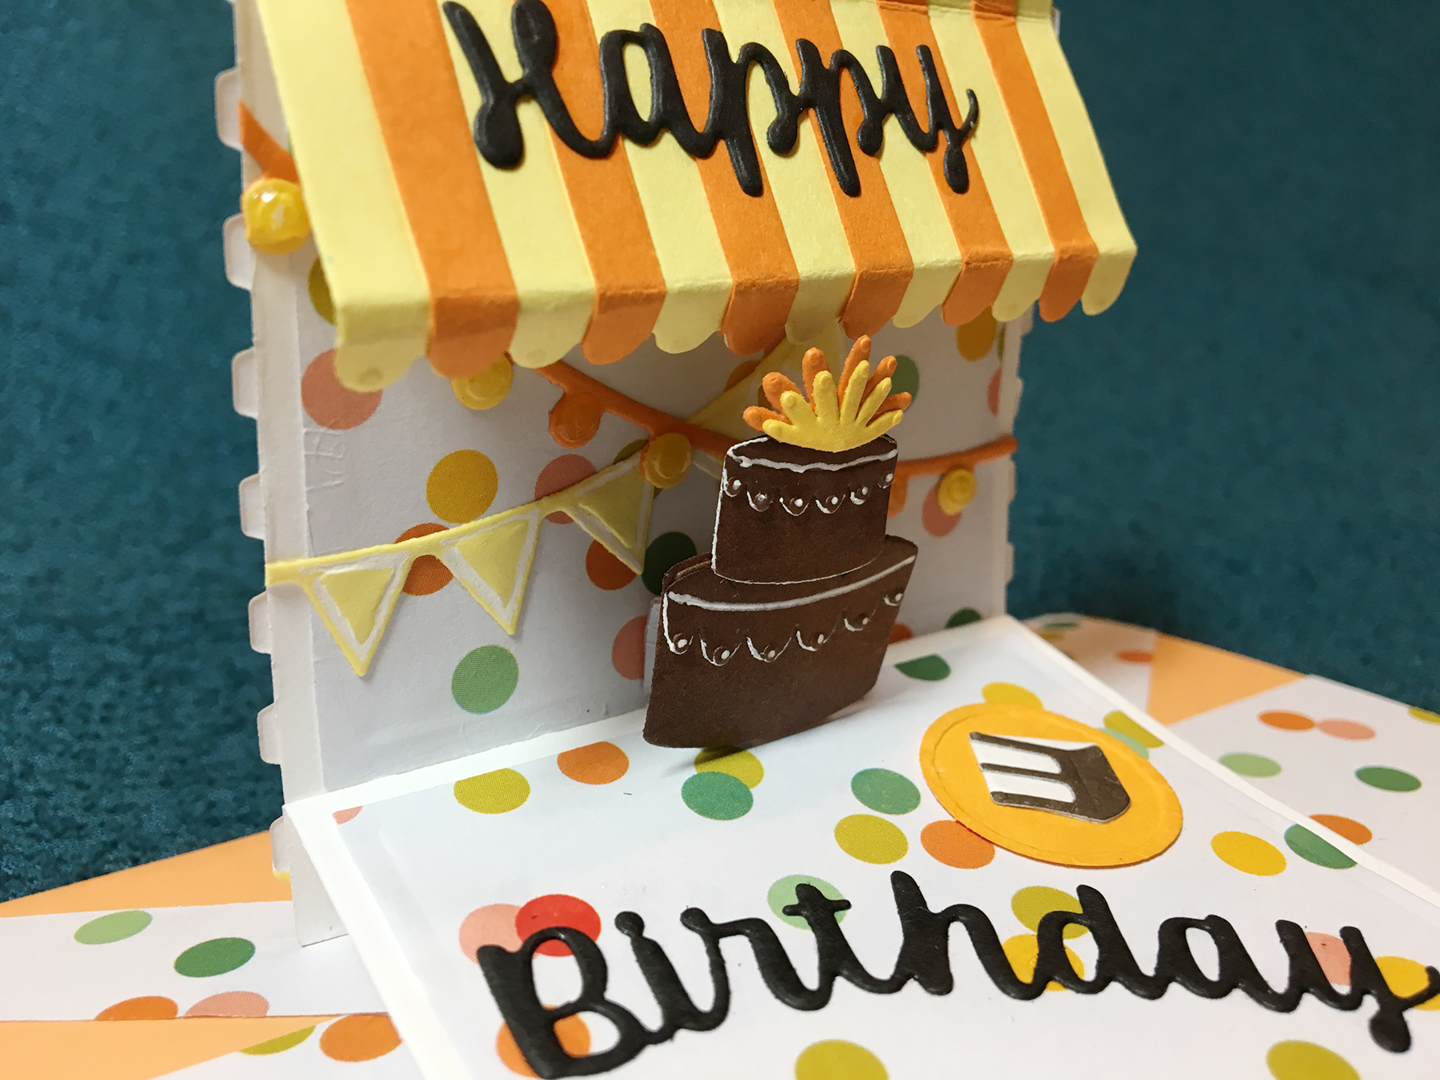
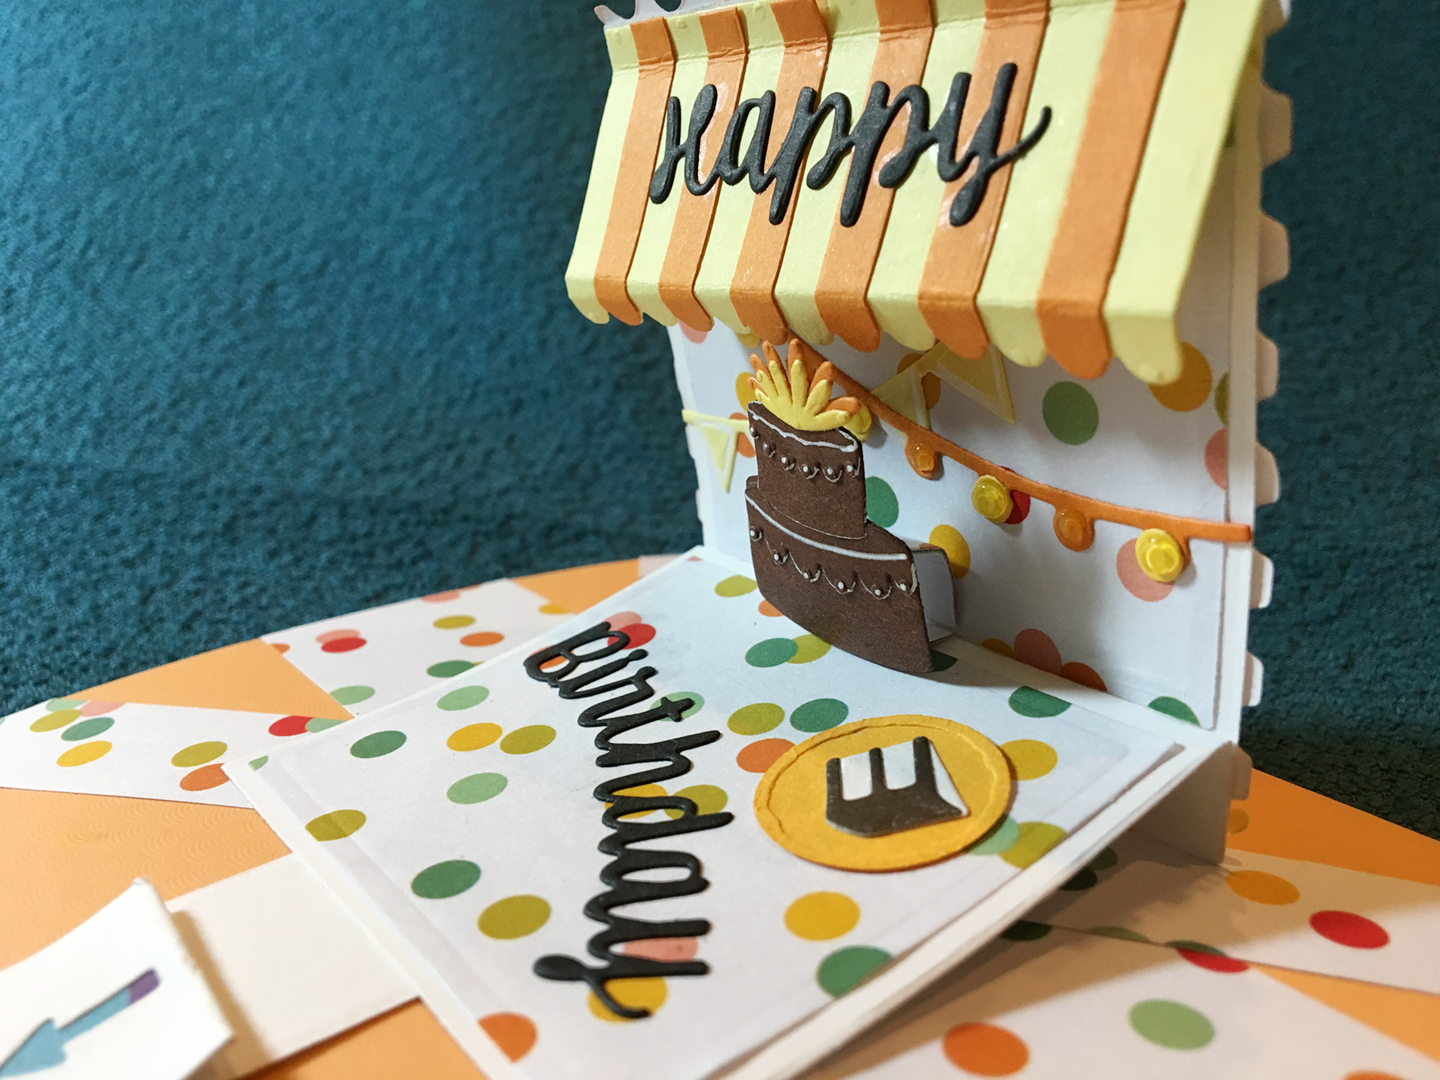
This card is primarily made with Karen Burniston dies focusing on the Cake Pop-Up in a 7 inch x 5 inch card base. (I used an off-white shimmer card stock for the inside of the card and took mica spray-painted shimmer card panels for the front and back of the card.)

Cut out two of each of the cake tier pieces, two of the three scalloped edging pieces and two of the bride and groom piece. (I used shimmer cardstock for all but the groom pieces.) Fold tier pieces on scored lines as shown in the video. Glue each tier together following the video.

It is easier to decorate the cake before attaching it to the card. (I added some embellishment drops to the scalloped edges that needed to dry overnight.) Glue one set of bride and groom together on to tab at cake top. Glue the second set on to back side of cake top. Adhere the scalloped edging on to each tier of cake, starting and stopping each scalloped piece at the center fold of each tier.

Cut a 3 1/4 inch circle from silver mirror and then cut a 2 1/4 inch circle from the center of the larger circle. Cut in half and glue on either side of the card base fold. Play with the layout of your decorative pieces before gluing the cake to the silver circle. Align the cake center fold with the card base fold. Place glue on the lowest tier’s folded tabs and glue in place. Fold card closed and firmly press cake to card base. Wait until glue has set to open.

I used the fancy layered label and tiny hearts dies from the Paper Frames Pop-Up set to decorate the inside of the card. (To make the tiny hearts be visible I coated them in a peachy translucent embellishment drops that had to dry overnight.)

The sentiments for the card front are dies from my stash and the “Happily ever after” is a Karen Burniston die that I cut twice so that I could paper piece the red heart into the blue words. The gold swags on the card front are from another Karen Burniston dies set of Party Border Blends.

Hope this fun card has provided some inspiration for your crafting. 😊

SUPPLIES Used from Dies R Us:

Dies

Miscellaneous

Other Supplies:

  • Simply Creative Mr & Mrs steel cutting die
  • Momenta Firefly’s Celebrate Happy Birthday die set 35516 R7
  • Papers by BoBunny and Recollections’ Shimmer Cardstock
  • Colored and mirror cardstock scraps
  • Nuvo Dream Drops – Cloud 9
  • Nuvo Jewel Drops – Peach Sobert
  • “Congratulations” stamp by Jennifer Ellory from Cardmaking & Papercraft issue 178
  • Stampin’ Up – Crumb Cake ink pad
  • Neenah Social – A7 envelope – Bare white techweave
  • Nuvo Mica Mists – Pecan Peach, Nebula Blue, Silver Smoke and Antique Gold

Don’t forget to come join in the fun at the Dies R Us Challenge Blog. There’s a new challenge theme offered on the 1st and 15th of each month and one lucky randomly drawn winner will receive a gift voucher prize to the Dies R Us Store.  

 For your convenience, all the important Dies R Us links are provided below.

click below for:

STORE

CHALLENGE BLOG

FACEBOOK

INSPIRATION BLOG

FRIENDS OF DIES R US PINTEREST PAGE

There’s Always Room for Cake

There is always room for indulgence on one’s birthday. This card is inspired by the Daisy Mae Designs bakery and sweet shops collection of stamps and stencils.

I created the gingham stenciled background with the striped stencil inked one way for the vertical stripes and then turned once to ink the horizontal stripes in coral ink. The doily is inked with the green pistachio through a stencil. The cake was stamped with a permanent black ink and then colored with watercolor pencils and mixed using a waterbrush.

Sentiments stamped on the front of the card come from the Daisy Mae stamp set while the inside sentiment is a Spellbinders’ foiling plate.

The envelope’s back flap was stamped using a mask to stamp just the fruit atop the cake and the spayed with gold mica mist.

Hope this card brings a smile to your face. 😊 Please like and leave a comment.

Supplies:

Stamps/Stencils

Inks/Watercolors

Papers

Foiling

Miscellaneous

A Party Without Cake

cake shop front-cu

“A party with out cake is just a meeting” is the sentiment for this pop-up cake shop birthday card.  Made with Die-cutting Essentials Special Edition Issue 6 – Shop Front and Hunkydory Moonstone Shadow Box Frame – MSTONE076 die sets and papers from shop front kit, this scrumptious card is a fun little diorama style card.

cake shop front-medium

The shop front papers include interior scenes as well as signs and background papers.  I adhered the interior paper for the cake shop on to light weight cardstock and then fussy cut around the table shapes. Then I cut the shadow box outer frame and two inner frames. I played with spacing the three tables out on the frames looking through he window and door, before I adhered the tables to frames. I taped using double-sided tape the striped pink wallpaper to the back piece of cardstock for the shadowbox frame and then using foam tape placed the back table on the wallpapered panel. The front two tables were taped using transparent removable tape to the lower corners of the interior shadow box frames.

cake shop front-roof

Next, I worked on decorating the shop front cut from a textured red paper, and I cut a second shop front from cream colored cardstock and fussy cut the window frame and door out it.  The “sweet” sign on the door is a sticker. The mail flap is a piece of gold holographic card, and the doorknob is Nuvo Crystal Drops. The green bushes are cut from a food box and embossed with the embossing folder from the shop front kit and placed with foam tape. The doorstep is from paper kit. A clear piece of acetate was adhered to the back of the window after the shop front was adhered to shadow box frame with double-sided-tape. This helps with the folding of the card, so cakes don’t get caught in the window frame. Sign was cut from papers and then adhered to cream cardstock before being permanently on shop front.

cake shop front-full

The “Happy Birthday” top of the card was stamped, and heat embossed onto white card stock and the cut out with a tab on the bottom. Using makers to create polka dots and then adhered to shop roof. The same polka dot paper from the back was used to roof the shop. The back sentiment was also heat embossed and adhered to back with foam tape.

cake shop back


SUPPLIES USED:

Dies

Paper:

Embossing Folder:

Stamps and Ink:

Miscellaneous:

Be Spontaneous!

BDay Party Ulta closeup-pop-up

Spontaneous birthday parties are wonderful, especially pop-up ones. This card’s inspiration came from experimenting with cutting multiple square wave frames and playing with shadow boxes. Once I realized the square wave frames fit the Karen Burniston Frame Pull Pop-Up top square, I knew I had to create a mini pop-up version of Courtney Chilson’s Birthday Shadow Box card.

BDay Party closeup-Front

Having made the Frame Pull Pop-up card before, I studied my practice card to make sure I remembered the assembly. (You can access the assembly video at here.) I remembered her advice to keep the top square flexible and not over decorated with stiff layers and used papers rather than cardstock to lay the background of colorful wave frames. I made sure the top edge did not have any overhanging edges of the frames that would catch when the card popped open.

IMG_5856

I had cut and assembled several sets of decorations from the Birthday Shadow Box card die set the last time I had made the card, so I only had to cut the cake and frosting and a circle for a plate from scrap cardstock in my stash. I found two shades of browns for the cake and used a white gel pen to added accents to the frosting. After gluing the cake together, I gently rounded the cake with my fingers to add depth to it as well as a Mini Dimensional foam dot to adhere it to the pop-up cube on the card. Double-sided red tape was used to attach the awning to the top of the pop-up.

BDay Party closeup-pop-up right

Decorations for the inside of the card all came from the Birthday Shadow Box set. The sentiment banner is a strip of thin cardstock stamped and embossed using Stampin’ Up Blow Out the Candles stamp set, VersaMark Watermark Stamp Pad and Ranger Black Sparkle Embossing Powder. The balloons stamped on the envelope flap are also from the Blow Out the Candles set. The die cut words on the pop-up come from Karen Burniston Word-Set-2-Birthday.

BDay Party -inside

SUPPLIES USED:

Dies

Stamps:

Paper:

Miscellaneous:

TZXT2727[1]

Just For You


IMG_4128

Here is a birthday party in an envelope. The recently released Sizzix Birthday Shadow Box by Courtney Chilson is a great deal of fun to create. Because I love chocolate cake with a thin glaze of icing, I used wax paper for the icing. White gel pen and Nuvo Drops help create the 3D look on the card. Foam tape between the window frames and under the decorations, cake, gift and shelves create the shadow box.

IMG_4126

The inside carries on the window theme with additional part decorations. I used the yellow window cut-out from the card front as the bottom mat for the computer-generated greeting.

IMG_4127

Materials: