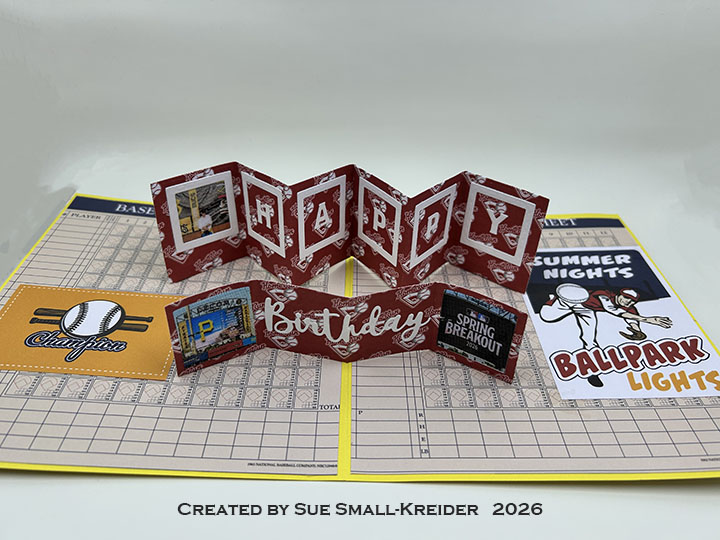
Made this special birthday card for a MLB baseball stringer using Karen Burniston’s Photo Gallery Pop-Up and Happy Birthday Lorna Add-Ons along with Carta Bella Home Run double-sided papers by Steven Duncan.
Cardbase: I folded a 6.5×12-inch rectangle yellow cardstock in half to create a 6.5×6-inch cardbase. Next, I covered the cardbase with full sheets from the Carta Bella 6.5×6-inch paper pad and then added some of the journaling cards.
Pop-Ups: Watch the assembly video at the bottom of the linked page of Photo Gallery Pop-Up. Add the sentiment and decorations before installing in the cardbase.
Sentiments: I used the word dies from the Happy Birthday Lorna Add-Ons and the square frames decorator dies from the Photo Gallery Pop-Up.
Disclaimer: Karen Burniston products are provided free of charge by the manufacturer for review and use. All other items were personally purchased. Compensated affiliate links used where or when possible, meaning I will receive a small percentage commission from these manufacturers at no cost to you. This will allow me to add more content to my YouTube channel and help out a lot. Thank you.
Materials Used:
Dies
Karen Burniston in cahoots with Riley and Company – Happy Easter – 1263
Karen Burniston in cahoots with Riley and Company – Squares – Crosshatch – 1056
Papers
Carta Bella – 6×6-inch Double-Sided 65lb. Papers by Steven Duncan. – Home Run
Core’dinations – 12×12 inch Textured 80lb Cardstock – Candy Shop
Watch the process video to see how I made this card.
Cardbase: Cut a 5×7-inch A7 cardbase from brown kraft cardstock. (I used a purchased cardbase and envelope.) Cover the inside with decorative paper. Clouds and sun are cut using the Rainbow Add-Ons die set.
Pop-Up: Watch the assembly video at the bottom of the linked page for the Stocking Pop-Up as well as the video above.
Horse and Fence: Cut one tan unicorn body from the Leaping Animals die set and from dark brown cut the tail and mane pieces. (I cut three of the tan because my cardstock was less than 80lb weight.) Use the die stencil features to draw in the horse’s eye, mouth, nostril and hooves with a thin black marker. Cut one fence from heavy white cardstock using the Farm Edgesdie set. Glue fence to top edge of pop-up over piece and glue horse to inner pop-up tombstone piece.
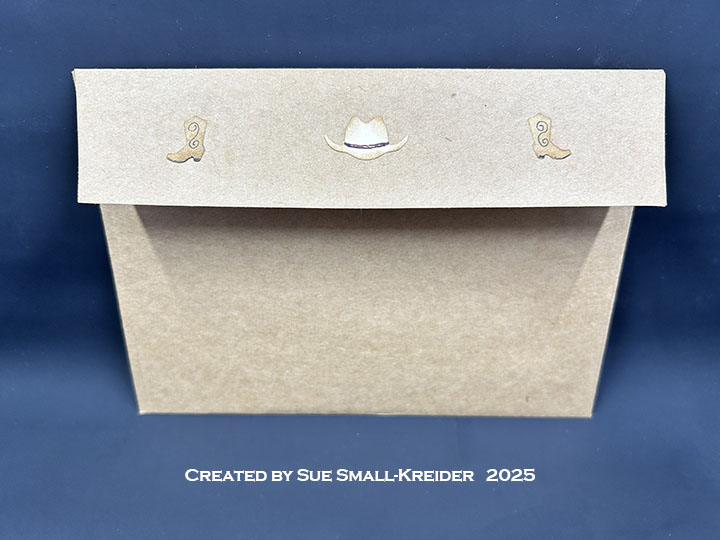
Cowgirl: Cut out one body, one hair style, one pair pants, one collared shirt, and one women’s short sleeved top from the Paper People die set. Cut one scarf bandana and two pair of cowboy hat and boots from the Tiny Accessories 3 set. (One set of hat and boots will be used on envelope.) I used a white brush marker to age the jeans and brown ink to age the hat and boots. The brown vest was made by cutting off the sleeves of the women’s top and cutting it up the middle. The front corners of each side were trimmed off to make a matching “v” similar to the neckline of the vest. The shirt and jeans were trimmed to fit under the vest. Boots were also trimmed to fit under the jeans. A piece of hemp cording was looped and glued together before adhering under the cowgirl’s hand.
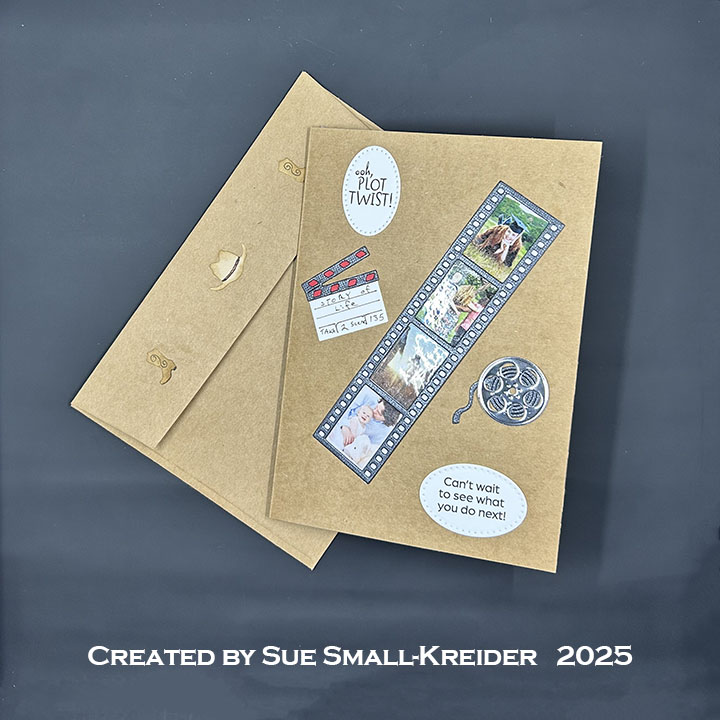
Movie Elements: Cut out of charcoal gray the film strip, film reel film and the clapper board “V” dies from the Movie Night Charms set. Cut the clapper board large base piece from white and color in the top “V” with red marker. Use thin black marker and die stencil feature to ink in the board’s lines. Cut one reel die from silver foil cardstock. Cut off all charm loops from clapper board and film reel. Assemble as shown in video above. Fill film strip with photos. (I used digital images that were resized on computer and printed on computer paper that was covered with clear packing tape.)
Sentiments: All the sentiments were stamped using the Movie Night stamp set with in black ink. “Ooh, plot twist!” was cut out using the smallest oval die in the Rectangles and Labels – Crosshatch die set. “Can’t wait to see what you do next!” and “Lights, Camera, Celebrate!” were cut out using the oval die in the Lorna Label Pop-Up set. “And the award for totally crushing it goes to…YOU!” was cut out using the smallest fancy label die in the Rectangles and Labels – Crosshatch die set.
Envelope: The card fits into an A7 (5x 9-inches) size envelope with a die cut a cowgirl hat and boots the back flap using the Tiny Accessories 3 set.
__________________________
Thank you for experiencing this blog post.
I hope this inspires you and makes you smile.
Please like and leave comments 😊
__________________________
Disclaimer: Karen Burniston products are provided free of charge by the manufacturer for review and use. All other items were personally purchased. Compensated affiliate links used where or when possible, meaning I will receive a small percentage commission from these manufacturers at no cost to you. This will allow me to add more content to my YouTube channel and help out a lot. Thank you.
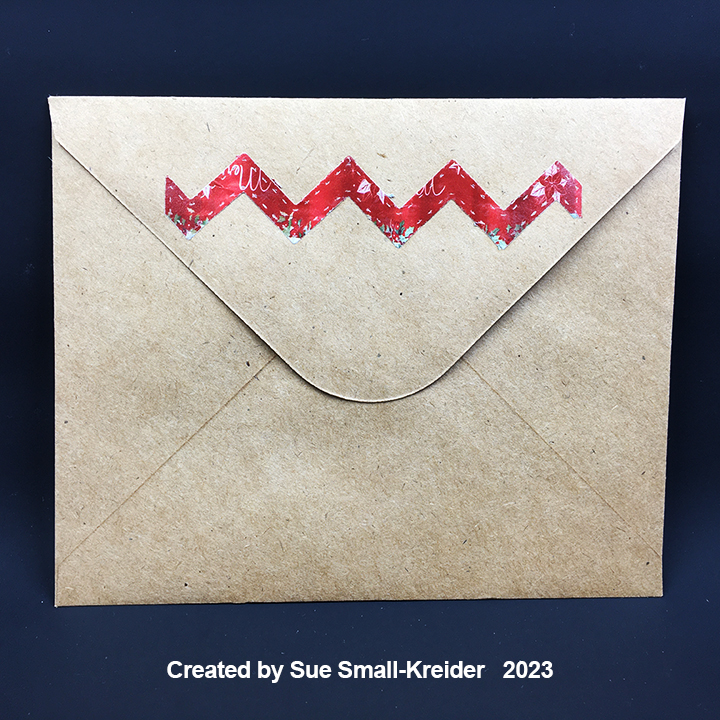
This card was made for Craft Roulette #187 whose parameters included a card made with cardstock and not-cardstock, Santa’s workshop colors, collar(s) element and zig-zags.
As a simple Christmas card with a pieced paper background and sentiments from the paper pad. This was a quick card to make in less than two hours. I started with the Carta Bella Letters to Santa paper pad and a mail-order catalog page of a red Christmas shower curtain to die cut three different colors of chevron background die. After separating all the pieces into a tray, I took the woodgrain frame and glued it to an A2 (4.25-inches by 5.5-inches) kraft card base. Alternating the colors, I filled in the frame.
The two sentiment cards or toppers were cut from the paper pad. Santa’s helpers with their collars was popped-up on the card front with foam dots. Small dots of translucent red Nuvo Drops were added to the elves’ shoe and hat tips. Santa’s face with “Merry Christmas” greeting were added to the card inside.
An extra red zig-zag stripe of red decorates the envelope flap.
Thank you for reading this blog post. I hope this inspires you and makes you smile. Please like and leave comments 😊
Materials Used:
Dies
Divinity Designs – Metal Die – Chevron Background – CBD474
Papers
Carta Bella – 6×6 Double-Sided Paper Pad – Letters To Santa
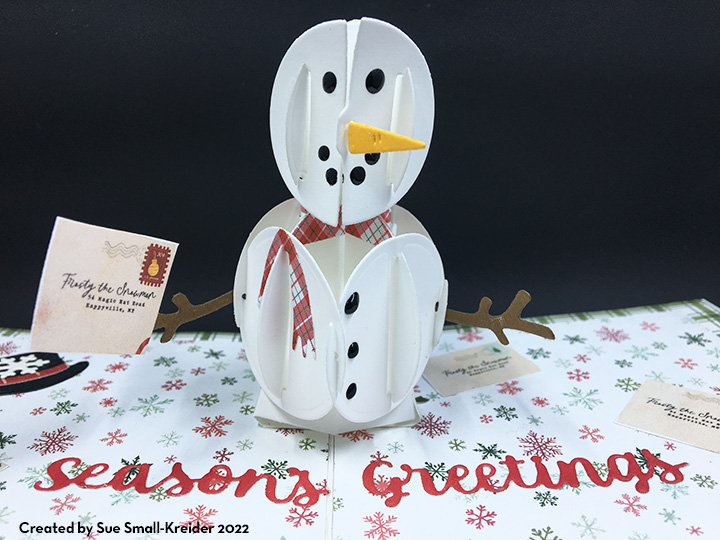
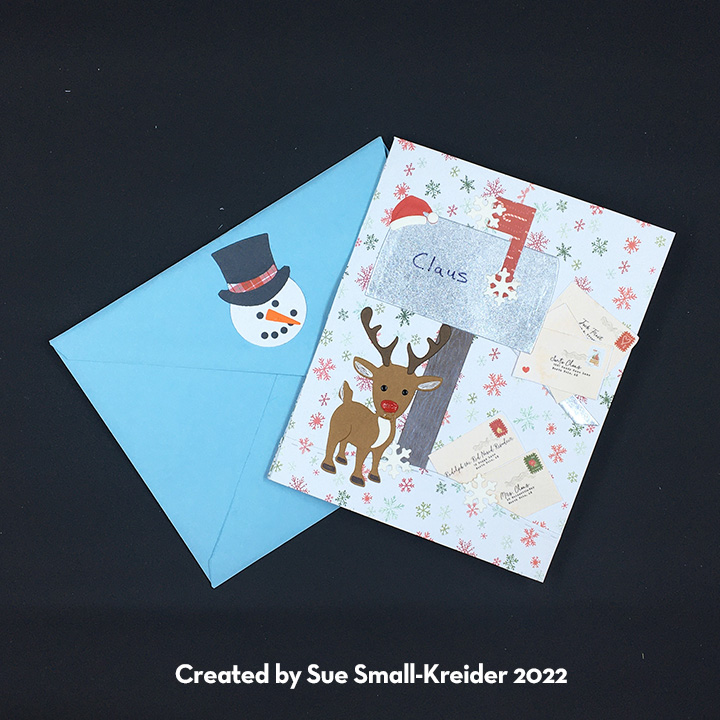
Who doesn’t love getting mail! The most famous snowman, Frosty sure does enjoy his mail in this card celebrating wintertime mail. It uses dies by Karen Burniston to create a delightful pop-up card.
The main die sets used were the Mailbox Pop-Up and the Snowman Pop-Up. Watch the two assembly videos for tips on how to construct the pop-up snowman and mailbox by clicking on the links above before starting your card. (If I had been smart and followed my advice of watching the assembly videos before starting the card, I would have known I needed at least 5 inches from the card fold to have Frosty in his top hat and should have done a top fold card instead of a side fold vertical card.)
Because I constructed my card base before I watched the assembly videos, I had to make the snowman without his hat to fit in the card. I used the top hat and snowflake from another snowman die set by Karen Burniston.
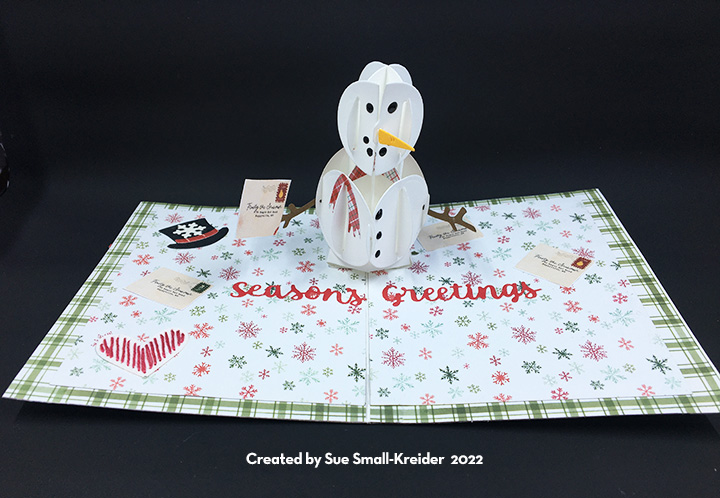
My inspiration for this card was the Carta Bella paper pad that has a page of envelopes addressed to various North Pole and winter characters. I cut out several of the envelopes from the paper and scattered them throughout the card. The other patterned papers are from this paper pad as well.
I like creating an outer frame for my card bases covered in patterned papers. I used the medium sized crosshatched rectangle to cut the frames in the inside green plaid paper panels and I used one of these rectangles on the back of the card over a border made from paper leftovers from the inside of the card.
For the card front I constructed a background from three leftover pieces of the snowflake print. The snow in the foreground was cut using a nature edge die that cuts a stitched rolling hill with trees. The trees I cut off.
While the mailbox is designed to be inside the card as an interactive element, it can be simplified down to a flat element. I used the main mailbox, lid, flag and wood grained post dies. The brown wooden post I inked the dies with white ink to get it into the wood grain and then gently rubbed the piece over the ink cube to get a snowy effect. I added the Santa hat and snowflakes to give some hints, if the name on the mail box didn’t clue the viewer that it is Santa Claus’ mailbox. I leave it up to the viewer to decide if the small Rudolf is the real one or a winter decoration.
Using the die as a stencil, I colored with a white gel pen to shade Rudolph’s ears and tail and a black fine-tipped marker for his hooves. I used Glossy Accents over his red paper nose to look more like a light. For Rudolph’s eyes and the snowman’s coal eyes and buttons, I used Nuvo Drops. With both these products be sure to allow 12-24 hours for them to dry. (I swished Rudolph’s nose and didn’t notice until the glossy accents had almost set.)
Inside the card, the finishing touches include: a snowflake, a stitched heart, and the sentiment of “Season’s Greetings” from the Karen Burniston Word Set 3. (I’ve been experimenting with various dies by Karen Burniston with the dotted outlines because they are easy to make stitched or embroidered charms and embellishments for cards. This heart is from theCircle Charm Pop-Up set.)
For the envelope, I made a snowman face with top hat from Karen Burniston’s Snowman set and glued all its pieces and back securely to the back flap of the envelope. Sometimes for thick cards to fit into a standard size envelope (A2 for this card) you need to trim a total of 1/4 of an inch off the non-fold sides of the card.
Thank you for reading. If you enjoyed this blog post, please like it and follow the blog. 😊
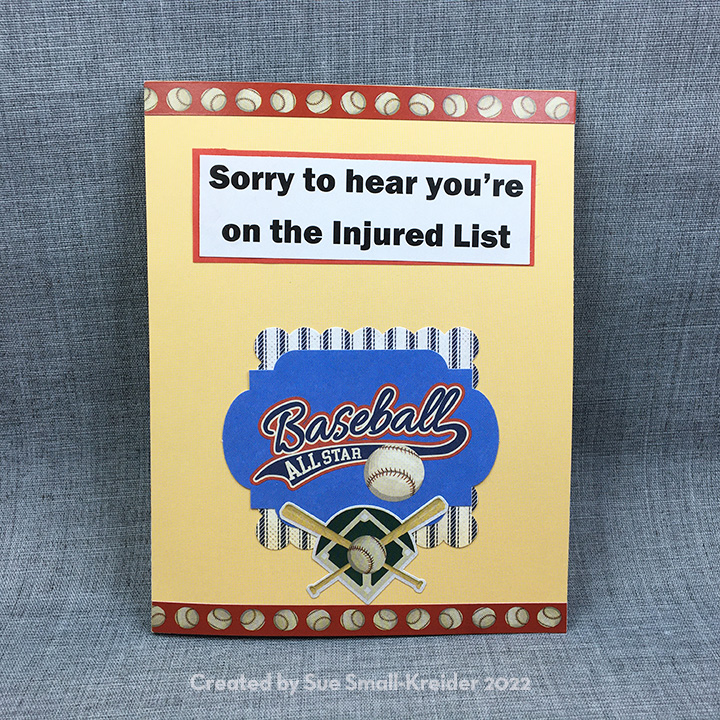
For a baseball fan, having your favorite player on the injured list, is bad, having yourself on the list is even worse. This card is for a sports fan recovering from surgery.
Echo Park Paper Co. makes a Baseball mega bundle of double-sided papers and ephemera that works well with Carta Bella’s Baseball element stickers. I used items from both these sets along with the circle twisting mechanism designed by Karen Burniston to make this card.
After watching Karen’s assembly video for the Snowman Twist Circle die set, I selected the largest two circle dies, cutting the largest from sand colored paper and the smaller stitched circle from white cardstock. I used a pencil to sketch where the red stitching would be on the white circle and used a fine tipped marker to mark the baseball’s stitching. The striped paper for the inside of the card was folded and die-cut as directed in the video. The arm piece was also cut from the striped paper.
A lightweight 5 x 6.5 inch card base was what I glued the striped inside paper to. For the outside I cut two 5 x 6.5 inch pieces of the sand colored paper. Decorating the card with the stickers and pre-cut ephemera was the fun part of the card. Using a computer, I created the two sentiments playing off the twisting action of the batter on the circle. “It won’t be long before your back in the swing of things!”
The envelope is also decorated with a baseball sticker.
Thank you for reading this blog post. Please like and leave comments 😊
I have a Coach K in my life who has coach hundreds of young men to excel in the game of baseball from Little League through high school teams. His baseball hero is Roberto Clemente. So when I saw the Carta Bella Paper’s Baseball series I immediately thought of Coach K.
I made an A2 size card with a fold-out shadow box inside including a dangling baseball made from two plastic baseball embellishment stickers stuck together encasing the thread. The batter was cut out as a rectangle with strips add to the sides to adhere using double-sided tape. A circle die was used to cut the hole for the shadow box.
I used the scoreboard card for the background of the batter. The Home Run hotdogs sign became the ads you often see around the fences and walls of baseball stadiums. The happy birthday sign was computer generated to match the style of the cards.