Who doesn’t love getting mail! The most famous snowman, Frosty sure does enjoy his mail in this card celebrating wintertime mail. It uses dies by Karen Burniston to create a delightful pop-up card.
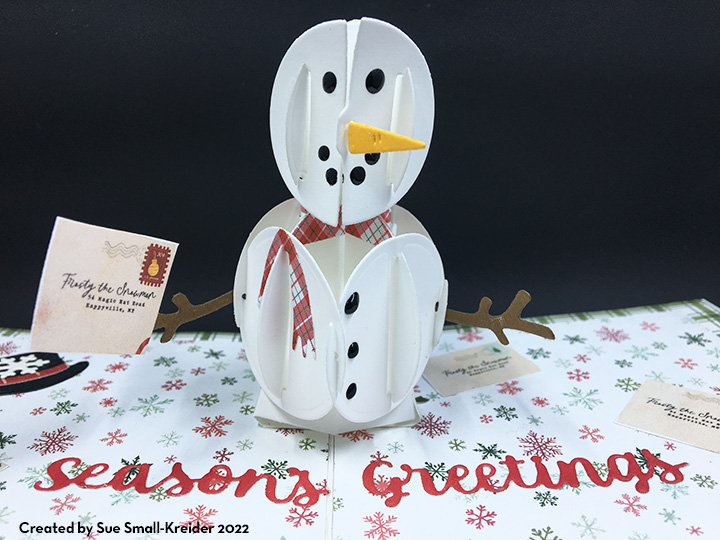
The main die sets used were the Mailbox Pop-Up and the Snowman Pop-Up. Watch the two assembly videos for tips on how to construct the pop-up snowman and mailbox by clicking on the links above before starting your card. (If I had been smart and followed my advice of watching the assembly videos before starting the card, I would have known I needed at least 5 inches from the card fold to have Frosty in his top hat and should have done a top fold card instead of a side fold vertical card.)

Because I constructed my card base before I watched the assembly videos, I had to make the snowman without his hat to fit in the card. I used the top hat and snowflake from another snowman die set by Karen Burniston.
My inspiration for this card was the Carta Bella paper pad that has a page of envelopes addressed to various North Pole and winter characters. I cut out several of the envelopes from the paper and scattered them throughout the card. The other patterned papers are from this paper pad as well.

I like creating an outer frame for my card bases covered in patterned papers. I used the medium sized crosshatched rectangle to cut the frames in the inside green plaid paper panels and I used one of these rectangles on the back of the card over a border made from paper leftovers from the inside of the card.
For the card front I constructed a background from three leftover pieces of the snowflake print. The snow in the foreground was cut using a nature edge die that cuts a stitched rolling hill with trees. The trees I cut off.

While the mailbox is designed to be inside the card as an interactive element, it can be simplified down to a flat element. I used the main mailbox, lid, flag and wood grained post dies. The brown wooden post I inked the dies with white ink to get it into the wood grain and then gently rubbed the piece over the ink cube to get a snowy effect. I added the Santa hat and snowflakes to give some hints, if the name on the mail box didn’t clue the viewer that it is Santa Claus’ mailbox. I leave it up to the viewer to decide if the small Rudolf is the real one or a winter decoration.
Using the die as a stencil, I colored with a white gel pen to shade Rudolph’s ears and tail and a black fine-tipped marker for his hooves. I used Glossy Accents over his red paper nose to look more like a light. For Rudolph’s eyes and the snowman’s coal eyes and buttons, I used Nuvo Drops. With both these products be sure to allow 12-24 hours for them to dry. (I swished Rudolph’s nose and didn’t notice until the glossy accents had almost set.)
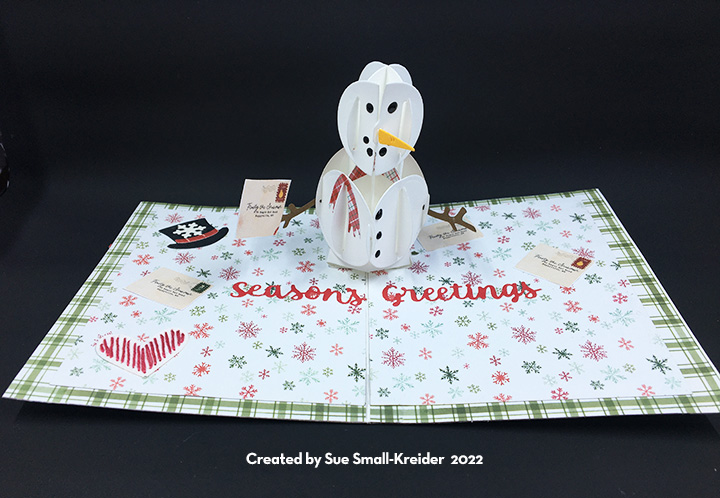
Inside the card, the finishing touches include: a snowflake, a stitched heart, and the sentiment of “Season’s Greetings” from the Karen Burniston Word Set 3. (I’ve been experimenting with various dies by Karen Burniston with the dotted outlines because they are easy to make stitched or embroidered charms and embellishments for cards. This heart is from the Circle Charm Pop-Up set.)
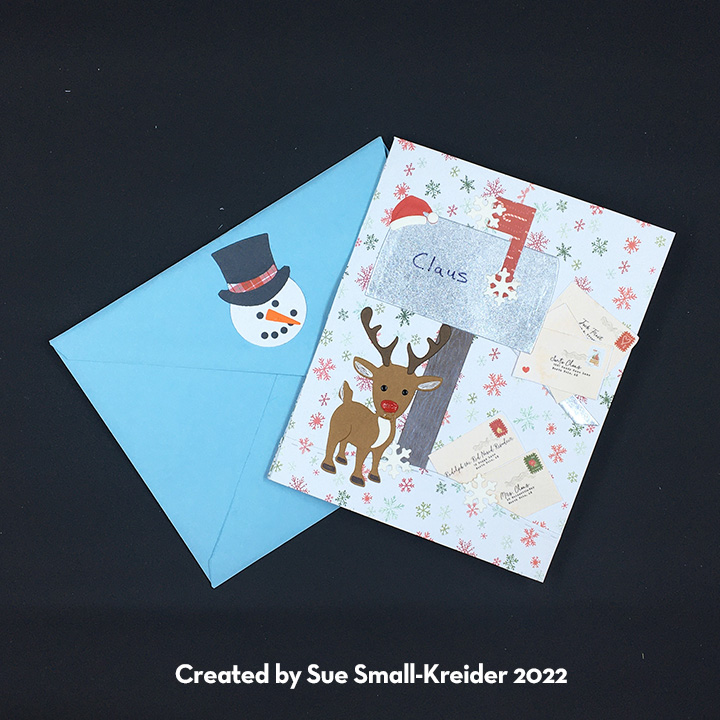
For the envelope, I made a snowman face with top hat from Karen Burniston’s Snowman set and glued all its pieces and back securely to the back flap of the envelope. Sometimes for thick cards to fit into a standard size envelope (A2 for this card) you need to trim a total of 1/4 of an inch off the non-fold sides of the card.
Thank you for reading. If you enjoyed this blog post, please like it and follow the blog. 😊
Dies:
- Karen Burniston – Dies – Snowman – 1017
- Karen Burniston – Dies – Word Set 3 – Holiday – 1022
- Karen Burniston – Dies – Circle Charm Pop-Up – 1046
- Karen Burniston – Dies – Rectangles – Crosshatch – 1054
- Karen Burniston – Dies – Christmas Animals -1061
- Karen Burniston – Dies – Snowman Pop-Up – 1169
- Karen Burniston – Dies – Long Nature Edges 2 – 1178
- Karen Burniston – Dies – Mailbox Pop-Up – 1192
stamps & Ink
- Craft Smart – Ink Pad – White
- Ink
- Stamp
- Sakura – Gelly Roll Pen– 08 -White
- Sharpie – Ultra Fine-Tipped Marker – Black
Papers
- Carta Bella – 6×6 Paper Pad of Double-Sided cardstock – Letters to Santa
- Lightweight 8.5×11 inch white cardstock
- Matte silver foil cardstock scrap
- Colored cardstock scraps
- A2 Envelope
Additional Supplies Used:
- Lineco – neutral-ph adhesive glue
- Die cutting machine
- Fineline18 Gauge Applicator & Bottle
- Quick Stick – pokey tool
- Nuvo – Crystal Drops – Gloss Ebony Black
- Ranger – Glossy Accents

This is just adorable. You are so creative!!!!!
LikeLiked by 1 person