This card was inspired by a pun on the Bing Crosby classic “I’m Dreaming of a White Christmas” song. It uses dies by Karen Burniston and stamps by Riley and Company.
Watch the process video to see how I made this card.
Cardbase: Cut an 8.75 x7.5-inch rectangle of 65lb. white cardstock and score and fold in half to form an 8.75 x3.25-inch top-fold slimline card base. Cover using decorative papers.
Pop-Ups: Watch the assembly videos for the Lorna Label Pop-Up and the Piano Keys Pop-Up by click on the links and looking for the videos at the bottom of each link’s page.
Decorations: For the musical notes and piano are from the Music Charms set while the shark inside is from the Sea Animals set. The shark border on the card back is from the Beach Borders set. The sharks were cut in white and colored with a gray marker.
Envelope: The card will need to be mailed in a bubble wrap envelope because of its size and thickness.
___________________________________
Thank you for experiencing this blog post.
I hope this inspires you and makes you smile.
Please like and leave comments 😊
___________________________________
Disclaimer: Karen Burniston products are provided free of charge by the manufacturer for review and use. All other items were personally purchased. Compensated affiliate links used where or when possible, meaning I will receive a small percentage commission from these manufacturers at no cost to you. This will allow me to add more content to my YouTube channel and help out a lot. Thank you.
This card was made for Craft Roulette #239 whose parameters included an interactive card, picnic colors, farm element, and paper strips.
Watch the process video to see how I made this card.
Cardbase: I used a purchased A6 (4.5 x 6.25-inch) cardbase and envelope.
Stable & Reindeer: Using the Reindeer Stable die set by Scrapping Cottage, cut the stable base from red cardstock and inked the edges with brown ink. All the other pieces were cut from white cardstock and colored. The weathervane was cut twice and glued together to reinforce the tiny piece. I made my own wire wobbler springs using thin florist wire and gluing them in place.
Flying Reindeer Mechanism: Using dies by Whimsy Stamps kinetic collection, I eventually figured out how to make the reindeer fly over the stable using the die cut paper strips and foam dots. (Watch the tutorial to see how I made it.)
Snow: Avry Elle white ink spray was used to cover the card with splatters of snow. (I had to color over the facial details and shading on the reindeer after spraying.) The trees have white gel pen to place snow accumulation at the end of the branches.
Sentiments: All the winter sentiments stamped in black ink are from Waffle Flower. The “Pull” and arrow are tiny stamps from My Favorite Things.
Envelope: The card fits into an A6 (4.5x 6.25-inches) size envelope With “Let It Snow” on the back flap.
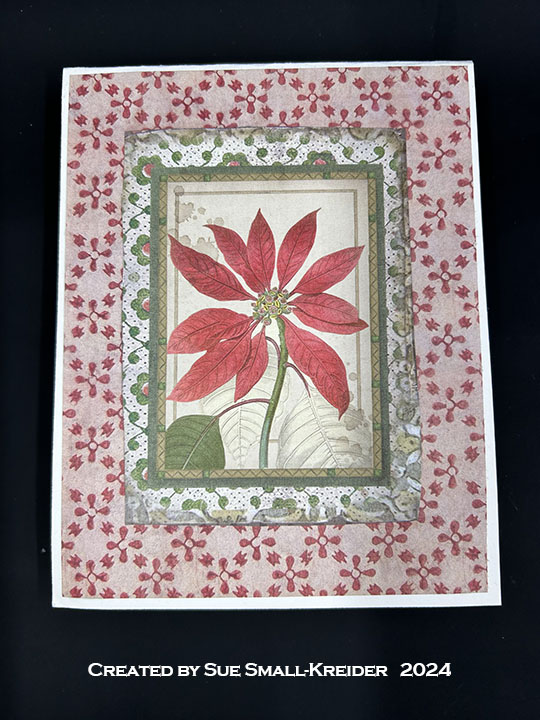
This card was inspired by a 3D embossing folder that features poinsettias and candy canes by Spellbinders. It also uses some new dies by Karen Burniston and paper by Graphic 45.
Watch the process video to see how I made this card.
Card Back
Cardbase: I used a purchased A7 (5×7-inch) side fold cardbase with matching envelope. (Color the fold both inside and out using markers that are close in color to the papers, so that the white fold line is less seen.) The cardbase was covered using decorative papers.
Embossed Front: The Spellbinders 3D embossing folder of the month for October 2024 embosses a 5 1/2×8 1/2-inch surface. I used gold foil cardstock to emboss and colored the image with fine tipped alcohol markers. (I found the smaller tipped makers got brighter coverage, but I went over most of the images two or three times to get my desired color.)
Poinsettia: Using the Karen Burniston Poinsettia die set, cut one large poinsettia petals from green and another from red cardstock. Cut two of the small petals from red. Cut one red center and a second center from yellow cardstock backed with double sided adhesive tape to make stickers. Assemble the flower as shown in video. Cut berry branches and fir branches from green and berries from red cardstock covered with clear packing tape. Use berry die as a stencil to add white gel pen highlights to berries.
Fan Pop-Up: Using the Photo Fan die set, cut one of the fan mechanism piece from decorative paper matching the card inside paper. Cut off arms and save arms. Glue two arms together and attach to fan with arm edge butted into the center fold of the fan. Install fan into card as directed in the video.
Sentiment: Cut one of the Merry Christmas Lorna Add-on large die from red cardstock and the words from gold foil cardstock.
Envelope: The card fits into an A2 (4.25x 5.5-inches) size envelope. I decorated the back flap of the envelope with candy canes from the Christmas Borders 2 die set.
___________________________________
Thank you for experiencing this blog post.
I hope this inspires you and makes you smile.
Please like and leave comments 😊
___________________________________
Disclaimer: Karen Burniston products are provided free of charge by the manufacturer for review and use. All other items were personally purchased. Compensated affiliate links used where or when possible, meaning I will receive a small percentage commission from these manufacturers at no cost to you. This will allow me to add more content to my YouTube channel and help out a lot. Thank you.
Welcome to our Karen Burniston Products – KB Riley LLCOctober 2024 Release Blog Hop. (See GIVEAWAY details at the end of this post for blog hop list.) The Design Team have come together with Karen today for a fun blog hop to celebrate the release of 10 new dies and 5 new stamp sets. Sneak peeks of the new release started last week, and the dies are available to order NOW!
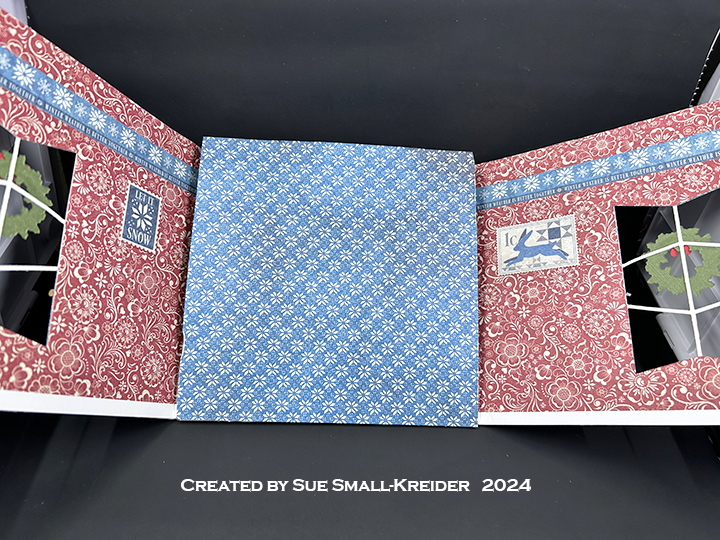
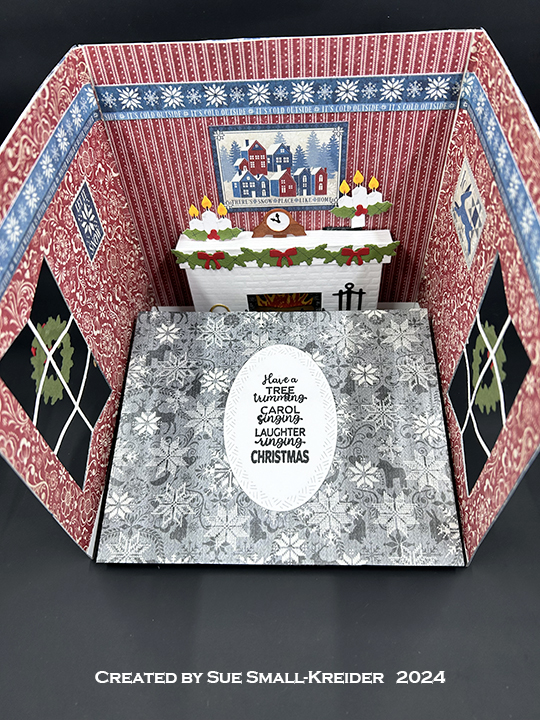
This is a special card that creates a 6×6-inch miniature scene of trimming the Christmas tree. (I think the people must have stepped out to get some hot cocoa.) There are dangling ornaments (or baubles) along with a colorful paper chain and a strand of lights. These are all created with dies from the new release – Christmas Tree Add-Ons,Charm Rings, Snow Charms andPenguin and Reindeer Snowman Add-Ons. The stamped sentiment is from the new Season of Cheer stamp set.
(While it uses multiple die sets, you could make a smaller card with the tree and furniture or the tree next to the fireplace.)
Watch the process video to see how I made this card.
Cardbase: From 100 lb. cardstock cut two 6 x 6 1/2-inch rectangles, one 6 x12-inch rectangle, and one 6 x 5 1/2-inch rectangle. Watch video to see the order of assembly of pieces and when to cover pieces with decorative paper.
Sofa and Table: The sofa and table are made using the Family Room Pop-Up die set and modifying the chair into a table by not adding the chair seat and back piece. The tabletop is the waste piece from the sofa section of the base. For the plate of gingerbread men, cut the plate using the smallest circle die in the Crosshatch Circles die set. There are three different die sets that have gingerbread men of about the same size. Any set will work – Gingerbread Tiny House Add-Ons, Winter Charms or Christmas Borders 1. (Watch assembly videos on the dies’ linked pages.)
Sentiments: The card uses many sentiments from the Graphic 45 paper collection, but the main inside sentiment comes as the card is opened to reveal the fireplace with “Have a tree trimming, carol singing, laughter ringing Christmas“ stamped on an oval rug using the Season of Cheer stamp set.
Envelope: The card is thick, so a special padded envelope is needed to mail it.
Disclaimer: Karen Burniston products are provided free of charge by the manufacturer for review and use. All other items were personally purchased. Compensated affiliate links used where or when possible, meaning I will receive a small percentage commission from these manufacturers at no cost to you. This will allow me to add more content to my YouTube channel and help out a lot. Thank you.
To celebrate the release Karen Burniston and each of the Karen Burniston – KB Riley LLC Design Team members will be giving away a $25 Gift Certificate to some lucky person who comments on our blog posts, so make sure you join the hop and comment on everyone’s blog post. Winners will be randomly chosen from ALL of the blog hop comments received on our blog posts by Monday,4th November 2024. Lots of chances to win some goodies, so just leave a comment on this post or any other blog hop posts to enter! Don’t forget to leave some way for us to contact you, in case you are a lucky winner!
This card was made for Craft Roulette #238 whose parameters included collage, Italian restaurant colors, short element and diagonal lines.
Watch the video to see how I made this card.
Cardbase: I used a 11 x 4 1/4-rectangle folded in half to form a top-fold A2 (4 1/4 x 5 1/2-inch) card. The top panel was folded in half to form the easel.
Lights: Use one Pear Blossom Press Halo Light attaching to the front of the easel cardbase with double-sided tape. Cut a piece of white cardstock to cover the battery and button. Stamp the “Press Here” over where button is and attach with double-sided tape to battery case.
Wreath: Cut at least 20 pine tree branches from different shades of green. Cut a circle frame using the fourth and fifth larges circle dies and glue the pine branches around the circle. Attach the wreath to halo light with foam squares. Decorate with red dots and robin cut from decorative papers.
Card Back
Sentiments: “Wishing you a season of cheer” is from a new Karen Burniston stamps set Season of Cheer. The “Press Here” stamp is from Pear Blossom Press.
Envelope: The card fits into an A2 (4 1/4 x 5 1/2-inch) size envelope.
Disclaimer: Karen Burniston products are provided free of charge by the manufacturer for review and use. All other items were personally purchased. Compensated affiliate links used where or when possible, meaning I will receive a small percentage commission from these manufacturers at no cost to you. This will allow me to add more content to my YouTube channel and help out a lot. Thank you.
It’s Sneak Peak Week for Karen Burniston’s October 2024 release of new dies and sentiment stamps. These dies will be available for purchase on October 28, 2024 on the KB Riley LLC website.
Watch the process video to see how this card was made.
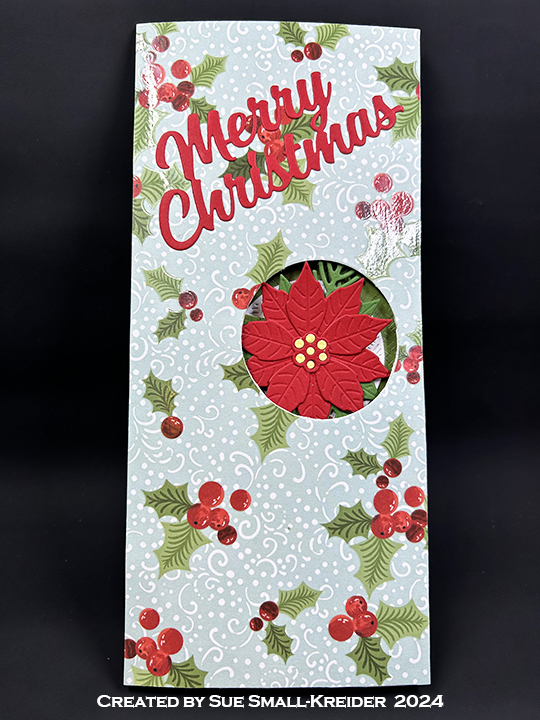
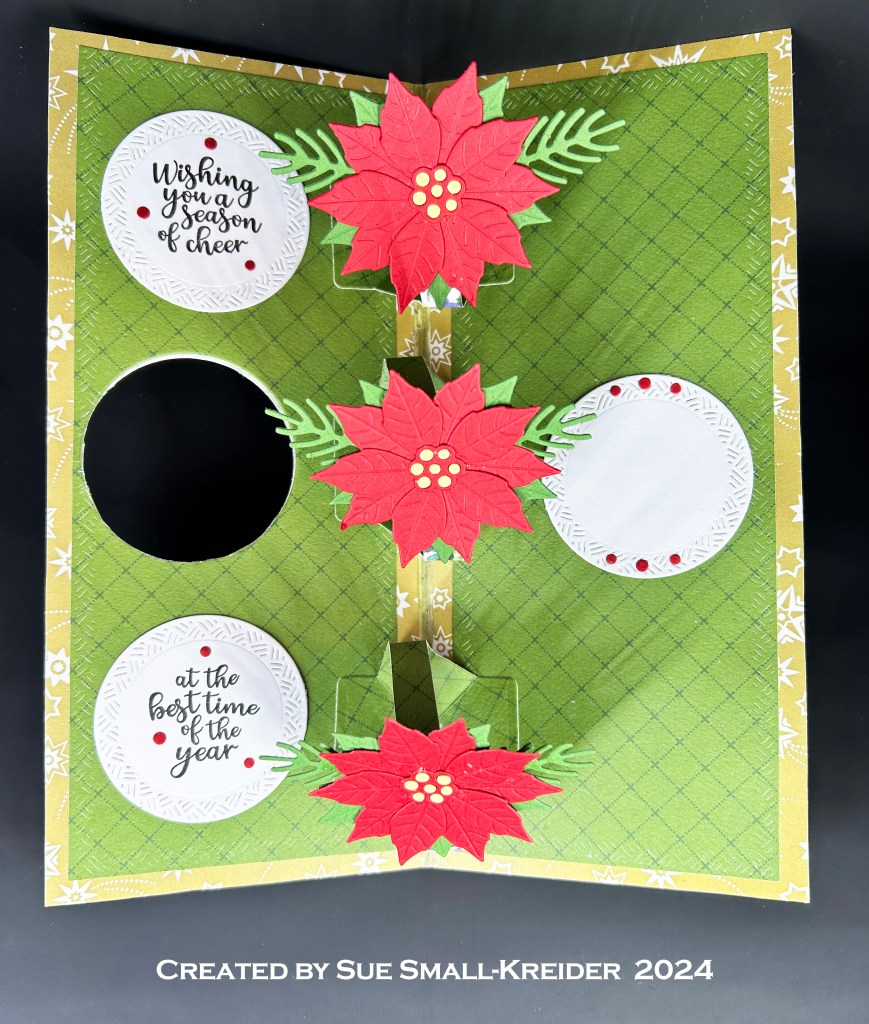
Cardbase: Cut a 7 3/4 x 8 3/4-inch rectangle from light weight cardstock. Fold in half to form a 3 7/8 x 8 3/4-inch side-fold card. Cover the inside panels with gold patterned paper then use the largest of the Long Rectangles – Crosshatch dies to cut two green patterned paper mats for the inside. Cover the outside panels with holly patterned paper. Using the second smallest crosshatch circle in the Circles – Crosshatch die set to cut a window thru the card front by centering the circle die between 3 1/4-inches and 5 1/2-inches from the top of the card and 1/4-inch from the right side of the card.
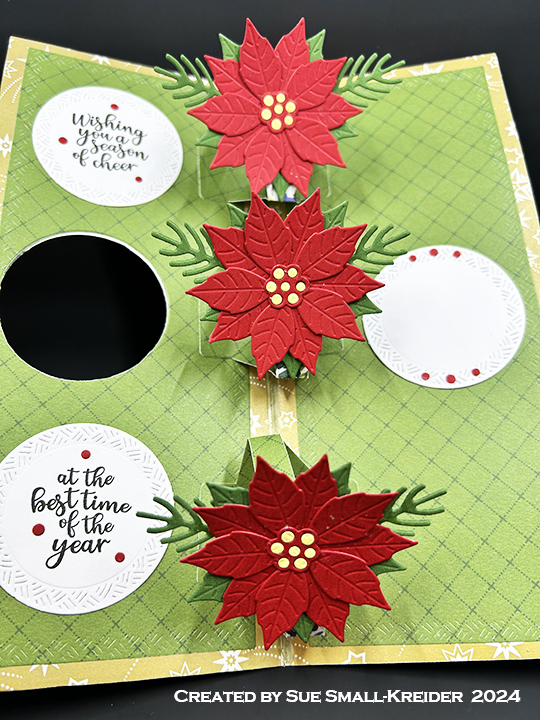
Poinsettias: Cut six of the smaller flower die from red using the new Poinsettia die set. Cut three of the smaller flower from green. Cut 3 of the flower center from red and three more from yellow backed with double-sided adhesive. (You can glue these yellow dots in if you don’t have double sided adhesive.) Cut six of the small pine branches from green. Watch YouTube video above for assembly instructions.
Flower Twist Pop Mechanisms: Cut three mechanisms using the Twist Flower Pop-Up die set. (If using a double-side paper, cut three 1/2-inch by 1 1/2-inch strips of the same paper.) Assemble as shown in assembly video at the bottom of this linked page. Attach center mechanism to show flower through the front circle window. Space out the other two mechanisms on either side and check for catchpoints before permanently gluing into card.
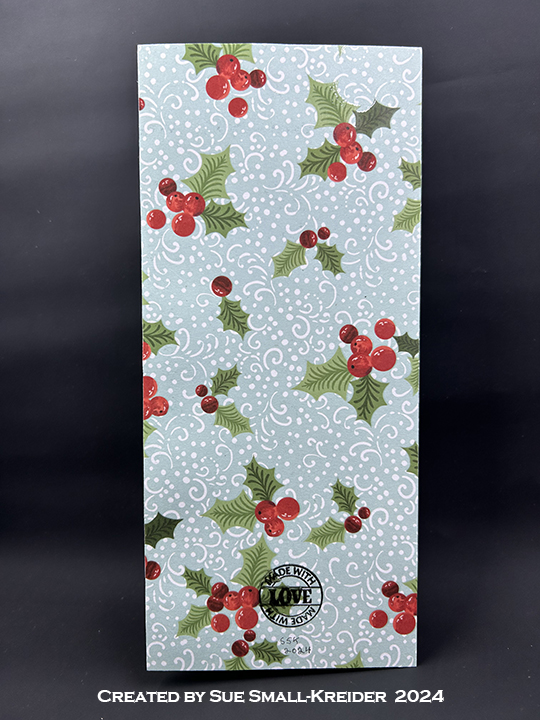
Sentiments: “Merry Christmas” is a previously released die set by Karen Burniston. The inside stamps come from the new stamp set Season of Cheer. The red dots are leftover from the flower centers. The “Made with Love” stamp on the card back is from the new Special Delivery stamp set.
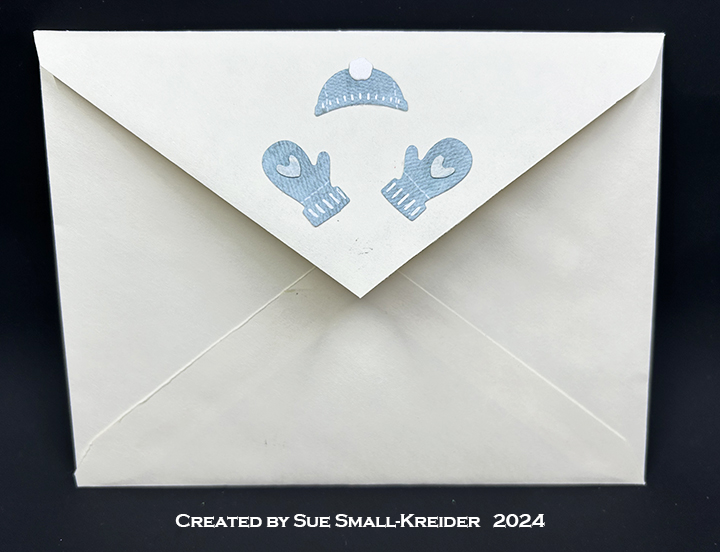
Envelope: The card fits into #10 business size envelope. I decorated the back flap by covering it with gold paper and leftover fir branches and red dots from the flower centers.
Disclaimer: Karen Burniston products are provided free of charge by the manufacturer for review and use. All other items were personally purchased. Compensated affiliate links used where or when possible, meaning I will receive a small percentage commission from these manufacturers at no cost to you. This will allow me to add more content to my YouTube channel and help out a lot. Thank you.
It’s Sneak Peak Week for Karen Burniston’s October 2024 release of new dies and sentiment stamps. These dies will be available for purchase on October 28, 2024 on the KB Riley LLC website.
Today’s card is an A2 size top-fold card that uses the new Snow Charms die set and Winter Hugs stamp set.
Watch the process video to see how this card was made.
Cardbase: Fold in half an 11×4.25 inch piece of white cardstock to form a top-fold A2 (4.25×5.5 inch) size cardbase. Cover all four panels with rectangles of patterned paper using the largest die from the Rectangles – Crosshatch set. Cut a frame of white glitter cardstock using the same die and the next largest die and glue to the front panel.
Mug of Cocoa: Using the Tea and Coffee Pop-Ups die set cut one mug from red cardstock covered with clear packing tape. Cut one of the largest snowflake in the Snow Charm set, snip off charm loop and cover with glitter gloss before gluing to mug center. Allow to dry before rounding/shaping mug with a bone folder. Cut from white shimmer cardstock the cupcake frosting piece from the Cupcake Add-Ons set and adhere to back of the mug with two small foam dots. Cut one steam piece from the Tea and Coffee Pop-Ups set from clear vellum.
Cut the mechanism piece and arm strip from the same patterned paper as inside of card. Cut a white crosshatch label from the Rectangles and Labels – Crosshatch set and trim off about 1/2-inch from long side. Glue the large piece of label onto the inside card floor centering it up against the fold. Glue the mechanism into card as instructed on the assembly video located at the bottom of this linked page. Attach arm to mechanism. Using a large foam dot adhere the mug to the front of mechanism. Glue vellum steam piece to arm making sure it is positioned so it does not peak-out of the card when it is closed.
Decorations: The card front decorations are from the Snow Charms set, along with some snowflake sequin mix elements. The inside spoon is from the Tea and Coffee Pop-Ups set.
Sentiments: All the sentiments come from the Winter Hugs stamp set. All the fancy labels come from the Rectangles and Labels – Crosshatch die set. “Snowflake kisses & winter wishes” was stamped on clear vellum with StazOn ink and the whole label was covered with glitter gloss. The vellum was adhered to the card front using glue dots.
Envelope: The card fits into an A2 (4.25x 5.5-inches) size envelope. The back flap was decorated with a hat from the Winter Animals set and mittens from the Snow Charms set.
___________________________________
Thank you for experiencing this blog post.
I hope this inspires you and makes you smile.
Please like and leave comments 😊
___________________________________
Disclaimer: Karen Burniston products are provided free of charge by the manufacturer for review and use. All other items were personally purchased. Compensated affiliate links used where or when possible, meaning I will receive a small percentage commission from these manufacturers at no cost to you. This will allow me to add more content to my YouTube channel and help out a lot. Thank you.
It’s Sneak Peak Week for Karen Burniston’s October 2024 release of new dies and sentiment stamps. These dies will be available for purchase on October 28, 2024 on the KB Riley LLC website.
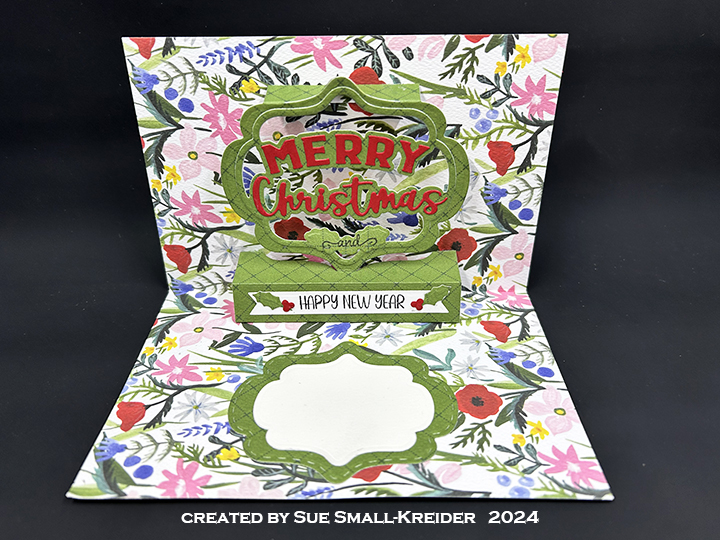
CARDBASE: Cut an 8×6-inch rectangle of a double-sided patterned paper and fold in half to form a top-fold 4×6-inch cardbase.
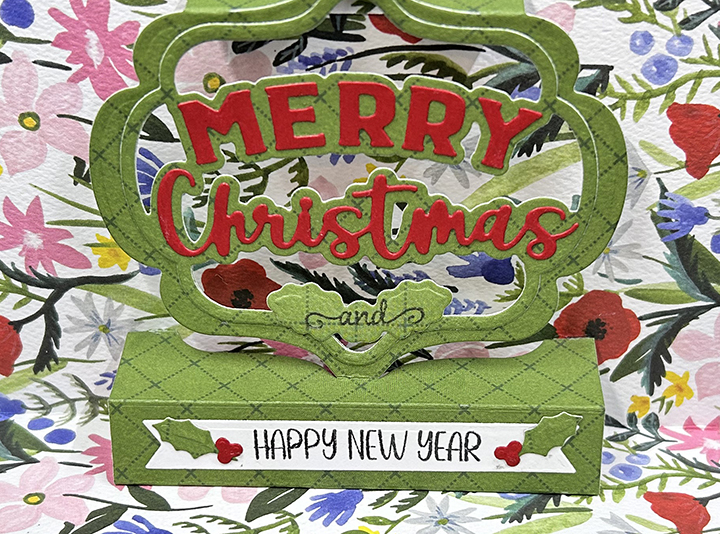
LORNA LABEL: Follow the assembly video for theLorna Label Pop-Up but cut out a frame by sandwiching the largest decorator label inside the Lorna Label die. Glue the Merry Christmas Add-Ons frame to the Lorna Label frame and decorate with words from add-on set before gluing the Lorna label pop-up into the card.
POINSETTIA: From the Poinsettia die set, cut one of the large leaves die from green and another from red. Cut one red from smaller leaves die. Brush the edges of the leaves with ink slightly darker than the cardstock. Cut the small, dotted center piece once from red and once from yellow. Save the yellow dots to inlay into the red center. Glue the large red piece onto the large green piece and then top with smaller red piece. Make sure to alternate the leaves for full coverage. Adhere red and yellow flower center. Die cut five pine branches and two of the berry stems to add around the large flower.
SENTIMENTS: The Merry Christmas Lorna Add-On set has a holly leaves shadow die that is just the right size to stamp the word “and” onto and glue to the bottom tip of the Lorna Label frame. The “and” and “Happy New Year” are from the Season of Cheer stamp set. The fishtail banner is a die in the Lorna Label Pop-Up set. The holly leaves and berries are in the Merry Christmas Lorna Add-On set.
___________________________________
Thank you for reading this blog post.
I hope this inspires you and makes you smile.
Please like and leave comments 😊
___________________________________
Disclaimer: Karen Burniston products are provided free of charge by the manufacturer for review and use. All other items were personally purchased. Compensated affiliate links used where or when possible, meaning I will receive a small percentage commission from these manufacturers at no cost to you. This will allow me to add more content to my YouTube channel and help out a lot. Thank you.
I had a rare Sunday afternoon to just play in my craft room and I made four of the same card, but each with a different version of the word “merry.” These cards were inspired by a card class that Meghann Andrew taught during the Scrapbook and Cards Today‘s Christmas in July – Jolly Holiday 2024 event.
Leave a comment letting me know which version of “merry” you like best.
I also stamped envelopes for the cards.
All cards and envelopes used stamps, stencils and dies from the event kit. I used the Stampin’ Up – Tranquil Tide and Simon Says Stamp – Surf Blue ink pads, Spectrum Noir Tri-Blend – Green Turquoise Blend Light, red and gold gel pens, gold metallic marker, Nuvo Glitter Paste – Moonstone, Nuvo- Glitter Gloss and some tiny gold gems and puff star stickers from my stash.