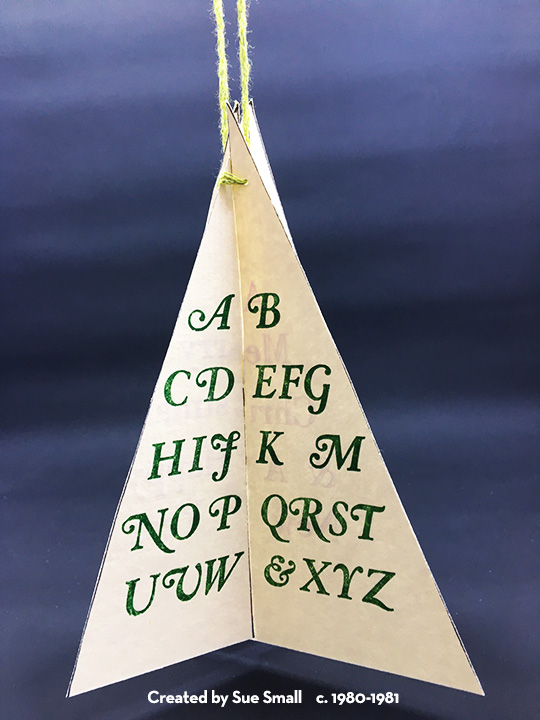
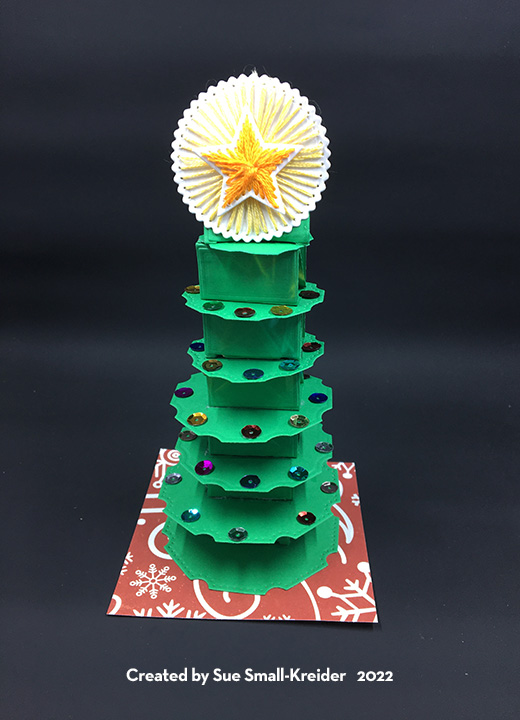
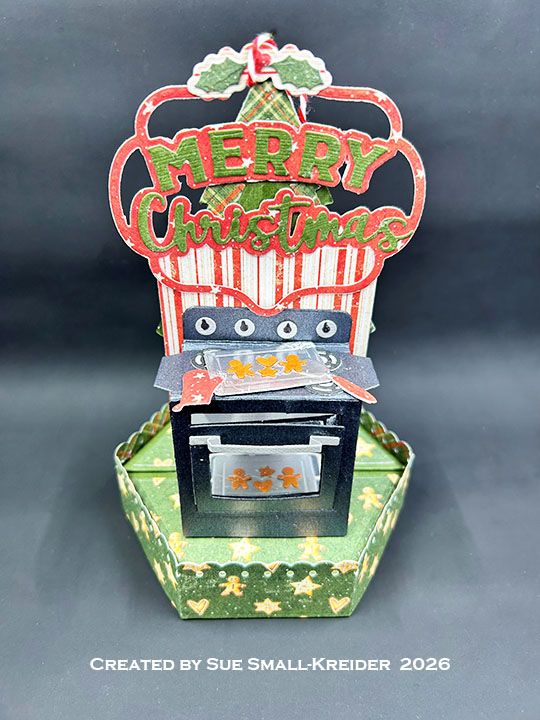
I had so much fun making a gingerbread house ornament for the Karen Burniston Design Team April 2026 Challenge using the Stage Pop-Up die set, that I made another ornament card with a baking theme. To the Stage Pop-Up I added the Oven Pop-Up along with the Christmas Trees Pop Stand, the Merry Christmas Lorna Add-Ons and the Party Stage Add-Ons.
Watch the process video to see how I made this card.
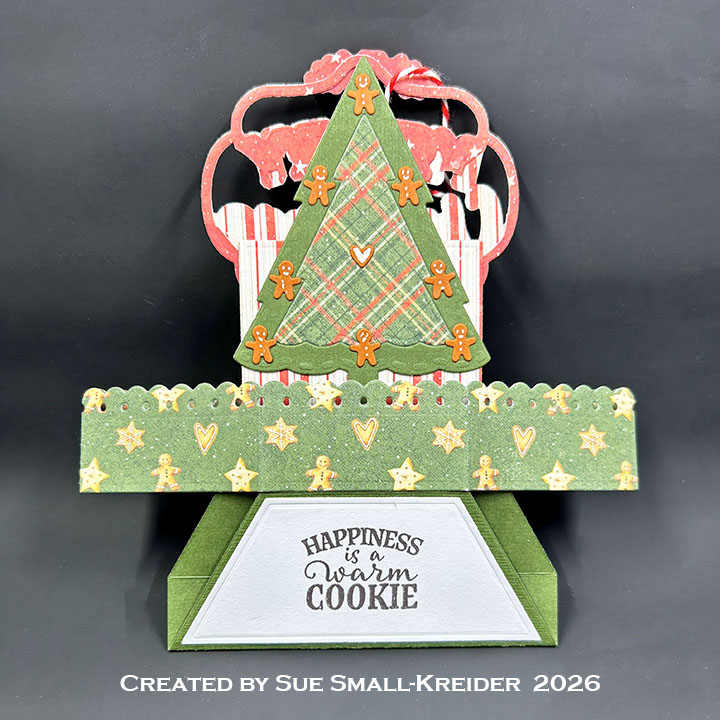
Pop-Up Stage Base: (Watch the assembly video at the bottom of the linked page for Stage Pop-Up.) Cut two base pieces from the Stage Pop-Up die set in green and two scalloped side pieces from the Party Stage Add-Ons set from decorative cardstock. Cut one decorative rectangle from the Stage Pop-Up set in white. Cut two of the base polygon decorative pieces from white cardstock and two decorative papers. Save the white pieces to be stamped with a sentiments before gluing to the bottom and side of the stage base. Cut a rectangle to be glued between the two stage base pieces. (I used the 2.4×3.7-inch die in the Rectangles – Crosshatch set.)
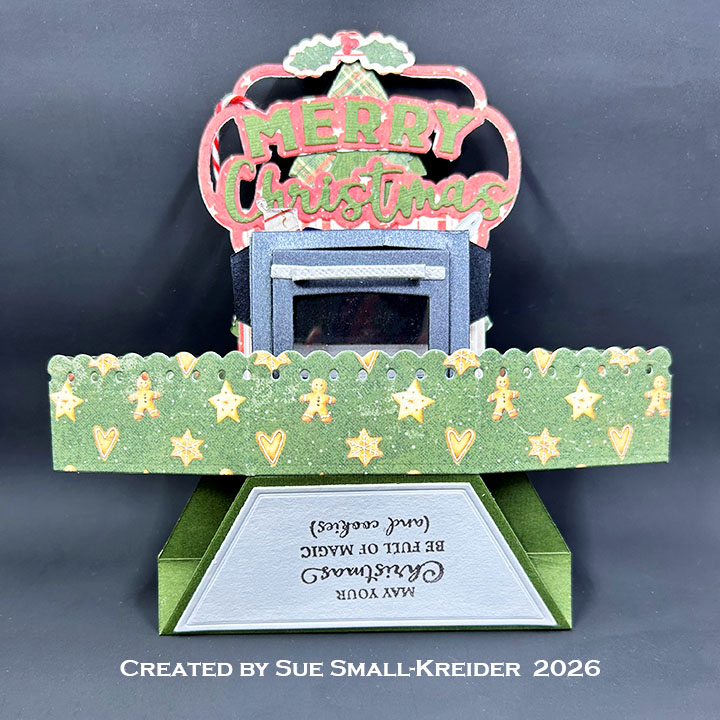
Oven Pop-Up: (Watch the assembly video at the bottom of the linked pages for Oven Pop-Up and the video above for alterations to the installation of the oven.) Cut two main oven pieces from black metallic cardstock. Trim one down to just the front with door. Cut a 1 3/8-inch square of clear acetate and sand which between the two oven doors using narrow double-sided tape. Cut one base piece from black metallic cardstock and trim off triangular sides as shown in video above. Add decorative rack, cookie tray, cookies, spatula, oven mitt, stove burners and knobs. Add to stage base as shown in video above.
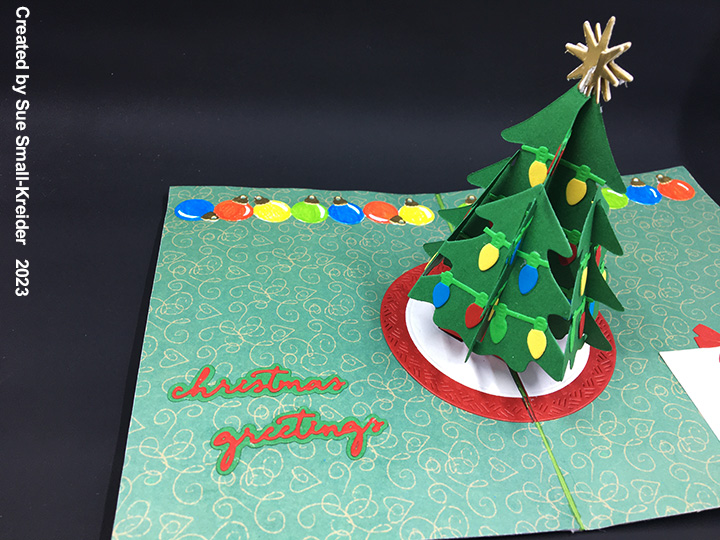
Christmas Tree: From the Christmas Trees Pop Stand, cut one of the large tree die from green cardstock and another from decorative cardstock. Taking the inside tree of decorative paper and tape it from the back to a green tree frame. Glue the extra tree pieces to the back of the taped one to form a double sided tree. Add gingerbread cookies to tree that are cut from the Oven Pop-Up set and decorated with a white gel pen. Cut a pail from red using the pail from the Adirondack Chair Pop-Up set. Glue tree inside the pail’s edge. (Watch installment of tree in video above.)
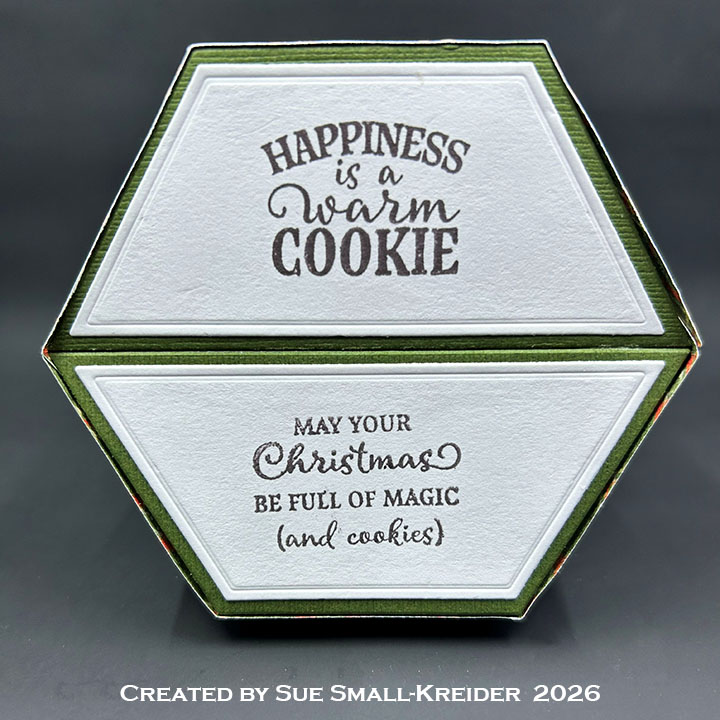
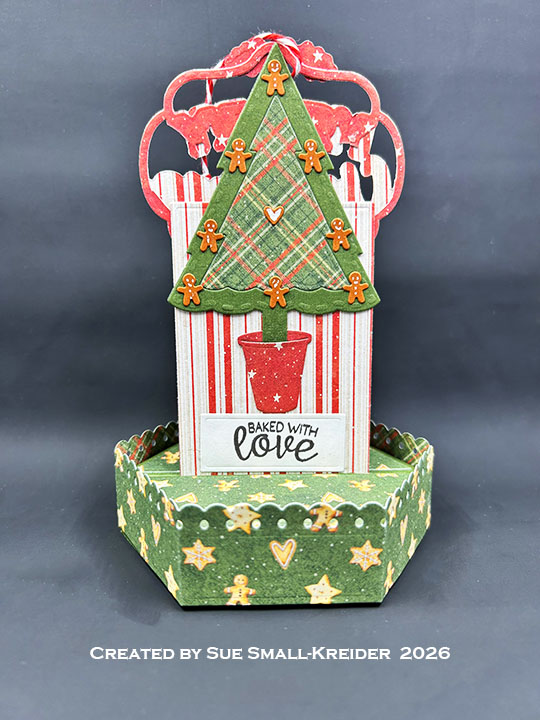
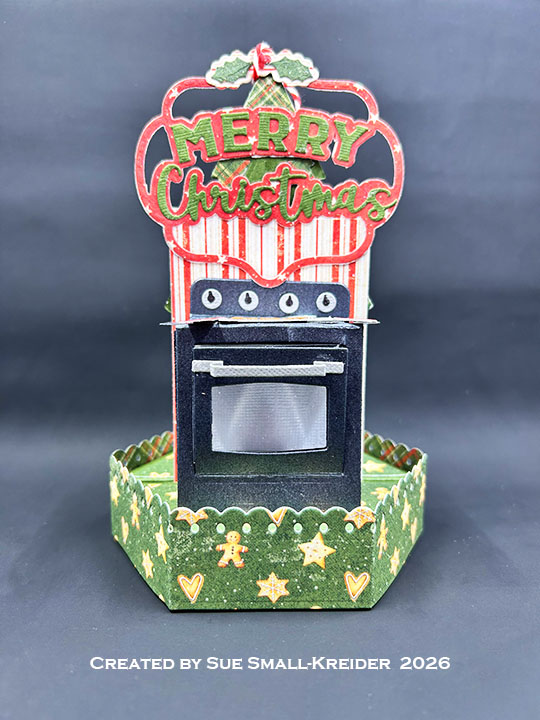
Sentiments: The tree sentiment “Baked with love” is from the Sweet Treats stamp set and stamped on the white rectangle decorator piece with brown ink. The bottom stamped sentiments come from Christmas Wishes and Sweet Treats stamp sets. “Merry Christmas” is die cut using the Merry Christmas Lorna Add-Ons with the base piece cut twice from red decorative paper and the letters cut once from green cardstock. (Watch the video above to see how the die-cut sentiment is installed. For an assembly video of the Lorna Add-ons click here and watch video at the bottom of the linked page.)
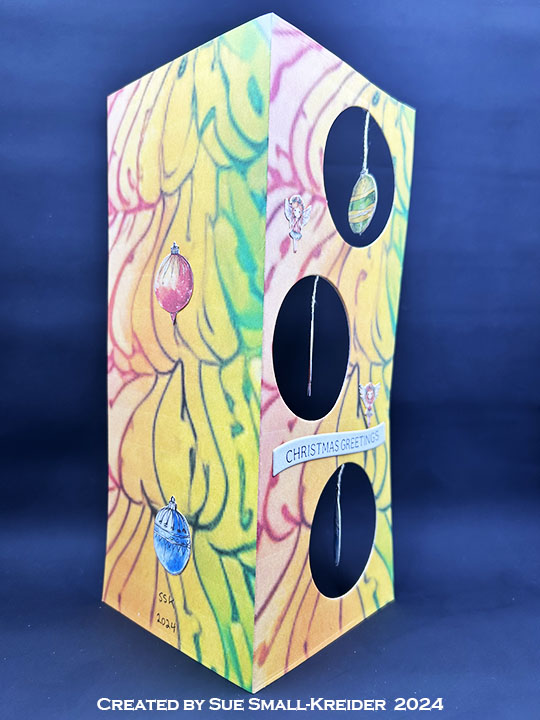
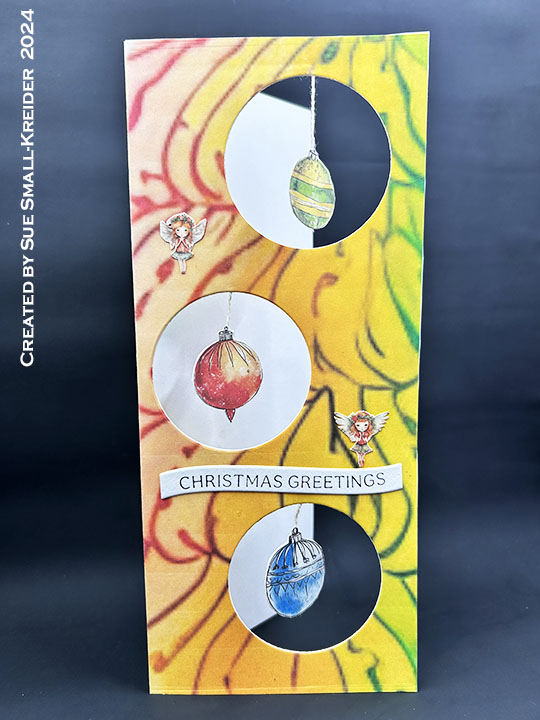
Envelope: The card is about 6 1/4 x 6 1/4-inches so it would require a custom made envelope or, if the striped wall piece was shortened by 1/4-inch, it would fit into a catalog envelope of 6×9-inches.
___________________________________
I hope this inspires you and makes you smile.
Please subscribe, like and leave comments 😊
Follow my YouTube channel, Instagram and Pinterest as well.
___________________________________
Disclaimer: Karen Burniston products are provided free of charge by the manufacturer for review and use. All other items were personally purchased. Compensated affiliate links used where or when possible, meaning I will receive a small percentage commission from these manufacturers at no cost to you. This will allow me to add more content to my YouTube channel and help out a lot. Thank you.
Materials Used:
Dies
- Karen Burniston in cahoots with Riley and Company – Party Stage Add-Ons – 1335
- Karen Burniston in cahoots with Riley and Company – Oven Pop-Up – 1250
- Karen Burniston in cahoots with Riley and Company – Adirondack Chair Pop-Up – 1071
- Karen Burniston in cahoots with Riley and Company – Christmas Trees Pop Stand – 1064
- Karen Burniston in cahoots with Riley and Company – Rectangles – Crosshatch – 1054
Stamps
- Karen Burniston in cahoots with Riley and Company – Clear Stamps – Christmas Wishes
- Karen Burniston in cahoots with Riley and Company – Clear Stamps – Sweet Treats
Papers
- Bazzill – 8.5×11 Cardstock – Rain Forest -5-5104
- Bazzill – 8.5×11 Cardstock – Tiara -18-1002
- Fun Stampers Journey – 8.5×11-inch Cardstock – Pumpkin Bread
- Maja Design – 12×12-inch Double-Sided Cardstock – Christmas Wish- Belonging & A Gift
- Seguras Crafts – 5.5×4.25-inches 105lb Metallic Cardstock – Anthracite
- Black and White Cardstock
- Silver Mirror Cardstock
- A7 (5×7-inch) Envelope – White
Ink
- Memento – Fade Resistant Dye ink – Espresso Truffle
- Sakura – Gelly Roll Pen – Medium – White
Adhesives
- Neutral PH Adhesive by LINECO
- Fine-Tip Glue Bottle
- Double-Sided Tape – 1/8-inch wide
Tools
- Spellbinders Platinum Die Cutting Machine
- Scrapbook.com – Magic Mat
- We R – Precision Press Mini – Stamping Platform
- Stamping Blocks as paperweights
- Scissors
- Tweezers
- Craft Clips
- We R Memories – QuickStick
- Scrapbook.com – Mint Tape
Miscellaneous
- Red and White Baker’s Twine