Triple The Fun With Mini Mini Slimline Pop-Up Cards

This card was made for Craft Roulette #251 whose parameters included for a slimline card, lumberjack colors, hat(s) or cap(s), and lace or doily.

Watch the process video to see how I made this card.

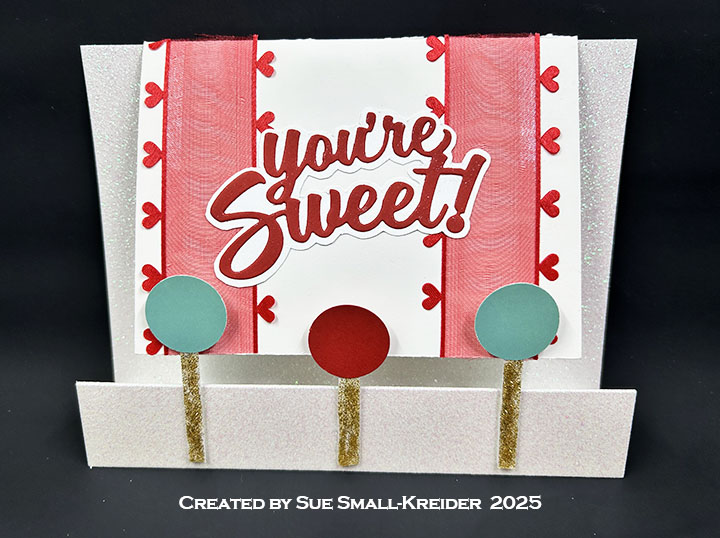
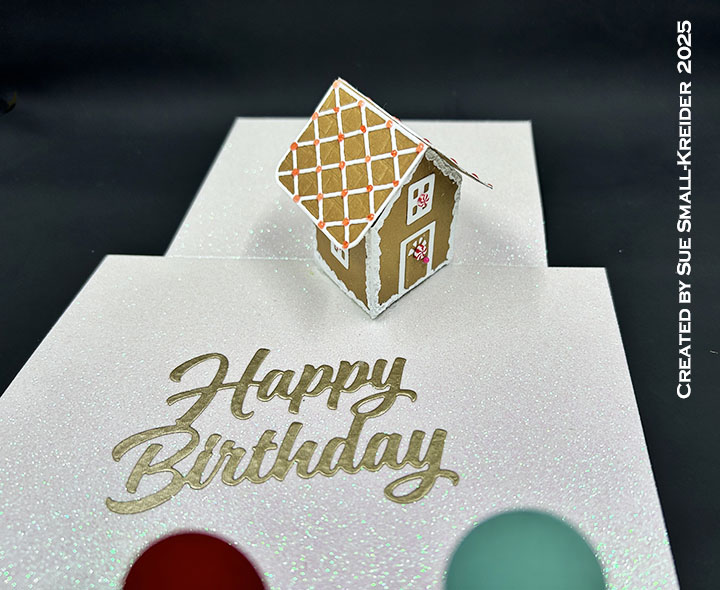
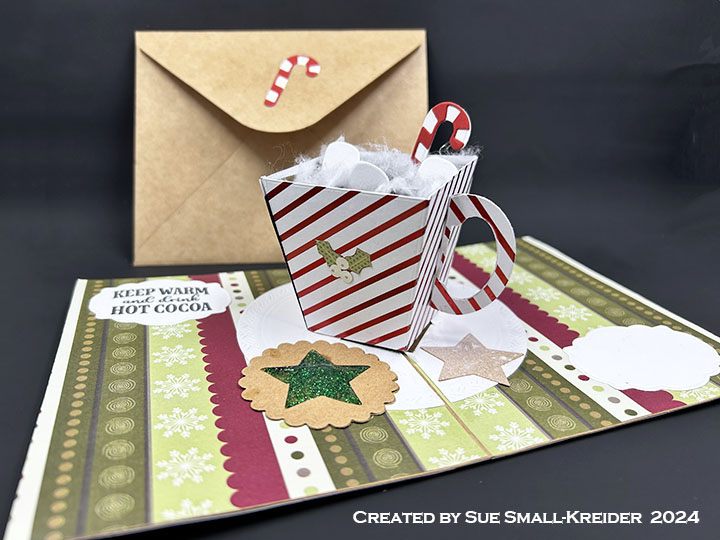
Cardbase:  Each card is made from a 2×6-inch piece of double-sided patterned paper, folded into a top-fold 3×2-inch card.  The box to hold them is made using Karen Burniston’s Candy Hearts Box die.

Sentiments:  The sentiments were all stamped in black ink using the Craft Roulette Funn Sentiments #01 set except for the “Hats off to you” which was handwritten.

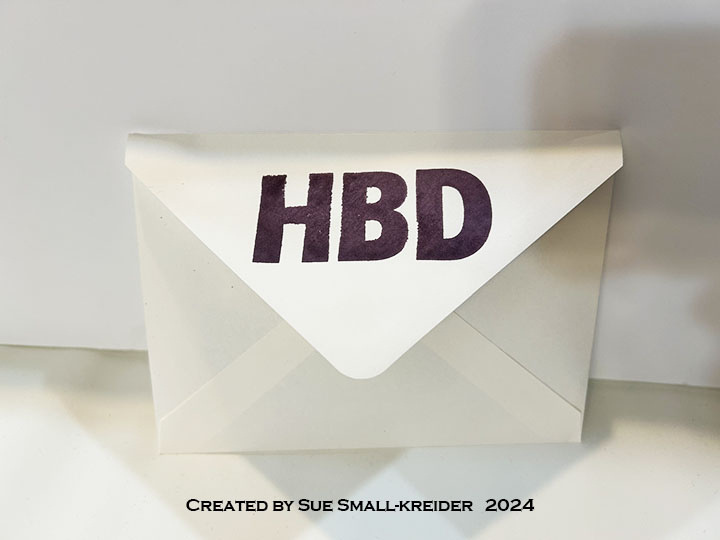
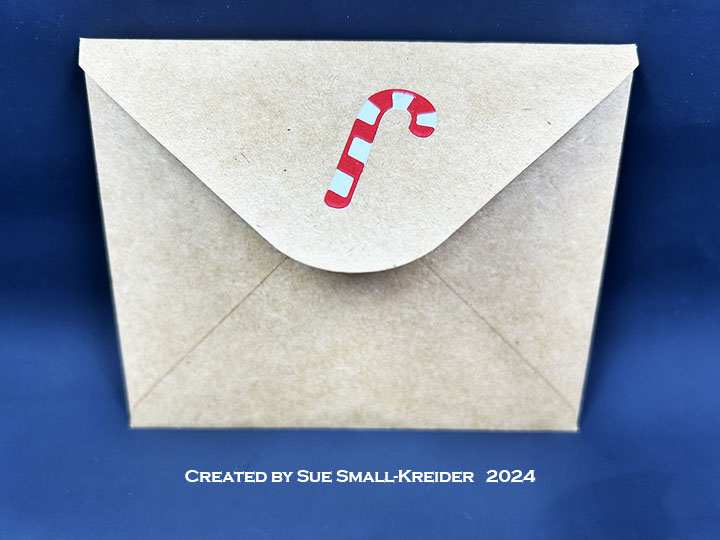
Envelope:  The flatten box with three cards will fit into an A2 (4.25x 5.5-inches) size envelope.

___________________________________

Thank you for experiencing this blog post.

I hope this inspires you and makes you smile.

Please like and leave comments 😊

___________________________________

Disclaimer: Karen Burniston products are provided free of charge by the manufacturer for review and use. All other items were personally purchased. Compensated affiliate links used where or when possible, meaning I will receive a small percentage commission from these manufacturers at no cost to you. This will allow me to add more content to my YouTube channel and help out a lot. Thank you.

Materials Used:

Dies

Stamps

  • Craft Roulette – Clear Stamps – Funn Sentiments #01

Papers

  • Scrapbook.com – 6×8 Double-Sided Cardstock – Noel Patterned Collection
  • Simple Stories – 6×8 Double-Sided Cardstock – What’s Cookin’?
  • Black, Brown, Red, White and Yellow Cardstock Scraps
  • Fraser Papers for William House – A2 Envelope – Genesis Text Milkweed Smooth

Ink

  • Memento – Fade Resistant Dye ink – Tuxedo Black
  • Crafter’s Squares – Metallic Markers .05 in – Blue and Silver
  • Pigma – Mircon 01 Fine Tip Pen – Black
  • Pigma – Mircon 005 Fine Tip Pen – Black
  • Sakura – Gelly Roll Pen – Medium – White
  • Sharpie – Permanent Marker – Ultra Fine Tip – Black, Blue, Brown, Red

Adhesives

Tools

Miscellaneous

  • Nuvo – Aqua Shimmer Brush Marker – Glitter Gloss
  • Ranger – Glossy Accents
  • Cotton String

Button Heart Gate Fold Aperture Birthday Card

This card was made for Craft Roulette #250 whose parameters included a funn fold card, nostalgic colors, blanket element and buttons.

Watch the process video to see how I made this card.

Details and supplies used are below.

Cardbase: Cut a 5.5×12-inch piece of light pink cardstock. Score at 2-inches, 4-inches, 8-inches and 10-inches. Fold as shown in video. On the gate fold panels, place heart die with center points over the fold and die-cut. Repeat on other side lining up the die to make a mirror image. I used the third largest die in Karen Burniston’s Hearts – Crosshatch set.

Buttons: I cut 70 buttons from four shades of pink cardstock. Using thin cotton string, thread the buttons’ holes and hand-tied knots to all of the card front buttons. The buttons were cut using Karen Burniston’s Sewing Charms die set.

Sentiments: All sentiments stamped in black ink on two rectangular panels cut using Karen Burniston’s Rectangles Crosshatch die set. “Happy Birthday is by Rubbernecker Stamps and the other two sentiments are Riley and Company’s Funny Bones stamps.

Envelope: The card fits into an A2 (4.25×5.5-inch) size envelope. A die-cut button was glued to back flap to hint at whats to come.

___________________________________

Thank you for experiencing this blog post.

I hope this inspires you and makes you smile.

Please like and leave comments 😊

___________________________________

Disclaimer: Karen Burniston products are provided free of charge by the manufacturer for review and use. All other items were personally purchased. Compensated affiliate links used where or when possible, meaning I will receive a small percentage commission from these manufacturers at no cost to you. This will allow me to add more content to my YouTube channel and help out a lot. Thank you.

Materials Used:

Dies

Stamps

  • Riley and Company – Funny Bones Stamps – Red Rubber Stamp – RWD-1119- Do Something
  • Riley and Company – Funny Bones Stamps – Clear Stamp – RWD-1259-You Are Far Too Special
  • Rubbernecker Stamps – Red Rubber Stamp – 0218 SO – Happy Birthday

Papers

  • DCWV – 12×12 Textured Cardstock Stack – Brights
  • Core’dinations – 12×12 80lb. Textured Cardstock – Candy Shop Canvas
  • Recollections – 8.5×11 65 lb. Cardstock – White
  • Fraser Papers for William House – A2 Envelope – Genesis Text Milkweed Smooth

Ink

  • Memento – Fade Resistant Dye ink – Tuxedo Black
  • Pigma – Mircon 005 Fine Tip Pen – Black

Adhesives

Tools

  • Die Cutting Machine
  • Paper Trimmer
  • Bone Folder
  • Score Board
  • Scissors
  • Paper Masking Tape
  • Tweezers
  • Pencil
  • Art Gum Eraser

Miscellaneous

  • Thin Cotton String

A Pop-Up Zoyfold Birthday Card

This card was made for Craft Roulette #249 whose parameters included a zoyfold card, elegant colors, front door and three circles. (This is my second zoyfold card. Click here to see my first.)

Watch the process video to see how I made this card.

Details and supplies used are below.

Cardbase: The cardbase is really a blend of two cardbases together. The larger card is a 5×7-inch landscape/horizontal z-fold card with an almost square 4 1/2x 5 1/2-inch card for a joyfold card Hence the newly coined card fold – the zoyfold (The term was coined by Mary Gunn Funn and Irene “Hattrick” Smith on the Craft Roulette Members Show #244.) Watch the process video for assembly instructions. The back of the card is covered with striped paper and a scalloped rectangle from the Karen Burniston’s Rectangles and Labels – Crosshatch die set.

Gingerbread House: (Watch the assembly videos for the Tiny House Pop-Up and Gingerbread Tiny House Add-ons at the bottom of each of the linked pages.) I used Nuvo Jewel Drops, Nellie’s Choice Snow Effects and adhesive backed peppermint candies to decorate the gingerbread house before attaching the house to the card with hot glue.

Sentiments: All sentiments are by Karen Burniston. ”You’re Sweet!” and “Happy Birthday” die cuts. The envelope sentiment is from the Sweet Treats stamp set.

Envelope: The card fits into an A7 (5x 7-inch) size envelope.

___________________________________

Thank you for experiencing this blog post.

I hope this inspires you and makes you smile.

Please like and leave comments 😊

___________________________________

Disclaimer: Karen Burniston products are provided free of charge by the manufacturer for review and use. All other items were personally purchased. Compensated affiliate links used where or when possible, meaning I will receive a small percentage commission from these manufacturers at no cost to you. This will allow me to add more content to my YouTube channel and help out a lot. Thank you.

Materials Used:

Dies

Stamps

Papers

  • PinkFresh Studio – 8.5×11 Essential Glitter Cardstock 250 GSM – Glacier
  • Stampin’ Up – 12×12 Double-Sided Cardstock – Marbled Elegance
  • Matte Gold Hammered Fabric Paper
  • Brown, Green, Red and White Cardstock
  • Recollections – A7 Envelope – Cream

Ink

  • Memento – Fade Resistant Dye ink – Tuxedo Black
  • Pigma – Mircon 01 Fine Tip Pen – Black
  • Sharpie – Permanent Marker – Ultra Fine Tip – Red

Adhesives

Tools

  • Die Cutting Machine
  • Paper Trimmer
  • Bone Folder
  • Score Board
  • Stamping Blocks
  • Scissors
  • Paper Masking Tape
  • We R Memories – QuickStick
  • Tweezers
  • Hot Glue Gun

Miscellaneous

  • Kat Scrappiness – Rainbow Dot Sprinkles
  • Nellie’s Choice – Snow Effects
  • Nuvo – Aqua Shimmer – Glitter Gloss
  • Nuvo – Jewel Drops – Strawberry Coulis
  • Scrapbook.com – Pops of Color – Glitter-Champagne
  • Stampin Up – Real Red & White Adhesive-Backed Peppermints
  • 2-inch-wide Red Organza Heart-Edged Ribbon

A Pop-Up Tag Card with a Nautical Theme

This card was made for Craft Roulette #248 whose parameters included a tag(s) , Disney colors, January element, and branch (es) or (ing). I used a Craft Roulette stamp set and two Karen Burniston dies die sets.

Watch the process video to see how I made this card.

Cardbase:  Using Karen Burniston’s Tag Book Pop-Up die set, I cut two of the large tag frames from heavy weight light blue cardstock and two more from darker blue lightweight cardstock. The rectangular hinge die I cut once from light blue cardstock. The dark blue pieces I trimmed a 1/16-inch off all edges and then glued the dark blue on top of the light blue. The hinge was glued onto the inside of the light blue panels. (Watch Karen’s assembly video for her Tag Book Pop-Up.) You can cut two of the large tags from patterned paper to cover over the hinge on the inside. (It is easier to do the patterned paper background now than after you’ve glued in the yellow pop-up piece as I show in the process video above.) There are a number of decorator dies that come in the Tag Book Pop-Up Set such as the chain rope and hole protectors.

Pop-Up Panels: Cut two of the inside die piece from lightweight yellow cardstock. Cut two sets of the decorating strips die from dark blue. Follow the assembly instructions in her video.

Nautical Elements: The nautical elements of a ship, life preserver, anchor and ship’s wheel are all die cut and stenciled using dies from Karen Burniston’s Cruse Charms. (You can watch Karen’s assembly video for these charms at the bottom of this linked page Cruse Charms.) The chain rope borders and dark blue background mats are all dies in the Tag Book Pop-Up die set. The tags have red and white baker’s twine tied to them.

Sentiments:   The “Happy Birthday” and HBD sign are stamps in the Craft Roulette Funn Friend #1 stamp set. The “HBD” letters and yellow shade were cut using the stamp set’s coordinating dies.

Envelope:  The card fits into a purchased A6 (4.5x 6-inches) size envelope or larger.

Below is the Craft Roulette Community Showcase show on which I originally made this card.

___________________________________

Thank you for experiencing this blog post.

I hope this inspires you and makes you smile.

Please like and leave comments 😊

___________________________________

Disclaimer: Karen Burniston products are provided free of charge by the manufacturer for review and use. All other items were personally purchased. Compensated affiliate links used where or when possible, meaning I will receive a small percentage commission from these manufacturers at no cost to you. This will allow me to add more content to my YouTube channel and help out a lot. Thank you.

Materials Used:

Dies

Stamps

  • Craft Roulette – Funn Sentiments Clear Stamps – #1

Papers

  • Bazzill – 8.5×11 Cardstock – Tiara -18-1002
  • Concord & 9th – 8.5×11 Cardstock – Harbor
  • Graphic 45 – 12×12 Double-Sided Pattern and Solids Paper – Let’s Get Cozy
  • Recollections – 8.5×11 65 lb. Cardstock – White
  • Dark Blue, Red and Yellow Cardstock

Ink and Watercolors

  • Memento – Fade Resistant Dye ink – Tuxedo Black
  • Pigma – Mircon 005 Fine Tip Pen – Black
  • Ranger – Tim Holtz – Distress Watercolor Pencils – Hickory Smoke
  • Sakura – Gelly Roll Pen – Medium – White
  • Sharpie – Permanent Marker – Ultra Fine Tip – Red & Yellow
  • Stampin’ Up – Classic Ink Pad – Real Red

Adhesives

Tools

  • Spellbinders – Platinum Die Cutting Machine
  • Paper Trimmer
  • Bone Folder
  • Stamping Platform
  • LDRS – Stampendable Stamping Tool
  • Stamping Blocks used as paperweights
  • Scissors
  • Paper Masking Tape
  • Waterbrush

Miscellaneous

  • Red & White Baker’s Twine

Accordion Birthday Card For A Crafty Friend

This card was made for Craft Roulette #247 whose parameters included a card for a crafty friend, pretty paper colors, bell(s) or belle(s) element, and something gold. I used Craft Roulette stamp sets and Karen Burniston dies.

Watch the process video to see how I made this card.

Cardbase:  Cut three of the large die from the Landscape Rectangle Accordion die set from heavy weight cardstock. Cut three of the same die from thin decorative papers. Trim out the center pivot panel and side tab to form the decorative frames. Glue frames onto the larger panels. (I used a pretty patterned paper of blue, lavender and green for the center frame and coordinating lavender paper for the other two frames.)

Fence:  Watch the assembly video at the bottom of this linked page Fence Add-Ons for a how-to on adding the fence into the accordion frame. (I used coordinating striped paper to cover gray cardstock fence pieces before i glued the fence in place.) The bluebell flowers are from the Fence Add-Ons die set.

People: The people were stamped using Craft Roulette’s Funn Friend stamp sets #1 and #2. They are colored with blended watercolor pencils. Using some teal colored twine, I tied a multi-looped bow with a small gold bell onto the card frame.

Sentiments:  On the third panel is the poetic crafty birthday sentiment which was embellished with hand-drawn balloons and a hint of glitter gloss. The sentiment is from the Craft Roulette Funn Sentiments #1 stamp set. The “Happy Birthday” and HBD sign are stamps in the Funn Friend #1 stamp set. “Crafty Friend” was hand written.

Envelope:  The card fits into a purchased A7 (5x 7-inches) size cream envelope. The back flap of the envelope was stamped with “HBD” (Happy Birthday) in a plum colored ink.

___________________________________

Thank you for experiencing this blog post.

I hope this inspires you and makes you smile.

Please like and leave comments 😊

___________________________________

Disclaimer: Karen Burniston products are provided free of charge by the manufacturer for review and use. All other items were personally purchased. Compensated affiliate links used where or when possible, meaning I will receive a small percentage commission from these manufacturers at no cost to you. This will allow me to add more content to my YouTube channel and help out a lot. Thank you.

Materials Used:

Dies

Stamps

  • Craft Roulette – Funn Friends Clear Stamps – #1 and #2
  • Craft Roulette – Funn Sentiments Clear Stamps – #1

Papers

  • Bazzill – 8.5×11 Cardstock – Tiara -18-1002
  • Bazzill – 8.5×11 Cardstock – Gummy Bear 6-6105
  • BoBunny – 6×8 Single-Sided paper – Bee-utiful You Collection
  • Recollections – 8.5×11 65 lb. Cardstock – White
  • Light Lavender Cardstock
  • Recollections – A7 Envelope – Cream

Ink and Watercolors

  • Gel Pens – Blues and Purples
  • Memento – Fade Resistant Dye ink – Tuxedo Black
  • Pigma – Mircon 005 Fine Tip Pen – Black
  • Ranger – Tim Holtz – Distress Watercolor Pencils – Carved Pumpkin, Chipped Sapphire, Festive Berries, Hickory Smoke, Mowed Lawn, Mustard Seed, Tattered Rose, Vintage Photo
  • Stampin’ Up – Classic Ink Pad – Perfect Plum

Adhesives

Tools

  • Spellbinders – Platinum Die Cutting Machine
  • Paper Trimmer
  • Bone Folder
  • Stamping Platform
  • LDRS – Stampendable Stamping Tool
  • Stamping Blocks used as paperweights
  • Scissors
  • Paper Masking Tape
  • Waterbrush

Miscellaneous

  • Craft Consortium – Tis The Season – Gold Metal Bell Charm
  • Fun Stampers Journey – Journey Thread – Beach Breeze

Cocoa Mug Pop-Up Christmas Card

This card was made for Craft Roulette #246 whose parameters included for a holiday card, tree colors, drinking vessel(s), and something from the floor. (Watch the video to find out what was from my floor.)

Watch the process video to see how I made this card.

Cardbase:  I used a purchased kraft paper cardbase that measures 4.25×11-inches when open and folded is an A2 side-fold card measuring 4.25-inches wide and 5.5-inches tall. The four panels were covered with decorative papers from my stash (Sorry, I don’t know the manufacturer of either paper.)

Pop-Up Mug:  I modified the Flower Pot Pop-Up by cutting off the folder over flaps on the flower pot and added a handle cut from the mug die from the Tea and Coffee Pop-Up set. (See the video for how the mug was assembled.) Marshmallows are from the Camping Charms while the candy cane comes from the Stocking Pop-Up.

Cookies: The round, jam-filled two-layer Linzer cookie is cut using a scalloped circle die and small star die. The jam is made with Nuvo Glitter Drops and Glossy Accents.  The star cookie was cut with an embossing die using an embossing sandwich on my die-cutting machine. The powdered sugar is white spray ink.

Sentiments:  On the card front is a die-cut “Merry Christmas” made using just the word shadow and words from the Merry Christmas Lorna Add-Ons set. Inside the card two fancy labels were cut from white cardstock using the Rectangles and Labels – Crosshatch and one was stamped in black with “Keep Warm and drink Hot Cocoa” from the Winter Hugs stamp set.

Envelope:  The card fits into a purchased A2 (4.25x 5.5-inches) size kraft paper envelope. Another candycane was glued to the back flap of the envelope.

___________________________________

Thank you for experiencing this blog post.

I hope this inspires you and makes you smile.

Please like and leave comments 😊

___________________________________

Disclaimer: Karen Burniston products are provided free of charge by the manufacturer for review and use. All other items were personally purchased. Compensated affiliate links used where or when possible, meaning I will receive a small percentage commission from these manufacturers at no cost to you. This will allow me to add more content to my YouTube channel and help out a lot. Thank you.

Materials Used:

Dies

Stamps

Papers

  • American Crafts – 12×12 inch Single-Sided Paper – 341347 Red Holly and Berries
  • Unknown – 12×12 inch Single-Sided Paper – Snowflake Scalloped Borders
  • Unknown – 12×12 inch Single-Sided Coated Embossed Cardstock– Christmas Trees
  • Recollections – 8.5×11 65 lb. Cardstock – White
  • The Paper Cut – 8.5×11 Glossy 10 PT Kromekote Cardstock – White
  • Tonic Studios – Craft Perfect – A4 Sized 104 lb Foiled White Kraft Card – Candy Stripe
  • Browns, Red and White Cardstock
  • Horizon Group – A2 Cardbase and Envelope – Kraft

Ink

  • Avery Elle – White Spray Ink
  • Memento – Fade Resistant Dye ink – Tuxedo Black
  • Sharpie – Permanent Marker – Ultra Fine Tip – Black
  • Stampin’ Up – Stampin’ Write Marker – Chocolate Chip

Adhesives

Tools

  • Spellbinders – Platinum Die Cutting Machine
  • Paper Trimmer
  • Bone Folder
  • Stamping Blocks
  • Scissors
  • Pencil
  • T-Ruler
  • Glue Eraser
  • Paper Masking Tape

Miscellaneous

  • Cotton Ball
  • Nuvo – Glitter Accents – Seasonal Pine
  • Ranger – Glossy Accents

A Treemendous Christmas Challenge

This card was made for Relatively Thoughtful’s A Treemendous Christmas Challenge which uses the free download Treemendous Christmas images.

Watch the process video to see how I made this card.

Cardbase: Using my computer I enlarged one tree image to cover a 9.5×4.25-inch rectangle and then copied the image a second time to print the outside cardbase which I cut down to a 8.75×7.50-inch rectangle. I folded that rectangle in half for a side-fold 3.75×8.75-inch cardbase. I printed a second sheet to cover one panel of the card inside.

Sentiments: I used some Spellbinder’s BetterPress banner sentiments that I had printed and die cut previously. “Christmas Greetings” and “Happy New Year”.

Envelope: The card fits into a #10 business size envelope.

___________________________________

Thank you for experiencing this blog post.

I hope this inspires you and makes you smile.

Please like and leave comments 😊

___________________________________

Disclaimer: Karen Burniston products are provided free of charge by the manufacturer for review and use. All other items were personally purchased. Compensated affiliate links used where or when possible, meaning I will receive a small percentage commission from these manufacturers at no cost to you. This will allow me to add more content to my YouTube channel and help out a lot. Thank you.

Materials Used:

Dies

  • Karen Burniston in cahoots with Riley and Company – Circles – Crosshatch – 1057

Press Plates

  • Spellbinders – BetterPress Plate & Die Set – Mistletoe Greetings Press

Papers

  • Recollections – 8.5×11 65 lb. Cardstock – White
  • Relatively Thoughtful Digital Images – A Treemendous Christmas Challenge

Ink

  • Pigma – Mircon 01 Fine Tip Pen – Black
  • Computer Printer

Adhesives

  • Neutral PH Adhesive by LINECO
  • Fine-Tip Glue Bottle
  • Double-Sided Tape – 1/4-inch wide

Tools

  • Die Cutting Machine
  • Paper Trimmer
  • Bone Folder
  • Score Board
  • Spellbinders – BetterPress System
  • Scissors
  • Paper Masking Tape
  • We R Memories – QuickStick

Miscellaneous

  • Thin Cotton String

A Joyful Holiday Card

This card was made for Craft Roulette #244 whose parameters included a joyfold card, bold/quiet colors, family element, and ribbon.

Watch the process video to see how I made this card.

Cardbase: The cardbase is a top-fold slimline (4×9-inch) cut from an 8×9-inch piece of red cardstock folded in half.

Sentiments: The sentiments were computer generated. (You can download the page for free for your own cards.)

Envelope: This card fits into a #10 business envelope.

___________________________________

Thank you for experiencing this blog post.

I hope this inspires you and makes you smile.

Please like and leave comments 😊

___________________________________

Disclaimer: Karen Burniston products are provided free of charge by the manufacturer for review and use. All other items were personally purchased. Compensated affiliate links used where or when possible, meaning I will receive a small percentage commission from these manufacturers at no cost to you. This will allow me to add more content to my YouTube channel and help out a lot. Thank you.

Materials Used:

Dies

Papers

  • Recollections – 8.5×11 65 lb Cardstock – Red and Green
  • Computer Paper

Ink

  • Computer Printer

Adhesives

Tools

Miscellaneous

  • Red Flat Back Gems

A FUNN LetterPress Birthday Card

This card was made for Craft Roulette #243 whose parameters included a a belly band, cottage colors, coat(s) element, and upcycled.

Watch the process video to see how I made this card.

Cardbase: The cardbase is a top-fold A2 (4.25×5.5-inch).

Sentiment: “Hooray it’s your birthday” are printed with the Spellbinder’s BetterPress system, specifically Paint The Town press plates on bisque cotton card panel with BetterPress Black ink. The inside sentiments of “Happy Birthday” and longer rhyme, come from the Craft Roulette Funn Sentiments #01 stamp set and stamped with Memento Tuxedo Black ink.

Envelope: This card fits into an A2 envelope with it’s back flap stamped with “HBD” also from the Craft Roulette stamp set.

___________________________________

Thank you for experiencing this blog post.

I hope this inspires you and makes you smile.

Please like and leave comments 😊

___________________________________

Disclaimer: Karen Burniston products are provided free of charge by the manufacturer for review and use. All other items were personally purchased. Compensated affiliate links used where or when possible, meaning I will receive a small percentage commission from these manufacturers at no cost to you. This will allow me to add more content to my YouTube channel and help out a lot. Thank you.

Materials Used:

Dies & Press Plates

  • Spellbinders – BetterPress of the Month – Paint the Town
  • Spellbinders – Cutting Dies – Party Time Cake

Stamps

  • Craft Roulette – Clear Stamps – Funn Sentiments #01

Papers

  • Recollections – 8.5×11 65 lb Cardstock – White
  • Spellbinders – 5.50×4.25″ (A2) BetterPress Cotton Card Panel – Bisque
  • Colorful Cardboard Packaging

Ink

  • Memento – Fade-Resistant Dye Ink – Tuxedo Black
  • Spellbinders – BetterPress Ink – Apricot, BetterPress Black, Clay, Coastal, Tuscan
  • Pigma – Mircon 005 Fine Tip Pen – Black
  • Sharpie – Permanent Marker – Ultra Fine Tip – Brown

Adhesives

Tools

  • Spellbinders – BetterPress System
  • Die Cutting Machine
  • Paper Trimmer
  • Stamping Platform
  • LDRS – Stampendable Stamping Tool
  • Stamping Blocks as paperweights
  • Scissors
  • Spellbinders – Best Ever Craft Tape
  • Paper Masking Tape
  • Archival Ink Cleaner
  • Micro Fiber Cloth

Miscellaneous

  • Nellie’s Choice – Effect Snow
  • Bakers Twine