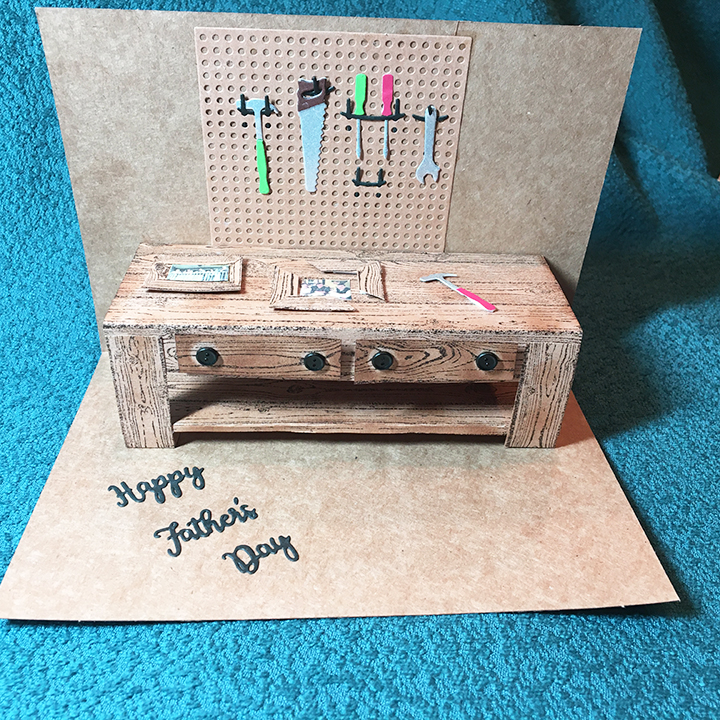
Not every dad has a work bench, but many do and the recipient of this Father’s Day card was a carpenter when his family was young.
Much of my inspiration for this card has come from a variety of Pinterest posts of 3D workbenches and some tool bench and tool box posts on Craftworld.com.
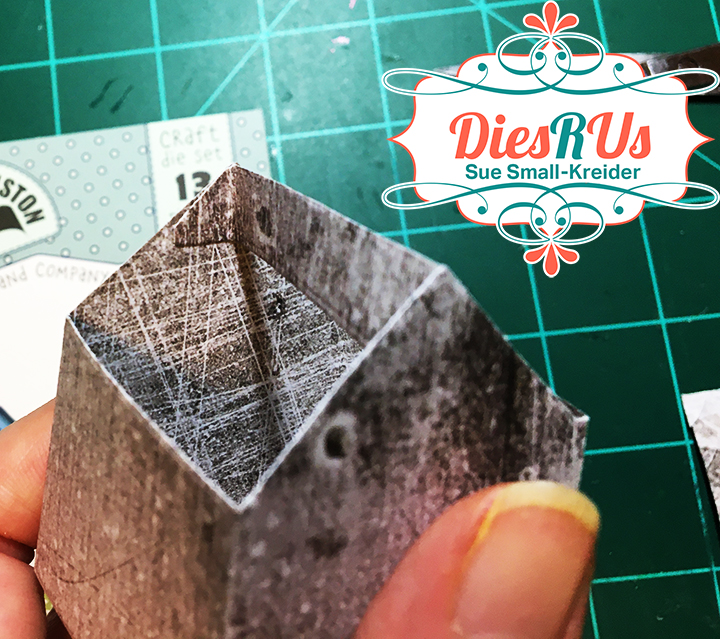
To make the bench, I stamped the Stampin’ Up hardwood stamp twice on light kraft paper. I cut the stamped pieces out to their edges of 5 inches x 5 ½ inches. Next, I scored down the long side at 1/2 inches, 2 ½ inches and 4 ½ inches. Using a pencil on the back side of the scored paper, I drew a line at 3 1/8 inches (5/8 inches below the 2 ½ inch score line). I also drew lines ½ inch parallel to the short edge from the 5-inch edge to the 3 1/-inch pencil line on each side. These pencil marks should form a smaller rectangle that needs to be cut out to from the lower center portion to form the table legs. Save the rectangle to cut two drawer fronts. I punched holes for black button shaped tiny brads to go thru to form the drawer pulls. (And then used foam tape to adhere the drawers to table front after it was all folded and glued to card.) Age the edges of drawers and table top with some Distress ink and a sponge or brush before gluing table into card.
Mean back to the table. All the score lines should be mountain folds with the woodgrain facing up and pencil marks hidden underneath. From the second stamped piece cut the lower shelf 2 ¾ inches by 5 ½ inches. And then score at ½ inches and 2 ½ inches down long side and make into mountain folds. Make pencil marks on back of each leg 3/8 from bottom foot flap. You will glue the edge of shelf at these marks. Once the shelf is glued on to legs the bench is ready to install on card. Mark the inside back of card at 3/8 inches and 2 inches from center fold. These marks are what you will use to glue the tale top and shelf flaps to on inside card back. Once the table is glued to card securely, glue the table leg flaps down.
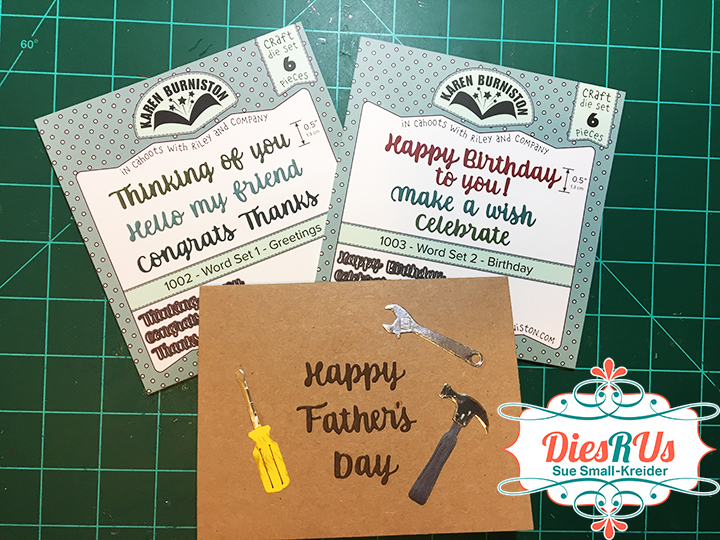
Because I used dies by three different brands, none matched the others in scale, so I adapted the Divinity Designs pegboard and hooks to work with the tiny Tayored Expressions tools set. The picture frames are scraps from the table that I darkened with Distress inks. The tiny photos are of photos of the recipient’s family reduced in Photoshop to ¾ inches wide and printed on computer printer. The “Happy Father’s Day” was die cut from two die sets. Foam tape was used to adhere all items to the table top. All the tools were cut once from silver card and then again from colored or stamped card scrap to cut handles which were then glued onto silver base tools.
The front of the card was made using a mat of graph paper, a computer printed sentiment given to me by the card giver and the die cuts of hammer, nails and saw were from the larger set of tool dies by Sunny Studio.

I used the matching stamps from Sunny Studio to stamp the hammer and saw “x” on the envelope flap. The hammer was stamped first and then, using a post-it tape mask over the saw, I stamped the hammer.
Other Father’s Day cards on my blog
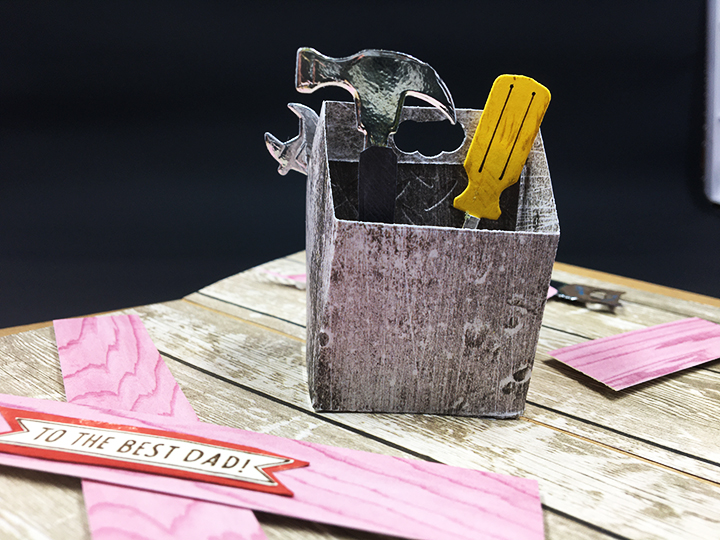
A Tool Box Father’s Day
A Fishing Father’s Day
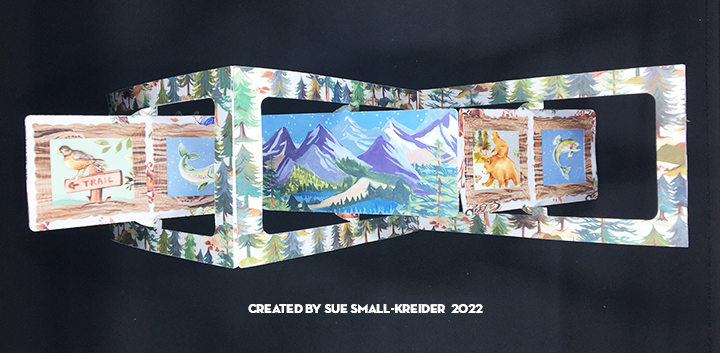
A Father’s Day Waterfall Pop-Up
A Work Bench Father’s Day Card
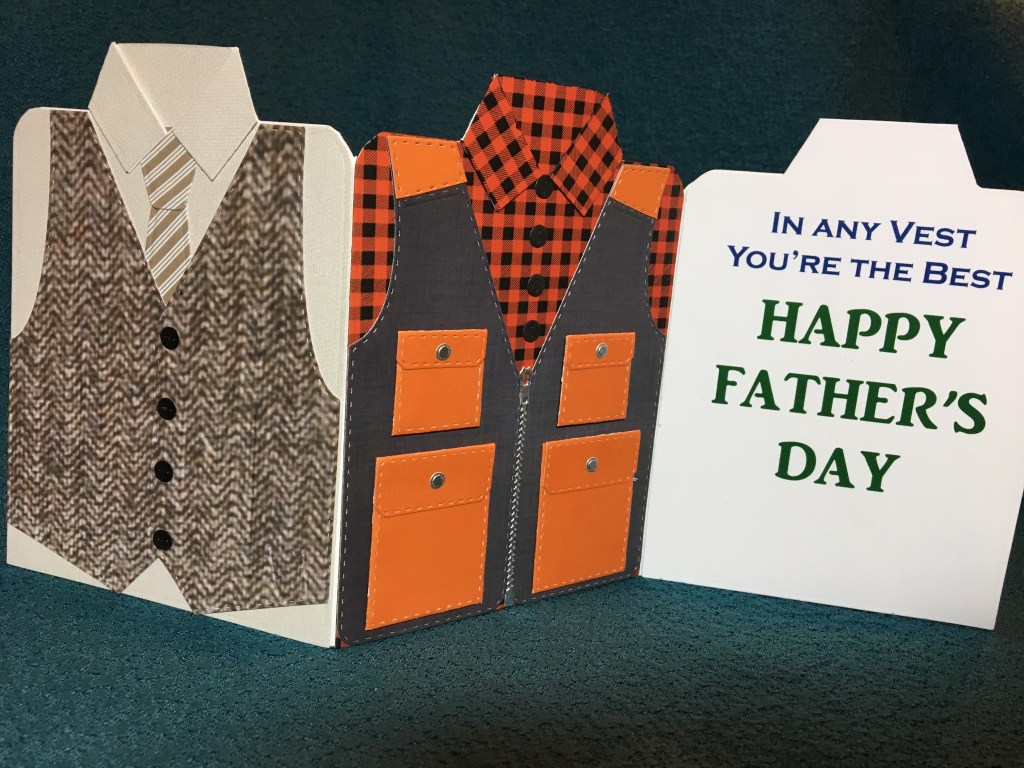
In-Vested Father’s Day Card
Supplies used:
Dies
Stamps
Papers
- AC Cardstock – 5 x 7 in set of 8 kraft cardstock cards & envelopes
- Computer paper
- Colored and silver matte metallic cardstock from my stash
- Graph paper
Inks
Miscellaneous