Welcome to the Horse Farm

Greetings it’s Sue here from the Dies R Us design team with another barn pop-up card.

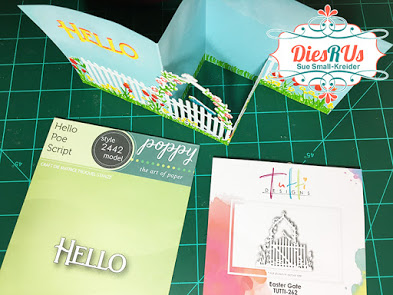
The barn pop-up is Karen Burniston’ Barn Pop Stand as are the Farm Edges fence and hills. The horses are cut and stenciled using Karen Burniston’s Horse, Unicorn and Zebra set and the hat and pitchfork come from her Tiny Accessories 3 set. “Howdy!” sentiment is also by Karen Burniston.

Cut:

2 – largest barn die out of red card stock -Cut doors out of one

1 – small “X” window from white

2 – doors “X” die out of white

1 – door railing out of white

2 – roof trim die out of white

2 – weathervanes at same time by placing silver mirror card back-to-back

3 – hay bales -color with Distress Ink

1 – pitchfork – color with markers

2 – fence out of white

3 – horse bodies

3 – horse manes and tails

1 – cowboy hat from yellow – color with distress inks and markers

2 – Howdy! – one from white and one from yellow

Cut horses and color using stencils on dies and Distress Oxide inks using large Pink & Main blender brush. (This was my first time using this larger inking brush and I was delighted with the ease of inking up the large horse pieces.  The ink blending went smoothly unlike when I use sponge inking tools.)

Glue white “X” frames to window cut outs to form a hay loft door. Using clear tape hinge door onto loft. Glue on roof trim to front and back barn pieces. Glue weather vane to inside back piece.

To assemble the sliding doors, weave the top bar end of the red door piece through the white door railing piece fold the red bar over the railing where indicated and glue bar onto top of door making sure no glue is on the railing. Glue white “X” frame over door. Repeat with second door.

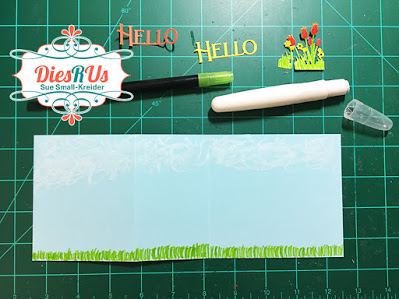
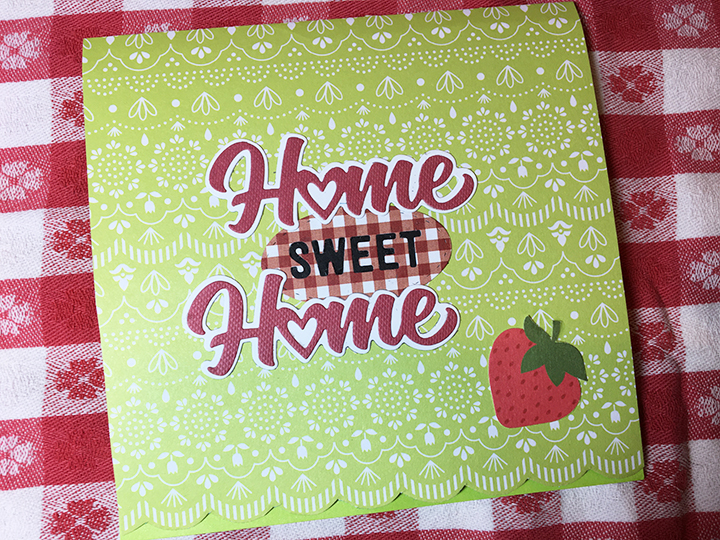
The card base is a 10 x7 inch white heavy weight card stock folded in half to form a 5 x 7 inches card. Panels of printed paper were cut to cover the front and back panels (5 x 7 inches, front and 5 ½ x 7 inches, back).

The inside panels are 4 ¾ x 6 ¾ inches. I positioned and taped the inside panels with clear removable tape so that I could die cut the pop-up flaps to anchor the barn to. Using Scor-tape, I adhered the paper panels to the card base removing the clear tape once all panels were adhered.

Glue barn pieces to pop-up tabs. Cut a 1-inch strip of paper fold in half and fold to create tabs on both bottom edges. Glue two hay bales and pitchfork to one side and glue tabs down inside barn, over the card fold. This will be seen when the barn doors are opened. Glue remaining hay bale behind barn hay loft door.

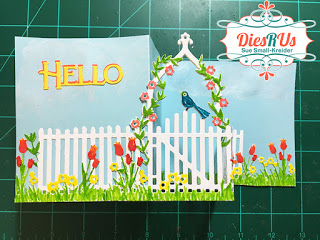
Glue matching printed papers to cover over tabs inside barn. Using only a small dot of glue at inside top of barn glue barn pieces together. Fold fences in half and glue ends inside barn. Glue decorated horses to fence.

Decorate the inside and outside of card with grass and hills cut using Farm Edges die set. (I trimmed off the tractor from my hills and had to cut and move the die to get a longer hill for my 7-inch card.)

The front sentiment is cut twice and slightly off set. I used Distress Oxide ink to color the yellow layer.

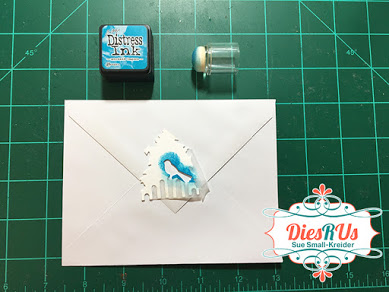
Stamped a vintage stamp of a horse on the back flap of envelope.

Hope this fun card has provided some inspiration for your crafting. 😊

SUPPLIES Used from Dies R Us:

Other Supplies:

  • Red, yellow, green and white cardstock
  • Printed papers from The Paper Studio’s Beach House pad and Graphic 45’s Fruit & Floral pad
  • Clear tape
  • Crayola Signature Brush & Detail Dual-ended Markers
  • Pigma Micron 05 archival ink pen
  • Vintage horse stamp
  • Stampin’ Up – Early Espresso ink pad
  • Ranger – Distress Ink – Fossilized Amber
  • Ranger – Distress Oxide – Ground Expresso
  • Sponge dauber
  • Stamping platform
  • Scissors
  • Tweezers

Don’t forget to come join in the fun at the Dies R Us Challenge Blog. There’s a new challenge theme offered on the 1st and 15th of each month and one lucky randomly drawn winner will receive a gift voucher prize to the Dies R Us Store.  

 For your convenience, all the important Dies R Us links are provided below.

click below for:

STORE

CHALLENGE BLOG

FACEBOOK

INSPIRATION BLOG

FRIENDS OF DIES R US PINTEREST PAGE

A Sweet Spring Card

Hi, I’m Sue SK of Ully Cat’s World and a new member of the Dies R Us Design Team.

 This sweet spring card is a z-fold card that when flat fits in an A2 (4 3/8 in x 5 ¾ in) envelope.

It uses two dies – TuttiDesigns Easter Gate and PoppystampsHello Poe Script.

1.  Cut three gates from white cardstock, saving the waste pieces from between the fence pickets to use as fence rail extensions. (See bottom left gate).

2.  Trim arch and left flowers from gate/fence and save off-cuts from second die-cut.  

3.  Trim off areas of gate to make into fence. (Compare right fence to left gate.)

4.  Repeat steps 2 & 3 with third die-cut.

5.  Glue a fence section to each side of gate. Use the waste pieces as fence rail extensions and flowers to glue the pieces together.

 6.  Fold right side of fence as shown. 

7.  Color the flowers, vine and grass using fine tip markers.

8.  Taking one of the waste birds, trim off excess paper from feet and tail. Cut a wing from scrap and glue onto bird. Color bird.

9.  Glue bird’s eye back into gate piece and glue colored bird over bird on gate. Use fine tip pen to add dot to eye. Glue third scrap bird onto back of bird on gate.

10.  Glue the two waste arch/vine pieces to the back of gate arch. (Red outline) Add fence rails as needed to support where fence pieces were added to gate piece.

11.  Cut a blue piece of cardstock 10 inches x 4 inches. Score at 3 ¼ inches and 5 5/8 inches.

12.  Color the background to add grass using a green marker and clouds using white watercolor crayon.

13.  Die-cut two of the “Hello” sentiment in light and dark colors. Glue light on top of dark, off setting to create a shadow.

14.  Glue left side of fence to left side of card, matching bottom edges and left corner.

15.  Glue right small folded flower/fence section and fold card base onto glued section.

16.  Glue sentiment onto from of card.

Don’t forget to decorate your envelope and get more use out of your dies by using the off-cuts as stencils. 


17. 
Using the waste piece from under the arch and gate, tape closed the bird’s feet and tail. Stencil using ink and sponge dauber.


18. 
With a fine tip pen add details to the bird.

Hope this card brings a smile to your face and provides some inspiration to your crafting.

Click here to see more cards I’ve made with fences.

SUPPLIES Used from Dies R Us:

Tutti Designs - Dies - Easter Gate

Tutti Designs – Dies – Easter Gate

Poppystamps - Dies - Hello Poe Script

 Hello Sentiments

Cosmic Shimmer Specialist Acrylic Glue - 125mL

CosmicShimmer – Specialist Acrylic Glue – 125ml

Sizzix - Big Shot PLUS Machine Only - White and Gray + 10 BONUS DIES

Sizzix – Big Shot PLUS die cutting Machine

Don’t forget to come join in the fun at the Dies R Us Challenge Blog. There’s a new challenge theme offered on the 1st and 15th of each month and one lucky randomly drawn winner will receive a gift voucher prize to the Dies R Us Store.  

For your convenience, all the important Dies R Us links are provided below.

click below for:

STORE

CHALLENGE BLOG

FACEBOOK

INSPIRATION BLOG

FRIENDS OF DIES R US PINTEREST PAGE

Back into the Swing of Things

Back in the Swing -Inside-CU

Coming home after a long stay in the hospital deserves a cheerful card. Home Sweet Home may have a different meaning for those of us who have been fortunate enough to stay healthy during this year of COVID-19, but to a survivor it truly can be sweet.

Back in the Swing -front

The mechanical base for this card come from Karen Burniston’s House and Fence Pop-Up die set, as does the house. The fence, flowers, grass, tree and swinging girl come from the Xcut “Make Me” die set included in the Homemaker Die Cuts & Digi Stamps All-in-one Die & Digi Stamp Kit.

This is about the eighth time I have made this pop-up platform which is easy to use. I spent time exploring how to get the best embossing impression on the house by using fun foam to act as a shim. I inked the house and decoration on the tree and swinging girl with distress inks. The bushes are a scrap decorated with pink dots from the flowers.

Back in the Swing -Inside-wide

The front sentiment is another Karen Burniston die set which makes it quick and easy to create a stylized sentiment. The strawberry comes from the Park Lane paper pad as does the gingham tag inside the card.

I created the inside sentiment on the computer and used distress ink to color the background. If I were to print the sentiment again, I would ink the paper first and then print the words to minimize the black ink blurring.

The folded size of the card is 5 ½ inches by 5 ¾ inches. For interest, the bottom front edge is fussy cut along the printed scalloped edge.

Video is at https://spark.adobe.com/video/Ah8pNrimuXg8u.

Supplies

Dies

Paper

Inks

Miscellaneous

Stable Happy Mail

7 Stable-front-opened

Everyone likes Happy Mail and this one is made for a family of horse lovers. After making a z-fold card using a gate and fencing, I envisioned this horse paddock card.

5 Stable-folded envelope

The card is designed to fit folded into a #10 slimline envelope.

I laid-out the fence first on a 2 ½ inch x 12-inch strip of textured cardstock folding it long-ways in half and then scored at 3 inches and 9 inches. Draw pencil lines for the fence posts at: 1/4 inch, 1 7/16 inches, 1 9/16 inches, 2 7/8 inches, 3 inches, 3 1/8 inches, 4 7/16 inches, 4 9/16 inches, 5 7/16 inches, 6 1/16 inches, 7 7/16 inches,, 7 9/16 inches, 8 7/8 inches, 9 inches,, 9 1/8 inches, 10 7/16 inches, 10 9/16 inches, and 11 ¾ inches. Next, I evenly spaced three boards long-ways and colored in the spaces to be cut out. Using an Xacto craft knife and metal ruler I cut out the colored spaces on the folded over strip measuring 1 ¼ x 12 inches. (I recommend coloring in the cutout spaces as it gets very confusing, and like me, you have to start over again.)  (If you have the Karen Burniston Farm Edges die set or another fence die set, you could piece together the fence rather than cutting it as I did.)

3 Stable-Fence cut

The last cutting is to trim one half of the endposts off (See photo). Once the fence is done being cut, glue the wrong sides together to form a sturdy fence. I used distress inks to color the fence.

4 Stable-Fence endpost

The stable doors are sized to fit the Karen Burniston horse die. I cut three horses and decorated them differently using a black fine tipped pen and watercolor pencils. (Watch the assembly video for decoration ideas and tips). The doors are loosely based of the retired Stampin’ Up barn door set. I cut pieces of woodgrain paper to form the trim pieces and glued. The sliding door hardware is from the Stampin’Up set. Because the door is smaller than the die set door, I had to do a modified cutting of the slots that the door slides on.  I followed the door assembly method described in this video by The Creativity Cave.

6 Stable-front-unopened

The sentiments are from the barn door set. You will need to cut two pieces of wood grained paper for the stable at 4 x6 inches. Once you have cut the door slots out of the front piece, and assembled the door, you can adhere the backing piece with the grain sided facing the back side of the front. (The grain will camouflage the slot cuts. Make sure you don’t glue your acetate door mechanism to the backing piece. Test your door before the glue dries if you need to make adjustments. Stamp and cut out your sentiments and adhere behind the doors. Glue one horse head to be peaking out from the stall door and the glue door onto stable.

7 Stable-front-opened

Glue the fence endposts to the front of the stable once the doors and decorations have been added to the front of the stable. Add the horses to your paddock by gluing one to the back of the front fence and the other by using a strip of clear plastic from packaging (It needs to be sturdier than acetate.) to glue the acetate in place, first glue one side the inside of the side fencing. Fold the paddock flat to one side and see where the plastic strip folded tab ends up on the fence and, then glue to that spot.

You can write your personal message on the back of the stable.

Supplies

Stamps/Dies

Inks/Watercolors

Paper

  • Textured 12 x12 off white card stock from my stash
  • All other papers were from my scrap bin

Miscellaneous

Garden Gate and A Curious Kitty

Garden Gate -Front Cat -bird

An idyllic summer morning with birds singing, a kitten roaming about the garden and the prospect of a cup of tea and good long chat with a friend are what this card reminds me of when I see it.

My friend challenged me to make something special with my new Stampin’ Up stamp and die sets. (So this card is for you, Donna.)

I had seen on Pinterest cards using the Garden Gateway die to create a z-fold card with a fenced in garden. This was my inspiration and starting point.

Garden Gate -side open CU

Fence and Gate: I cut two of the arched gateway and four of just the garden gate without the arch.  Using a craft knife, I trimmed off the cross-piece sections on the small gates and the middle hinge to get the gate to look like a fence. Next, I tried laying out the fence knowing it had to be 11 inches (278mm) long because my card base was 4 inches by 11 inches (102mm x278mm).  I had scored and folded my card base in the middle and then the left side I folded in half to make the z-fold. I needed the gate to be right of the front quarter-fold section on the card base. I wanted the folded corner of the fence at the right of the gate to be at the mid-section of the timed gate. I cut and pieced the fence gluing large end posts over large end posts. I trimmed off the far-right end post as it was too long. The arch seemed to bend too easily, so, I took the second arched gate and glued it to the back of the fence and gate for added strength.

Garden Gate -side open

Card Base Background: I stamped the tree and bistro table and chairs from the Joanna Sheen stamp set and tried a grass stamp with green distress ink but ended up using the grass stencil in the Joanna Sheen set to do the grass. Using a fingertip dauber sponge, I smoothed out the grass. The clouds on the blue cardstock were made with a white Distress Crayon that was slightly blurred with a water brush.

Garden Gate -Front open CU

Garden: I stamped the flowers, kitten and bird on the leftover white cardstock I had leftover from die-cutting the gate and fence pieces. Using watercolor pencils and a waterbrush, I colored the stamped images.  After getting the fence glued together and the folds made to create the garden, I glued the fence sections to the front and back of card base, making sure the free standing fence sections don’t accidentally get glued to anything. I decorated the outside of the fence with flowers making sure the gate could open. For the flowers inside the garden, I attached them with folded pieces of clear acetate. The placement of the inside flowers needs to be done so the card will fold flat so using glue to adjust their placement is useful.

Garden Gate -Front folded

Sentiments: I stamped the sentiments last, using a blue ink. I tried to center the two sentiments on the back so that they were framed by the arch of the gate when closed or opened.

Garden Gate -Envelope Folded

Envelope: The back flap of the envelope was stamped first with the bird stamp in blue on a sticky note, cut out and stuck as a mask over the stamped bird on the envelope flap. Next, I stamped small flowers over the masked bird in green. Once the mask was removed, it looks like the bird is standing amid the flowers.

Garden Gate -Envelope CU

Supplies

Stamps

Inks/Watercolors

Paper

Miscellaneous