
An idyllic summer morning with birds singing, a kitten roaming about the garden and the prospect of a cup of tea and good long chat with a friend are what this card reminds me of when I see it.
My friend challenged me to make something special with my new Stampin’ Up stamp and die sets. (So this card is for you, Donna.)
I had seen on Pinterest cards using the Garden Gateway die to create a z-fold card with a fenced in garden. This was my inspiration and starting point.

Fence and Gate: I cut two of the arched gateway and four of just the garden gate without the arch. Using a craft knife, I trimmed off the cross-piece sections on the small gates and the middle hinge to get the gate to look like a fence. Next, I tried laying out the fence knowing it had to be 11 inches (278mm) long because my card base was 4 inches by 11 inches (102mm x278mm). I had scored and folded my card base in the middle and then the left side I folded in half to make the z-fold. I needed the gate to be right of the front quarter-fold section on the card base. I wanted the folded corner of the fence at the right of the gate to be at the mid-section of the timed gate. I cut and pieced the fence gluing large end posts over large end posts. I trimmed off the far-right end post as it was too long. The arch seemed to bend too easily, so, I took the second arched gate and glued it to the back of the fence and gate for added strength.

Card Base Background: I stamped the tree and bistro table and chairs from the Joanna Sheen stamp set and tried a grass stamp with green distress ink but ended up using the grass stencil in the Joanna Sheen set to do the grass. Using a fingertip dauber sponge, I smoothed out the grass. The clouds on the blue cardstock were made with a white Distress Crayon that was slightly blurred with a water brush.

Garden: I stamped the flowers, kitten and bird on the leftover white cardstock I had leftover from die-cutting the gate and fence pieces. Using watercolor pencils and a waterbrush, I colored the stamped images. After getting the fence glued together and the folds made to create the garden, I glued the fence sections to the front and back of card base, making sure the free standing fence sections don’t accidentally get glued to anything. I decorated the outside of the fence with flowers making sure the gate could open. For the flowers inside the garden, I attached them with folded pieces of clear acetate. The placement of the inside flowers needs to be done so the card will fold flat so using glue to adjust their placement is useful.

Sentiments: I stamped the sentiments last, using a blue ink. I tried to center the two sentiments on the back so that they were framed by the arch of the gate when closed or opened.

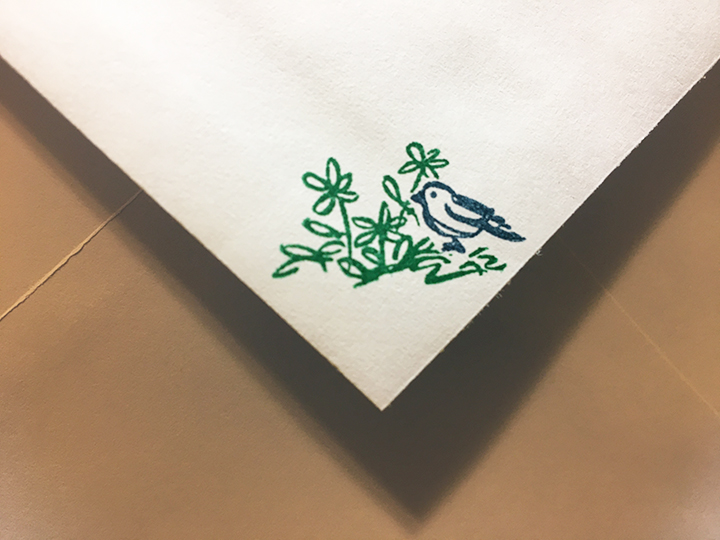
Envelope: The back flap of the envelope was stamped first with the bird stamp in blue on a sticky note, cut out and stuck as a mask over the stamped bird on the envelope flap. Next, I stamped small flowers over the masked bird in green. Once the mask was removed, it looks like the bird is standing amid the flowers.
Supplies
Stamps
- Stampin’Up – Grace’s Garden Photopolymer Stamp Set– 151513
- Stampin’ Up – Garden Gateway Dies – 151512
- Joanna Sheen Cardmaking Collection box kit #8
Inks/Watercolors
- Stampin’ Up Classic Stamin’ Pad – Dapper Denim and Emerald Envy
- Memento – Tuxedo Black ink pad
- Prima Marketing Inc. Watercolor Pencils -The Basics
- Ranger – Distress Ink – Mowed Lawn
- Ranger – Distress Crayon – Picket Fence
Paper
Miscellaneous
- PVA Glue – Cosmic Shimmer Acrylic Glue

Oh, I love, love, love it!!! Best Grace’s Garden card I’ve seen. I’m gonna copy.
LikeLiked by 1 person
I really like the way this looks. I don’t have a kit but might just cut out some of my drawings and add them to a card. Thanks!
LikeLiked by 1 person
I’m thinking any kind of lacy die cut would also work for the “z” top piece.
LikeLiked by 1 person