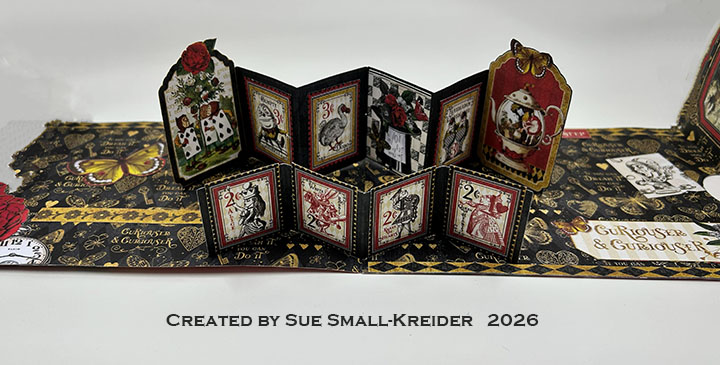
Wanting to make a project with the Graphic 45 Curiouser & Curiouser paper collection, I used the new Karen Burniston Photo Gallery Pop-Up die set along with her previously released Waterfall Card dies to make this Alice in Wonderland themed junk journal folio card.
Watch the process video to see how I made this card.
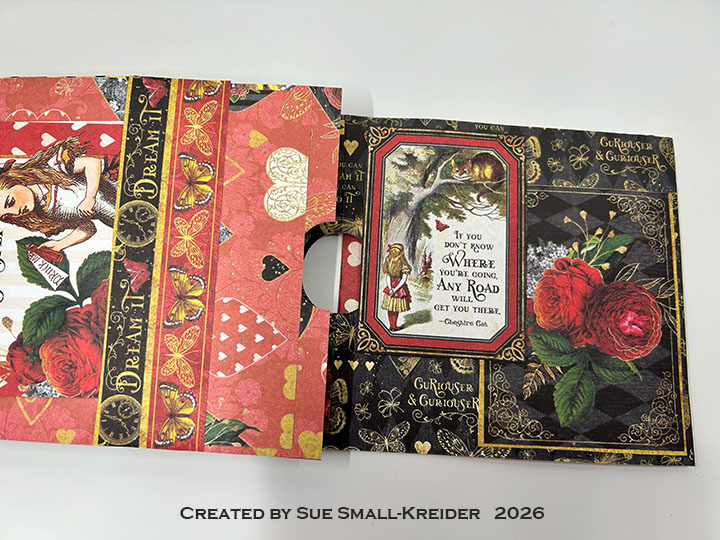
Cardbase: (Watch the video above for assembly instructions.) Cut a 5×12-inch rectangle from double-sided cardstock. Cut another rectangle at 5×7 1/4-inches from the same cardstock. Score both pieces at 6 7/8-inches. Glue tab of short piece to long piece on the 7-inch side to form a 19-inches long trifold cardbase.
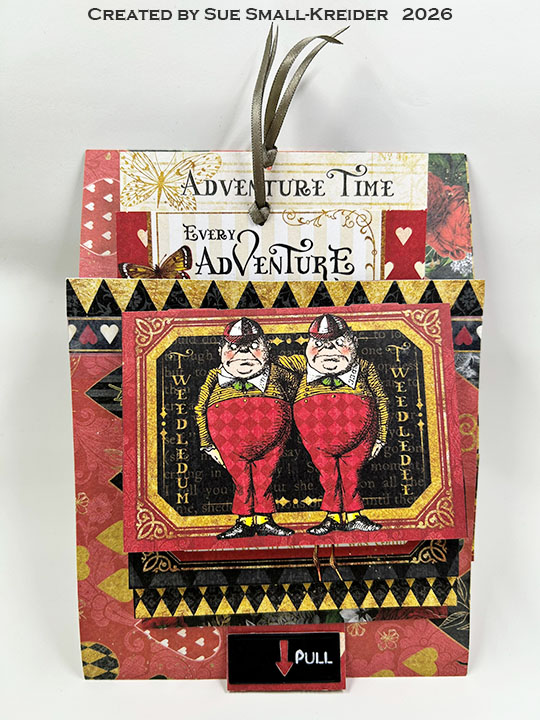
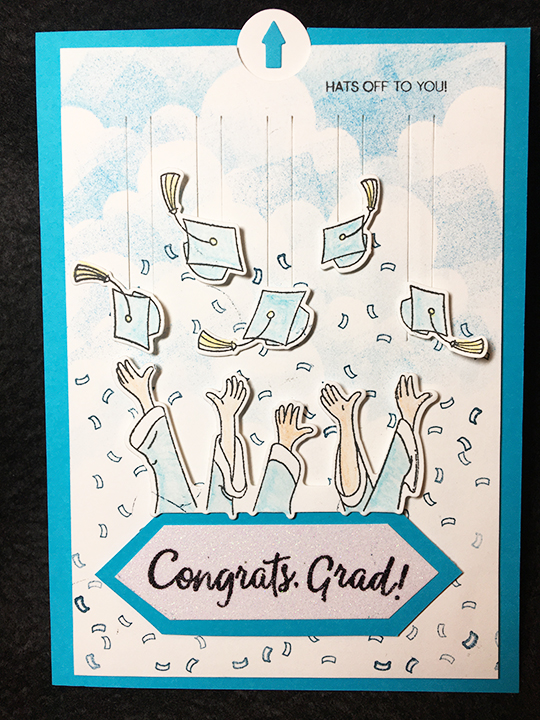
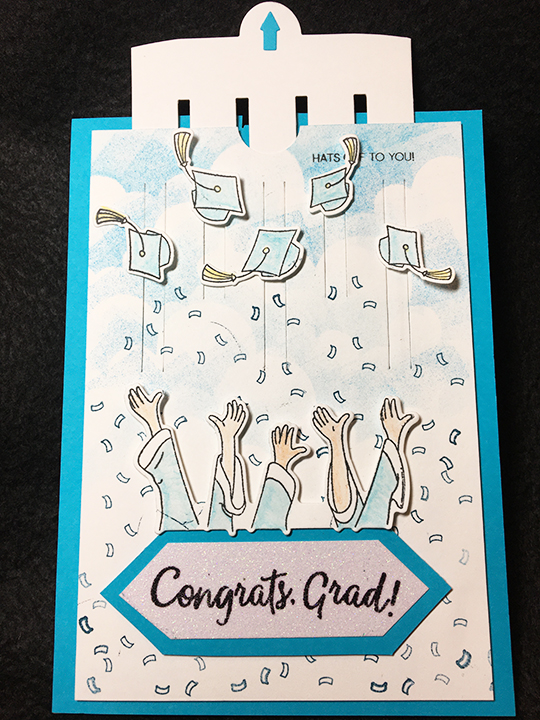
Waterfall Card Front: (Watch the video above for assembly instructions.) on the 5×12-inches cardbase piece, using the half-circle die in the Waterfall Card set, cut the thumb hole in the center of the fold. Cut the waterfall pull strip and base piece from the same patterned cardstock, train the folds and glue the smiley face tabs together. Centering the pull strip over the thumb hole, staple the base piece in place at the bottom corners.Cut four images from the double-sided papers so that they are 2 3/4-inches tall and less than 4-inches wide. Glue images to waterfall base as shown in the video. Attach the “pull” arrow rectangle die cut from the Waterfall Card set to the end of the pull strip.
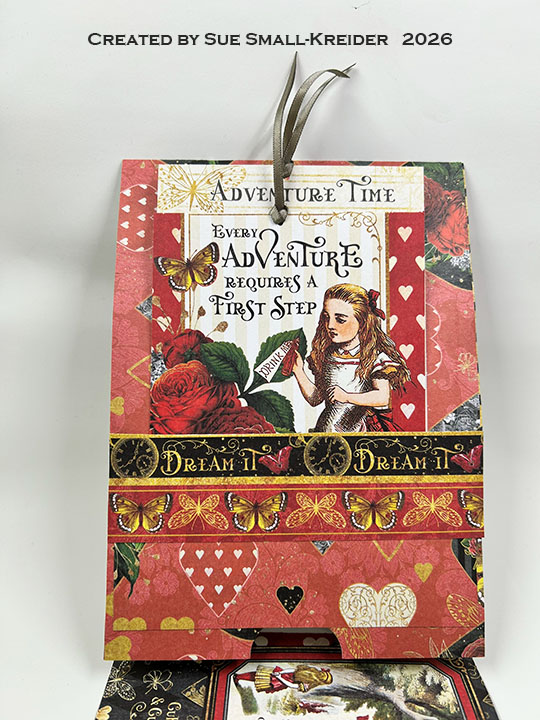
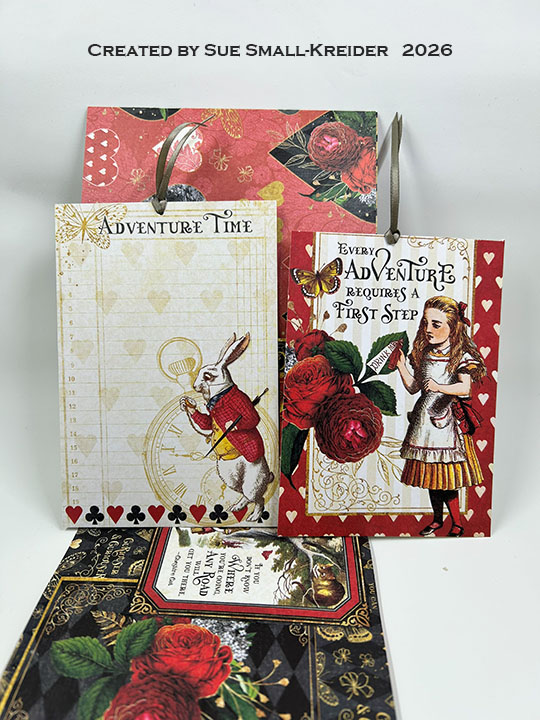
Pocket Tags: Cut one or two images to be tags for the second cardbase panel (My images are 3 3/4×5-inches and 3 3/4×5 1/2-inches.) Punch holes and thread through ribbon as pull strings. Cut and decorate a 2 1/5×4 3/4-inch piece of the same cardstock as the cardbase and glue on three sides to make the tags’ pocket.
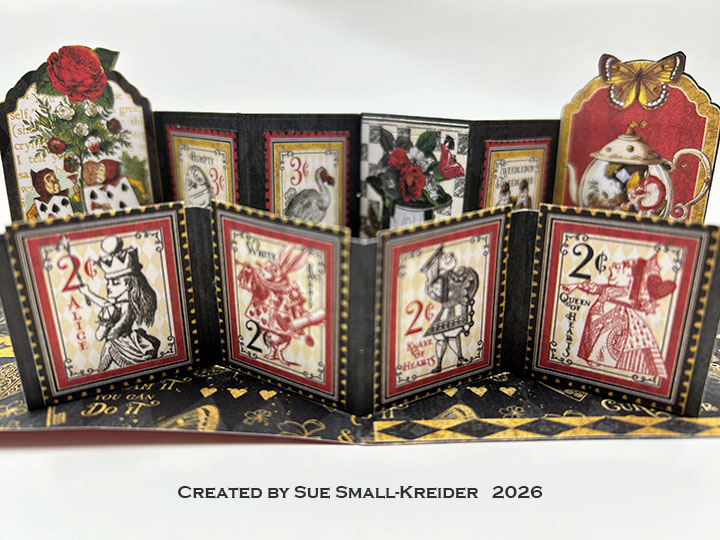
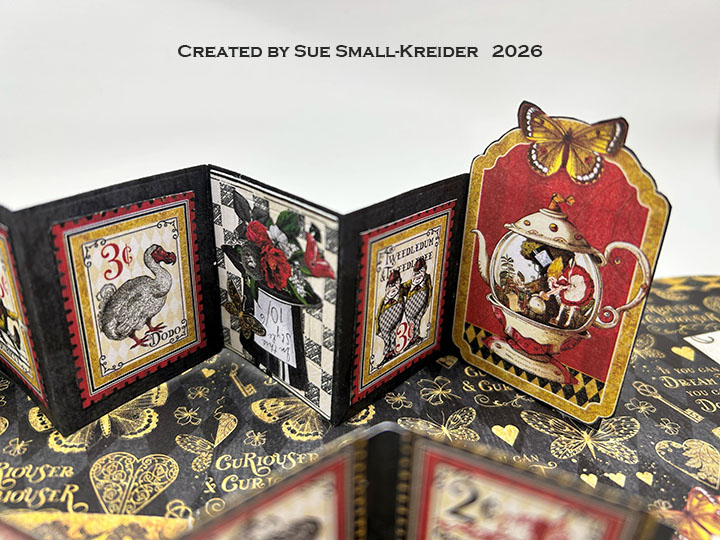


Photo Gallery Pop-Up: (Watch the video above for assembly instructions.) Using the Photo Gallery Pop-Up die set, cut two of the large gallery pieces matching the direction of the pattern paper so that when glued together the pattern is all going the same way. Cut the two triangle tabs from the same paper as the cardbase. Cut one of the smaller galley piece. From the patterned paper cut enough images to fit the two gallery pieces. (Note that many of my images stick up over the top edge of the gallery pieces.) Attach the gallery pieces as shown in the video above. Decorate the cardbase with extra images taking care to not cover folds or create catchpoints.
Envelope: This junk journal folio card fits into an A7 (5×7-inches) envelope.
___________________________________
Thank you for experiencing this blog post.
I hope this inspires you and makes you smile.
Please subscribe, like and leave comments 😊
Follow my YouTube channel, Instagram and Pinterest as well.
___________________________________
Disclaimer: Karen Burniston products are provided free of charge by the manufacturer for review and use. All other items were personally purchased. Compensated affiliate links used where or when possible, meaning I will receive a small percentage commission from these manufacturers at no cost to you. This will allow me to add more content to my YouTube channel and help out a lot. Thank you.
Materials Used:
Dies
- Karen Burniston in cahoots with Riley and Company – Photo Gallery Pop-Up – 1331
- Karen Burniston in cahoots with Riley and Company – Waterfall Card – 1161
Papers
- Graphic 45 – 12×12-inch Double-Sided Paper – Curiouser & Curiouser Collection Pack
- Graphic 45 – 12×12-inch Double-Sided Paper – Curiouser & Curiouser Patterns & Solids Pack
- Black Coated Cardstock Packaging
Ink
- Pigma – Mircon 08 Fine Tip Pen – Black
- Sakura – Gelly Roll Pen – Medium – White
- Sharpie – Permanent Marker – Chisel Tip – Black
Adhesives
Tools
- Die Cutting Machine
- Scrapbook.com – Magic Mat
- Stapler
- Scissors
- Scrapbook.com – Mint Tape
- Tweezers
- We R Memories – QuickStick
Miscellaneous