SHELL-ebrate!

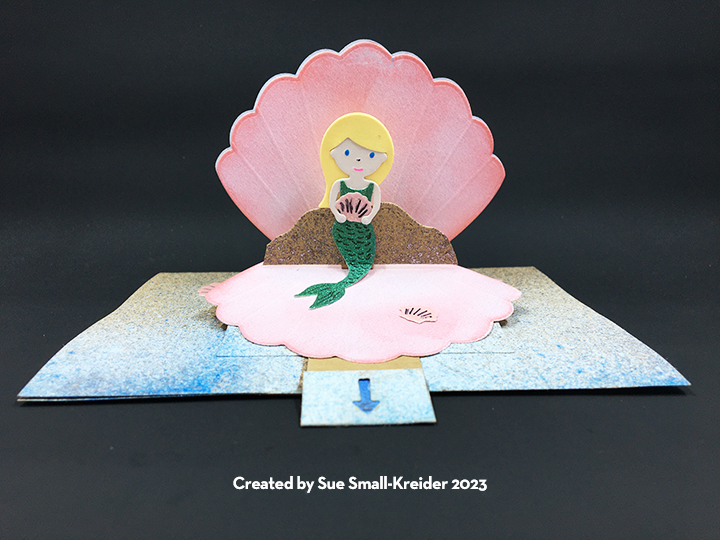
With a nod to Botticelli’s The Birth of Venus painting and Hans Christian Anderson’s The Little Mermaid story, this birthday card is full of birthday shell-ebration!

For this 4 1/4 X 5 1/2-inch card, I used one of Karen Burniston’s new die sets – Small Scenes Bam Box – along with the previously released dies of Happy Birthday, Happy Birthday Shadow, Princess and Mermaid, Celebrate!, Frame Pull-Pop-up and Sea Charms.

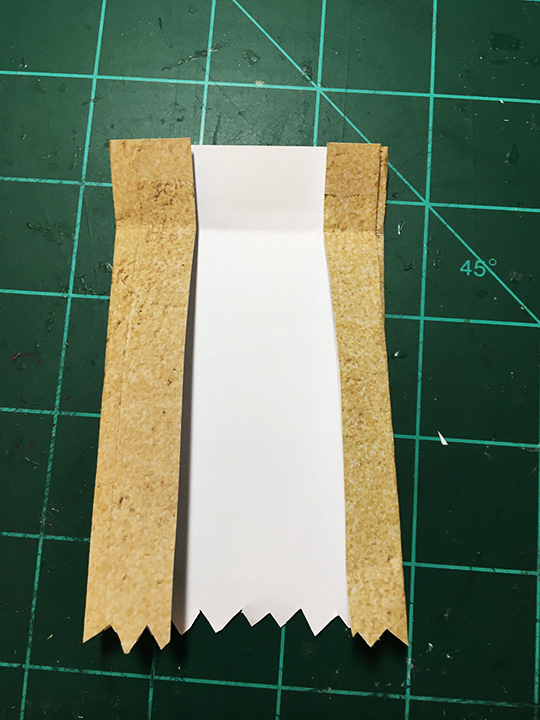
Card Base: Starting with a 5 1/2-inch by 8 1/2-inch rectangle of heavy kraft cardstock, Fold in half to form a top-fold A2 card. Create a finger hole in the center of the bottom edge, cut a half circle through both layers using a 3/4-inch circle punch. Spray both sides of the cardbase to create a sand effect with brown and gold mica and glitter sprays. Let card base dry for an hour or two and place between sheets of paper with weights on top to have it dry flat.

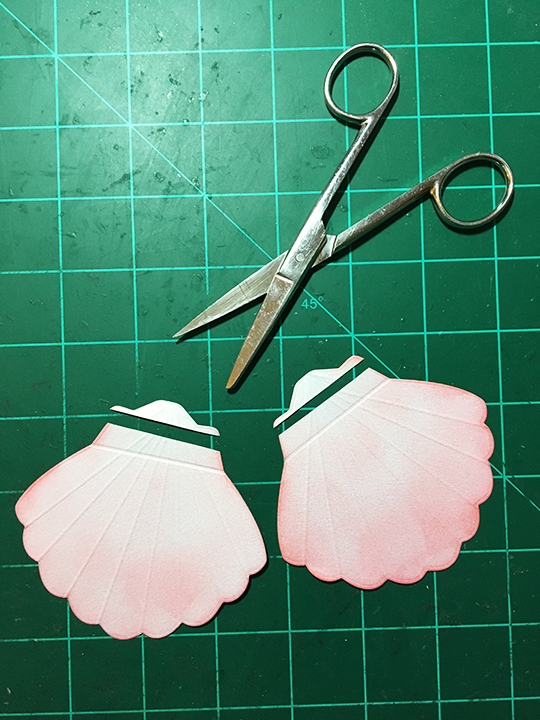
Pop-Up Shell: Cut three shell shapes from creamy white shimmer or pearlescent cardstock using a scalloped shell die approximately 3 1/2x 3 1/2-inches in size. (I used one by Frantic Stamper.) Ink the shimmer side of two of the shells pink and the remaining one blue. Using a score board with one channel marked in black, score the shells from center tip to dips between scallops on the shimmer side of the cardstock. Trim off the end of the pink shells to fit the flap of the mechanism.

Pop-up Mechanism: Watch the die assembly video for the Frame Pull-Pop-up set located at the bottom of the link page. before, cutting the two pieces with smiley faces.  Glue the pull tab to the base piece. Trim off the corners as shown in photo. (I attached the brown kraft base to the card using strong doubled-sided tape instead of staples. Next, I did a light spray of white ink for sea form and a spritz of blue for water along the bottom edge of the card to blend in the base to the card.) Glue one of the pink trimmed shells to the base piece matching the trimmed edge to the tab. Put glue on base shell tab. Add the second pink shell with pink sides together to form top half of pop-up pull frame. Make sure shells are perfectly aligned overreach other. Test to make sure mechanism works properly and let glue dry. Glue blue shell to back of top shell, aligning all the edges. Test mechanism and adjust as needed.

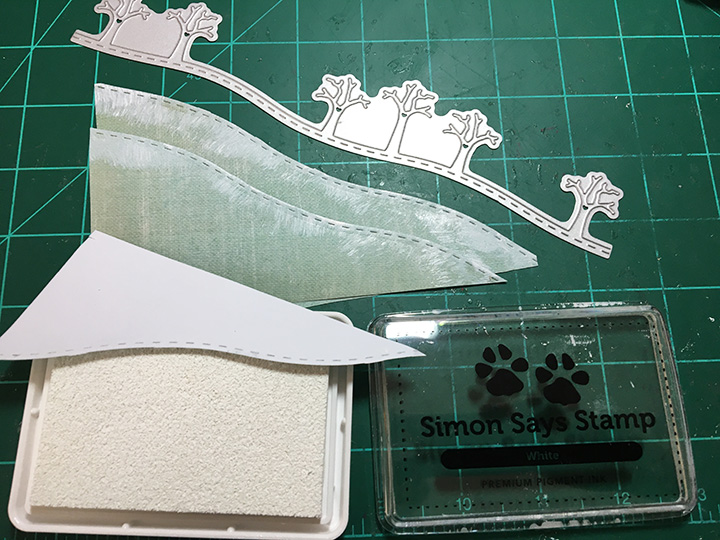
Mermaid on Rocks: Follow the images on the Princess and Mermaid packaging to create mermaid. (I used stencil feature of the die to draw on fish scales on glitter cardstock using a permanent ink marker.) Cut the small pop-up mechanism in the Frame Pull-Pop-up set and glue inside pop-up shell. Glue on rocky backdrop from Small Scenes Bam Box. (I spritzed my rock with brown paint and had to trim the ends to fit inside my shell.) Fold mermaid to fit into the shell and glue in place. Add shell(s) from the mermaid set for decorations.

Sentiments: For “Shell-ebrate!” I used a shell charm from the Sea Charms set and trimmed off “Cel” from the Celebrate! die. The hyphen is cut from the “l.” Inside the card is “Happy Birthday using both the Happy Birthday and Happy Birthday Shadow sets. I cut two large shells from plain white cardstock and scored as shown before for personal message labels on the inside and back of card.

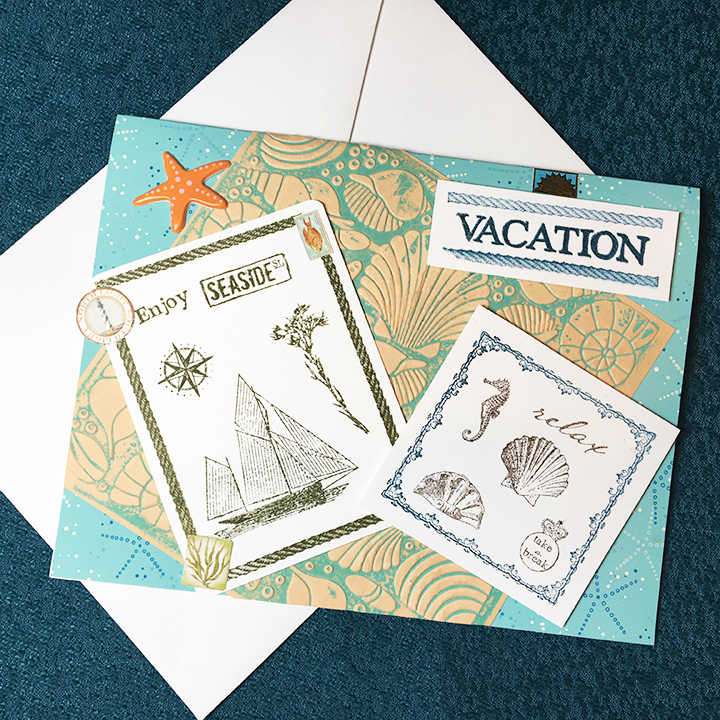
Envelope: The card fits into an A2 invitation envelope. I decorated the back flap with a glitter shell cut using the Sea Charms set.

Thank you for reading this blog post. I hope this inspires you and makes you smile. Please like and leave comments 😊

Materials Used:

Dies

Papers

  • Recollections – 8.5×11 White Gold Shimmer Cardstock
  • Kraft, White, Yellow and Cream Cardstock
  • Glitter Cardstock – Greens and Pink
  • A2 Blue Envelope

Ink

  • Ranger – Tim Holtz – Distress Ink- Abandon Coral and Salty Ocean
  • Sharpie – Permanent Marker – Ultra Fine Tip – Black
  • Gel Pens – Blue, Pink and Black
  • Nuvo – Mica Mist – Antique Gold and Nebula Blue
  • Nuvo – Sparkle Spray – Cocoa Powder
  • Avery Elle – White Ink Spray

Adhesives

Tools

  • Die Cutting Machine
  • We R Memories – QuickStick
  • We R Memories – Scoring Board and Trimmer
  • Sponge Dauber
  • Craft Mat
  • Craft Knife
  • Scissors
  • Stapler
  • 3/4-inch Circle Punch
  • Clips
  • Flat Weights – Stamp Blocks and Cell Phone

Miscellaneous

  • Scrap Newsprint or Cardboard Spray Box

Beach Wedding Card – part 2

A destination beach wedding can be fun. This card came with the design brief for a grandmother unable to attend her granddaughter’s beach wedding. It must reflect the beach theme, be unique and have a place to hold a monetary gift either as a gift card or check.

Using Karen Burniston’s new February 2023 release which has a Beach Bar Add-ons set that converts her previously released Tiny House Pop-up into a topical hut with a thatched roof, I was able to make a beach village scene with a chapel and tiki bar hut. The new release also has a Beach Borders set that provided the flamingos and dancing crabs used on the back of the card. One other new die set in the release provides a 5×7 inch Crosshatch Rectangle and a Label used on the front of the card box.

See yesterday’s Beach Wedding Card – Part 1 for instructions on paper prep, chapel, tiki hut, flamingos and card back decorations.

Gift Card Bag:  The gift bag is cut from the same paper as the card base panels. The rectangle is approximately 5 inches wide by 4 inches tall. Fold the sides at 3/8-inch, 3/4-inch, 1 1/4-inches, 3 3/4-inches, 4 1/4-inches and 4 1/2-inches. Fold bottom 1/2-inch and measure the size of gift card and panel where it will go before trimming the top of the bag in a zig-zag pattern. Glue the three closed side tabs of bag to card panel.

Waves:  The waves are created using three corner-cut pieces of blue paper that are die-cut with the Long Nature Edges rolling hill with trees die. Trim off the trees. Using a white ink pad, rub the wave edges along ink pad edge to add the white foaming part of the waves. Glue waves over corner of card base cutting apart where the fold is on card base. Trim overhanging edges of blue paper.

Closure Band:  Because my decorative papers were thin paper, I used a sheet of double-sided adhesive to adhere the sand patterned paper to the cardstock before die-cutting the heart. The roof fringe die from the Beach Bar Tiny House Add-ons was used to cut eight fringe strips that are glued around the back edge of the heart.

The band is a 1 3/4-inch by 8 1/2-inch strip of cardstock loosely folded around the card with enough wiggle-room to slide it on and off the card. I glued the heart over the seam on the band. The back of the band is decorated with a flamingo border from the new Beach Borders set.

Box: I took two 8 1/2-inch by 11-inch sheets of brown kraft cardstock to make the box. The top is made from a 9 1/4-inch by 7 3/8-inch rectangle and the bottom is made from a 9 1/8-inch by 7 1/4-inch rectangle. Score 1-inch from all sides of each rectangle. Make tabs at the corners by cutting one side of the squares made by the transecting score lines. Glue tabs to inside.

Die-cut a label from the same cardstock using the crosshatch fancy label from the Rectangles and Labels Crosshatch set. This will be a place to put the bride and groom’s name and wedding date.

Because the card is a tight fit, the following method to add a ribbon will provide a way to pull the card out of the box and secure the box closed. Cut a ribbon 60 inches long. Place the center of the ribbon in the center of the bottom of the box with the ribbon running the length of the box.  Place card in the box. Place lid on the box with label tag over the top of the card.  

Flip box over and loop the ribbon over itself to form a cross. Flip box back over and tie a bow on the front to secure the box closed.

You now have a keepsake wedding card from a grandmother to her granddaughter that can be stored in its own box.

Thank you for reading this blog post. I hope this inspires you and makes you smile. Please like and leave comments 😊

Materials Used:

Dies

Papers

  • The Paper Studio – 12 x12 inch Paper Pad – Beach House
  • Brown Kraft Cardstock – 8.5×11 inches
  • White, Black, Matte Gold, Blue and Pink Paper and Cardstock Scraps

Pens & Ink

  • Pigma – Mircon 01 – Black
  • Gelly Roll – Gel Pen – White
  • Staples – Liquid Stix – Hot Pink Chisel Nose Highlighter
  • Mechanical Pencil
  • Simon Says Stamp – Premium Pigment Ink – White

Miscellaneous

Beach Wedding Card – part 1

Beach Wedding Card – Part 1

Welcome to our Karen Burniston Products – KB Riley LLC February 2023 Release Blog Hop. (See details at the end of this post and blog list.)

A destination beach wedding can be fun. This card came with the design brief for a grandmother unable to attend her granddaughter’s beach wedding. It must reflect the beach theme, be unique and have a place to hold a monetary gift either as a gift card or check.

Using Karen Burniston’s new February 2023 release which has a Beach Bar Add-ons set that converts her previously released Tiny House Pop-up into a topical hut with a thatched roof, I was able to make a beach village scene with a chapel and tiki bar hut. The new release also has a Beach Borders set that provided the flamingos and dancing crabs used on the back of the card. One other new die set in the release provides a 5×7 inch Crosshatch Rectangle and a Label used on the fronts of the card and box.

Card Base: Cut a 10×7 inch cardstock rectangle and score at 2 1/2-inches and 7 1/2-inches. Fold the side panels inward to make a 5×7 inch gate-fold card base. Cut a 10×7 inch decorative paper rectangle and then cut into panels as shown below and adhere to inside of card. Cut similar panels of decorative paper for the outside of card. (My paper had a path of sand going diagonal through the center panel. This determined the path of the waves and placement of buildings on the card.)

Paper Prep: Because my decorative papers were thin paper, I used a sheet of double-sided adhesive to adhere the paper to a piece of cardstock before cutting out the roofs and tiny house pieces of for the chapel and tiki hut.

Chapel:  The assembly of the chapel starts with the Tiny House base with its windows and doorway cut out while still flat using the arched door from the Church School Tiny House Add-ons for the doorway and the rectangular door from the Tiny House Pop-Up for the windows.(Make sure you cut the front door from the gabled side with the bottom tab to make this building open in the direction shown.) I cut the bell from some silver foil packaging I’d saved.

Assemble the tiny house as directed in assembly video. Follow assembly video for the church tower. Add the roof fringe after the roofs are attached to their bases. I used four layers of fringe for the main roof and two layers for the tower roof. I trimmed the tower roof fringe to almost half. (Wait to adhere your buildings to your card until both are completed. It is a tight fit with the bell resting on top of the tiki hut when the are folded closed.)

Tiki Hut: Assemble the tiny house as directed in assembly video. Follow assembly video for the beach bar hut. I used three layers of fringe for the hut roof. The hut’s counters and their posts are cut from brown cardstock. The glasses are part of the Beach Bar Add-ons set which I colored the drink onto and glued to the window frames. There is a sand dune die that will let you add the flamingos or other decorations off the sides of the hut. (The sides must be the ones that have the bottom tabs that attach the hut to the card.)

Flamingos:  Each of the buildings has two flamingos attached. The Beach Bar Add-ons set has two different flamingos which come with a stencil feature to the dies to color their wings, eyes and legs. I used the bow tie from the Wedding Charms’ groom to make these flamingos into wedding guests.

Card Back:  A personal message can be written on the back of the card in the dancing blue crabs heart. The crabs are part of the Beach Borders set along with the flamingos used on the back of the closure band.

Card Front: The front two panels were first covered in blue paper and then a crosshatch frame was added to the outer edges. The frame was cut using the two largest dies in the Rectangles and Labels Crosshatch set.

See tomorrow’s Beach Wedding Card – Part 2 for instructions on making the gift bag, waves, closure band and box as well as the materials used list.

Welcome to our Karen Burniston Products – KB Riley LLC February Release Blog Hop. The Design Team have come together with Karen today for a fun blog hop to celebrate the release of 6 new dies. Sneak peeks of the new release started last week, and the dies are available to order NOW!

This release includes:

  • 1 new Charm die sets
  • 1 new Word set
  • 1 new Tiny House Add-Ons sets
  • 1 new Pop-up die sets
  • 1 new Crosshatch die sets
  • 1 new Border die set

Dies are available to order now on the website.

GIVEAWAY:

To celebrate the release Karen Burniston and each of the Karen Burniston – KB Riley LLC Design Team members will be giving away a $25 Gift Certificate to some lucky person who comments on our blog posts, so make sure you join the hop and comment on everyone’s blog post. Winners will be randomly chosen from ALL of the blog hop comments received on our blog posts by Monday, 27th of February 2023. Lots of chances to win some goodies, so just leave a comment on this post or any other blog hop posts to enter! Don’t forget to leave some way for us to contact you, in case you are a lucky winner!

Karen Burniston  

Lois Bak  

Sue Small-Kreider – YOU are HERE

Karen Aicken  

Jennifer Webster  

Frances Byrne  

Suzanne Smit  

Sandy Diller   

Fran Sabad   

Nicky Foden  

Enjoy The Waves At The Beach

It’s Sneak Peek week for Karen Burniston’s February 2023 release!

Standing in waist-high water at the beach letting the waves bounce you up and down is a fun childhood past-time. This card is reminiscent of those sunny, seashore visits. It uses a variety of new beach themed dies from Karen Burniston’s February 2023 release along with some new labels and frames that coordinated with the previously released Label Charm Pop-Up set.  This 3.5 x 8.5-inch card is a quick make and easily fits in a #10 business envelope. 

I started with a 3.5-inch by 8.5-inch rectangle and scored an additional 3.5-inch by 6-inch rectangle at .25-inch to form a tab along the short end. Glue this tab to the back of the large rectangle to form the card base.

Using double-sided tape, I covered the inside and outside panels with coordinating papers. (My favorite technique for using double-sided tape is to place around the edge of the card, lift the ends of the tape so corners are sticky, position the covering paper, you can shift the top paper a bit before you pull all the tape backing paper strips. See tutorial post)

Before I die-cut my Label Charm Pop-Up pivot panel into my card base, I watched the assembly video for the die and cut out the accompanying tabbed frame and label. I also cut out a large frame to edge the front aperture of the pivot panel.  I centered the pivot label charm pop-up die over the front of my card and die cut through all three layers of paper and cardstock. Because of its thickness, I ran it through my die cutting machine twice. 

Besides the frame, there are two additional labels that will fit inside the pivot panel and back tabbed label. For this card, I used the smallest of the new labels with the largest dotted border label from the original set.

Decorate the oval charm with shells from the new Sea Charms set. (I daubed a pale-yellow ink- Antique Linen on the oval charm and dotted with a gold gel pen to give the look of sand. Then I glued on stenciled shells to both sides of the oval charm.) Attach the decorated charm to the oval frame with a jump ring before assembling the pop-out elements of this card. (My jump ring had a rhinestone dangle.)

Fold the charm frame and attached label together as they will go into the card. Place a drop of glue on the frame’s tab and adhere to the back side of the card front label. Glue the blue label to the inside card back panel.

To decorate the card, I used the dancing tiny crabs from the new Beach Borders set. There are eye holes in the die that make it easy to take a white gel pen to stencil in the eyes. I added mouths for fun.

“Enjoy the Waves” come from a coordinating sentiment strip in the paper pad. “At the Beach” is die cut using the new Word Set 16 -Beach Happy Hour.

As with all my cards that are sent in an envelope, I have decorated the back flap with some dancing blue crabs to hint at what’s inside. This is #10 business envelope.

Thank you for reading this blog post. I hope this inspires you and makes you smile. Please like and leave comments 😊

Materials Used:

Dies

Papers

  • Park Lane Paperie – 12×12 Printed Cardstock – Nautical
  • Fun Stampers Journey – 8.5 x 11 Card Stock – Pumpkin Bread
  • Navy Blue and White cardstock scraps
  • Light weight white cardstock
  • #10 Business Envelope – Craft Paper

Pens & Inks

Miscellaneous

One Shell of A Party

Hi it’s Sue of the Dies R Us Design Team with a beachy kind of birthday card.

For this card front I used three of Memory Box new dies –Wood Grain Planks, End of My Rope Set and Grand Spiral Shell.

The card base is a white 7 x 10 inches rectangle fold to 7 x 5 inches. The three shades of blue mats are 6 5/8 x 4 1/2 inches, 6 3/8 x 4 1/4 inches, and 6 x 4 inches.

The wooden planks were cut on gray paper and aged with white and brown ink cubes. Cut from an oatmeal cardstock, the rope frame was inked with a dark brown ink.

The shell has a base cut from mother of pearl holographic cardstock and its top detail piece from white shimmer cardstock. A green gem was glued to the spiral center.

Assembly of the card is mat layers, wooden planks, a glitter white netting, sentiment and shell adhered with foam squares, and finally confetti sequins glued down with a few green gems.

The sentiment is a recycled one from another card.

See the inside of this card by going to Under The Sea.

Hope this fun card has provided some inspiration for your crafting. 😊

SUPPLIES Used from Dies R Us:

Don’t forget to come join in the fun at the Dies R Us Challenge Blog. There’s a new challenge theme offered on the 1st and 15th of each month and one lucky randomly drawn winner will receive a gift voucher prize to the Dies R Us Store.  

 For your convenience, all the important Dies R Us links are provided below.

click below for:

STORE

CHALLENGE BLOG

FACEBOOK

INSPIRATION BLOG

FRIENDS OF DIES R US PINTEREST PAGE

Seaside Vacation

Seaside vacation - front

Need a break? Jump-into this vacation card and get away, hear the waves gentling coming ashore, the occasional seabird crying out overhead, smell the sea air and feel the grit of the sand beneath your feet.

This fun, A7 sized card came from my desire to make a nautical themed card from my stash of underwater, fishy, and nautical stamps, dies, papers and embossing folders. The papers and embossed/inked background came from one of early papercrafting magazines I purchased – Love Cardmaking issue 4 and its the “By the Shore” embossing folder, stamps and digi papers. I love these papers and have used them for to make a number of cards in years past. Two small stamp sets from Prima Marketing’s Seashore collection at some point made their way into my stash, but never used. Some new to me Stampin’ Up inkpads gave me the excuse to try stamping the small nautical stamps.

After pulling together all the various elements that I might use and having noticed a trend of shapes being layered askew on card fronts, I decided to try the trend. I played with the layout and began by gluing the blue background over the front and back of card. Next, I glued edges of inked embossing folder piece and trimmed off the overlaps that went off the edges. The top is wrapped over the fold and glued on the back.

Seaside vacation - front-cu

Using two different thicknesses of foam squares/dimenisionals, I adhered the stamped pieces to the front. The rectangular card needed somethings to hide the fact the rope border didn’t fully meet-up at the corners. In digging around in my elements caddy, I found some K & Company die-cut sea life images which were all too big for my purposes, but on the packaging were just the right size of images which I fussy cut and adhered to the rope corners. The addition of a puffy orange starfish and a foiled rising sun sticker and, voila, the front was finished.

I had one tiny multi-colored masked and stamped image with the word “Enjoy” which I glued inside the card.  The blue paper on the back of the card didn’t come completely down to the bottom edge so I pieced together a sandy beach to complete the card.

Seaside vacation -inside-envelope

The sailing ship was stamped in blue ink on the back of the envelope.