A destination beach wedding can be fun. This card came with the design brief for a grandmother unable to attend her granddaughter’s beach wedding. It must reflect the beach theme, be unique and have a place to hold a monetary gift either as a gift card or check.
Using Karen Burniston’s new February 2023 release which has a Beach Bar Add-ons set that converts her previously released Tiny House Pop-up into a topical hut with a thatched roof, I was able to make a beach village scene with a chapel and tiki bar hut. The new release also has a Beach Borders set that provided the flamingos and dancing crabs used on the back of the card. One other new die set in the release provides a 5×7 inch Crosshatch Rectangle and a Label used on the front of the card box.
See yesterday’s Beach Wedding Card – Part 1 for instructions on paper prep, chapel, tiki hut, flamingos and card back decorations.

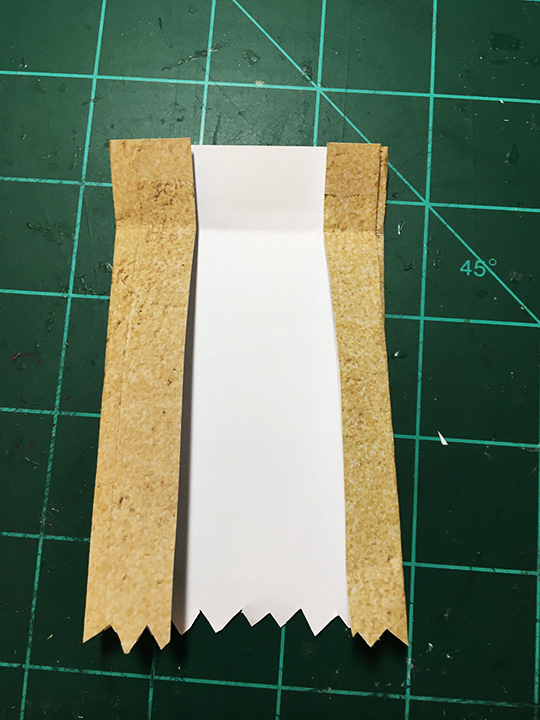


Gift Card Bag: The gift bag is cut from the same paper as the card base panels. The rectangle is approximately 5 inches wide by 4 inches tall. Fold the sides at 3/8-inch, 3/4-inch, 1 1/4-inches, 3 3/4-inches, 4 1/4-inches and 4 1/2-inches. Fold bottom 1/2-inch and measure the size of gift card and panel where it will go before trimming the top of the bag in a zig-zag pattern. Glue the three closed side tabs of bag to card panel.

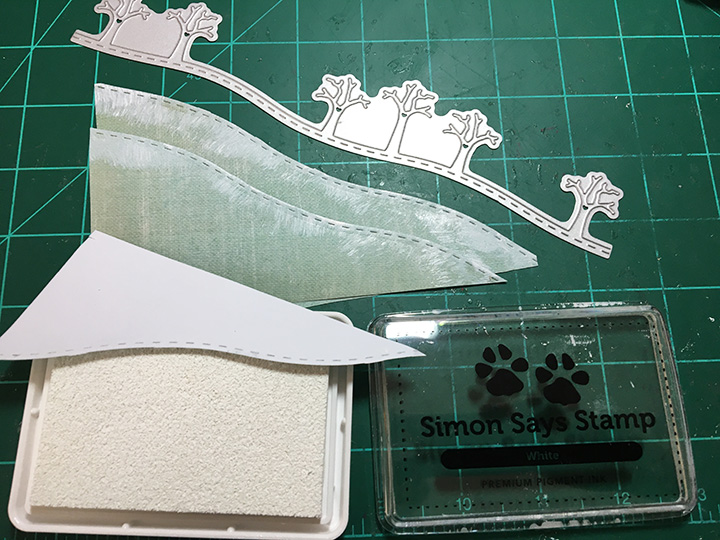

Waves: The waves are created using three corner-cut pieces of blue paper that are die-cut with the Long Nature Edges rolling hill with trees die. Trim off the trees. Using a white ink pad, rub the wave edges along ink pad edge to add the white foaming part of the waves. Glue waves over corner of card base cutting apart where the fold is on card base. Trim overhanging edges of blue paper.


Closure Band: Because my decorative papers were thin paper, I used a sheet of double-sided adhesive to adhere the sand patterned paper to the cardstock before die-cutting the heart. The roof fringe die from the Beach Bar Tiny House Add-ons was used to cut eight fringe strips that are glued around the back edge of the heart.

The band is a 1 3/4-inch by 8 1/2-inch strip of cardstock loosely folded around the card with enough wiggle-room to slide it on and off the card. I glued the heart over the seam on the band. The back of the band is decorated with a flamingo border from the new Beach Borders set.

Box: I took two 8 1/2-inch by 11-inch sheets of brown kraft cardstock to make the box. The top is made from a 9 1/4-inch by 7 3/8-inch rectangle and the bottom is made from a 9 1/8-inch by 7 1/4-inch rectangle. Score 1-inch from all sides of each rectangle. Make tabs at the corners by cutting one side of the squares made by the transecting score lines. Glue tabs to inside.
Die-cut a label from the same cardstock using the crosshatch fancy label from the Rectangles and Labels Crosshatch set. This will be a place to put the bride and groom’s name and wedding date.


Because the card is a tight fit, the following method to add a ribbon will provide a way to pull the card out of the box and secure the box closed. Cut a ribbon 60 inches long. Place the center of the ribbon in the center of the bottom of the box with the ribbon running the length of the box. Place card in the box. Place lid on the box with label tag over the top of the card.


Flip box over and loop the ribbon over itself to form a cross. Flip box back over and tie a bow on the front to secure the box closed.
You now have a keepsake wedding card from a grandmother to her granddaughter that can be stored in its own box.
Thank you for reading this blog post. I hope this inspires you and makes you smile. Please like and leave comments 😊
Materials Used:
Dies
- Karen Burniston in cahoots with Riley and Company – Rectangles and Labels Crosshatch – 1233
- Karen Burniston in cahoots with Riley and Company – Beach Bar Tiny House Add-ons – 1231
- Karen Burniston in cahoots with Riley and Company – Beach Borders – 1230
- Karen Burniston in cahoots with Riley and Company – Church School Tiny House Add-ons – 1220
- Karen Burniston in cahoots with Riley and Company – Wedding Charms – 1218
- Karen Burniston in cahoots with Riley and Company – Hearts – Crosshatch – 1191
- Karen Burniston in cahoots with Riley and Company – Long Nature Edges 2 – 1178
- Karen Burniston in cahoots with Riley and Company – Tiny House – 1157
- Karen Burniston in cahoots with Riley and Company – Word Set 12 – Anniversary – 1137
- Karen Burniston in cahoots with Riley and Company – Tropical Scene – 1038
Papers
- The Paper Studio – 12 x12 inch Paper Pad – Beach House
- Brown Kraft Cardstock – 8.5×11 inches
- White, Black, Matte Gold, Blue and Pink Paper and Cardstock Scraps
Pens & Ink
- Pigma – Mircon 01 – Black
- Gelly Roll – Gel Pen – White
- Staples – Liquid Stix – Hot Pink Chisel Nose Highlighter
- Mechanical Pencil
- Simon Says Stamp – Premium Pigment Ink – White
Miscellaneous
- Neutral PH Adhesive by LINECO
- Fine-Tip Glue Bottle
- Pokey Tool
- Die Cutting Machine
- Scissors
- Craft Knife
- Tweezers
- 60-Inch Piece of 1-Inch-Wide Cloth Ribbon

So ingenious
LikeLike