This card was made for Craft Roulette #255 whose parameters included an A2 card, Valentine colors, February element, and metallic/foil.
Watch the process video to see how I made this card.
Cardbase: I used a purchased cardbase and envelope. The cardbase had a pink plaid exterior with was covered with decorative paper on the card back and a frame mat was cut from red using the Karen Burniston rectangle die so that some of the pink plaid would show.
Sentiments: The “Sweet” sentiment on the card front is front a journaling card from the 12×12 Memory Place paper collection. Inside, a Craft Roulette sentiment stamp was used for “Happy Birthday.”
Envelope: The card fits into an A2 (4.25x 5.5-inches) size envelope with decorative paper strips glued to the back flap.
___________________________________
Thank you for experiencing this blog post.
I hope this inspires you and makes you smile.
Please like and leave comments 😊
___________________________________
Disclaimer: Karen Burniston products are provided free of charge by the manufacturer for review and use. All other items were personally purchased. Compensated affiliate links used where or when possible, meaning I will receive a small percentage commission from these manufacturers at no cost to you. This will allow me to add more content to my YouTube channel and help out a lot. Thank you.
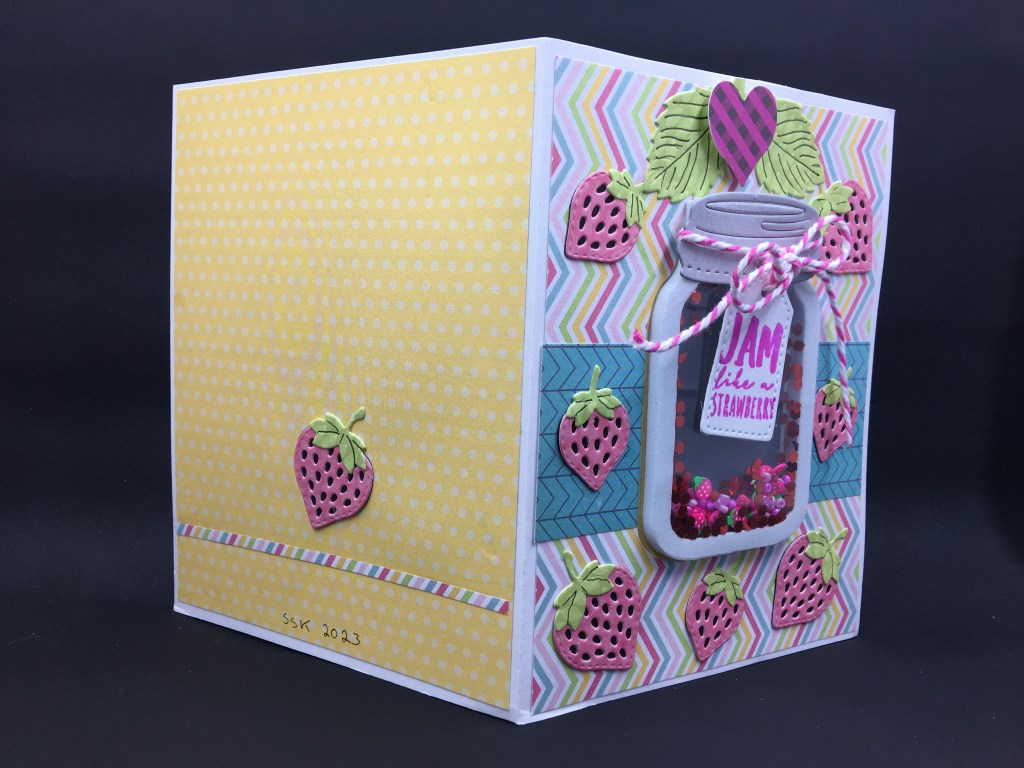
This card was made for Craft Roulette #176 whose parameters included: a split in the middle, jolly colors, a fruit element and a heart.
My inspiration for this card came from the Berry Special die and stamp set that came in the Die Cutting Essentials, issue 103. (This magazine is available on the Craftstash website. Note that there are different country based websites for this online vender. Use the one that works for youto avoid unnecessary currency/customs fees.) It has a stamp that says “Jam like a strawberry” so I immediately thought of a jam jar shaker and went to my Queen and Company stash of shaker kits.
Cardbase: Using a 8.5×5.5 inch rectangle of heavy white cardstock for the cardbase, I folded it in half and used a bone folder to burnish the card into a 4.25×5.5 inch A2 size. The front and back panels of the card are covered with 4×5.25 inch decorative paper rectangles. The front has an additional strip of blue decorative paper near its middle. The back uses a thin strip cut from the front panel paper as decoration. I used the jar frame die to cut the aperture into the card front when only the front decorative papers had been attached. Next, I glued on the inside decorative papers and cut the aperture again.
Shaker: Queen and Company are known for their shaker kits which use pre-cut foam shaker frames with adhesive on both sides and clear acetate covers which take the tediousness out of making shaker cards. For the jar I used two acetate pieces and one foam frame that all had been dusted with an anti-static brush. I peeled off one side of the frame’s adhesive backing and attached a pre-cut piece of acetate. Adding the glitter, seed beads and strawberry slices to the frame, I dusted the next acetate sheet again and peeled off the adhesive backing on the foam frame and attached the acetate to enclose the shaker elements. (The chucky glitter had a lot of static electric charge and jumped to the tiny bits of adhesive at the foam edges.) The shaker is attached to the card by gluing a jar frame cut from the front of the card to the inside of the card and then gluing the shaker to the jar frame.
Decorations: Eight layered strawberries were cut using the Berry Special die set from pink and green patterned paper and black cardstock. The dies cut two stems, large and small strawberry outlines and fronts with seeds cutout as well as a plant stem with large leaves. I also used two of the large leaves on the card front. Seven strawberries are scattered on the card front and one large strawberry on the back. A red plaid paper sticker on a foam dot is at the top of the card front.
Sentiments: Using the stamps from the Die-Crafting Essentials gift set, I stamped in purply-pink ink the sentiment “Jam like a strawberry” on the jar tag which is tied around the jar lid with baker’s twine, and the inside sentiment “Thank you berry much!”
Envelope: Stamped on the envelope flap is “You’re the sweetest!” in purply-pink ink.
Thank you for reading this blog post. I hope this inspires you and makes you smile. Please like and leave comments 😊
Materials Used:
Dies
Queen & Company – Steel Dies – Love Jar
Die Cutting Essentials, issue 103 – Dies – Berry Special
Stamps
Die Cutting Essentials, issue 103 – Clear Stamps – Berry Special
Shaker Elements and Frame
Queen & Company –Foam Shaker & Acetate – Love Jar
Red Chunky Glitter
Pink Seed Beads
Dress My Craft – Polymer Clay – Strawberry Slices
Papers
Queen & Company – 6×6 Double-Sided Mat Stack – Flirty Florals
Crate Paper – 6×6 Single-Sided Patterned Paper Pad – Cool Kid
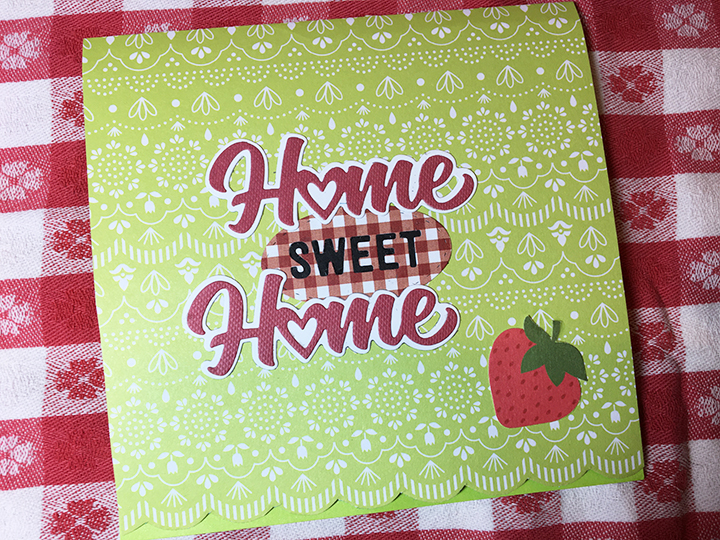
This card was made for Craft Roulette #159 whose parameters included a card type of my choice (5×7 pop-up), strawberry fields colors, plaid or gingham and a chair. It has a conservatory or fancy potting shed feel to it.
Karen Burniston’s Adirondack Chair die set is the basis for this pop-up card that uses a slipcover to convert it into an overstuffed chair. (See this video for technique.) I made a template that I can used to quickly create the slipcover.
First I glue strips of paper to the from of the legs and then glue the arms on pushing down the over hang tips to form the rounded arm fronts. Glue the slip cover to the chair base.
The plants are die cut from the Garden Charms set while the dog is from the Doghouse die set. All are popped-up using cubes made from strips of matching cardstock. The tiny bright strawberries are clay shaker elements adhered with dots of glue.
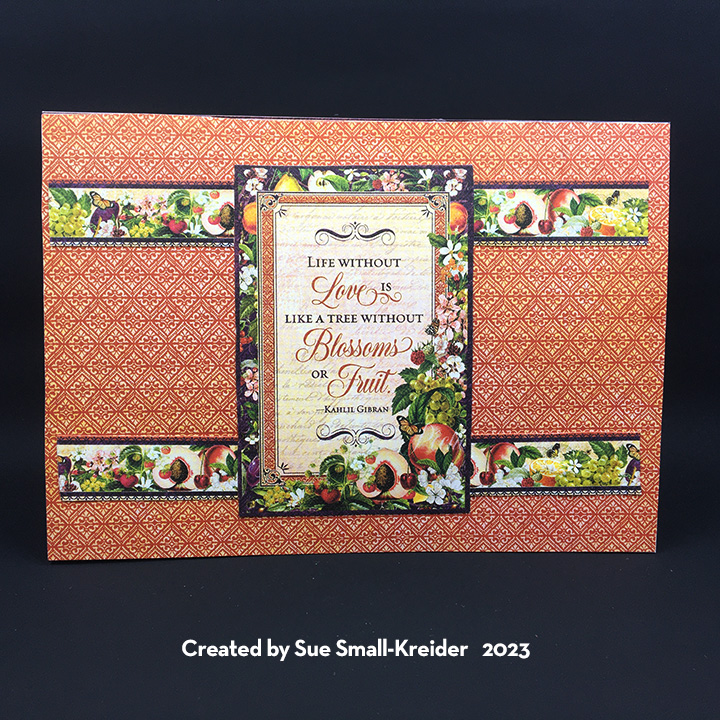
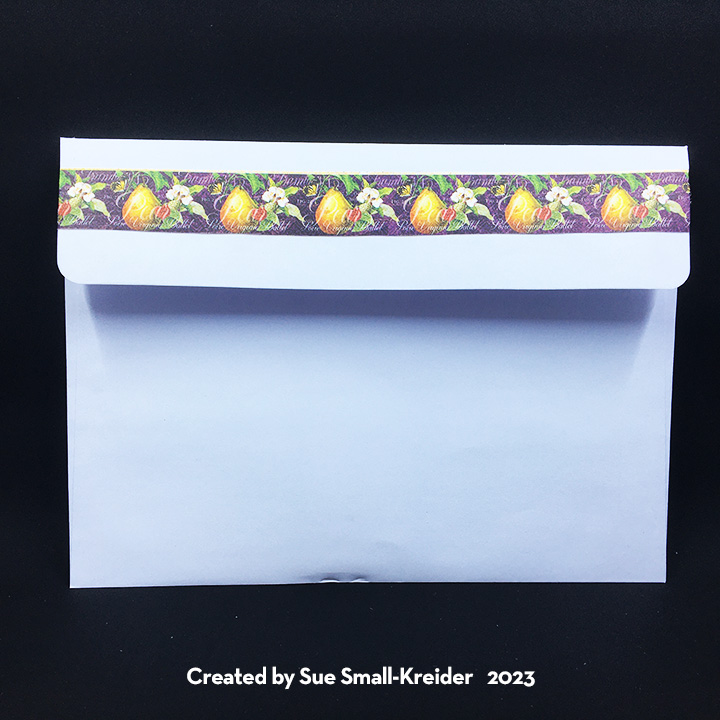
I like being able to use one paper collection for an entire card for coordinating colors and designs. The Graphic 45 Fruits & Flora set was perfect for this in the 8×8-inch size. It had journaling tags and border that were just the right scale for this card and envelope flap.
Coming home after a long stay in the hospital deserves a cheerful card. Home Sweet Home may have a different meaning for those of us who have been fortunate enough to stay healthy during this year of COVID-19, but to a survivor it truly can be sweet.
This is about the eighth time I have made this pop-up platform which is easy to use. I spent time exploring how to get the best embossing impression on the house by using fun foam to act as a shim. I inked the house and decoration on the tree and swinging girl with distress inks. The bushes are a scrap decorated with pink dots from the flowers.
The front sentiment is another Karen Burniston die set which makes it quick and easy to create a stylized sentiment. The strawberry comes from the Park Lane paper pad as does the gingham tag inside the card.
I created the inside sentiment on the computer and used distress ink to color the background. If I were to print the sentiment again, I would ink the paper first and then print the words to minimize the black ink blurring.
The folded size of the card is 5 ½ inches by 5 ¾ inches. For interest, the bottom front edge is fussy cut along the printed scalloped edge.