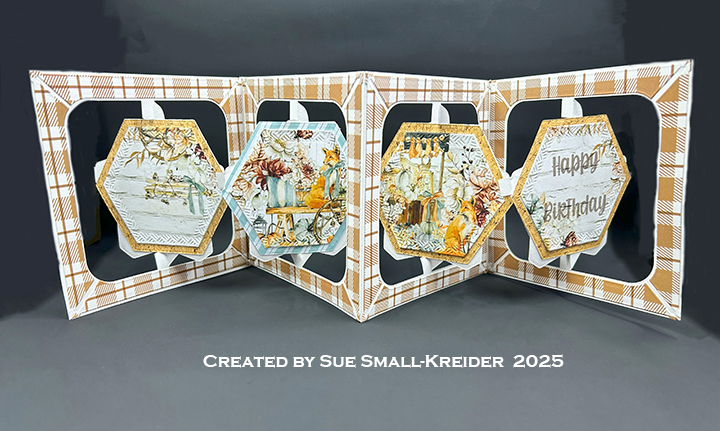
There’s a new mini release of five new stamp sets from Karen Burniston. For this card I’ve used the new Fall Phrases and Coffee Chat sentiment stamps along with previously released die sets – Fancy Label Accordion, Haunted Tiny House Add-Ons, Tea and Coffee Pop-Up and Fancy Solid Frame.

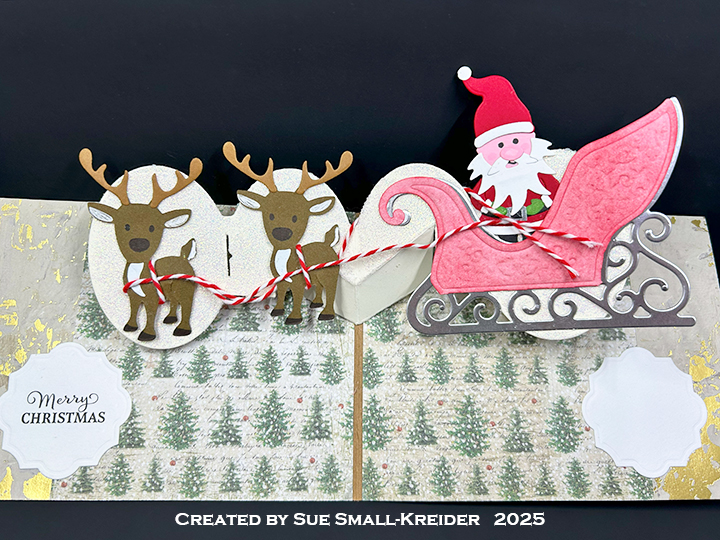
Cardbase: Cut three of the accordion frames from a plaid cardstock and followed the the assembly video for the Fancy Label Accordion die set. (Assembly video is at the bottom of the linked page for the die set.) Glue the frames together using the long tabs. Cut three sets of the Fancy Solid Frame and adhere to the back side of the accordion frames to hide the connecting tabs.

Card Front: Using the decorator dies in the Fancy Label Accordion set, cut a large plaid label and a smaller white label. Stamp on the white label “Let’s give ’em pumpkin to talk about” from the Fall Phrases stamp set. Glue the labels together and them on to the back of the lead pivot panel. From orange and green cardstock, cut and emboss the small pumpkin from the Haunted Tiny House Add-On die set. Glue to the label.

Coffee Mugs: Cut three of the mugs from white cardstock and two from the plaid cardstock using the Tea and Coffee Pop-Up die set. Stamp coffee sentiments onto the white mugs using the Coffee Chat stamp set. Adhere the mugs to the front and back of the pivot panels.
___________________________________
Thank you for experiencing this blog post.
I hope this inspires you and makes you smile.
Please subscribe to the email notices, like and leave comments 😊
___________________________________
Disclaimer: Karen Burniston products are provided free of charge by the manufacturer for review and use. All other items were personally purchased. Compensated affiliate links used where or when possible, meaning I will receive a small percentage commission from these manufacturers at no cost to you. This will allow me to add more content to my YouTube channel and help out a lot. Thank you.
Materials Used:
Dies
- Karen Burniston in cahoots with Riley and Company – Fancy Solid Frame – 1272
- Karen Burniston in cahoots with Riley and Company – Fancy Label Accordion – 1043
Stamps
- Karen Burniston in cahoots with Riley and Company – Clear Stamps – Fall Phrases
- Karen Burniston in cahoots with Riley and Company – Clear Stamps – Coffee Chat
Papers
- Dress My Craft – 12×12 in Single-Sided Cardstock – Baby Brown Gingham Checks
- Green, Orange and White Cardstock
Ink
- Memento – Fade Resistant Dye ink – Tuxedo Black
- Pigma – Mircon 005 Fine Tip Pen – Black
Adhesives
Tools
- Die Cutting Machine
- Paper Trimmer
- Stamping Platform
- Stamping Blocks as Paper Weights
- Scissors
- Paper Masking Tape
- We R Memories – QuickStick