Vintage Christmas Cards – NO L Tree

Recently I came across some family Christmas cards I had designed with the help of my father who owned a letterpress printing press and had cuts (think metal stamps on wooden blocks similar to rubber stamps on wood blocks) made of my drawings. The printing press held an 8×10-inch galley or frame which held the cuts and metal type (letters). Paper was hand-fed into the press which had an electric motor connected with a leather belt which turned the press wheel. From about age 8 and on I earned pocket money running the press to add people’s names to their store-bought Christmas cards, “From the Desk of” notepads and other small print jobs from family and friends.

The five cards that I am sharing this week were created before the computer drawing program Auto-CAD was widely available to individuals. (I know we didn’t have access to digital type fonts that Apple computers offered around that time.) I used rulers, India ink pens and protractors to draw the pop-ups.

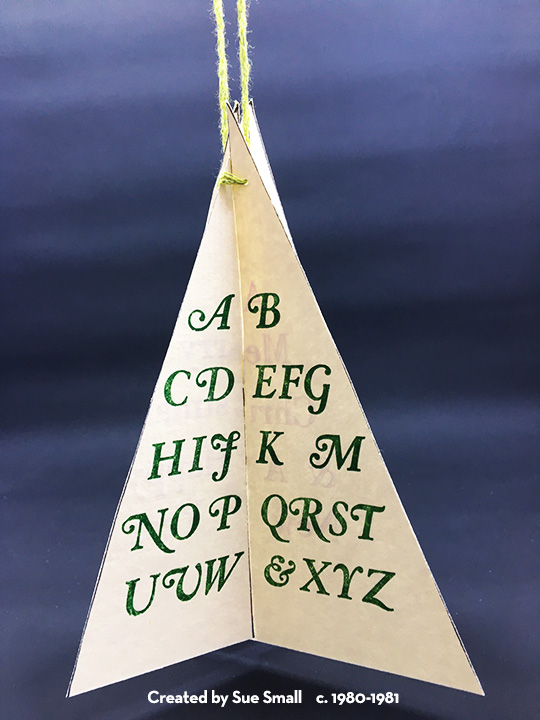
The NO L Tree card was a mash-up of another Christmas card my parents had done in the 1950s spelling out the alphabet but leaving a space where the “L” would have been, and a 3D triangle tree that I had made as a child which was made of two triangles cut with slits that allowed them to slide together. My father suggested having the sentiment in red ink be on two quadrants while the green alphabet be on the remaining two quadrants. We decided on different type fonts for the two sides.

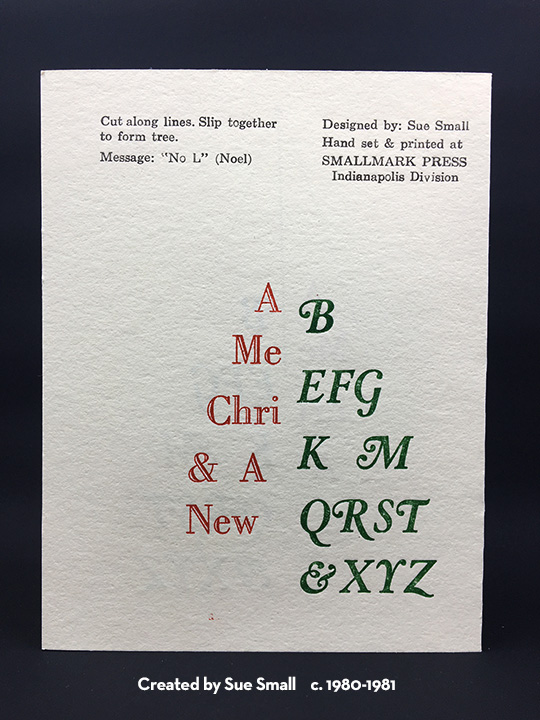
Hand setting the type was a little challenging, but after several test runs, we found the proper placement. I think we created a cardboard template to trace the tree lines inside the card with a black pen.

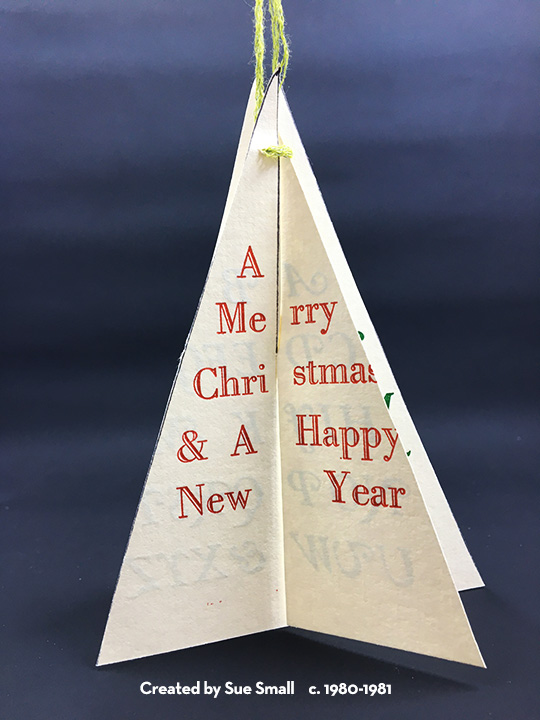
Instructions on how to assemble the tree as well as the card title/subtitle and card credits were all made with hand-set type. To print one card, it took two runs of green ink, two runs of red ink and one run of black ink for a total of five runs and one hand tracing of the triangle lines. We would print 200+ cards each year and start printing in October.

My siblings and I think this card was made around 1980-1981.

Here are other vintage Christmas cards:

  • NO L Tree

Vintage Christmas

What fun to be a child with a new toy or two to play with on Christmas morning. This card takes its inspiration from a BoBunny paper pad and matching die-cut pieces as well as a recent release of Karen Burniston’s Flip Frame Pop-up die set.

I found the Flip Frame Pop-Up easy to assemble, but strongly suggest practicing with scrap paper the gluing placement of the mechanism and frame before gluing with your good paper. (Here is the assembly video.)

I cut the flip frame from dark green mirror card and used some scrap green pattern pieces to hide the white side of the mechanism so that the mechanism strip blends into the background.

The cream-colored doily is for writing a personal message, but it does give the feel that the open card is a tabletop with a picture frame of a loved one.

The front is decorated with pictures cut from the paper pad and the little boy is a die-cut from the BoBunny set that is adhered with foam squares. A ribbon was the final dimensional element to tie the little girl to the boy and the opened gift box.

The card base is made entirely from two papers from the BoBunny paper pad. The inside sentiment and snowflake are from the coordinating die cuts set.

As is my style, I stamped the envelope flap with an older Kaisercraft stamp sentiment to set the mood for the card.

Hope this card makes you remember your childhood Christmases.

SUPPLIES

Dies

Stamps

  • Kaisercraft – Clear Stamps – Sentiments -Traditional – CS313

Ink

Paper

Miscellaneous

© Sue Small-Kreider 2020

Vintage Fan Birthday Wish

IMG_7687

Vintage greeting cards are charming. Using royalty-free images from Dover Publication’s Electronic Clip Art is a great way to use vintage images and resize them to fit your needs on a computer. I printed both flowery birthday images from a book with a CD-ROM called Treasury of Greeting Card Designs. The front fan image I printed on printable glitter cardstock. I put two of the same size of the smaller calling card image on regular white cardstock.

IMG_7683

Fussy cutting all the images was necessary. Of the two smaller images, I cut one fully out and the second one I only cut-out the calling card portion. The calling card is placed on foam squares to form the rest for the “easel” fan front.

IMG_7691

I traced the fussy cut fan onto a piece of white cardstock and cut it out for the card base. I covered the side of the base that would show when open with double-sided tape and then laid the plaid paper from the Victoria & Albert collection of fabric and wallpapers on top and fussy cut it. Next, I adhered the smaller image to the plaid side of card base positioning it so it would act as the easel rest. From the same plaid paper, I cut a 3.5-inch-wide strip folded in long-wise in half and using double-sided tape inside made a 1.25-inch-wide strip that was plaid on both sides.

IMG_7690

This strip I adhered using strong red double-sided tape to the backside of the fan image and then aliening it up with the bottom image, I attached the strip to the backside of the card base. Using the same technique of taping the backside of the fan image and the card base, I covered up the adhered plaid strip. Inside using plaid paper and the card base back with flowered paper again from the V&A collection.

IMG_7689

SUPPLIES USED:

Images:

Paper:

Miscellaneous: