A FUNN LetterPress Birthday Card

This card was made for Craft Roulette #243 whose parameters included a a belly band, cottage colors, coat(s) element, and upcycled.

Watch the process video to see how I made this card.

Cardbase: The cardbase is a top-fold A2 (4.25×5.5-inch).

Sentiment: “Hooray it’s your birthday” are printed with the Spellbinder’s BetterPress system, specifically Paint The Town press plates on bisque cotton card panel with BetterPress Black ink. The inside sentiments of “Happy Birthday” and longer rhyme, come from the Craft Roulette Funn Sentiments #01 stamp set and stamped with Memento Tuxedo Black ink.

Envelope: This card fits into an A2 envelope with it’s back flap stamped with “HBD” also from the Craft Roulette stamp set.

___________________________________

Thank you for experiencing this blog post.

I hope this inspires you and makes you smile.

Please like and leave comments 😊

___________________________________

Disclaimer: Karen Burniston products are provided free of charge by the manufacturer for review and use. All other items were personally purchased. Compensated affiliate links used where or when possible, meaning I will receive a small percentage commission from these manufacturers at no cost to you. This will allow me to add more content to my YouTube channel and help out a lot. Thank you.

Materials Used:

Dies & Press Plates

  • Spellbinders – BetterPress of the Month – Paint the Town
  • Spellbinders – Cutting Dies – Party Time Cake

Stamps

  • Craft Roulette – Clear Stamps – Funn Sentiments #01

Papers

  • Recollections – 8.5×11 65 lb Cardstock – White
  • Spellbinders – 5.50×4.25″ (A2) BetterPress Cotton Card Panel – Bisque
  • Colorful Cardboard Packaging

Ink

  • Memento – Fade-Resistant Dye Ink – Tuxedo Black
  • Spellbinders – BetterPress Ink – Apricot, BetterPress Black, Clay, Coastal, Tuscan
  • Pigma – Mircon 005 Fine Tip Pen – Black
  • Sharpie – Permanent Marker – Ultra Fine Tip – Brown

Adhesives

Tools

  • Spellbinders – BetterPress System
  • Die Cutting Machine
  • Paper Trimmer
  • Stamping Platform
  • LDRS – Stampendable Stamping Tool
  • Stamping Blocks as paperweights
  • Scissors
  • Spellbinders – Best Ever Craft Tape
  • Paper Masking Tape
  • Archival Ink Cleaner
  • Micro Fiber Cloth

Miscellaneous

  • Nellie’s Choice – Effect Snow
  • Bakers Twine

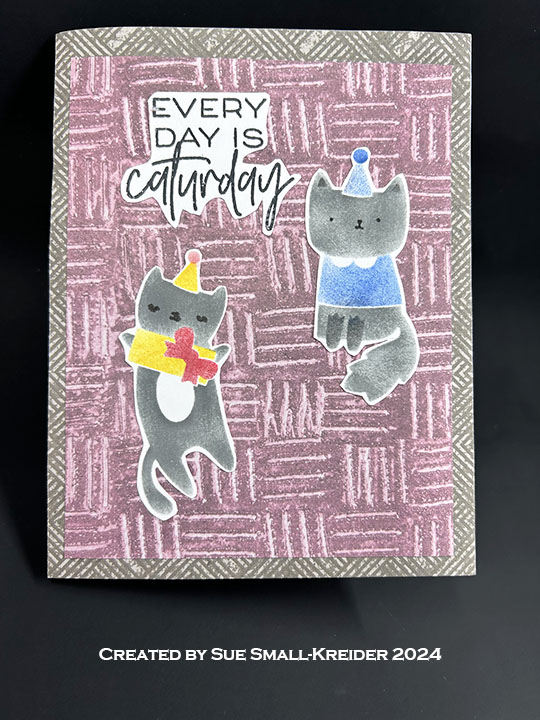
A Purrfect Birthday Pop-Up Card

This is the fourth in a series of cards that have shelves as the main element of the card.

This card was made with Waffle Flower dies, stamps and stencils.

Watch the process video to see how I made this card.

Cardbase: The outer cardbase is an A2 (4.25×5.5-inches) made from an 8.5×5.5-inch rectangle of lightweight white cardstock.  The outside is covered with panels of decorative paper.

Pop-Out Shelves: For the popout shelves cut an 8.5×5.5-inch rectangle of either patterned cardstock or lightweight cardstock with decorative paper covering it. Mark the center of the rectangle at 4.24-inches at the top and bottom of the cardstock and place the Inside Pop-Up Shelves die’s dotted center line on the center marks. Run through a die cut machine and work the fold-lines to make the shelves pop-out. Die-cut just the shelves from a woodgrain paper. Cut the shelf sections out and glue to the large pop-up panel. Decorate with plants from the Shelf Add-Ons die set.

Cats: Add to the shelves, cats die-cut from black cardstock using the Cattitude die set. Stencil cats using the Birthday Kitties Stencil set onto white cardstock and fussy cut out for use on card front.

Sentiments: Using the Purrfect Sentiments stamp set, stamp “Everyday is caturday” on white cardstock and “Have a purrect birthday” inside the card. Add “You’re the cat’s meow” diecut Subsentiments Cat to the inside shelves.

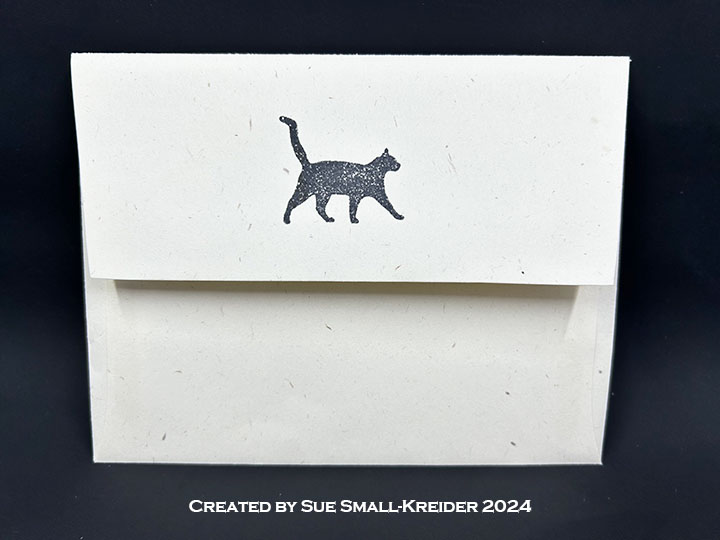
Envelope: The card fits into an A2 (4.25x 5.5-inches) size envelope which has a cat stamped on its back flap from the Cattitude stamp set.

___________________________________

Thank you for experiencing this blog post.

I hope this inspires you and makes you smile.

Please like and leave comments 😊

___________________________________

Disclaimer: Karen Burniston products are provided free of charge by the manufacturer for review and use. All other items were personally purchased. Compensated affiliate links used where or when possible, meaning I will receive a small percentage commission from these manufacturers at no cost to you. This will allow me to add more content to my YouTube channel and help out a lot. Thank you.

Materials Used:

Dies

  • Waffle Flower – Steel Craft Die – Cattitude
  • Waffle Flower – Steel Craft Die – Inside Pop-Up Shelves
  • Waffle Flower – Steel Craft Die – Shelf Add-Ons

Stamps

  • Waffle Flower – Clear Stamps – Cattitude
  • Waffle Flower – Clear Stamps – Purrfect Sentiments

Stencil

  • Waffle Flower – Plastic – Birthday Kitties

Papers

  • Recollections – 8.5×11 65 lb. Cardstock – White
  • Stampin’ Up – 12×12 Designer Series Paper – Earthen Elegance
  • Black, Greens and Yellow Cardstock
  • Fraser Papers for William House – A2 Envelope – Genesis Text Milkweed Smooth

Ink

  • Memento – Fade Resistant Dye ink – Tuxedo Black
  • Ranger – Tim Holtz – Distress Ink- Black Soot, Fossilized Amber, Hickory Smoke, Lumberjack Plaid, Prize Ribbon
  • Pigma – Mircon 05 Fine Tip Pen – Black
  • Sakura – Gelly Roll Pen – Medium – White
  • Sharpie – Permanent Marker – Fine Tip – Red
  • Sharpie – Permanent Marker – Ultra Fine Tip –Blue, Green, Red

Adhesives

Tools

  • Die Cutting Machine
  • Paper Trimmer
  • Bone Folder
  • Stamping Blocks
  • Scissors
  • Pencil
  • Ruler
  • Sponge Daubers
  • Paper Masking Tape

Miscellaneous

  • Waffle Flower – Subsentiments Cat – Diecuts

A Monsters’ Gallery of Birthday Fun!

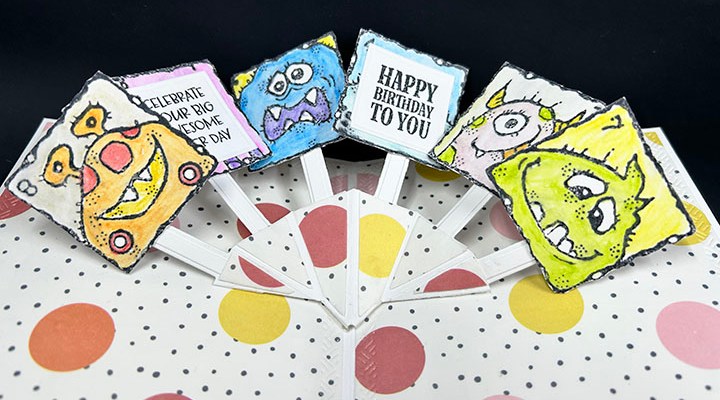
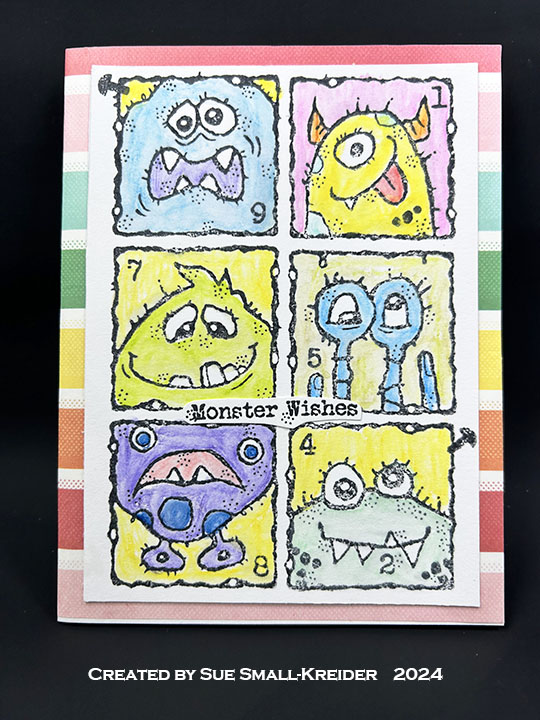
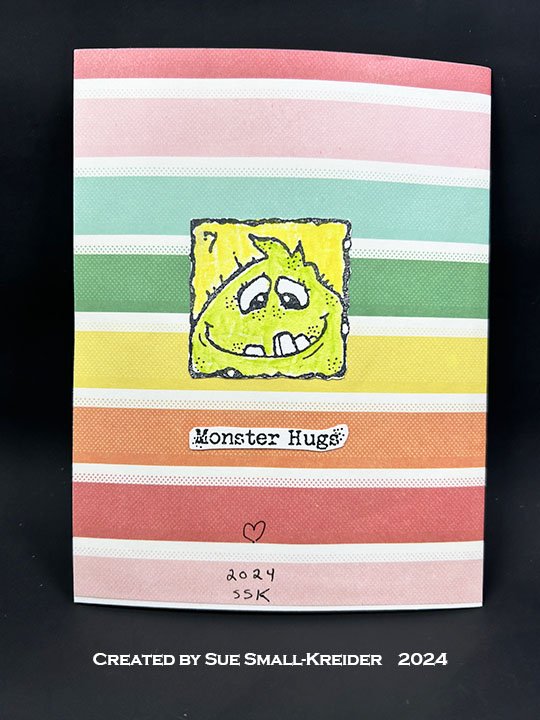
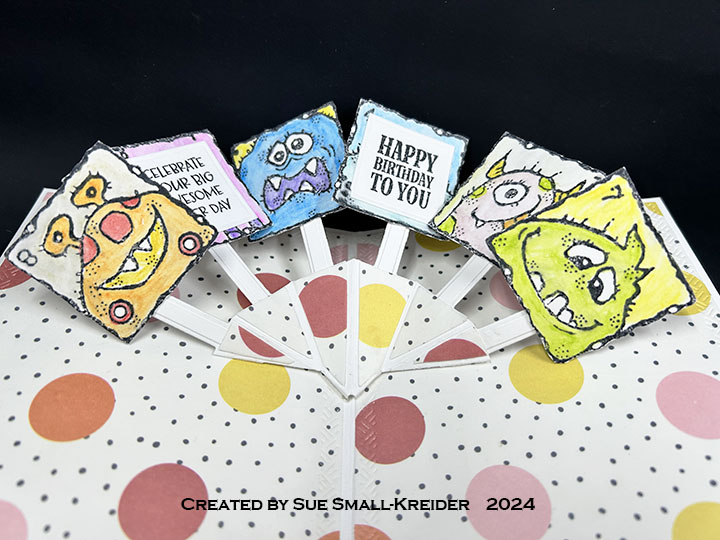
Just a fun birthday card featuring monsters on a Karen Burniston Photo Fan Pop-Up.

Watch the process video to see how I made this card.

Cardbase: Starting with a 5.5×8.5-inch rectangle of white cardstock folded in half to form a 4.25×5.5-inch side-fold A2 cardbase, the card was covered with colorful glassine paper inside and out. The inside panels were cut with the largest die in Karen Burniston’s Rectangles-Crosshatch set.

Monsters:  Monster Gallery stamp set is used as a front panel cut out as separate squares for the inside pop-up feature. The images were colored with watercolor pencils and then waterbrushed to even out the color.

Photo Fan Pop-Up: Watch the assembly video at the bottom of the linked page for the Photo Fan Pop-Up die.

Sentiments:  The inside sentiments of “Celebrate your big awesome super day” and “Happy Birthday to You” are from Karen Burniston’s Photo Memories stamp set. The “Monster Wishes” on the card front and “Monster Hugs” on the card back are from the Monster Gallery stamp set.

Envelope:  The card fits into an A2 (4.25x 5.5-inches) size envelope. On the back flap there is a “M” cut from scrap paper and glued there.

___________________________________

Thank you for experiencing this blog post.

I hope this inspires you and makes you smile.

Please like and leave comments 😊

___________________________________

Disclaimer: Karen Burniston products are provided free of charge by the manufacturer for review and use. All other items were personally purchased. Compensated affiliate links used where or when possible, meaning I will receive a small percentage commission from these manufacturers at no cost to you. This will allow me to add more content to my YouTube channel and help out a lot. Thank you.

Materials Used:

Dies

Stamps

Papers

  • Recollections – 8.5×11 65 lb Cardstock – white
  • Scrapbook.com – 4.25×5.5 Heavy Weight, Smooth, 400 GSM Mixed Media Paper Pad – White
  • We R Memory Keepers – 12×12 inch Food Safe & Grease Resistant Glassine Paper – Oh Goodie!
  • Fraser Papers for William House – A2 Envelope – Genesis Text Milkweed Smooth

Ink, Pigments

  • Memento – Fade-Resistant Dye Ink – Tuxedo Black
  • Ranger – Tim Holtz – Distress Watercolor Pencils – Antique Linen, Barn Door, Cracked Pistachio, Fossilized Amber, Kitsch Flamingo, Mermaid Lagoon, Mustard Seed, Pickled Raspberry, Prize Ribbon, Salty Ocean, Salvaged Patina, Speckled Egg, Spiced Marmalade, Twisted Citron, Villainous Potion
  • Pigma – Mircon 005 Fine Tip Pen – Black

Adhesives

Tools

  • Die Cutting Machine
  • Paper Trimmer
  • Bone Folder
  • Stamping Platform
  • LDRS – Stampendable Stamping Tool
  • Stamping Blocks used as paperweights
  • Scissors
  • Paper Masking Tape
  • Waterbrush

Shelf Cards – Bookshelf House Tri-Fold Card

This is the third in a series of cards that have shelves as the main element of the card.

Today’s card is a tri-fold house card with a cozy room scene with a bookcase made using dies by My Favorite Things.

Watch the process video to see how I made this card.

Cardbase:  The cardbase is a slimline size made from a 7 .75×8.5-inch rectangle folded in half and a 4.25×6.5-inch rectangle. Watch the tutorial video to see the details of the cardbase assembly.

Sentiment:  The “hello” on the card front is a die in the Concord & 9th On Display Pop-Up die set. There is a third panel that a personal message can be added to the card.

Envelope:  The card fits into a #10 business envelope. The back flap is decorated with a coffee mug from the My Favorite Things Be Your Own Barista die set.

___________________________________

Thank you for experiencing this blog post.

I hope this inspires you and makes you smile.

Please like and leave comments 😊

___________________________________

Disclaimer: Karen Burniston products are provided free of charge by the manufacturer for review and use. All other items were personally purchased. Compensated affiliate links used where or when possible, meaning I will receive a small percentage commission from these manufacturers at no cost to you. This will allow me to add more content to my YouTube channel and help out a lot. Thank you.

Materials Used:

Dies

  • Concord and 9th – Metal Dies – On Display Pop-Up
  • My Favorite Things – Premium Steel Die – Be Your Own Barista
  • My Favorite Things – Premium Steel Die – Décor and More
  • My Favorite Things – Premium Steel Die – Fundamental Furnishings
  • My Favorite Things – Premium Steel Die – Picture Window
  • My Favorite Things – Premium Steel Die – Potted Plants
  • My Favorite Things – Premium Steel Die – Room Decor
  • My Favorite Things – Premium Steel Die – Take A Seat

Embossing Folders

  • Honey Bee Stamps – 3D Embossing Folder – Rustic Brick Wall

Papers

  • Bazzill – 8.5×11 Cardstock – Tiara -18-1002
  • Stampin’ Up – 8.5×11 Thick Basic White Cardstock
  • Patterned Paper Scraps
  • Blue, Browns, Greens, Gray and Red Cardstock Scraps
  • #10 Business Envelope – Kraft

Ink & Pigment

  • Ranger – Tim Holtz – Distress Ink – Lumberjack Plaid
  • Ranger – Tim Holtz – Distress Watercolor Pencil – Crushed Olive
  • Pigma – Mircon 01 Fine Tip Pen – Black
  • Sharpie – Permanent Marker – Ultra Fine Tip – Blue
  • Stampin’ Up Stampin’ Write Marker – Chocolate Chip

Adhesives

Tools

  • Die Cutting Machine
  • Paper Trimmer
  • Bone Folder
  • Score Board
  • Stamping Blocks used as paperweights
  • Scissors
  • Pencil
  • T-Ruler
  • Sponge Daubers
  • Paper Masking Tape
  • Tweezers
  • Waterbrush

Shelf Cards – Pop-Up Shelves

This is the second in a series of cards that have shelves as the main element of the card.

Today’s card is a pop-up set of shelves made with On Display Pop-Up die set by Concord and 9th.

Watch the process video to see how I made this card.

Cardbase:  The cardbase is an A2 (4.25×5.5-inch) side-fold made by folding an 8.5×5.5-inch rectangle in half.

Sentiments:  The “hello” on the card front is a die in the On Display Pop-Up die set.

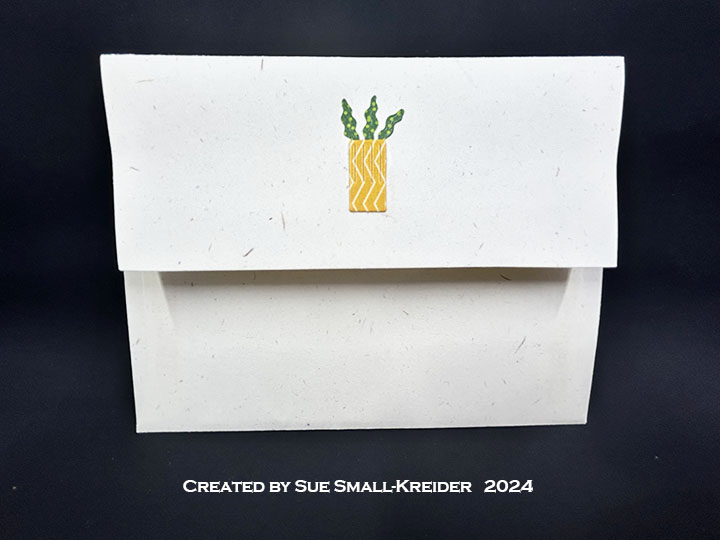
Envelope:  The card fits into an A2 (4.25x 5.5-inches) size envelope with a die-cut plant on the back flap.

___________________________________

Thank you for experiencing this blog post.

I hope this inspires you and makes you smile.

Please like and leave comments 😊

___________________________________

Disclaimer: Karen Burniston products are provided free of charge by the manufacturer for review and use. All other items were personally purchased. Compensated affiliate links used where or when possible, meaning I will receive a small percentage commission from these manufacturers at no cost to you. This will allow me to add more content to my YouTube channel and help out a lot. Thank you.

Materials Used:

Dies

  • Concord and 9th – Metal Dies – On Display Pop-Up

Papers

  • Bazzill – 8.5×11 Cardstock – Tira
  • Concord and 9th – 8.5×11 Cardstock – Honeycomb
  • Impression Obession – 6×6 Double-Sided Cardstock – Basics 1 – Yellows
  • My Favorite Things – 8.5×11 Cardstock – Something Blue
  • Spellbinders – 8.5×11 Cardstock – Cosmic Sky
  • Stampin’ Up – 8.5×11 cardstock – Copper Clay
  • Blues, Browns, Greens, White and Yellows Cardstock Scraps
  • Fraser Papers for William House – A2 Envelope – Genesis Text Milkweed Smooth

Ink

  • Ranger – Tim Holtz – Distress Ink- Rustic Wilderness
  • Nuvo – Glitter-Marker – 197 Lemon Drizzle
  • Pigma – Mircon 01 Fine Tip Pen – Black

Adhesives

Tools

  • Die Cutting Machine
  • Paper Trimmer
  • Score Board
  • Bone Folder
  • Stamping Blocks used as paperweights
  • Scissors
  • Paper Masking Tape
  • We R Memories – QuickStick
  • Sponge Daubers

Shelf Cards – Plant Ladder

This is the first in a series of cards that have shelves as the main element of the card.

Today’s card is a plant ladder made with dies by Scrappy Tails.

Watch the process video to see how I made this card.

Cardbase:  Use the outline die in the Plant Ladder die set to cut a shaped cardbase from a 3×12-inch piece of card stock that has been folded in half. Place the die so that the two top cutting edges of the die are just off the fold.

Sentiments:  I am leaving off any sentiment so that there is space inside and on the card back to write a message.

Envelope:  The card fits into an A2 (4.25x 5.5-inches) size envelope with a cardstock liner to keep the palm tree leaves from getting damaged in the mail.

___________________________________

Thank you for experiencing this blog post.

I hope this inspires you and makes you smile.

Please like and leave comments 😊

___________________________________

Disclaimer: Karen Burniston products are provided free of charge by the manufacturer for review and use. All other items were personally purchased. Compensated affiliate links used where or when possible, meaning I will receive a small percentage commission from these manufacturers at no cost to you. This will allow me to add more content to my YouTube channel and help out a lot. Thank you.

Materials Used:

Dies

  • Scrappy Tails – Metal Dies – Plant Ladder

Papers

  • Bazzill – 12×12 Cardstock – Sand Dollar
  • Black, Browns, Greens, and Yellows Cardstock Scraps
  • Fraser Papers for William House – A2 Envelope – Genesis Text Milkweed Smooth

Adhesives

Tools

  • Die Cutting Machine
  • Paper Trimmer
  • Bone Folder
  • Stamping Blocks used as paperweights
  • Scissors
  • Paper Masking Tape
  • We R Memories – QuickStick

Snowflake Easel Birthday Card

Karen Burniston’s October 2024 release of new dies and sentiment stamps are now available.

Today’s card is an A7 size top-fold easel card that uses the new Postage Pop-Up, Charm Rings, Snow Charms die sets and Winter Hugs stamp set.

Watch the process video to see how this card was made.

Cardbase:  Cut a white 7 1/2 x 5-inch rectangle; score and fold at 7-inches to form a tab. Cut a white 7 x 5-inch rectangle and glue to tab. On panel that does not have the tab glued to it, score at the center (3 1/2-inches) and fold to make an easel. Three decorative panels 3 4/3 x4 3/4-inches will be used to cover the outside of the card.

Postage Stamp Diamond Frames:  Using the large postage stamp frame and smaller squares and rectangle dies, cut eight frames. Separate the frames so that you have eight small square frames and two large square frames. (Save the other frames and cut-out shapes for other projects.) Glue to frames together to form four small squares and one large square. Watch video to see how window apertures are cut into the easel and how charms are hung.

Decorations: The smaller snowflake charms are from the Winter Charms set while the larger snowflake charm and individual snowflake are from the Snow Charms set. (Save the small circles that pop-out of the snowflakes to decorate the postage frames at the corners.) Watch the tutorial to see how the individual snowflake was made into a charm using the larger snowflake. Use two of the medium size Charm Rings to hang each snowflake.

Sentiments:  All the sentiments come from the Winter Hugs stamp set and were fussy cut out of the same cardstock as the cardbase. The back of the card uses “I made this cool card” stamp with the maker’s mark below and a pair of mittens from the Snow Charms set.

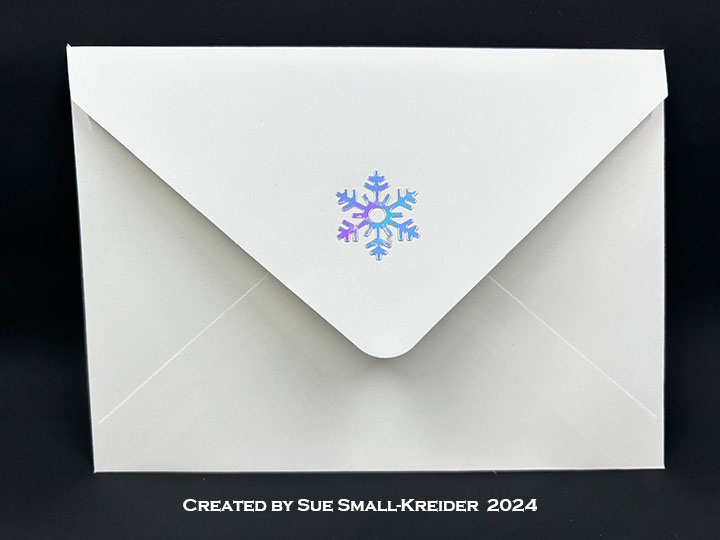
Envelope:  The card fits into an A7 (5 x 7-inches) size envelope. The back flap was decorated with a large snowflake from the Snow Charms set.

___________________________________

Thank you for experiencing this blog post.

I hope this inspires you and makes you smile.

Please like and leave comments 😊

___________________________________

Disclaimer: Karen Burniston products are provided free of charge by the manufacturer for review and use. All other items were personally purchased. Compensated affiliate links used where or when possible, meaning I will receive a small percentage commission from these manufacturers at no cost to you. This will allow me to add more content to my YouTube channel and help out a lot. Thank you.

Materials Used:

Dies

Stamps

Papers

  • My Favorite Things – 8.5×11 inch 100lb. Cardstock – Smooth White
  • American Crafts – 8.5×11 inch Specialty Cardstock – Foil On Paper
  • Recollections – 12×12 inch Glitter Cardstock – White Marble
  • Unknown – 8.5×11 Fabric Backed Paper – Hammered Metal – Silver
  • A7 Envelope – Cream

Ink

Adhesives

Tools

  • Die Cutting Machine
  • Paper Trimmer
  • Score Board
  • Bone Folder
  • Stamping Platform
  • Stamping Blocks used as paperweights
  • Scissors
  • Craft Knife
  • Pencil
  • T-Ruler
  • Paper Masking Tape
  • We R Memories – QuickStick
  • 1/8-inch Hole Punch
  • Ice Pick or Awl

Reindeer Games

It’s Sneak Peak Week for Karen Burniston’s October 2024 release of new dies and sentiment stamps. These dies will be available for purchase on October 28, 2024 on the KB Riley LLC website.

This card was inspired by the age-old question pertaining to the Rudolph-The-Red-Nose-Reindeer song – What are reindeer games? My interpretation is Winter games Olympic style with Rudolph winning the sledding race!

Watch the process video to see how this card was made.

Cardbase: The cardbase is an A7 size (5 x 7-inch) purchased card base with decorative papers glued to the four panels. I used the largest rectangle in the Rectangles and Labels – Crosshatch die set to cover the inside of the card and leftover pieces for the outside of the card.

Finish Line Flag Pop-Ups: Two Photo Fans Pop-Ups were created using white cardstock brushed with glitter gloss the arms and decorator pieces. the arm decorator pieces were cut in black and the two sided flags come from the Pirate Ship Add-Ons set. (You can also find a single flag in the Castle Pop-Up set.)

Sitting Reindeer: The sitting reindeer uses the body of the Snowman Pop-Up with the face, antlers, legs and tail from the Penguin and Reindeer Snowman Add-Ons set. The sled is from the Snow Charms set. (If I were to make this card again I would make two sleds and glue them into the card first, placing them so they overlap under the reindeer trimming off the excess front and back sled pieces before gluing the reindeer base over them and into the card.)

Standing Reindeer: Two reindeer were cut using the Christmas Animals die set. One reindeer is assembled on the reverse side so that the reindeer can face each other.

Sentiments: “Reindeer Games” was created using the Mini Alphabet die set while the inside “You’re so Cool” was stamped on a fancy label from the Rectangles and Labels – Crosshatch set with a stamp from the Winter Hugs stamp set. The “Made with Love” circle image on the back of the card is from the Special Delivery stamp set. The blank personal message label is also from the Rectangles and Labels – Crosshatch set. (I didn’t have a piece of matching cardstock wide enough for this label die, so I elected to center the die and cut with flat top and bottom of the label.)

Envelope:  The card fits into an A7 size envelope with the back flap decorated with leftover blue flags.

___________________________________

Thank you for experiencing this blog post.

I hope this inspires you and makes you smile.

Please like and leave comments 😊

___________________________________

Disclaimer: Karen Burniston products are provided free of charge by the manufacturer for review and use. All other items were personally purchased. Compensated affiliate links used where or when possible, meaning I will receive a small percentage commission from these manufacturers at no cost to you. This will allow me to add more content to my YouTube channel and help out a lot. Thank you.

Materials Used:

Dies

Stamps

Papers

  • Carnation Crafts – Merry and Bright from PaperCrafter issue 40
  • Echo Park – 12×12 Double-Sided Cardstock – Bundle of Joy -Peek-A-Boo
  • Silver Foil Cardstock
  • Black, Browns, Cream, Teal Blue, White and Yellows Cardstock
  • Park Lane Paperie – A7 Cardbase and Envelope – White

Ink

  • Hero Arts – Alcohol-Marker Friendly Ink Pad – Intense Black
  • Ranger – Tim Holtz – Distress Ink- Scorched Timber
  • Pigma – Mircon 005 Fine Tip Pen – Black
  • Sharpie – Permanent Marker – Ultra Fine Tip – Black and Red
  • Sakura – Gelly Roll Pen – Medium – White

Adhesives

Tools

  • Die Cutting Machine
  • Paper Trimmer
  • Bone Folder
  • Paperweight
  • Stamping Blocks used as paperweights
  • Scissors
  • We R Memories – QuickStick
  • Sponge Dauber
  • Paper Masking Tape
  • Glue Eraser
  • Pencil

A CAS’ed Birthday Card

This card was made for Craft Roulette #236 whose parameters included use a small bag, cornucopia colors, CAS a card from Craft Roulette #235 submissions and splatters.

Cardbase: I used a purchased 5×7 gatefold cardbase and envelope.

Card Front: Terre’s card in the Craft Roulette #235 Contributions Gallery was the card I based my card front on. I changed up the dark starry paper to a more colorful ink blended background with white splatters instead of star shapes. I used a red ringed planet instead of earth as the center focal point but stamped “HBD2U” in the upper left corner, where Terre had put her sentiment, and also in the lower right corner to balance the elements.

Pop-Up Bag: Inside the card is a small gift bag that pops-up to hold a small sealed bag of sequins and shaker elements. The dies that make the bag and the pop-up mechanism arm are by Karen Burniston. The mechanism arm if installed just as it is in the assembly video for the Flip Frame Pop-Up but the Mini Gift Bag back is attached to the arm rather than the frame and the bottom of the bag is glued to the cardbase. The bag is made from thin decorative paper and the handles are hemp cording.

Sentiments: “HBD2U” Happy Birthday” and “An itty-bitty gift for your big day!” are all stamped in black ink using the Craft Roulette Funn Sentiments #01 stamp set. The “Inspired by Craft Roulette, Made by” and cat head stamps are from the Craft Roulette The basics set.

Envelope: The card fits into an A7 (5x 7-inches) size envelope.

___________________________________

Thank you for experiencing this blog post.

I hope this inspires you and makes you smile.

Please like and leave comments 😊

___________________________________

Disclaimer: Karen Burniston products are provided free of charge by the manufacturer for review and use. All other items were personally purchased. Compensated affiliate links used where or when possible, meaning I will receive a small percentage commission from these manufacturers at no cost to you. This will allow me to add more content to my YouTube channel and help out a lot. Thank you.

Materials Used:

Dies

  • Karen Burniston in cahoots with Riley and Company – Mini Gift Bag – 1255
  • Karen Burniston in cahoots with Riley and Company – Flip Frame Pop-Up – 1134

Stamps

  • Craft Roulette – Clear Stamps – Funn Sentiments #01
  • Craft Roulette – Clear Stamps – The Basics

Papers

  • Hot Off The Press – 12×12 Single-Sided Paper – Sun’s Border – HOTP-20551
  • White Cardstock
  • Park Lane Paperie – A7 Cardbase and Envelope – White

Ink

  • Hero Arts – Alcohol-Marker Friendly Ink Pad – Intense Black
  • Ranger – Tim Holtz – Distress Ink- Dried Marigold, Fossilized Amber, Lumberjack Plaid, Twisted Citron
  • Avery Elle – White Ink Spray
  • Pigma – Mircon 01 Fine Tip Pen – Black

Adhesives

Tools

  • Die Cutting Machine
  • Paper Trimmer
  • Bone Folder
  • Stamping Platform
  • LDRS – Stampendable Stamping Tool
  • Stamping Blocks
  • Scissors
  • Craft Mat
  • Paper Masking Tape
  • Blending Brushes
  • Water Mister

Miscellaneous

  • Cousin – D.I.Y. – Natural Hemp Cord #20