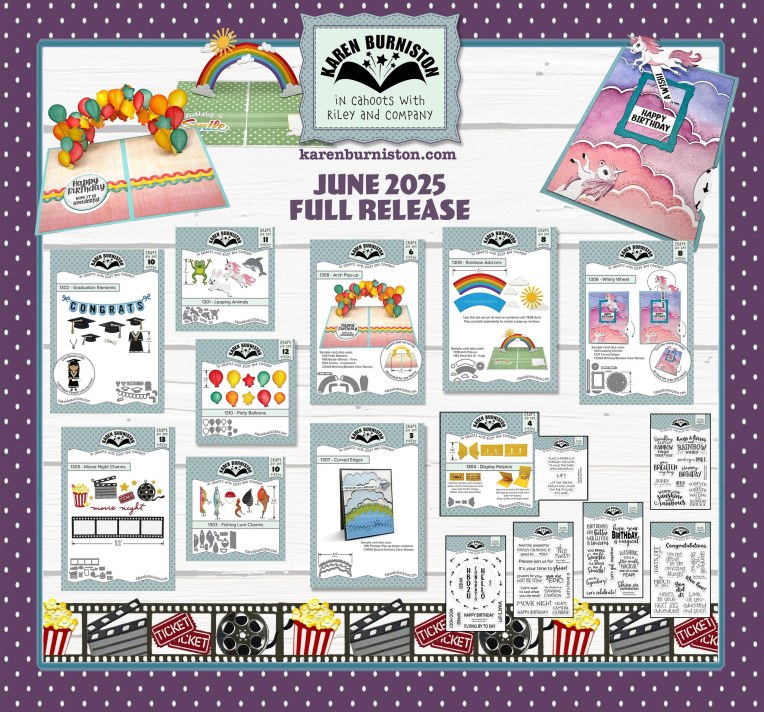
Here are some of the projects I’ve made with the new Karen Burniston Arch Pop-Up
(HINT: Click on photo to bring up tutorial on how the project was made.)
________________________
Thank you for experiencing this blog post. I hope this inspires you and makes you smile. Please like and leave comments 😊
________________________
Disclaimer: Karen Burniston products are provided free of charge by the manufacturer for review and use. All other items were personally purchased. Compensated affiliate links used where or when possible, meaning I will receive a small percentage commission from these manufacturers at no cost to you. This will allow me to add more content to my YouTube channel and help out a lot. Thank you.
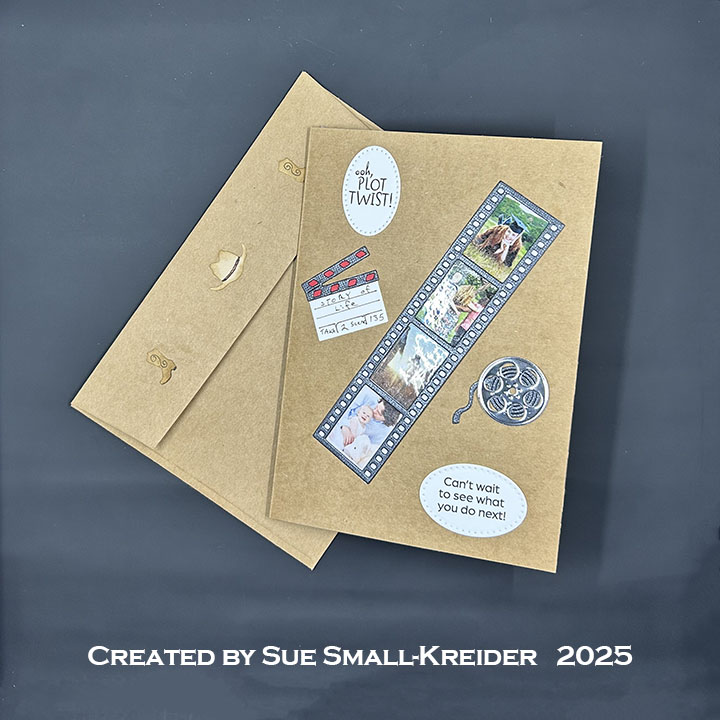
Watch the process video to see how I made this card.
Cardbase: Cut a 5×7-inch A7 cardbase from brown kraft cardstock. (I used a purchased cardbase and envelope.) Cover the inside with decorative paper. Clouds and sun are cut using the Rainbow Add-Ons die set.
Pop-Up: Watch the assembly video at the bottom of the linked page for the Stocking Pop-Up as well as the video above.
Horse and Fence: Cut one tan unicorn body from the Leaping Animals die set and from dark brown cut the tail and mane pieces. (I cut three of the tan because my cardstock was less than 80lb weight.) Use the die stencil features to draw in the horse’s eye, mouth, nostril and hooves with a thin black marker. Cut one fence from heavy white cardstock using the Farm Edgesdie set. Glue fence to top edge of pop-up over piece and glue horse to inner pop-up tombstone piece.
Cowgirl: Cut out one body, one hair style, one pair pants, one collared shirt, and one women’s short sleeved top from the Paper People die set. Cut one scarf bandana and two pair of cowboy hat and boots from the Tiny Accessories 3 set. (One set of hat and boots will be used on envelope.) I used a white brush marker to age the jeans and brown ink to age the hat and boots. The brown vest was made by cutting off the sleeves of the women’s top and cutting it up the middle. The front corners of each side were trimmed off to make a matching “v” similar to the neckline of the vest. The shirt and jeans were trimmed to fit under the vest. Boots were also trimmed to fit under the jeans. A piece of hemp cording was looped and glued together before adhering under the cowgirl’s hand.
Movie Elements: Cut out of charcoal gray the film strip, film reel film and the clapper board “V” dies from the Movie Night Charms set. Cut the clapper board large base piece from white and color in the top “V” with red marker. Use thin black marker and die stencil feature to ink in the board’s lines. Cut one reel die from silver foil cardstock. Cut off all charm loops from clapper board and film reel. Assemble as shown in video above. Fill film strip with photos. (I used digital images that were resized on computer and printed on computer paper that was covered with clear packing tape.)
Sentiments: All the sentiments were stamped using the Movie Night stamp set with in black ink. “Ooh, plot twist!” was cut out using the smallest oval die in the Rectangles and Labels – Crosshatch die set. “Can’t wait to see what you do next!” and “Lights, Camera, Celebrate!” were cut out using the oval die in the Lorna Label Pop-Up set. “And the award for totally crushing it goes to…YOU!” was cut out using the smallest fancy label die in the Rectangles and Labels – Crosshatch die set.
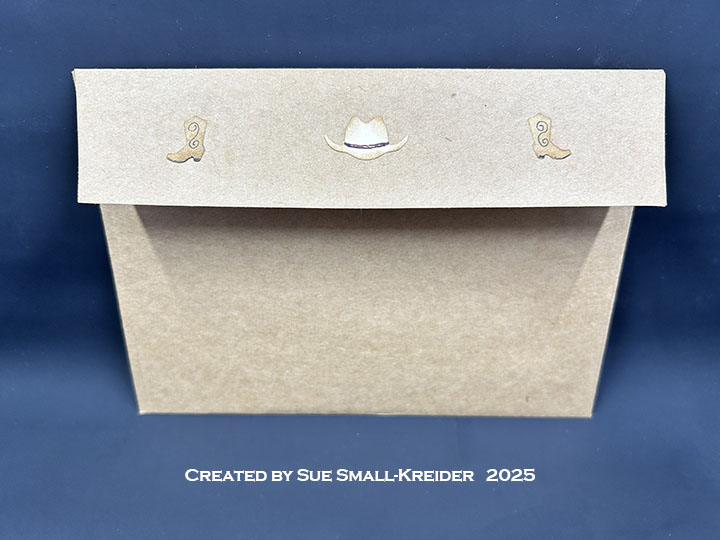
Envelope: The card fits into an A7 (5x 9-inches) size envelope with a die cut a cowgirl hat and boots the back flap using the Tiny Accessories 3 set.
__________________________
Thank you for experiencing this blog post.
I hope this inspires you and makes you smile.
Please like and leave comments 😊
__________________________
Disclaimer: Karen Burniston products are provided free of charge by the manufacturer for review and use. All other items were personally purchased. Compensated affiliate links used where or when possible, meaning I will receive a small percentage commission from these manufacturers at no cost to you. This will allow me to add more content to my YouTube channel and help out a lot. Thank you.
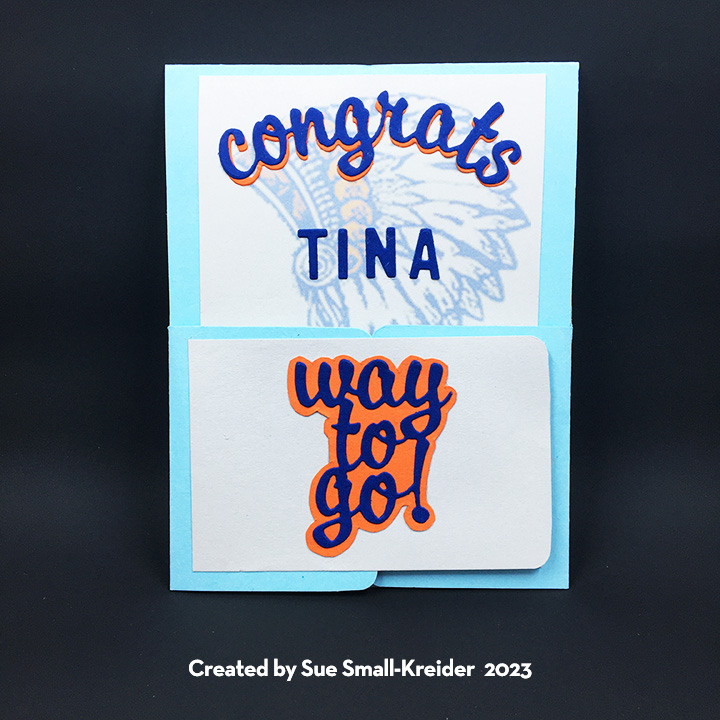
It’s graduation season and the Craft Roulette Episode 161 gave me the idea for this commissioned card for a high school graduate with the Dutch door cardbase, hats, campfire colors and book page element.
All of the dies used are by Karen Burniston. They include the Heart Collage Pop-Up (for the mechanism), Book Worm and Tiny Accessories 2 (both for graduation caps.) The hands and printed sentiments come from a Simon Says Stamp set called Hats off Grad.
Cardbase: Using a T-ruler and pencil, mark the measurements shown on the photo below on an 8 1/2″ x 11” sheet of heavyweight light blue cardstock. Trim off excess rectangles and then score and fold with metal ruler, scoring tool and Teflon folder. Erase pencil marks. Using a small corner punch, round all six corners.
Hat Mechanism: Watch the assembly videos on the Heart Collage Pop-Up page before die-cutting the mechanism piece from light blue cardstock matching the cardbase. Adhere to top fold as directed in assembly videos. Using a stencil and white ink, stencil clouds over the top inside of card, going over the mechanism. Cut out and assemble a number of graduation caps from Book Worm set (small caps) and from the Tiny Accessories 2 (large caps.)
Money Holder: Take a 3” x 4” piece of white copier paper and score along the short side 1/2″ from the edge. Score both long sides at 1/4″, 1/2″ and 3/4″. Accordion-style fold the long sides and then fold short side under to form a gusseted pocket. Using a small circle punch, cut a half circle at top of pocket as a finger hold.
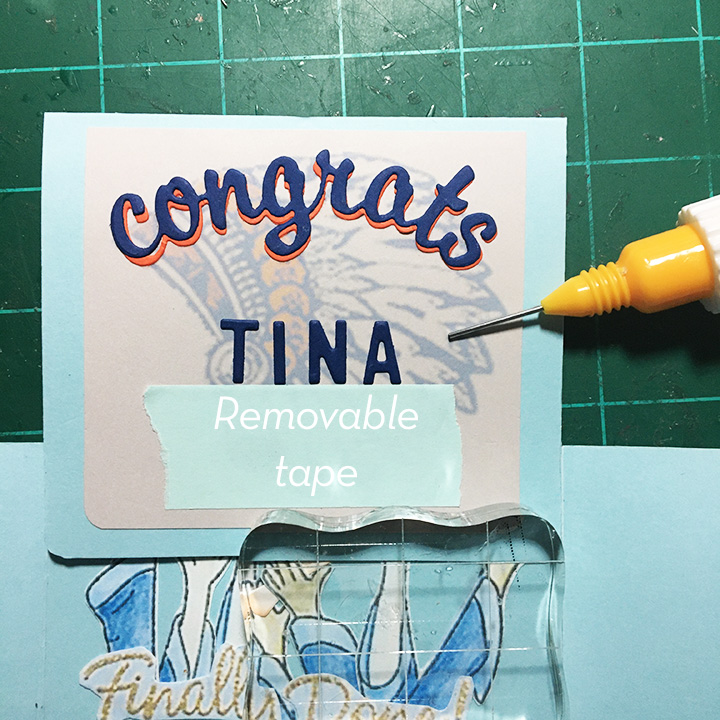
Sentiments: The large die-cut sentiments all come from the same Karen Burniston Word Set 8. “Congrats” was cut once from navy blue and once from orange – the high school’s colors. The two phrases were cut from navy blue and then their dies were traced on the outside on orange cardstock and fussy cut to create shadows for the words. The graduate’s name was die-cut using Karen Burniston’s Mini Alphabet set and lined up on card using removable paper tape.
Decorations: The high school logo was printed from the school website on light gray and white cardstock for the front and back of the card. (Because I could not find my Hats Off Grad stamp set, I had to print an image from photos of another card I had made using the stamp set.) The “Finally Done! Hats Off to You!” sentiment was fussy cut along with the hands which were glued to the sentiment before being glued to the card base. Five hearts and two diplomas were added to the hat mechanism and background die cut from the Tiny Accessories 2 set. The math book on the money holder was die cut from the Book Worm set. The labels for a personal message are from two coordinating sets – Label Charm Pop-Up and Crosshatch Rectangles and Labels.
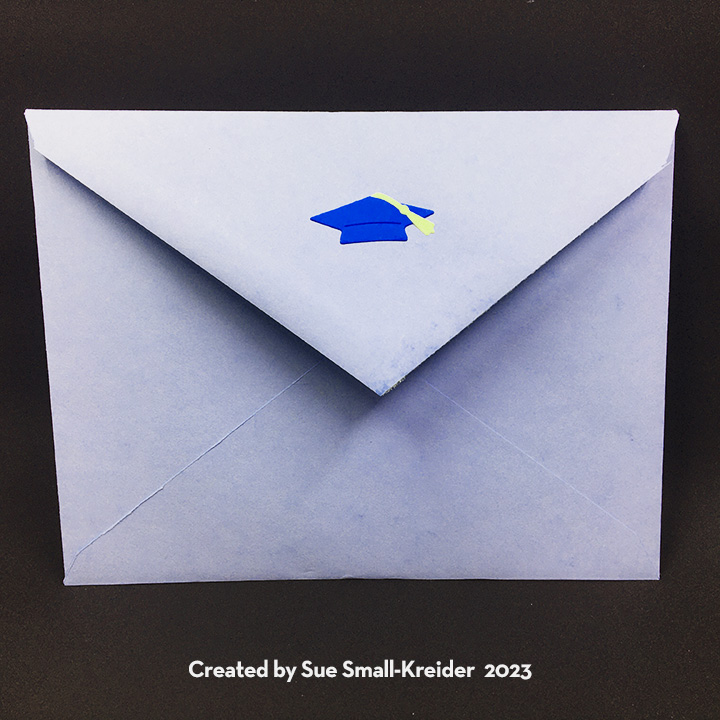
Envelope: The card fits into an A2 envelope. I like to hint at what’s inside the envelope, so a small graduation cap was glued to the back envelope flap.
Thank you for reading this blog post. I hope this inspires you and makes you smile. Please like and leave comments 😊
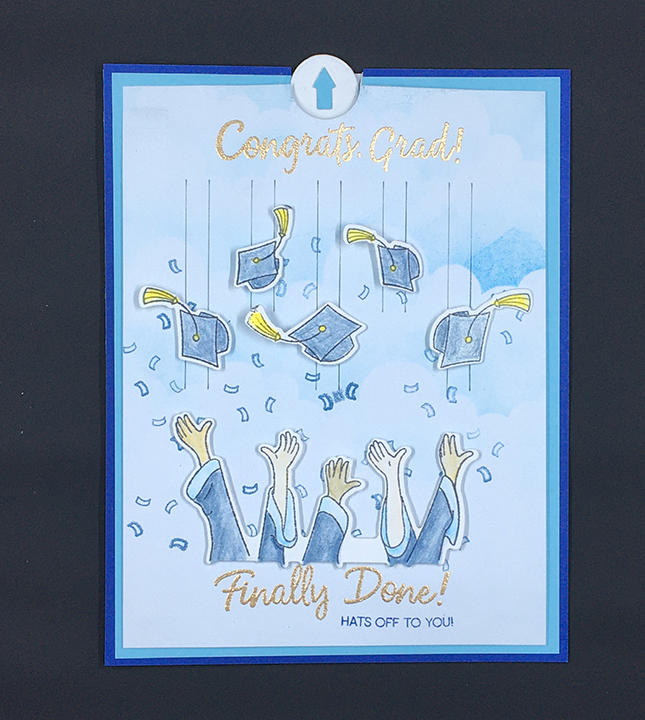
For many graduates of 2020, there were few opportunities to collectively toss their caps in the air and celebrate their accomplishments together. This card is for the class of 2020!
I used the Simon Says Stamp Hat’s Off Grad stamp and die set along with the Quintuple Slider dies to make an interactive card that has the graduates’ caps moving up and down.
To start, I used a stencil to ink (Salty Ocean) a cloudy background with tiny confetti being stamped in Dapper Denim blue up to just below the bottom of the slider slits (as if the confetti was falling out of the caps.) The bold sentiments were stamped with Versamark ink and heat embossed with gold embossing powder.
Next, I stamped the arms and caps using a black ink (Tuxedo Black) that dries fast and doesn’t bleed if water colored. Using the colors of the graduate’s college, a dark blue, I colored the caps and gowns using watercolor pencils and a thin tipped waterbrush.
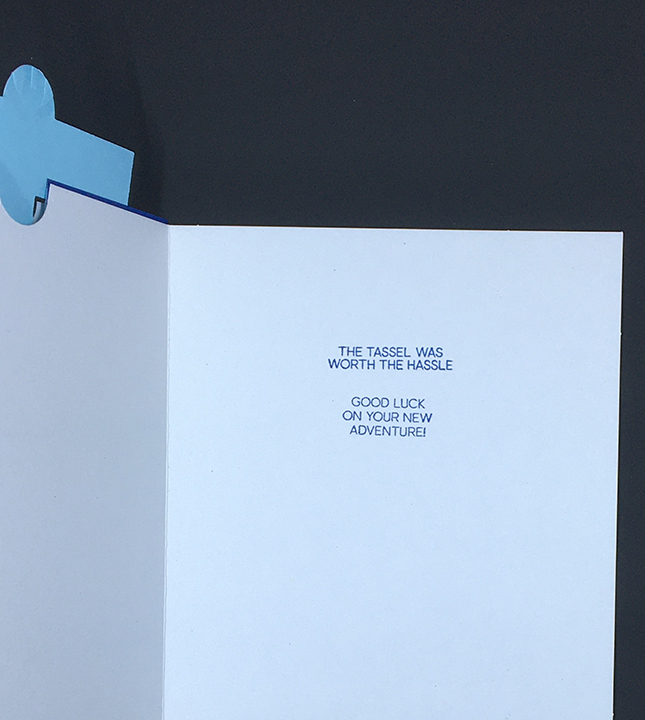
Inside the card base I stamped two of the smaller text sentiments included in the set – “The tassel was worth the hassle” and “Good luck on your new adventure” – in Blueberry Bushel blue.
Next, I did all my die cutting of elements using the matching dies, circle arrow and the squarish quintuple slider. On my test card, I had placed the die that cuts the slots into the background card, upside down. So, making sure that I had all the slots lined up at the top end of my background and using the slider die as a guide to know where the position the slot cutting die, I cut the slots. (Watch the assembly video to see how the alignment is done.)
To assemble the slider mechanism, I suggestion watching another assembly video to understand how the slider flaps wrap around the slots and how best to keep the flaps aligned. Once the tiny foam squares (I cut a square in half to fit the slider flaps) are adhered to the flaps, the decorating of the card can begin. (CRX – Don’t forget to add some hint that the slider tab needs to be pulled up by adding a die cut circle arrow which is included in the slider die set.)
I used two shades of blue cardstock to mat the slider mechanism. I found that I needed to cut a circle notch from all layers of the four layers of cardstock. I started by folding back the top of the slider once I had aligned the circle arrow die up on the background top layer and cut the circle out. Next, I took the two blue layers which I had glued together and aligned the top background layer over the blue mats and used a pencil to mark where the circle die should go. Cut these two layers and trim the top of the cut area to make a “U” shaped notch in blue layers. Position the blue mats over the card base and using a pencil to mark and then cut the circle from card base. Adhere the blue layers to card base with double-sided tape. Adhere the top mechanism using foam tape on sides and bottom. Leave top of mechanism layer free so slider can move up and down.
The back flap of the envelope has a diploma stamped in Blueberry Bushel blue to give a hint as to what was inside.
Thank you for reading this blog post. Please like and leave comments 😊
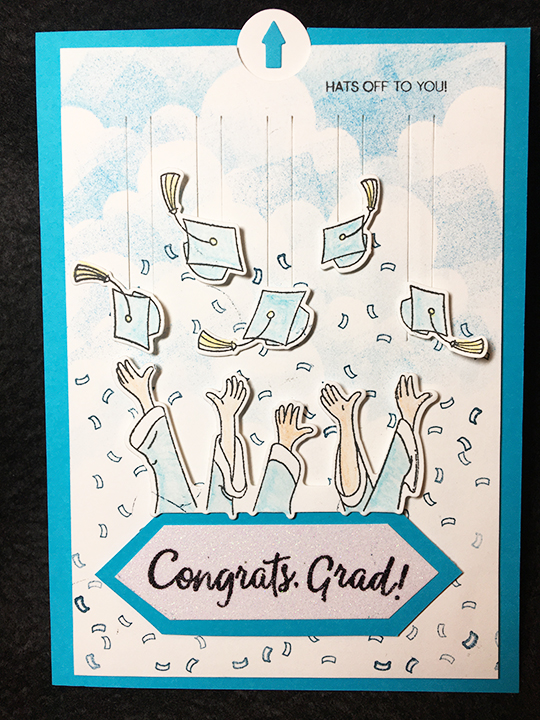
For many graduates of 2020, there were few opportunities to collectively toss their caps in the air and celebrate their accomplishments together. This card is for the class of 2020!
The wait for this stamp and die set was worth it. The quintuple slider dies make a quick and interactive card that has the graduates’ caps moving up and down.
To start, I used a stencil to ink in a cloudy background that ends with tiny confetti being stamped in blue up to the bottom of the slider slits (as if the confetti was falling out of the caps.) Next, I stamped the arms and caps using a black ink that dries fast and doesn’t bleed if watercolored over. Using the colors of the graduate’s college, a pale blue, I colored the caps and gowns using watercolor pencils and a thin tipped waterbrush.
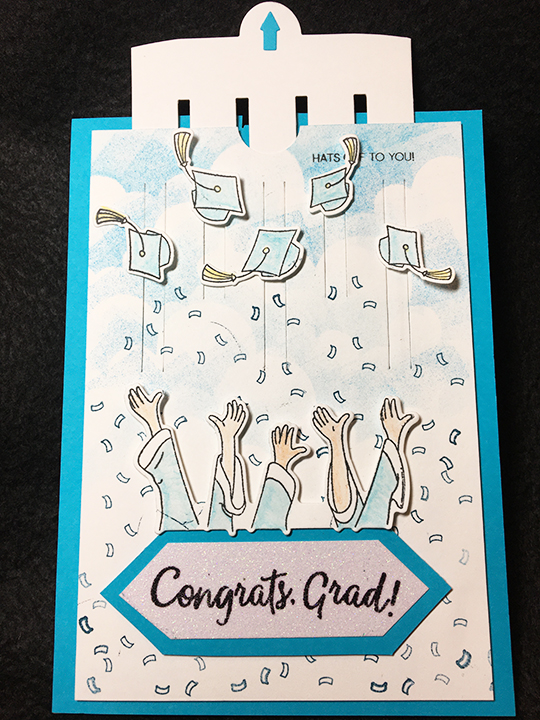
Next, I did all my die cutting of elements using the matching dies and the squarish quintuple slider. In my test card, I had placed the die that cuts the slots into the background card, upside down. So, making sure that I had all the slots lined up at the top end of my background and using the slider die as a guide to know where the position the slot cutting die, I cut the slots. (Watch the assembly video to see how the alignment is done.)
To assemble the slider mechanism, I suggestion watching another assembly video to understand how the slider flaps wrap around the slots and how best to keep the flaps aligned. Once the tiny foam squares are adhered to the flaps, the decorating of the card can begin. (Don’t forget to add some hint that the slider tab needs to be pulled up by adding a die cut arrow which is included in the slider die set.)
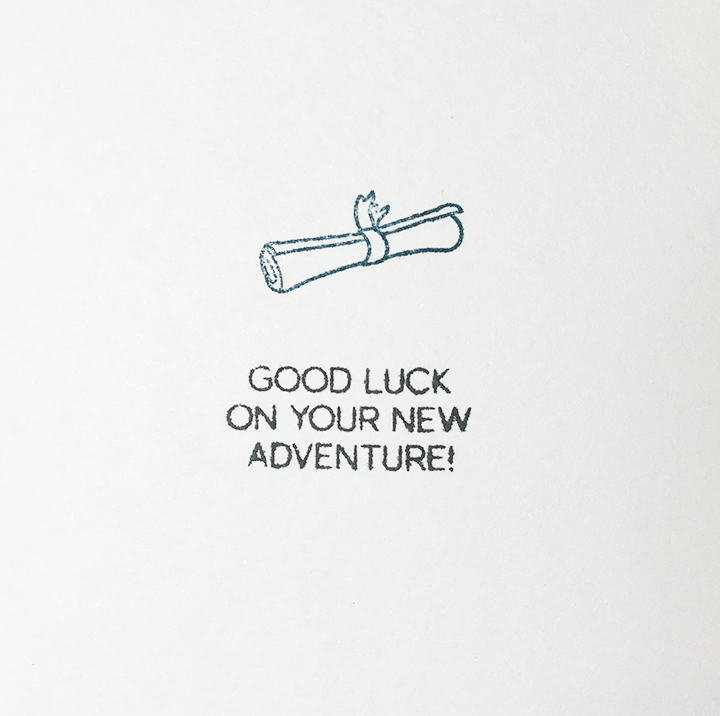
I found some scrap printable glitter paper in my stash and stamped the main sentiment directly on to it. For an added touch, I stamped “Hats off to you!” near the top front, and inside the card, I stamped “Good luck on your new adventure!” both in black. I decided the inside needed something else, so I stamped in blue above the good luck a tiny rolled diploma.
The back flap of the envelope had a cap stamped in blue to give a hint as to what was inside.