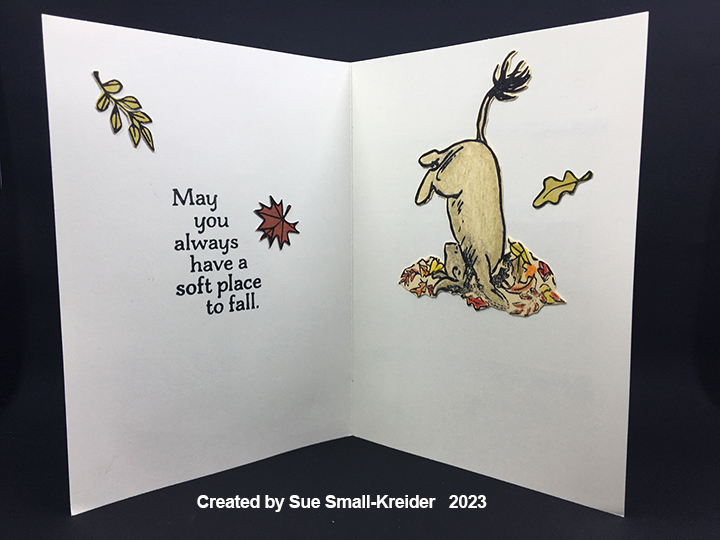
Crisp, colorful leaves gently falling off tree branches sometimes bring bitter-sweet emotions. A.A. Milne’s characters of Winnie-the-Pooh and Eeyore the donkey are playful reminders that fun can be had even in the worst of times.
For this card I used stamps and papers from Impression Obsession featuring E. H. Shepard’s Winnie-the-Pooh and Eeyore along with leaves and sentiments designed by Dina Kowal. The images were stamped in black ink and then colored with watercolor pencils. (I elected not to water brush the coloring.) Next the colored images were fussy cut. Additional leaves were stamped on some of the matted papers used on the card front and fussy cut.
The design principle of three is floated with the leaves throughout the card. Notice that the heart shaped leaf is always pointing to where your eye should flow. Leftover paper scraps were used to decorate the card back.
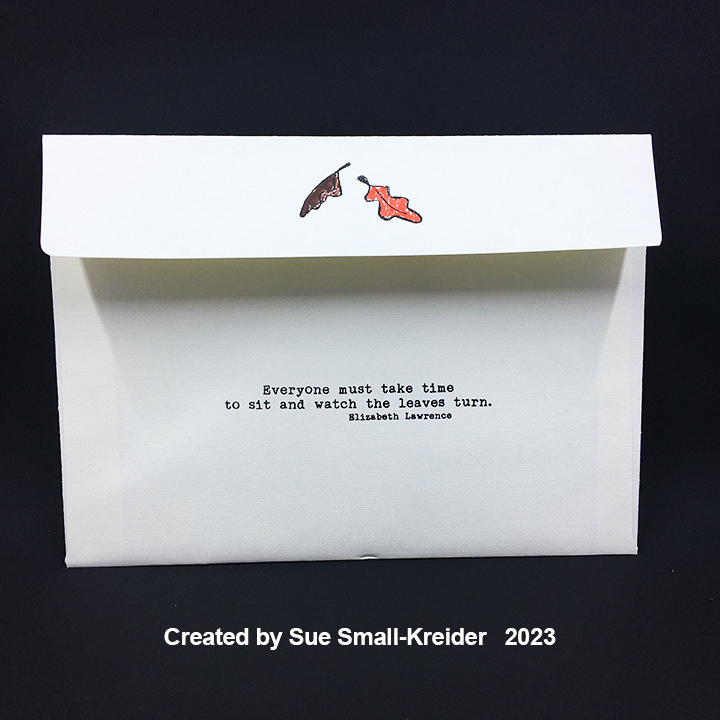
For the envelope back, leaves and a quote from Elizabeth Lawrence about taking time to watch the leaves turn colors, are stamped in black ink and colored with permanent markers.
Thank you for reading this blog post. I hope this inspires you and makes you smile. Please like and leave comments 😊
Materials Used:
Stamps
Impression Obsession – Clear Stamps designed by Dina Kowal – Pooh Window – CL1138
Papers
Impression Obsession – 6×6 Double-Sided Paper Pad – Classic Pooh – PP004
Park Lane Paperie – A6 Cardbase and Envelope – Ivory
Ink
StazOn – Solvent Ink – Jet Black
Ranger – Tim Holtz – Distress Watercolor Pencil- Antique Linen, Barn Door, Fired Brick, Mustard Seed, Peeled Paint, Rusty Hinge, Spice Marmalade and Walnut Stain
Pigma – Mircon 01 Fine Tip Pen – Black
Sharpie – Permanent Marker – Ultra Fine Tip – Orange and Brown
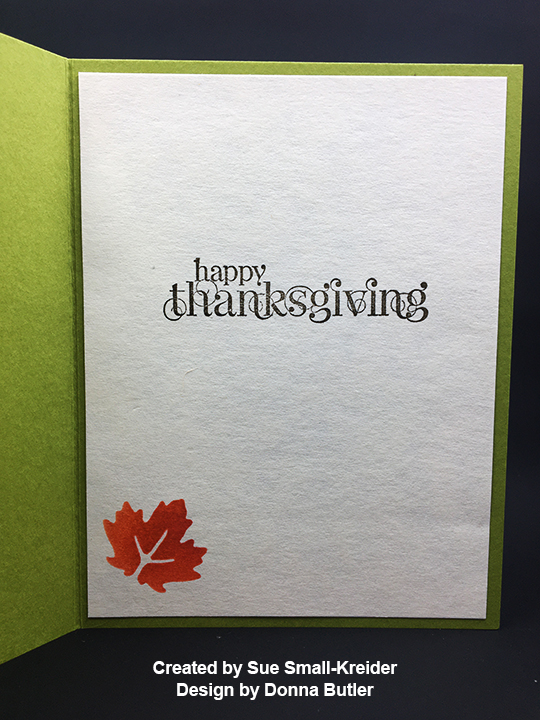
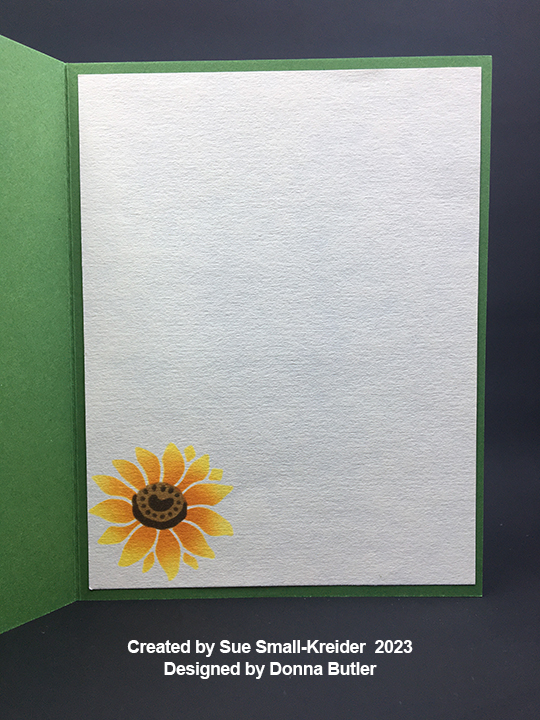
Last week I went to a cardmaking class using stencils taught by Donna Butler and had a chance to catch-up with some crafty friends I hadn’t seen in a while. Here are the cards I made.
EMBOSSED FALL LEAVES CARD
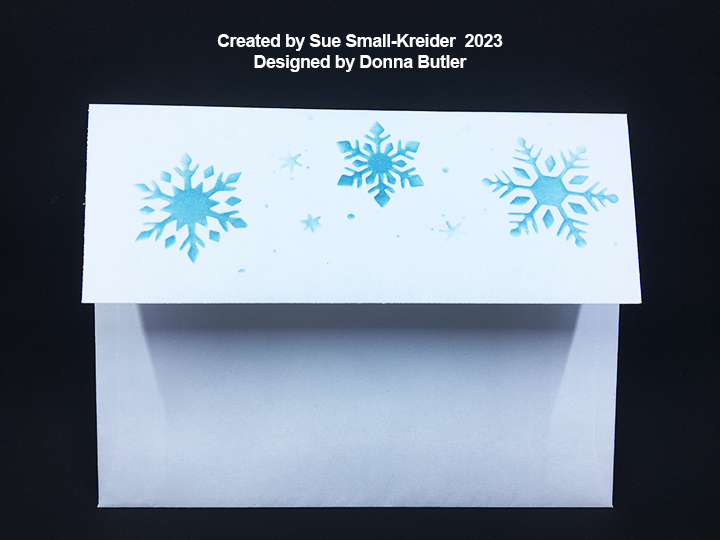
We embossed the stencil first into the top panel and then inked the piece. Inside and on the envelope we masked off a portion of the stencil to single out various elements.
SUNFLOWER CARD
Using several shades of ink easily created these striking flowers with 4-part layered stencils.
SNOWFLAKE CARD
Thank you for reading this blog post. I hope this inspires you and makes you smile. Please like and leave comments 😊
Last week I went to a cardmaking class taught by Donna Butler and had a chance to catch-up with some friends I hadn’t seen in a while. Here are the cards I made.
FRACTURED SHUTTER CARD
Here is a video that shows the Fractured Card or Faux Shutter technique.
SO REFRESHING CARD
Donna’s daughter Sarah designed this refreshing notecard.
IRRESISTIBLE BLOOMS CARD
Thank you for reading this blog post. I hope this inspires you and makes you smile. Please like and leave comments 😊
Cardbase: For this A2 (4.25×5.5-inches) card start with a piece of white cardstock 8.5×5.5-inches and scored and folded in half at 4.25-inches. Cover the back of the card base with white brick paper.
Shop Front: Watch an assembly video to get the basics on the assembly. Cut the shop front from white brick paper. (My paper was double-sided with red and white bricks on the back side.) Fold on score lines as directed in video. Decorate and add window acetate before attaching to cardbase. I used white and blue cardstock to cut the side posts and just blue for the panel below the windows. I cut the planters from white cardstock and brushed gray ink over them to add shape to them. The greenery is peppered with tiny red flowers made with a red gel pen. The planters are adhered and popped up on the shop front with thin foam squares.
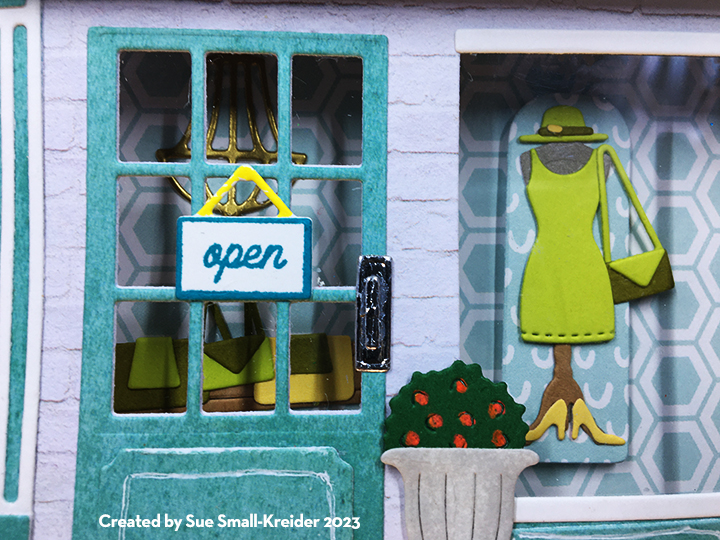
Shop Front Door: I decided to make the door window see-thru too, so I played with positioning the door and its windowpane die on the shop front. I only cut the panes into the front. Cut the door with pane die taped together with the door die and the decorative panel from blue cardstock. Ink edges of the decorative panel before gluing to bottom of door. (I used a white gel pen to freehand the lines on the panel.) I stamped the open sign (Fashion Shoppe Stamp set) and die-cut the sign base from white cardstock coloring string with a yellow marker. Die cut the door handle and plate from silver foil card and adhere to door side.
Shop Front Window: Cut a piece of acetate 4×5.25-inches. Use double-sided tape around all the window and door openings on the back side of the shop front.
Shop Assembly: Using double side tape, adhere bottom tab on shop front to bottom edge of front panel on cardbase. Cut a piece of decorative paper (I used a hexagon paper) 4.125×5.5-inches and adhere over the shop front tab and line-up with card fold. (I cut an additional hexagon strip to cover the top tab.) Decorate the inside of the shop before adhere top tab of the shop front . (I didn’t remember to decorate first and had to use tweezers to place all my shop pieces inside the shop.)
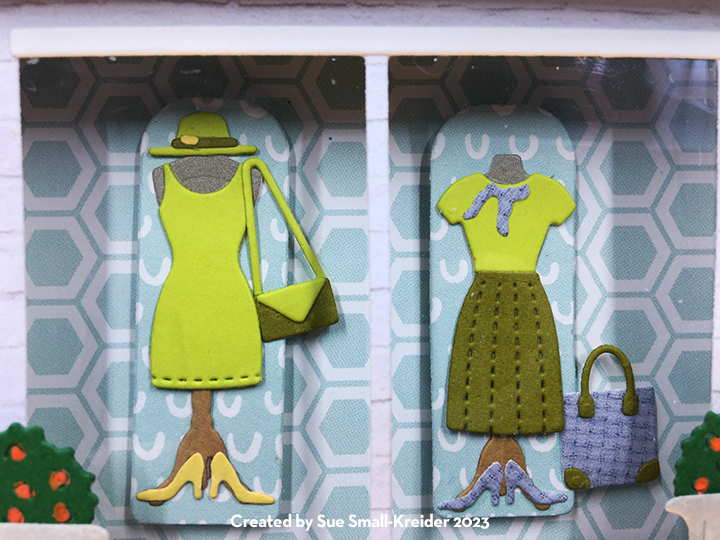
Watch fashion shop dies assembly video before constructing your outfits and merchandise table. (I used the mirror die to cut backdrops for my dress frames.)
Using double-sided tape on the front side of the shop front upper tab, adhere to card base as shown in the assembly video.
Awning: Die cut the shop awning from striped paper and fold along score lines. Glue the die-cut “Boutique” to middle of awning. I adhered the backside of the awning top tab with thin foam tape to the top of the card base.
Sentiments: The sentiment inside of “You’re classy from head to toe,” is from the Fashion Shoppe Stamp Set and stamped in a turquoise blue ink on a 4×5.25-inch piece of white cardstock. The sentiment piece was matted with a 4.25×5.5-inch piece of blue printed cardstock (backside of hexagon print.)
Envelope: The card fits into an A2 envelope. To give a hint as to what’s inside, a pair of shoes and a hat were glued to the back envelope flap.
Thank you for reading this blog post. I hope this inspires you and makes you smile. Please like and leave comments 😊
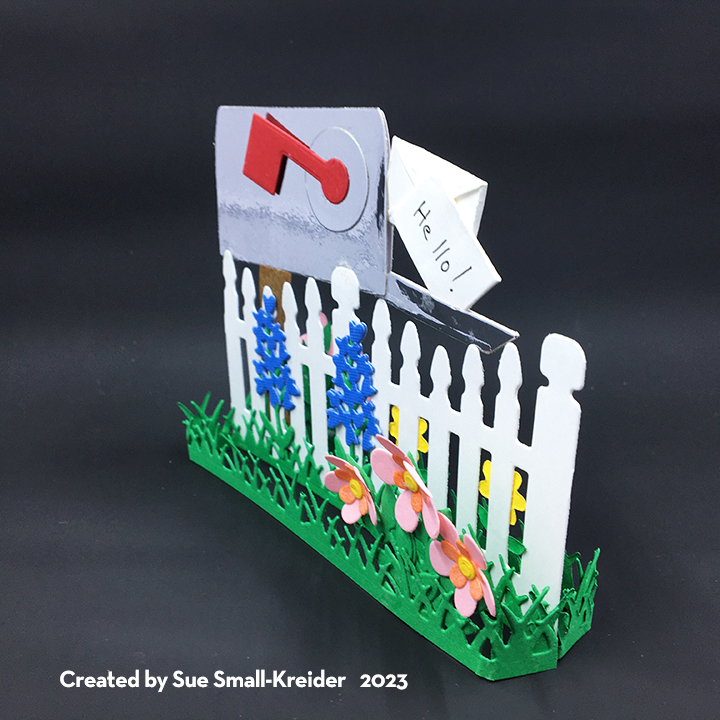
While more of a rarity to get a card in the mailbox these days, why not send a simple hello to someone you haven’t seen in a while. (Otherwise known as Happy Mail.)
This card was made using two of Karen Burniston’s new June 2023 release dies – Fence Landscape Accordion Add-On and Fun Flowers – and several previously released dies – Mailbox Pop-Up and Nature Edges. (The Nature Edges grassy strip is the longest of the straight grassy strips in all of KB’s dies. You could glue several together from the Fence Add-on, if you don’t have the Natures Edge set.)
Fence and Base: Cut one fence from the Fence Add-On set from white cardstock and trim off the four side tabs. Cut four of the grassy strips from the Nature Edges set from green cardstock. Lay grassy strip over the fence with an even amount of grass extending beyond the fence. Fold the excess grass over to form two tabs. Repeat for the remaining three grassy strips. Take two strips and glue the tabs over the tabs on the other strip to form a rectangular shape. Glue one side of the rectangle to the bottom of fence. Repeat with remaining grassy strips and glue to bottom of the other side of fence.
Mailbox: Using the Mailbox Pop-Up, cut two of the mail mailbox shape from silver foil cardstock. Cut two of the lids, making sure to reverse the foil side of the cardstock for one of them. Cut one wooden post from brown cardstock and one red flag. Cut one circle from silver foil cardstock. Cut two envelopes from white cardstock. Assemble envelopes as shown in assembly video and write “Hello” on the fronts. Glue front lid to bottom edge of main mailbox piece. Glue envelopes to side and lid of mailbox so that one envelope faces front and the other faces back. Glue wooden post to back of mailbox. Glue back lid piece matching notch to front so silver shows on both sides. Glue back mailbox piece onto front covering the post top. Position on back side of fence and glue in place. Adhere silver circle and red flag over hole on front of mailbox. Cut a butterfly from the Fun Flowers set and glue over the hole on back of mailbox. (I inked my butterfly with a dark blue ink and filled in its body with a black marker.)
Flowers: The flowers glued to the fence are cut from the Fence Add-On set. Cut two of the bluebell flowers in blue and two of the tall stem in green and glue stems to the flower backs. Cut once the two small flowers from yellow, the two circles from brown and the two stems from green. Glue brown circles to the flower centers and the stems to the back of the yellow flowers. The pink bush flowers that are glued to the opposite corners of the grassy rectangle base are from pieces in the Fun Flowers set. For each bush, cut four of the long leafy stem from green, the five flowers in one die from pink and the tiny circles from yellow. (I inked the three smallest flowers to be darker pink.) glue the four stems together to form a bush. Add a dot of glue to the three largest flowers and using a pick-up tool place one small dark pink flower in the center of a large flower, making sure to alternate the flower petals so no gaps show. Add another drop of glue to the center of small flower and drop in a tiny yellow circle. Fold all petals up to form a just opening flower. Glue to a top leaf on bush. Repeat steps until you have two bushes, each with three flowers. Glue bushes to opposite corners of the base rectangle so weight is evenly balanced and when the base is folded closed no leaf or flower overhangs the grass base.
Envelope: The folded card fits into an A2 (4.5 x 5.5-inch) invitation size envelope. I enclose the following CRX sheet to let the recipient know how to open the card.
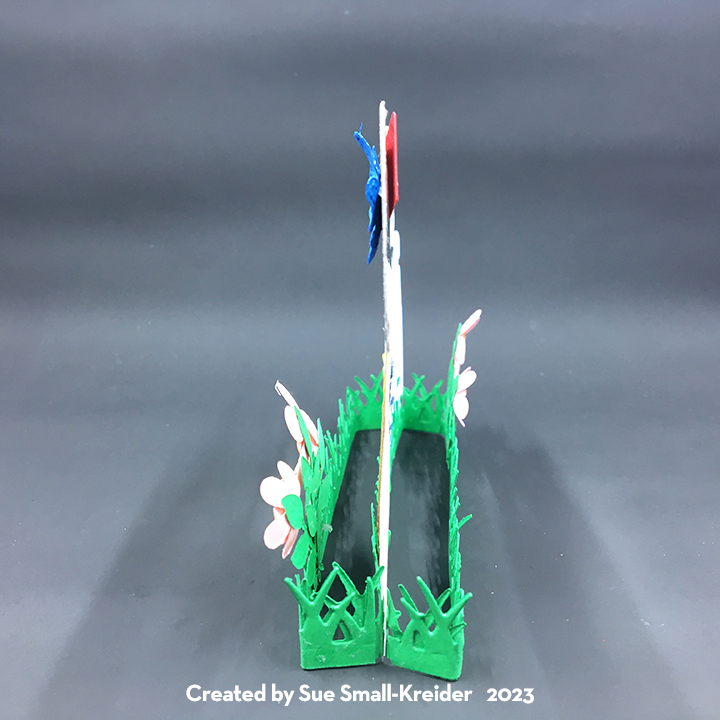
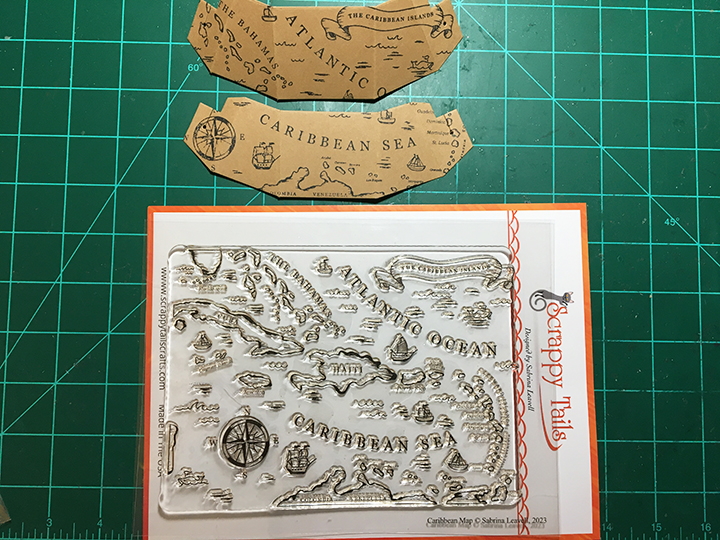
Base: Stamp on kraft paper the Caribbean Map Stamp. (To see the map colored with its coordinating layering stencils look at A Map To The Caribbean.) Cut two of the Pop Up Stand from the map. Train the folds on each piece and glue tabs with slot for rubber band together. Add rubber band. (I used a #12 band.)
Anchor: Cut two anchors from gold cardstock and two anchors from kraft cardstock using the large die from the Anchor die set. Trim the rope pieces from the gold anchors. Using the rope pieces in the die set, cut two sets of ropes from kraft cardstock. With a sponge dauber, ink the rope pieces to create shading. Glue the rope pieces to the kraft cardstock anchors. Next, glue gold anchors in place.
Sentiments: Three of the six hot foil banners in the Nautical Banner hot foil plates set were used – “Lets sail-ebrate!” and “Waving Hello.” (I usually do batch hot foiling with my Spellbinders’ Glimmer Foil System because it takes time to set-up, heat-up and cool-down.) The sentiment banners are attached to the anchors with foam squares after being cut out using the coordinating dies. “Ahoy!” was cut from navy blue cardstock from the Set Sail paper pad three times using a bonus gift die. Each “Ahoy!” was glued in place on the base and envelope. Gems and pearls from the Set Sail Card Kit were added to each anchor.
Envelope: The card folds flat to fit into an A7 envelope that I decorated the back flap with the the remaining “Ahoy!” and a scrap of gold rope.
Thank you for reading this blog post. I hope this inspires you and makes you smile. Please like and leave comments 😊
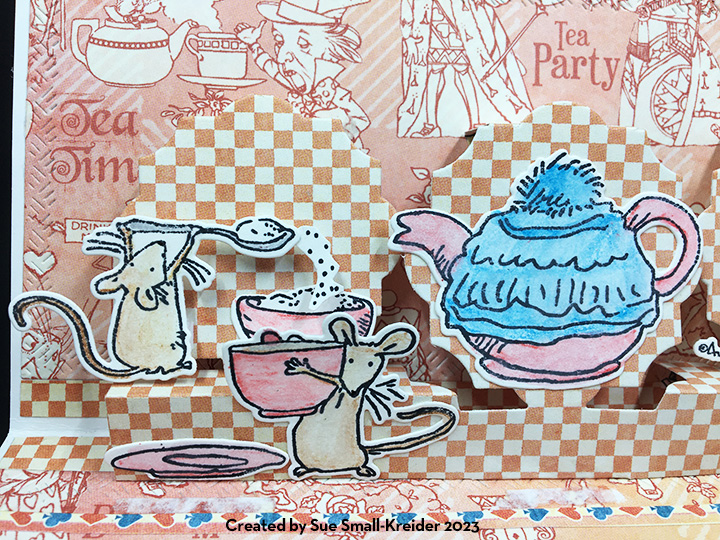
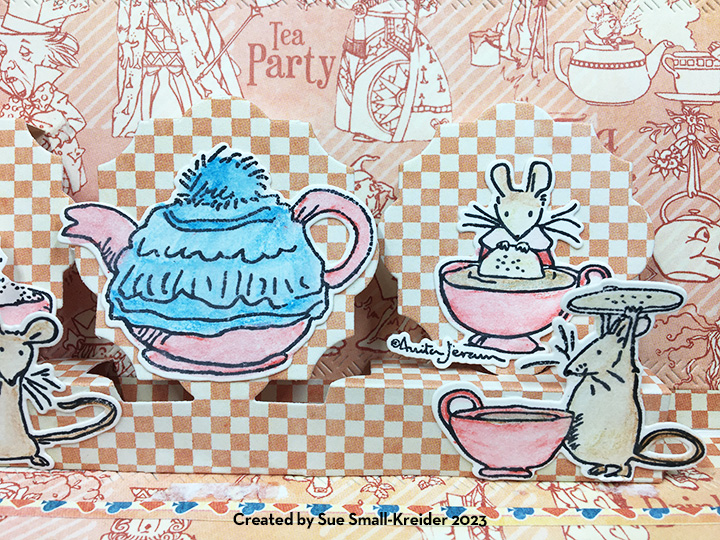
This card was made for Craft Roulette #164 whose parameters included a slimline card, tea party colors, a word element and a hand-drawn line.
I started with an 8 1/2 x 3 3/4 inch top fold slimline white cardbase. The word element “TEA” is die-cut into the front decorative paper which comes from Graphic 45’s Alice’s Tea Party Collection. “Time for” was hand-drawn as was the required line below it.
To pop-up the inside scene, I used Karen Burniston’s Little Labels Pop-Up. The stamped and water-colored mice having a fun party are drawn by Anita Jeram.
I popped-out the mouse spooning sugar with a double layer of foam squares.
Just like the inside background panels, the card back was decorated with two stripes of decorative papers taped together and the die-cut using the largest crosshatch rectangle from Karen Burniston’s Long Rectangles-Crosshatch. The cut outs of “TEA” from the front panel were glued onto the back .
Thank you for reading this blog post. I hope this inspires you and makes you smile. Please like and leave comments 😊
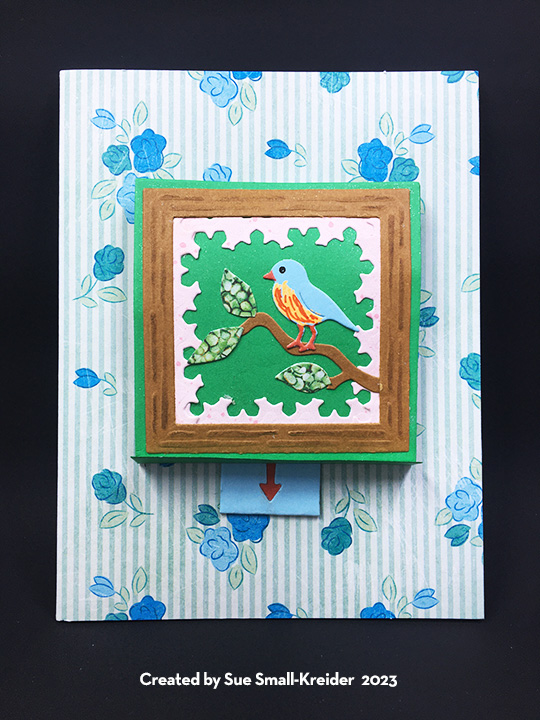
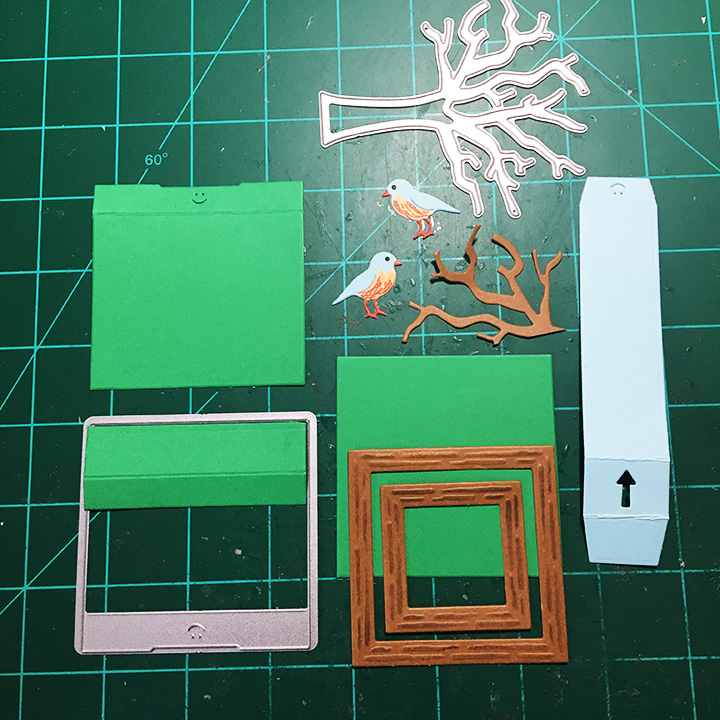
This card was made for Craft Roulette #162 whose parameters included a matchbook card, flowering field colors, a bird and woodgrain.
For the pop-up card on the purchased printed cardbase, I used Karen Burniston’s Frame Pull Pop-Up die set and branches and leaves from her Tree Pop-Up die set.
I followed the basic assembly video instructions for the Frame pull Pop-up using the packaging image as my design inspiration. Before I attached the mechanism to the card, I glued an inch long strip to the bottom and folded it over to form the lip of the matchbook.
Because the green background seemed bland, I covered it with a glitter gloss for some sparkle.
The blue birds were colored with markers while the tree leaves were cut from spotted green paper. I used some pink border scraps for the pink inside the woodgrain frames. The frames were embossed then die-cut and finally inked with a darker brown ink using the stenciling feature on the dies.
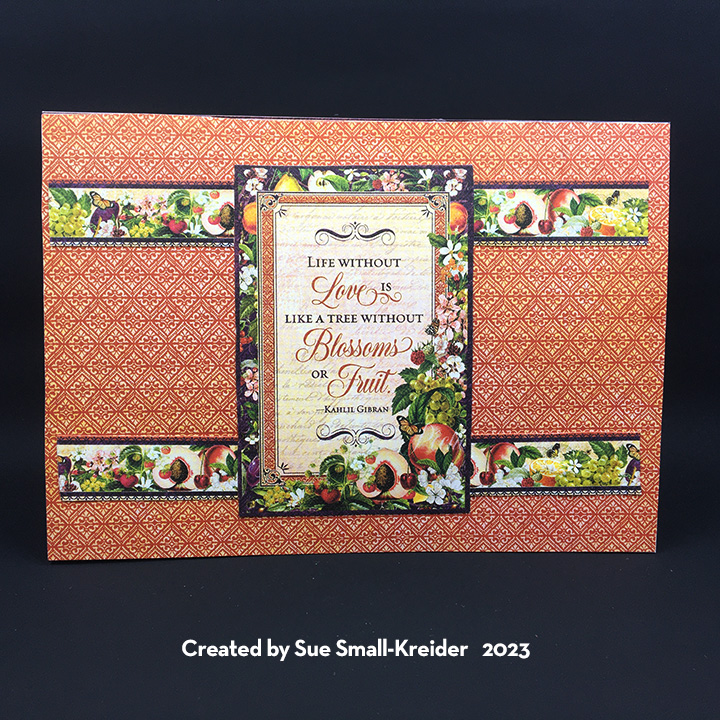
This card was made for Craft Roulette #159 whose parameters included a card type of my choice (5×7 pop-up), strawberry fields colors, plaid or gingham and a chair. It has a conservatory or fancy potting shed feel to it.
Karen Burniston’s Adirondack Chair die set is the basis for this pop-up card that uses a slipcover to convert it into an overstuffed chair. (See this video for technique.) I made a template that I can used to quickly create the slipcover.
First I glue strips of paper to the from of the legs and then glue the arms on pushing down the over hang tips to form the rounded arm fronts. Glue the slip cover to the chair base.
The plants are die cut from the Garden Charms set while the dog is from the Doghouse die set. All are popped-up using cubes made from strips of matching cardstock. The tiny bright strawberries are clay shaker elements adhered with dots of glue.
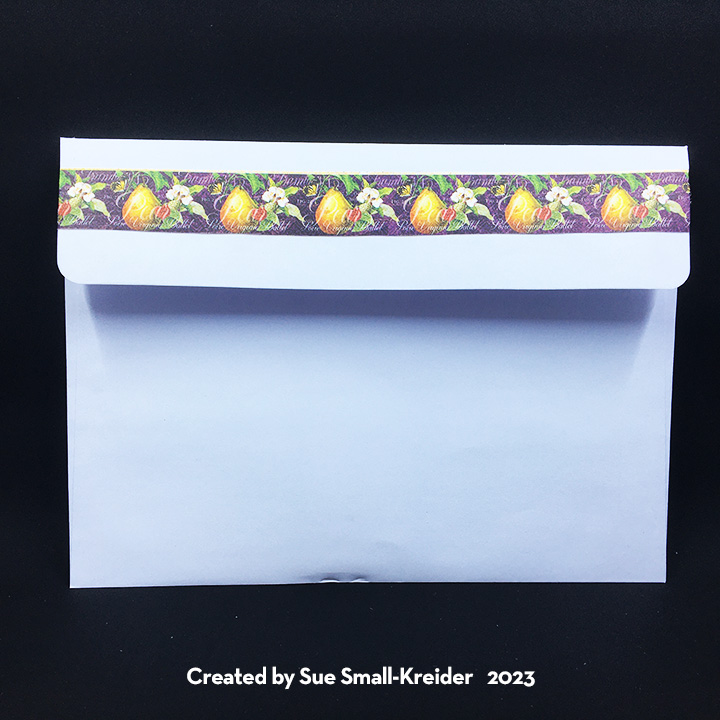
I like being able to use one paper collection for an entire card for coordinating colors and designs. The Graphic 45 Fruits & Flora set was perfect for this in the 8×8-inch size. It had journaling tags and border that were just the right scale for this card and envelope flap.