
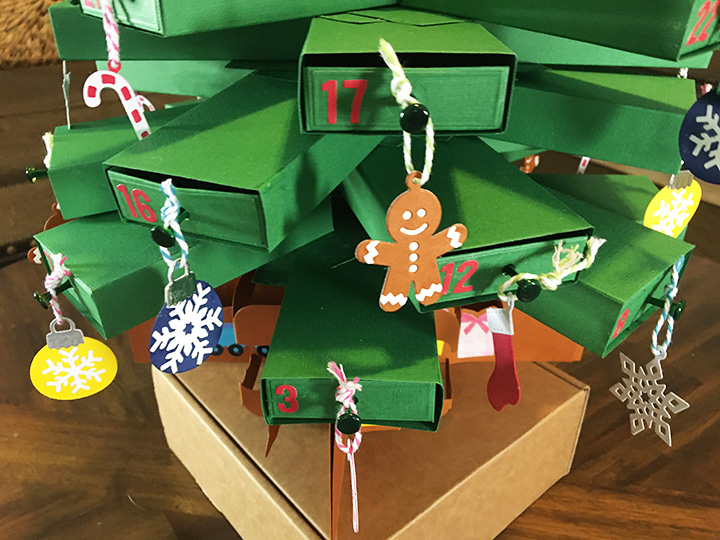
Here are some sneak peaks at next week’s release of new Karen Burniston dies. Dies will be available on December 12, 2022.
Slider boxes are fun little box drawers full of surprises. Below are some examples.


Here are some sneak peaks at next week’s release of new Karen Burniston dies. Dies will be available on December 12, 2022.
Slider boxes are fun little box drawers full of surprises. Below are some examples.
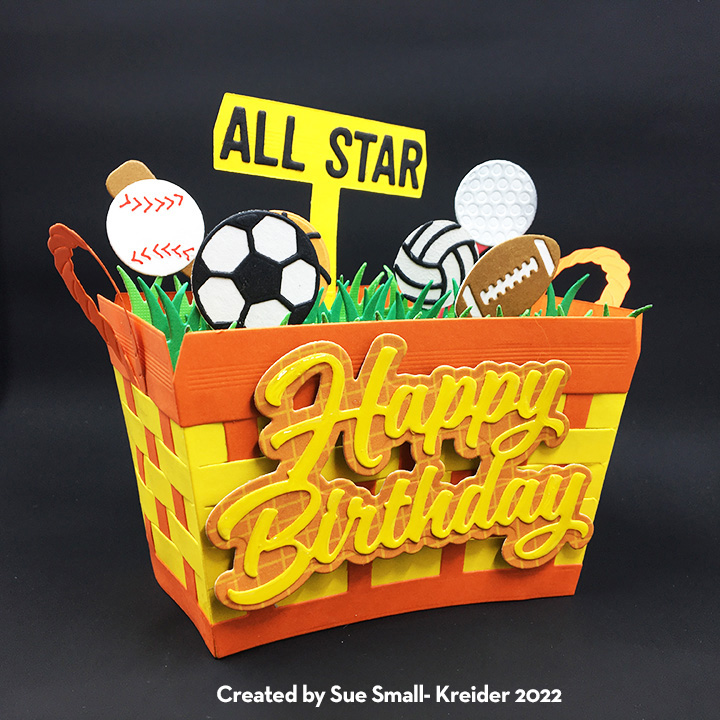
Here are some sneak peaks at next week’s release of new Karen Burniston dies. Dies will be available on December 12, 2022.
While wide woven baskets could be made using the original die, the new wide woven basket die makes it so easy.

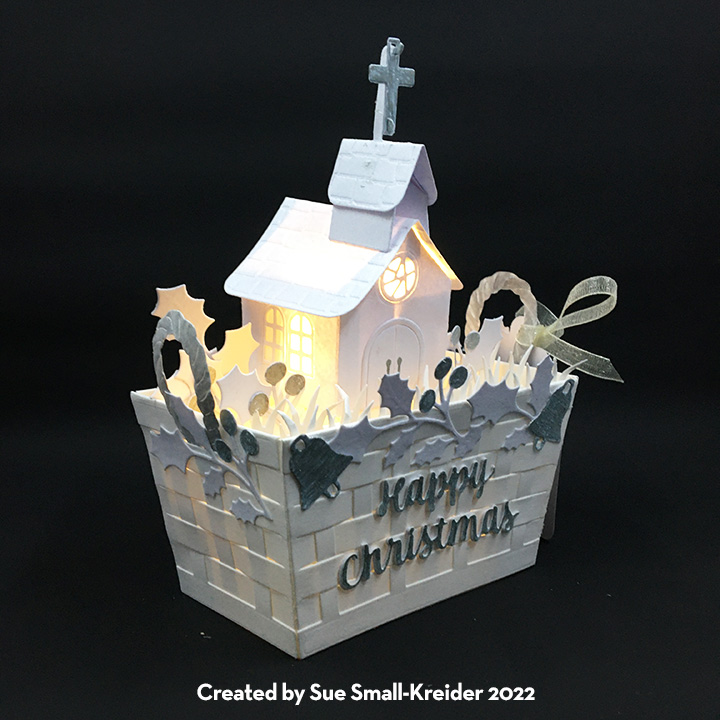
Here are some sneak peaks at next week’s release of new Karen Burniston dies.
These Tiny House add-on dies give more possibilities for the Tiny House pop-up set. Dies will be available for sale on December 12, 2022.

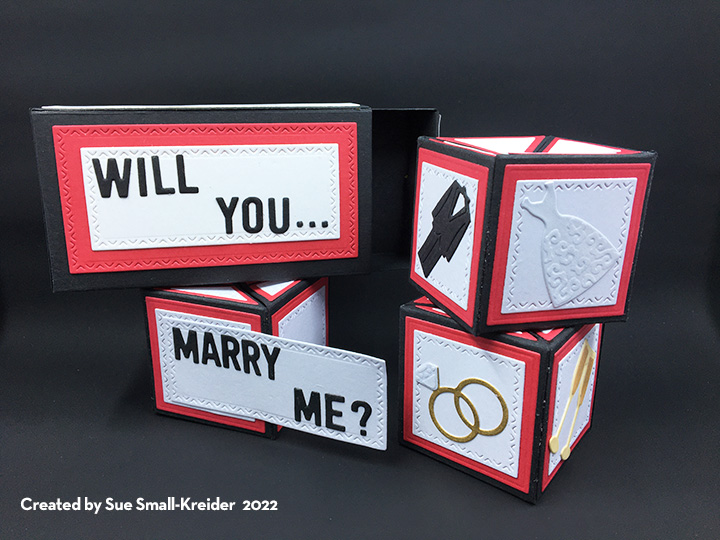
Here are some sneak peaks at next week’s release of new Karen Burniston dies. Dies will be available on December 12, 2022.
Bam Boxes are small (1 1/2 x 3/4 inches) that are pop-up cubes that make it possible to animate a basket or tiny house open instantly when removed from an envelope. They also allow for objects to be placed almost anywhere inside on a scene card and pop-up instantly when the card is opened. Below are some examples.


Sometimes it’s nice just to watch it snow with a warm cup of coffee or hot coco.
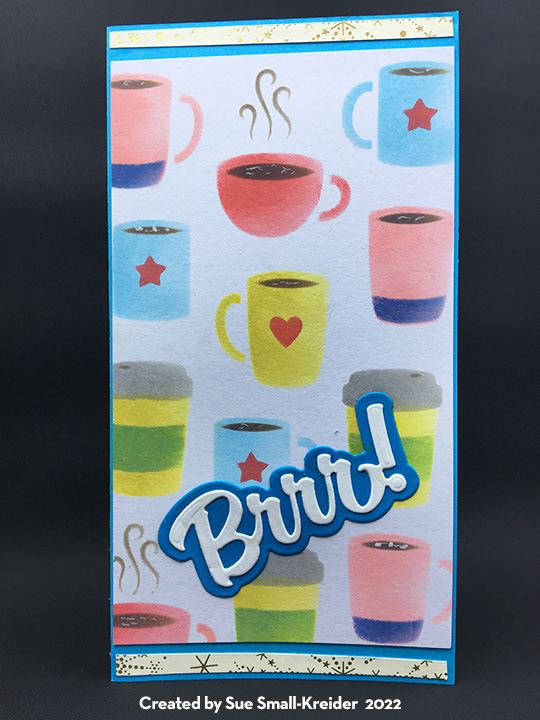
This fun mini-slim sized card is a blend of stenciled coffee cups and a die-cut snowflake collage pop-up. All the dies used are by Karen Burniston while the layered stencil is by Pretty Posh Pink. The coffee cups by both designers are similar in size and work well together.

I went through all my Karen Burniston die sets to find as many different single snowflakes as possible to use for the swirling collage mechanism inside the card. (I recommend watching the assembly video before starting your card. The video has useful tips and card base minimum sizes that will help you design your card.)

The sentiments all come from Karen Burniston’s Word Set 13 – Snow and include the shadow dies for the large words of “Brr!” and “Snow.” The mug and travel coffee cup inside are all die-cuts inked similar to the stenciled ones on the card front.

As with all my cards that are sent in an envelope, I have decorated the back flap with a hint of what’s inside. This time I stenciled a coffee mug on the flap.
See more coffee themed cards by clicking here.
Thank you for reading this blog post. Please like and leave comments 😊
Materials Used:
Dies
Stencils
Ink
Papers
Miscellaneous
This card is part of the Karen Burniston Design Team snowmen challenge for November.
Today, I’m show you how to make Papa Snow.

Papa Snow is comprised of all three balls – the Mini Ball Pop-Up, the Bitty Ball Pop-Up and the Surprise Ball Pop-Up with all his facial features, hat and stick arms from the Snowman Add-Ons.
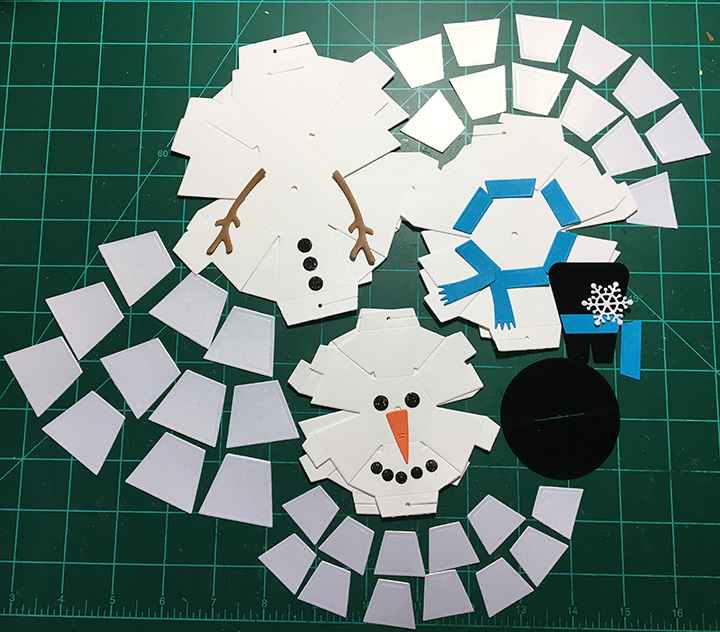
I find watching the assembly videos for the balls very useful. (Bitty Balls, Mini-Balls and Surprise Balls) Numbering the order of gluing the tabs is useful for the assemble of the balls. I cut all the trapezoid panels from white gold shimmer cardstock. And the ball halves are cut from a 100 lb. smooth white cardstock. Assemble the base Surprise Ball with a brad threaded through the bottom hole.
(I used the rubber bands recommended by Karen Burniston and had noted the number of knots for each size ball I used in the photo.)

Because the different size balls don’t cover the “shoulders” or top of neck of the snowman, I like to cut a full-size hexagon to cover this area by tracing the die and then cutting with scissors.


Once all the balls are assembled and decorated, glue the balls together. Next, you’ll attach the snowman to the card base with the brad.


Learn more about How each member of the Snow Family was created in these blogs:
Thank you for reading this blog post. Please like and leave comments 😊
Materials Used:
Dies
Papers
Miscellaneous

Pop-up ball cards always remind me of the jack-in-the-box toy when you open them and something pops up to make you smile. This pop-up ghost card was designed for a three-year-old boy for Halloween.

The card front and easel base are my design. (You can download the full-size scan I made of the ghost card front for free.)
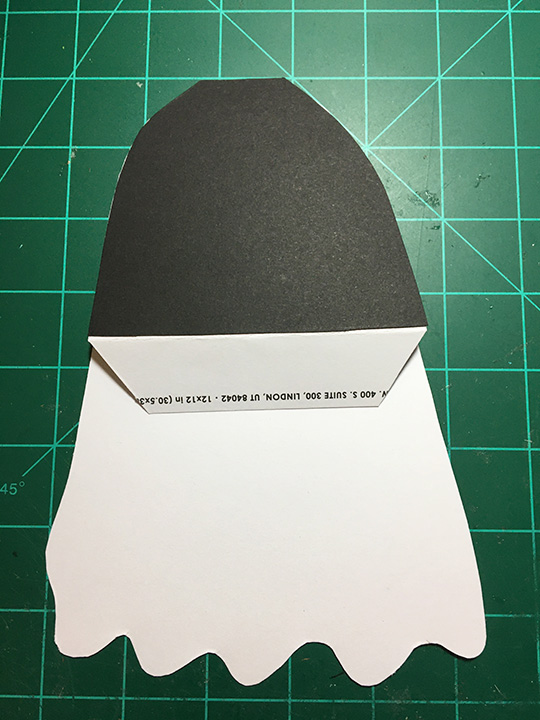
I traced the ghost onto a 12 x 12 inch sheet of cardstock twice. Next, I cut the cardstock between the ghosts and fold the card stock at the top of the ghost’s head and cut out two layers of the ghost leaving the top of the ghost’s head attached as a fold.
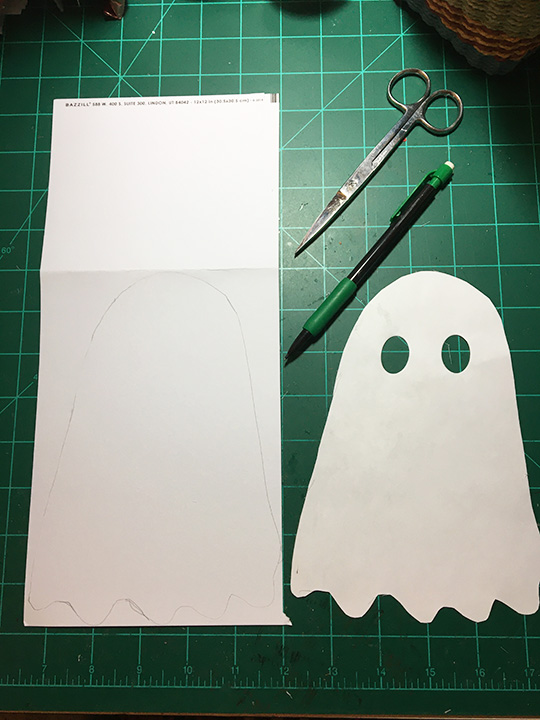

This will be the card base and easel prop. The second ghost I cut all the way around and used the largest oval die from the Karen Burniston Bitty Ball die set to cut out the eyes for the card front ghost.
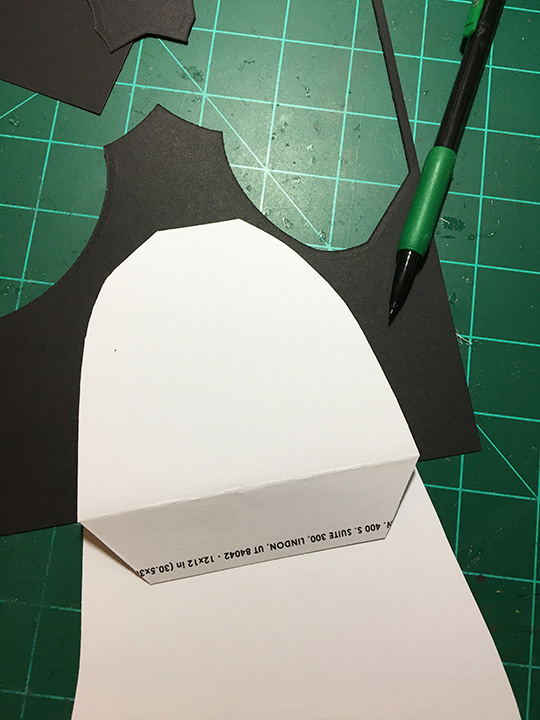
I traced the easel piece as well as the whole ghost back onto black cardstock and cut both pieces out. The easel back piece needs to be glued so that when the white ghost card front is glued onto easel flap the eyes show through as black.
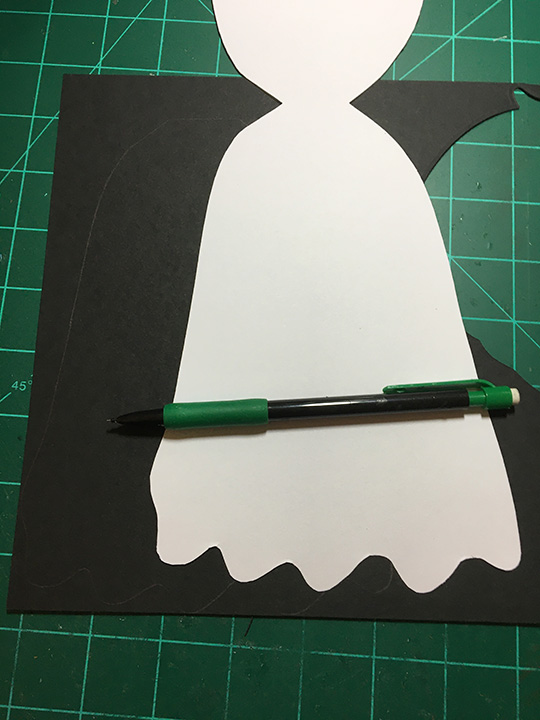


(Don’t glue the whole black ghost shape onto the back of the card until after the pop-up balls have been attached to the card base. This piece hides the brad legs.)
For the pop-up ghost inside I covered two mini pop-up balls (made using dies by Karen Burniston) with four layers of cheesecloth cut into a 6-inch circle and glued to the top pop-up ball. (Follow the assembly video for the pop-up balls.) Cut all pieces from white cardstock. Cut two black eyes using the same oval die used for card front ghost.


I made a band to hold the card closed from a leftover piece of white cardstock. The “BOO!” on the ghost as well as the band sentiment are by Karen Burniston from the two Halloween die sets listed below.


The card fits into a 6 x 9 inch envelope. I stamped the front and back of the envelope with ghost stamps by Julie Ebersole.
I often add a CRX slip that helps the card recipient know how to open the interactive card. (You can download the sheet with four slips on it. for free.)
Thank you for reading this blog post. Please like and leave comments
Materials Used:
Dies
Stamps
Inks
Papers
Miscellaneous

There is nothing so relaxing as a train ride through the mountains. Seeing the pine trees at the higher elevations and the babbling streams in the gullies. Hearing the chug-chug-chugging of the steam engine and experiencing the darkness of a mountain tunnel coming back into the sunlight.

In my challenge to myself to see how many different themed cards I can make with Karen Burniston’s new Fireplace die set; I decided on a mountain train tunnel with the mouth of the tunnel using the fireplace mechanism’s opening. All the dies used are by Karen Burniston.

I had made multiple train cars and engines for an earlier project. (Watch the assembly video for the trains.) The train tracks are from a train elements set and I cut 4 of them to have enough pieces to form the track I needed for the front and inside of the card. For the smoke from the smokestack, I turned the smallest cloud from the Outdoor Scene set on its side and glued inside the stack.

The front of the card uses curving hillside with large pine trees from the Outdoor Scene set and the treeless curving stitched edger from the Long Nature Edges set for the foothills. I shaded the hillside tope edges with a pale brown ink.

For the card’s sentiment, I double cut the large words “Enjoy” and “ride” once from brown and again from black so that I could offset them to create a shadow. The oval cuts out the word “THE” so it is backed with a scrap of black.

The inside of the card requires some practice laying out to get the right placement of the mountains, so they won’t stick out of the card when closed. (Watch the fireplace assembly video before laying out and assembling.) I used scrap pieces of brown lightweight cardstock to cut my crosshatch ovals. (Largest oval die in set was used.) I cut off the bottom of the ovals to have varying heights. The largest oval I turned over on the back, traced the mechanism opening onto and then die-cut the opening using the second to smallest to fit inside the penciled opening.


The smaller ovals are glued to the sides and behind the oval with the tunnel opening. I then adhered the fireplace mechanism as shown in assembly video and glued the mountains onto mechanism matching up the openings. Next, I pieced together the train tracks to come out of the tunnel and near the side of the mountains. Using the pop-up strip from the Fireplace die set and the two angled pop-ups from the Mini Pops set, played with placement of the pop-ups with the train pieces to set spacing. Glue the pop-ups first and once their glue has set, then adhere the train pieces. (I bent the pop-ups at their original scored folds, but you might play with other folds and or strips to get a more realistic alignment of the train cars.)


The babbling stream is created from strips of patterned paper cut with the Long Nature Edges curving stitched edger. The diagonal placement adds drama to the card and space in the corner to write a personal message.

Leftover pieces from the train track as well as pieces from other card projects complete the back of the card.

As is my habit, I decorated the envelope back flap with additional train pieces to hint at what’s inside.
Thank you for reading this blog post. Please like and leave comments 😊
Materials Used:
Dies
Papers
Inks
Miscellaneous

Karen Burniston Design Team September Challenge “JUST…”
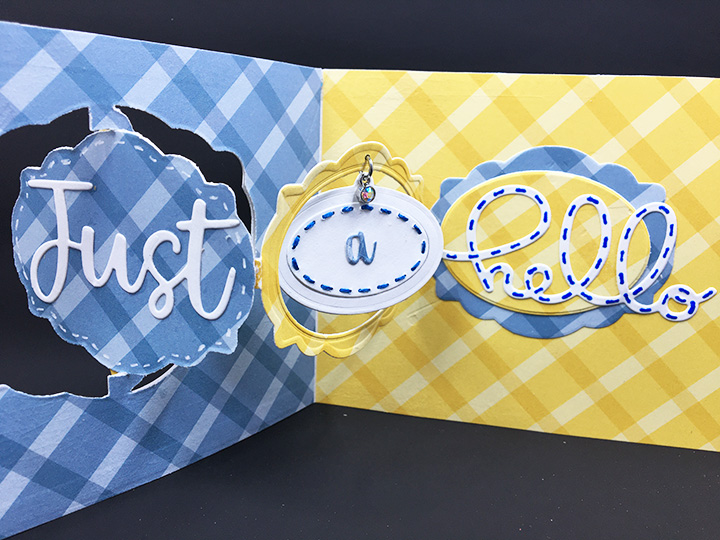
Just sewing a hello to you all. The fun new sewing charms from Karen Burniston’s August 2022 release make for a cute card. Paired with the Label Charm Pop-Up and Word Set 15, this 4.25×5.5-inch card is a quick make.

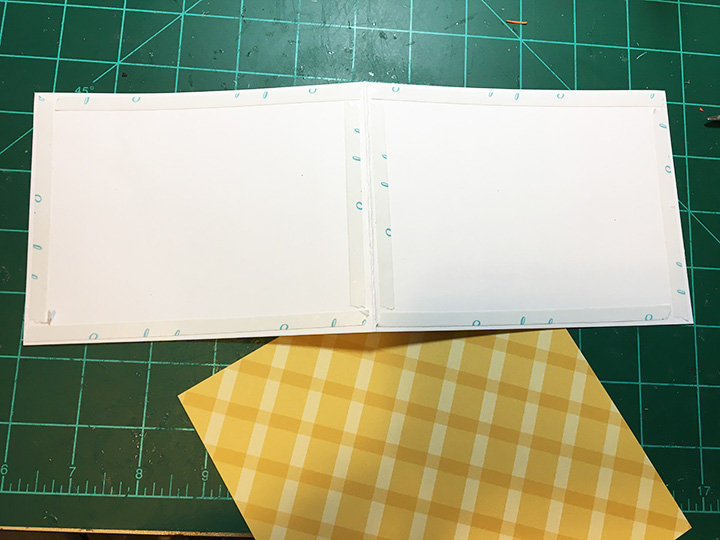
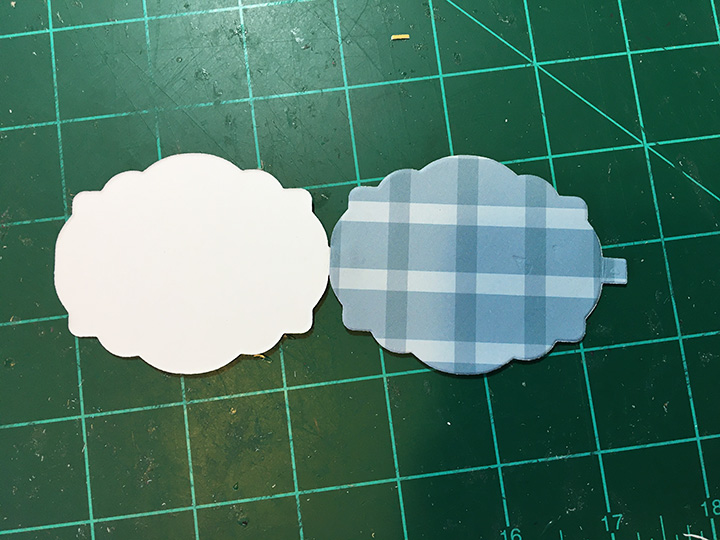
I started with a 4.25-inch by 11-inch card base folded in half. Using double-sided tape, I covered the inside and outside panels with yellow and blue plaid paper. (My favorite technique for using double-sided tape is to place around the edge of the card, lift the ends of the tape so corners are sticky, position the covering paper, you can shift the top paper a bit before you pull all the tape backing paper strips.)

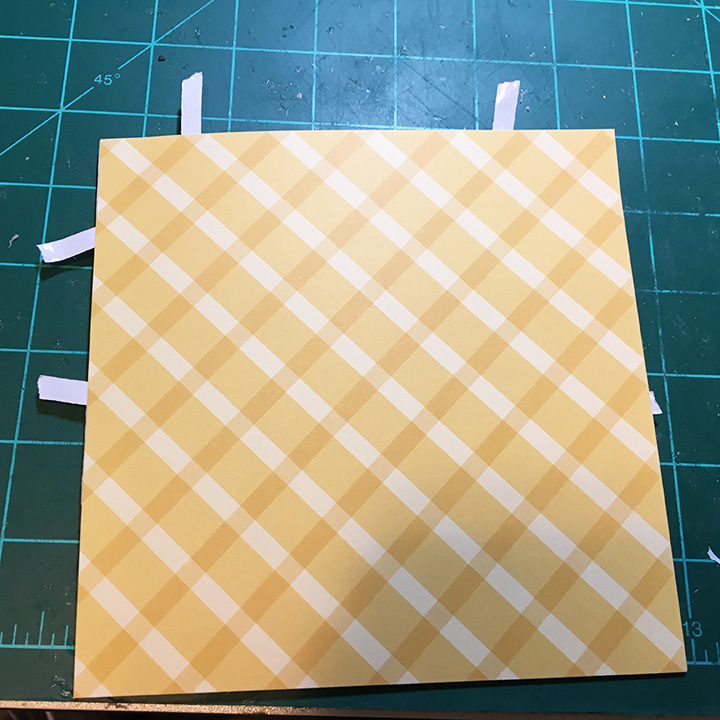
Since I used 6-inch by 6-inch paper, I opted to trim it to size after adhering it to the card.

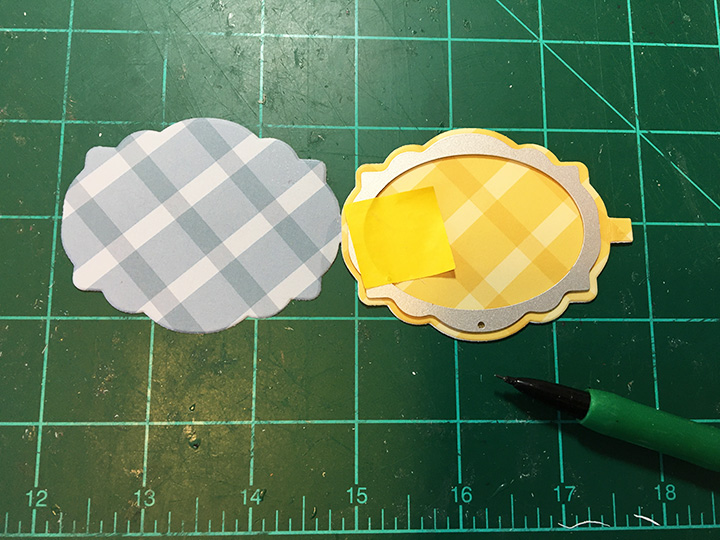
I centered the pivot label charm pop-up die over the front of my card and die cut through all three layers of paper and cardstock. Because of its thinkness, I ran it throught my die cutting machine twice.

Because I did not adhere the center of my decorative papers to the card base, when I die cut the front label pivot, I could snip away the decorative labels from the paper and use them to decorate my card.
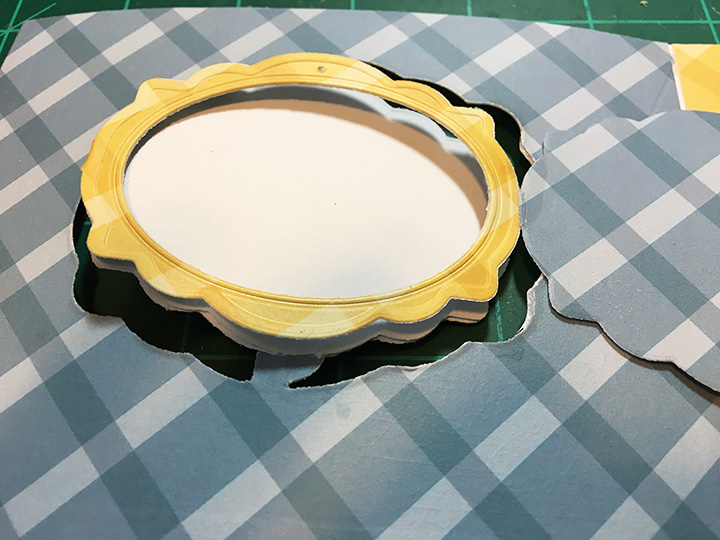
I cut two blue and one yellow tabbed labels. One of the blue labels, I glued the tab to the back of the yellow label and the adhered the other blue label over the back of the yellow label to hide the glued tab. Next, I used the label frame die with the hole to cut the frame from which the charm will hang from the double decorative papers side. Mark the hole to be pierced before cutting. (I would adhere the charm to the frame using a metal jump ring at this point, but you can add it as I did after the frame and label is glued into the card. It is harder to manipulate once the card is assembled.)

Fold the charm frame and attached label together as they will go into the card. Place a drop of glue on the frame’s tab and adhere to the back side of the card front label. Glue the blue label to the inside card back panel.
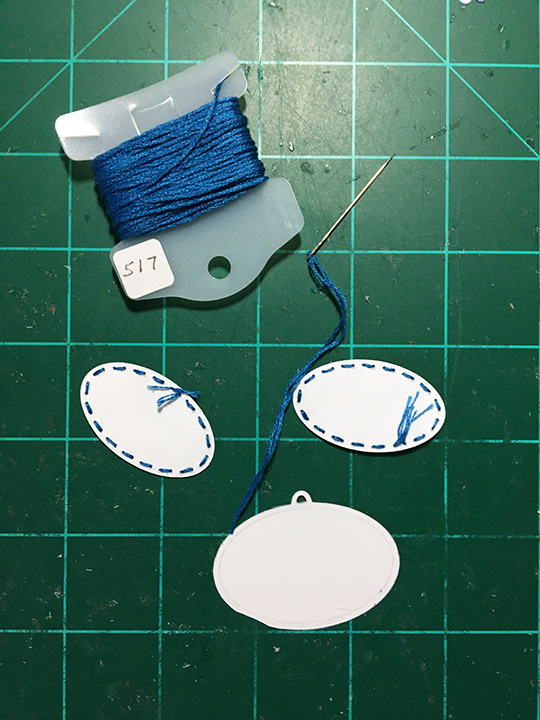
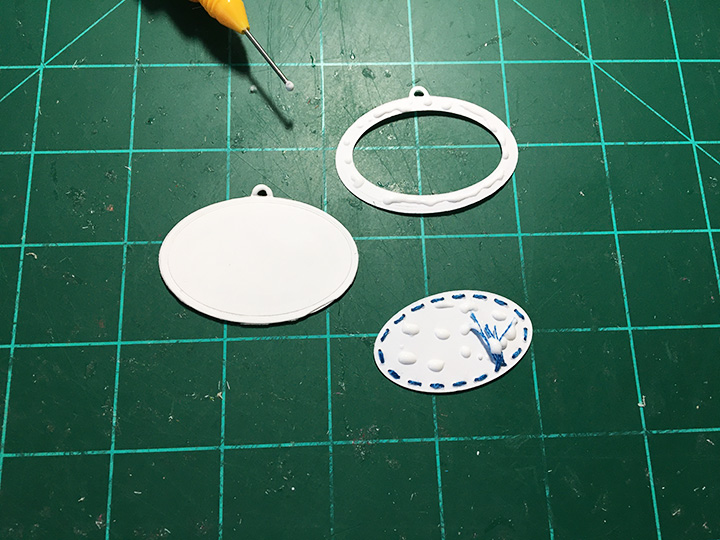
I cut three white charms. Two of the charms I cut the dotted oval from to form a charm frame and an oval. I stitched around the center oval of the charm with blue embroidery floss. To assemble glue the charm frame to the solid charm and then adhere one of the stitched ovals. Turn solid charm over and repeat.

I used four word sets for this card. The word sewing, I had to splice together from the words “wish” and “sending.” “Wish” is from Word Set 2. “Sending” is from Word Set 14. You can see in the photograph the sections circled in red where glued together to form the word “sewing.”
“Just” is from Word Set 15 and “Hello” is a single large die that embossed the stitch marks for you to color in with a fine -tipped marker.

The sewing charms (assembly video) can have their loops cut off and glued in place. I free-handed the stitch marks around the label and the label window with white and blue fine-tipped pens. For the back of the card I used the white waste from cutting the front pivot label to frame, and the leftover yellow label also cut from the front. The button and thimble cover the gaps in the frame.

As with all my cards that are sent in an envelope, I have stamped the back flap to hint at what’s inside. This is an A2 envelope. The card will require extra postage in the USA because of the thickness and the added metal charm may mean I’ll send the card in a padded envelope.
Thank you for reading this blog post. Please like and leave comments 😊
Materials Used:
Dies
Papers
Pens, Inks & Stamps
Miscellaneous
