This card is part of the Karen Burniston Design Team snowmen challenge for November.
Today, I’m show you how to make Mama Snow.

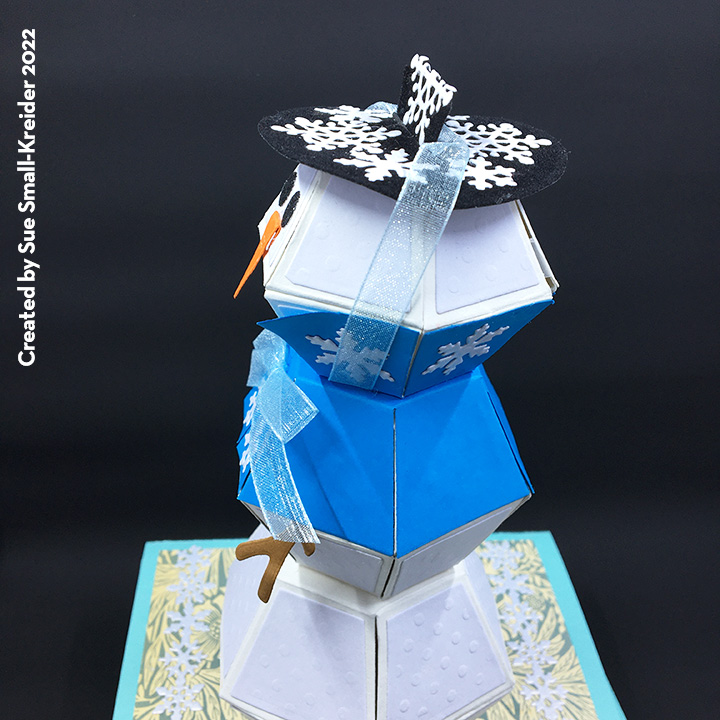

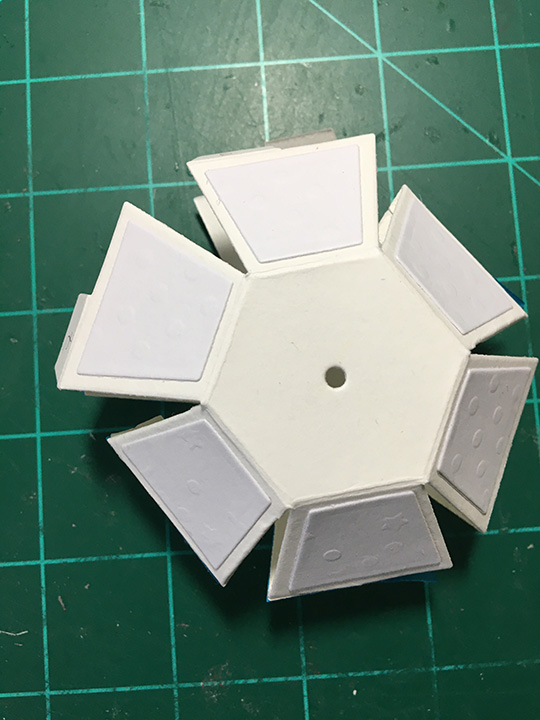
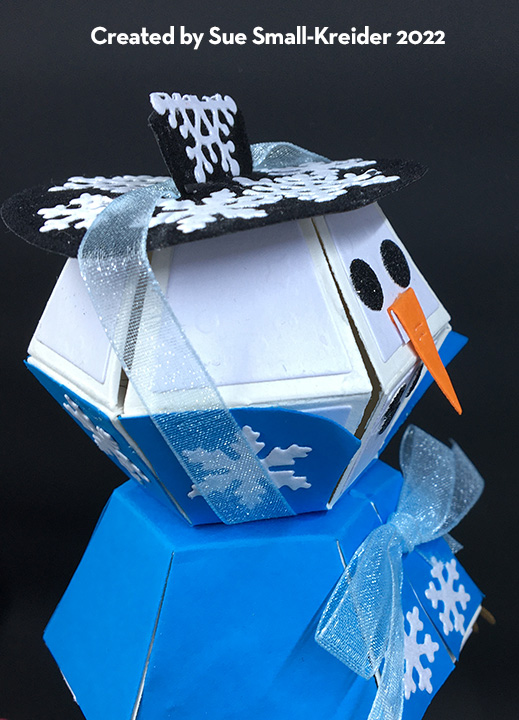
Mama Snow is comprised of all three balls – the Mini Ball Pop-Up, the Bitty Ball Pop-Up and the Surprise Ball Pop-Up with all her facial features, hat and stick arms from the Snowman Add-Ons. Her cape is made from the Mini Ball and Bitty Ball dies and her hat is cut down from the Snowman Add-ons set.
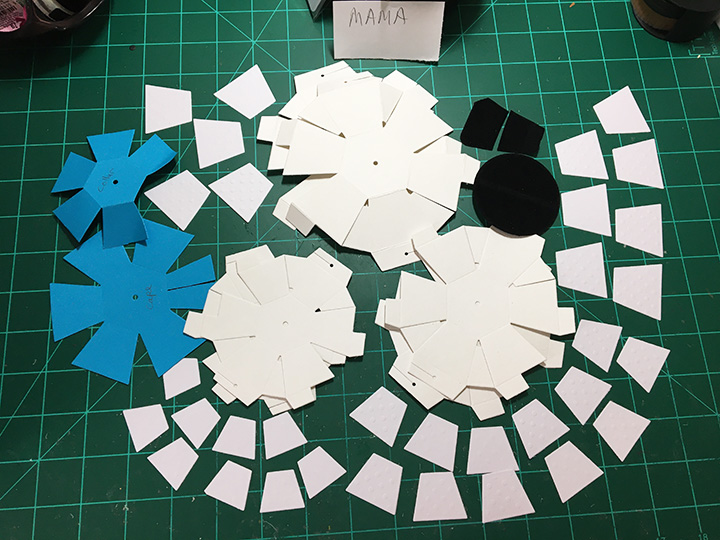
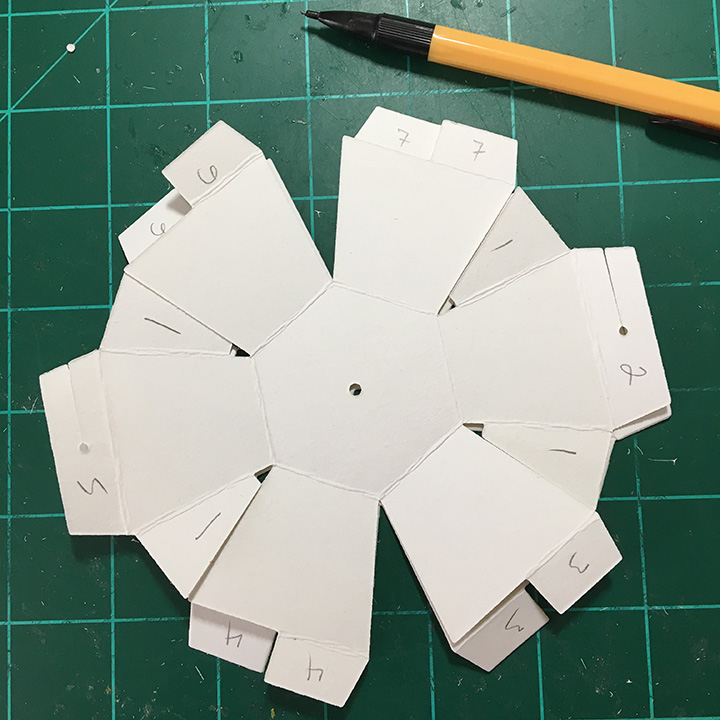
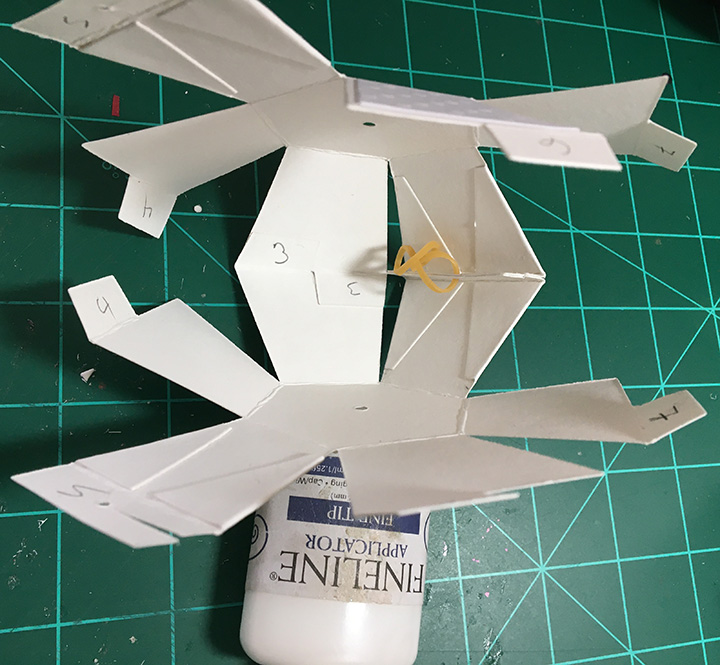
I find watching the assembly videos for the balls very useful. (Bitty Balls, Mini-Balls and Surprise Balls) Numbering the order of gluing the tabs is useful for the assemble of the balls. I cut all the trapezoid panels from an embossed white cardstock. And the ball halves are cut from a 100 lb. smooth white cardstock.
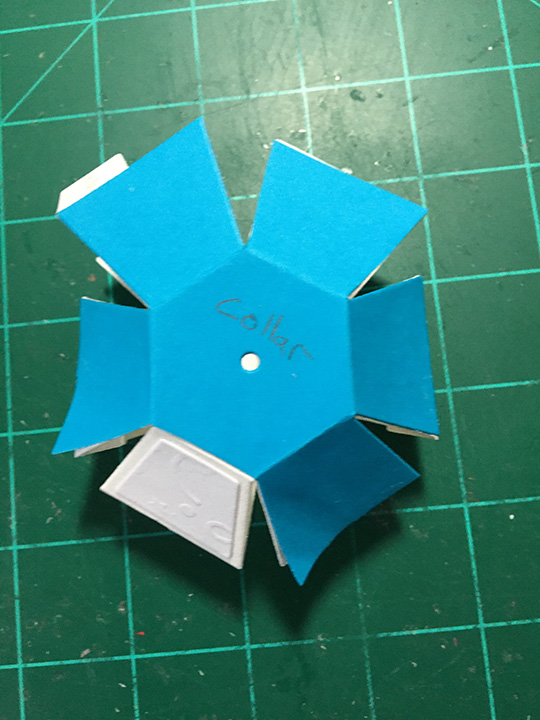
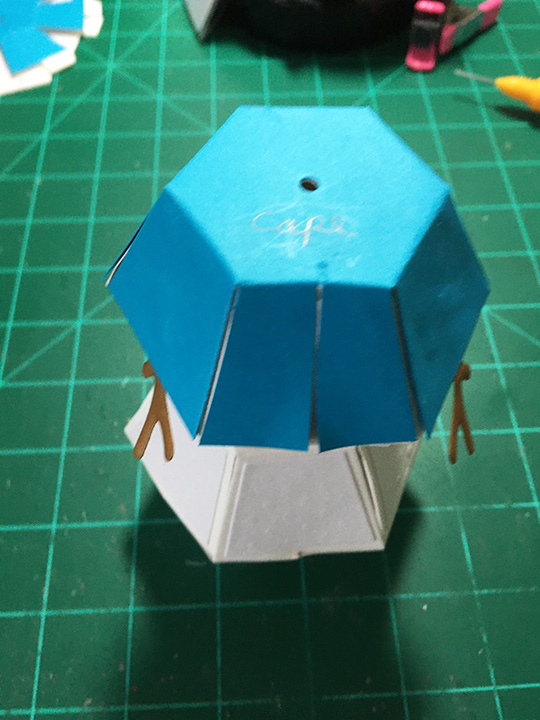
Assemble the base Surprise Ball in all white with a brad threaded through the bottom hole. The middle and head balls are of graduating size and are decorated with the blue cape and collar pieces before assembling.
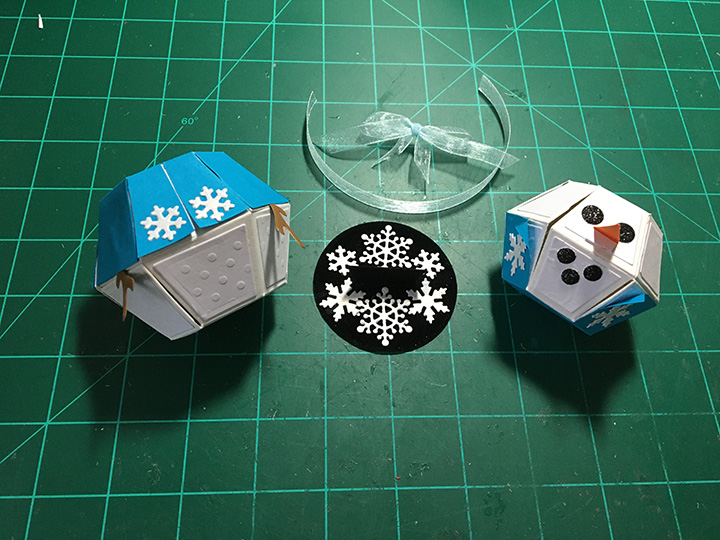
The blue cape is made by cutting one half of a Mini Ball in blue and trimming as shown in the photos. I glued it to the bottom of the ball first before assembling the ball. (Note that one panel of blue was cut off and the corners facing the missing panel were curved and not glued down. The missing panel area is where the mouth will be for the face.)


The cape is cut using the same blue cardstock using one half of a Bitty Ball. Cut a thin stripe out of the front of the cape and curve the bottom corners. Glue down stick arms to sides of Bitty Ball. Glue all of the cape to the top of the bitty ball, except for the curved corners.

Glue on facial features of coal eyes and mouth cut from glitter cardstock and an orange carrot nose. Docorate the cape and collar with snowflakes.
To assemble the hat, trim the tall top piece down to about 1/2 inch above the tab. Decorate brim with snowflakes from Snowman Add-Ons, Snowman Twist Circle or Snowman set. Glue top of hat flap through the slot in brim. Glue hat onto top of head. Cut a piece of ribbon long enough to go over hat brim and under the head plus 2 inches. Glue middle of ribbon to top of hat and them flatten head and glue ends of ribbon to the bottom of head ball. (You will need this slack in the ribbon to allow the ball to fold flat.)


Now you can glue the three balls together to make Mama Snow. I glued the ribbon bow on after I had assembled her to get the correct placement.
You can now added her to the card base using the brad.
Learn more about how each member of the Snow Family was created in these blogs:
Thank you for reading this blog post. Please like and leave comments 😊
Materials Used:
Dies
- Karen Burniston in cahoots with Riley and Company – Surprise Ball Double-Ups – 1216
- Karen Burniston in cahoots with Riley and Company – Bitty Ball Double-Ups – 1215
- Karen Burniston in cahoots with Riley and Company – Mini Ball Double-Ups – 1214
- Karen Burniston in cahoots with Riley and Company – Snowman Add-Ons – 1213
- Karen Burniston in cahoots with Riley and Company – Mini Ball Pop-Up – 1201
- Karen Burniston in cahoots with Riley and Company – Long Flap and Closure – 1200
- Karen Burniston in cahoots with Riley and Company – Word Set 13 – Snow – 1167
- Karen Burniston in cahoots with Riley and Company – Bitty Ball Pop-Up – 1131
- Karen Burniston in cahoots with Riley and Company – Surprise Ball Pop-Up- 1117
- Karen Burniston in cahoots with Riley and Company – Word Set 3 – Holiday – 1022
- Karen Burniston in cahoots with Riley and Company – Snowman – 1017
- Karen Burniston in cahoots with Riley and Company – Snowman Twist Circle – 1012
Papers
- Spellbinders – 100 lb. cardstock – Waterfall
- Hot Off the Press – Black Suede
- Hot off the Press – Black Glitter Cardstock
- Blue, orange, brown, and white cardstock scraps
- Staples – 8.5×11 Printable glitter paper
Miscellaneous
- Neutral PH Adhesive by LINECO
- Fine-Tip Glue Bottle
- Assorted embossing folders
- 8 inch piece of ribbon
- Alliance – Pale Crepe Gold – Softest Stretch Rubber Bands – size #12
- Die Cutting machine
- Pokey tool
- Brass colored brads

3 thoughts on “Meet the Snow Family – Mama Snow”