
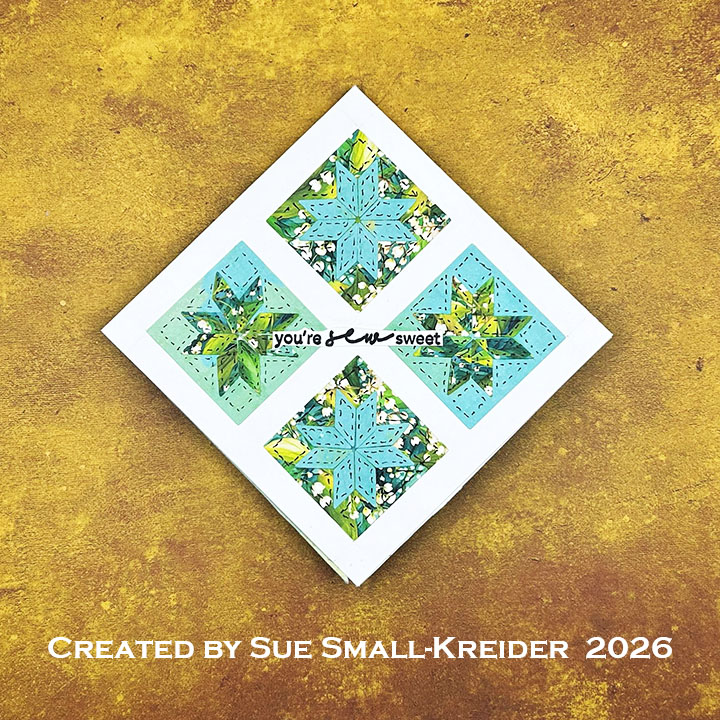
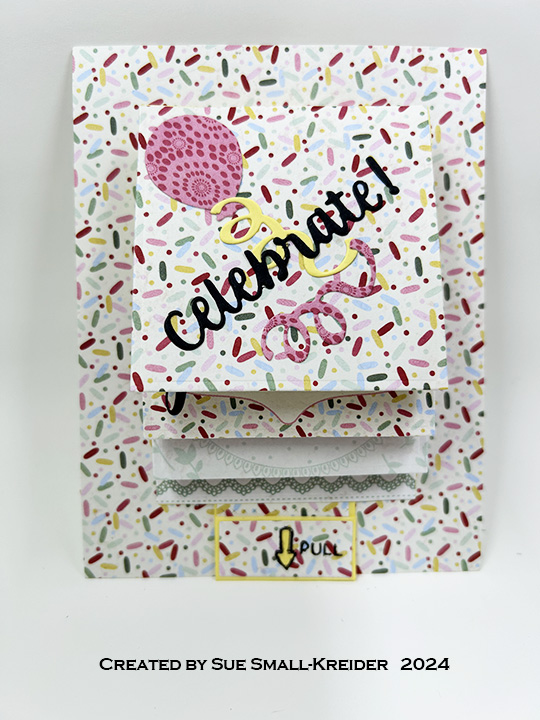
This card was made for Craft Roulette #318 whose parameters were: Ardyth’s Square (4.25-inch square) card, May garden colors, textile element and three layer random. I used Relatively Thoughtful digital papers as well as dies and stamps from Concord & 9th, Essentials by Ellen, Scrapbook.com, The Greetery & Waffle Flower.
Watch the process video to see how I made this card.
Cardbase: I took an 8.5×8.5-inch square of lightweight cardstock and scored and folded at 4.25-inchs on each side and along one of the diagonal corner to corner. (See the video above for directions.) Decorate front and back with quilt blocks and the sides cover with 4.25-inch squares of colored paper cut in half diagonally.
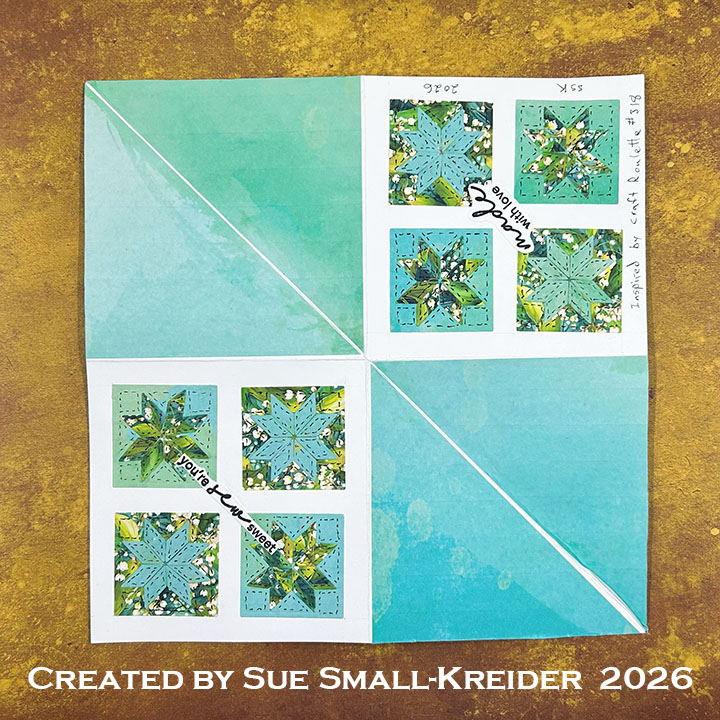
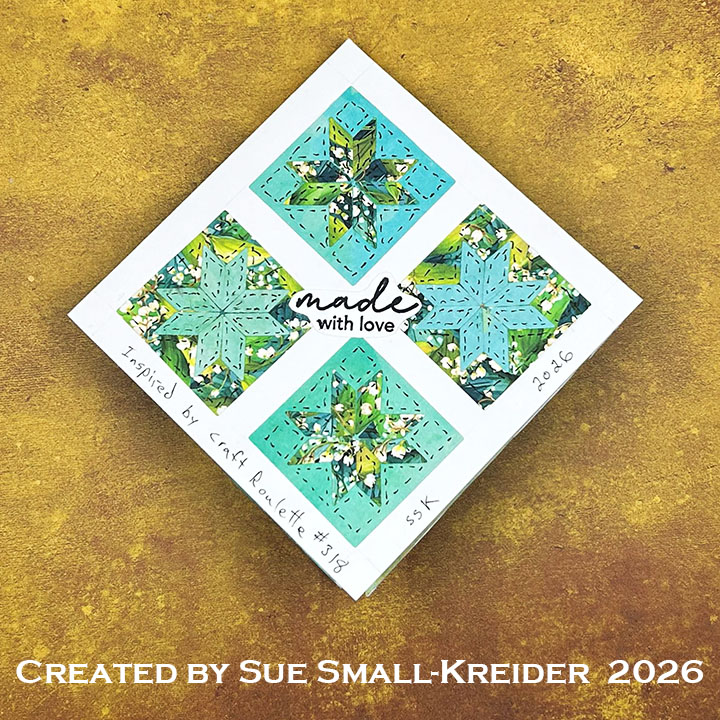
Quilt Blocks: Using the Scrapbook.com Mini Quilt Block die set, cut six of all the die pieces from solid color decorative paper and another six sets from patterned paper. (I printed all my digital papers on thin computer paper.) Use a fine-tipped black marker to add stitching lines.
Sewing Notions: Using The Greetery’s Notionable die set, cut one pair scissors from silver foil cardstock. (I cut a second set from white as my silver cardstock was thin and tended to curl.) Cut the thimble, needle and seven pins also from silver cardstock. From white cut the three pieces for the spool of thread and color using a light brown for the spool and light gray for the thread. Leave the thread label white, but highlight the writing with a fine-tipped black marker. Cut the curling piece of thread from white and color light gray. (I used scraps of solid colored cardstock for the pincushion and pin heads.) The card of pins uses an image printed on cardstock from the Relatively Thoughtful Walter Crane In The Garden A4 digital paper collection.
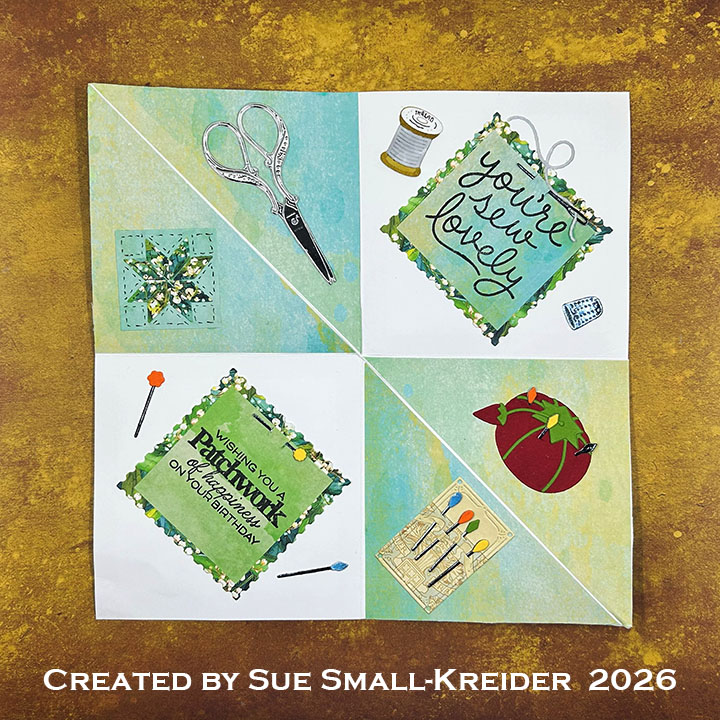
Sentiments: The outside stamped sentiments of “You’re sew sweet” and “Made with love” are from Essentials by Ellen – Old Spool. The inside sentiments come from Concord & 9th’s Sew Lovely stamp and die sets as well as Waffle Flower’s Quilted Hug stamp set.
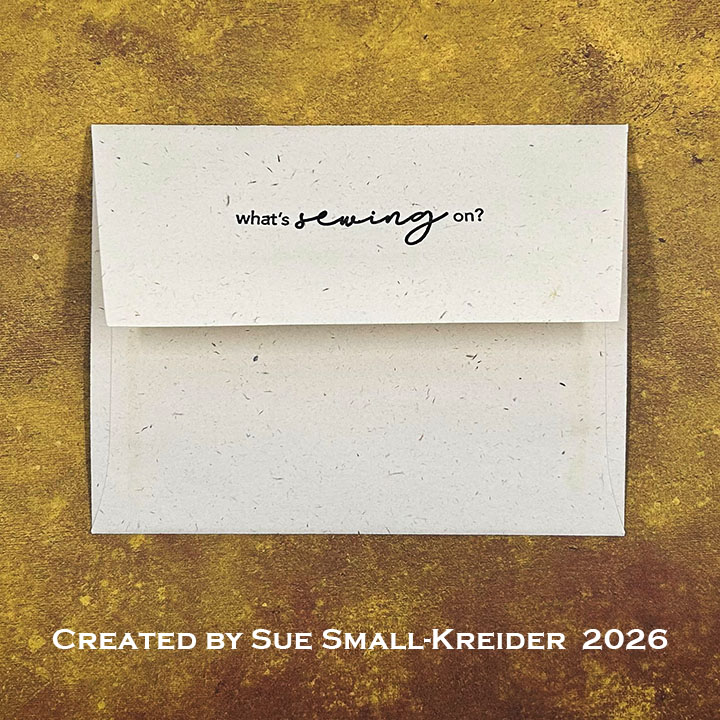
Envelope: The card fits into an A2 (4.25×5.5-inches) envelope with “What’s sewing on?” stamped on the back flap. Stamp is from Essentials by Ellen – Old Spool.
___________________________________
Thank you for experiencing this blog post.
I hope this inspires you and makes you smile.
Please subscribe, like and leave comments 😊
Follow my YouTube channel, Instagram and Pinterest as well.
___________________________________
Materials Used:
Dies
- Concord & 9th – Metal Dies – Sew Lovely
- The Greetery – Metal Dies – Notionable
- Scrapbook.com – Metal dies – Mini Quilt Block
Stamps
- Concord & 9th – Clear Stamps – Sew Lovely
- Essentials by Ellen – Clear Stamps – Old Spool
- Waffle Flower – Metal Dies – Quilted Hug
Papers
- Relatively Thoughtful – Digital Paper Collection – Walter Crane In The Garden A4
- Blue, Green, Orange, Red, White and Yellow Cardstock
- Silver Foil Cardstock
- 8.5×11-inch Thin Copier/Computer Paper – White
- Fraser Papers for William House – A2 Envelope – Genesis Text Milkweed Smooth
Ink
- Memento – Fade-Resistant Dye Ink – Tuxedo Black
- OLO Marker – Natural Gray 3
- Pigma – Mircon 005 Fine Tip Pen – Black
- Stampin’ Up – Stampin’ Blends Marker – Dark Wild Honey
Adhesives
- Neutral PH Adhesive by LINECO
- Fine-Tip Glue Bottle
Tools
- Die Cutting Machine
- Pencil
- Riley and Company – Pick & Poke Tool
- Ruler
- Scoring Board
- Scrapbook.com – Magic Mat
- Scissors
- Scrapbook.com – Mint Tape
- Stamping Blocks as paper weights
- Tweezers
- We R – Precision Press Mini – Stamping Platform


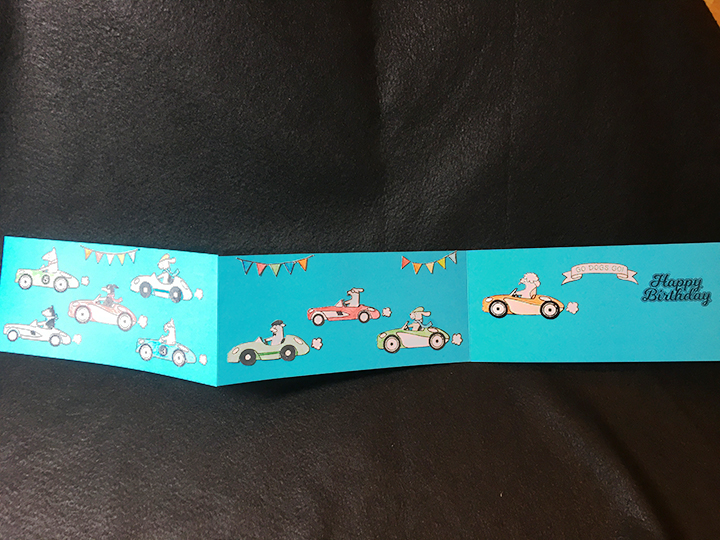


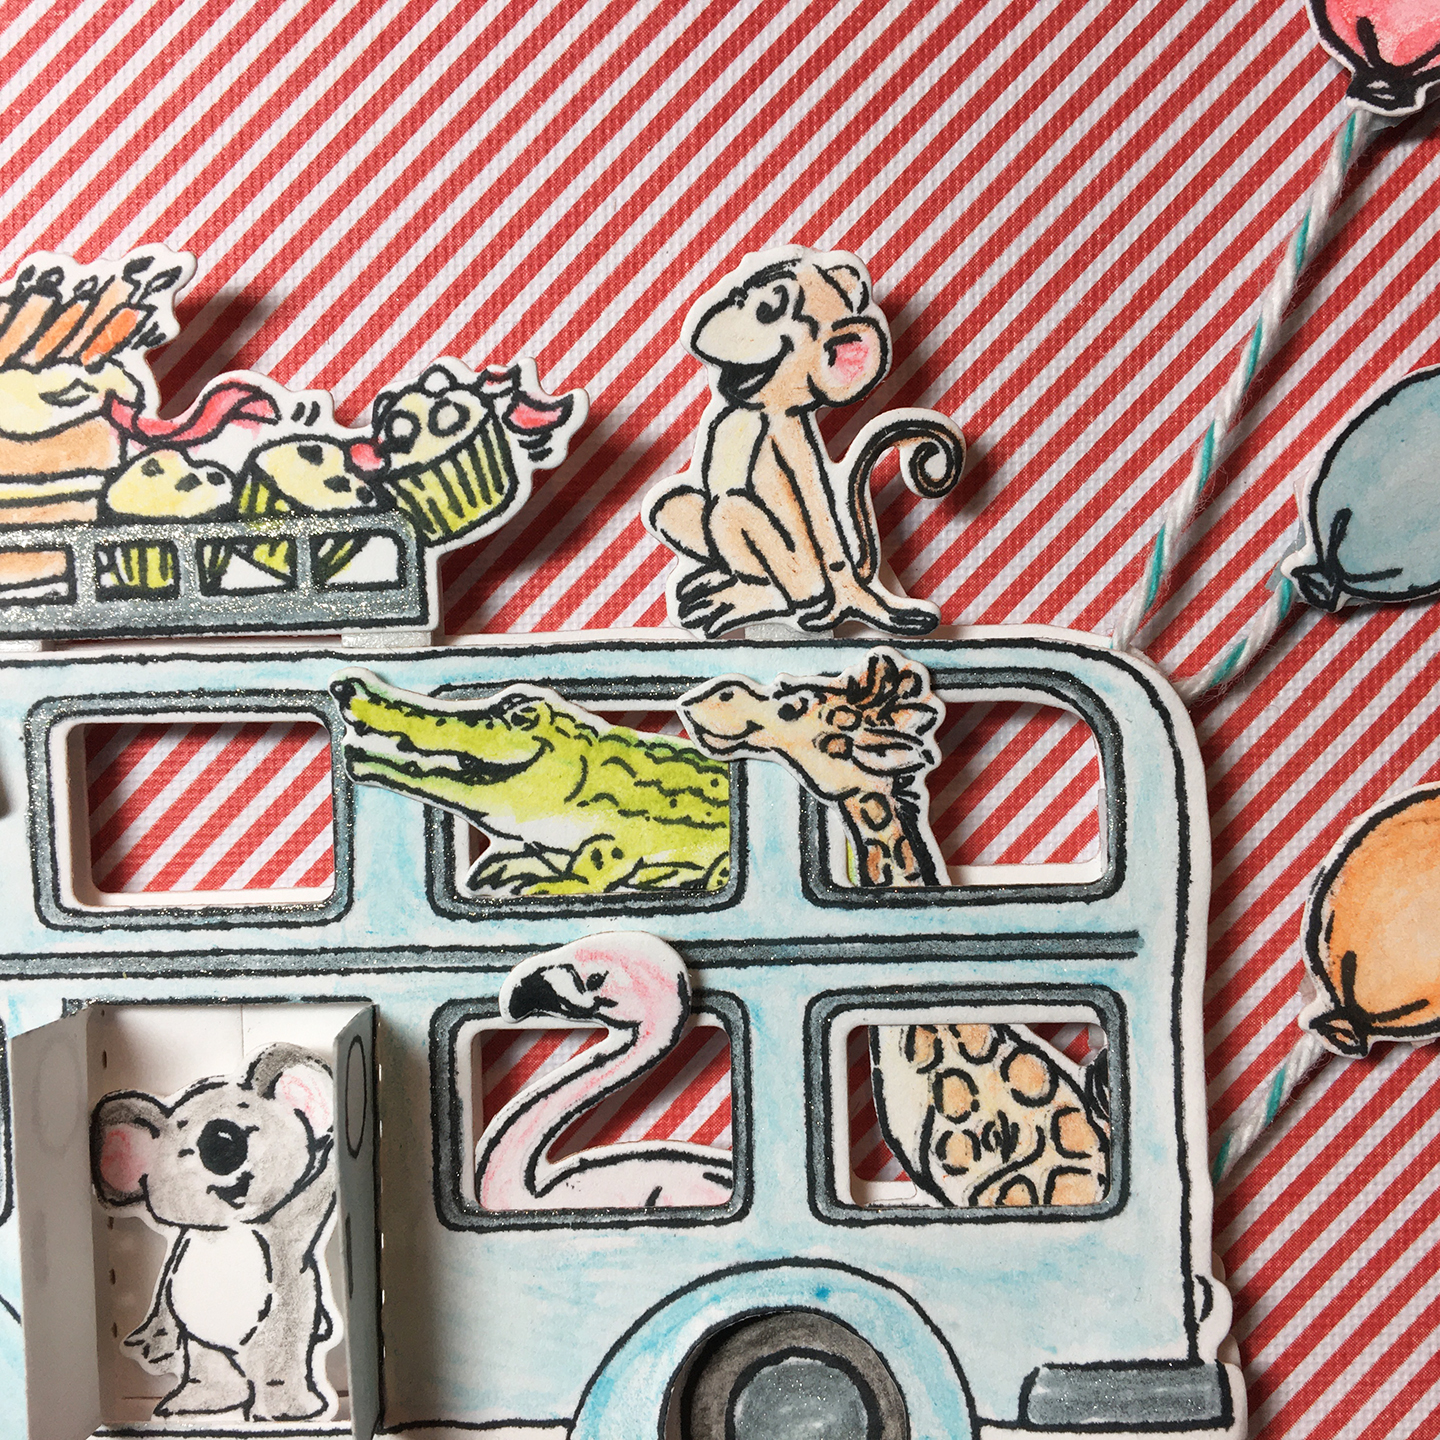 Using Memento Tuxedo Black ink to stamp the images on white cardstock, I colored them with using watercolor pencils and a waterbrush. Once the colors were dry, I used a silver gel pen to color all the chrome trim on the bus and hubcaps. Using the matching dies, I cut the animals and bus out. I cut a second bus out to act as a backing for the bus. I had colored and cut a set of spare tires, so I cut away the tires on the colored bus so I could add dimension of the tires being beneath the bus.
 Next I played with the placement of the animals in the bus and once satisfied with their placement, I glued them to the backside of the blue bus. For the cake rack and the monkey, I had to add small slips of cardstock for supports for the foam tape that adhered them to the bus frame. The koala bear was also foam taped to the back bus using the die cut door opening as my placement guides. The tires were glued flat to the backing bus’s wheels. (And while I toyed with the idea of making the wheels on the bus spin – mimicking the children’s song – I deciding against it.) Doubled sided foam bits from my stash were sandwiched between the two bus layers for dimension. Baker’s twine was taped to the back of the colored balloons and poked between the bus layers and glued.
 Using Stampin’Up Dapper Denim blue ink I stamped both outside “For You on your birthday” sentiment on white cardstock and then the large “Happy Birthday” inside the card. The “For You” I heat embossed with sparkly snow embossing powder which added sparkle, but embossed clear.
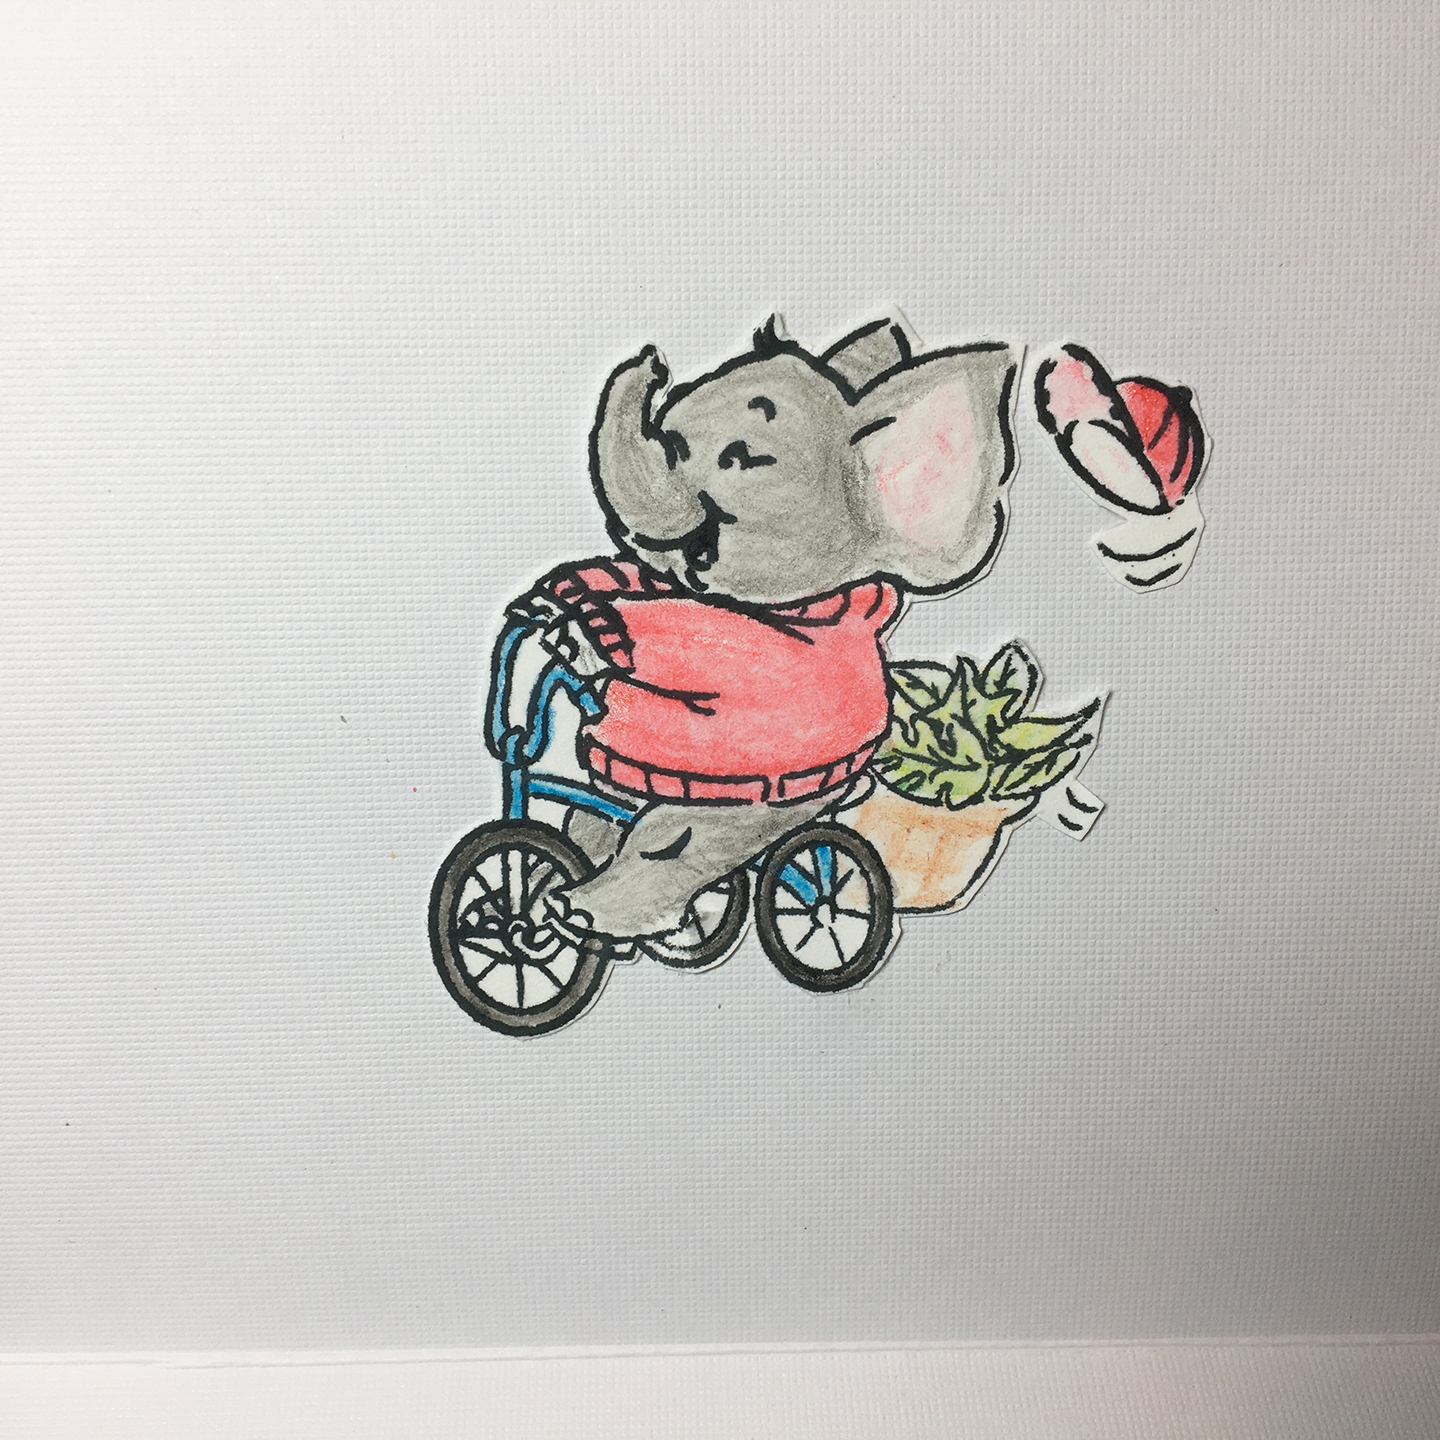 On the top inside panel I added another Art impression’s stamp of a tricycle riding elephant that I had colored and fussy cut out with its hat flying off.
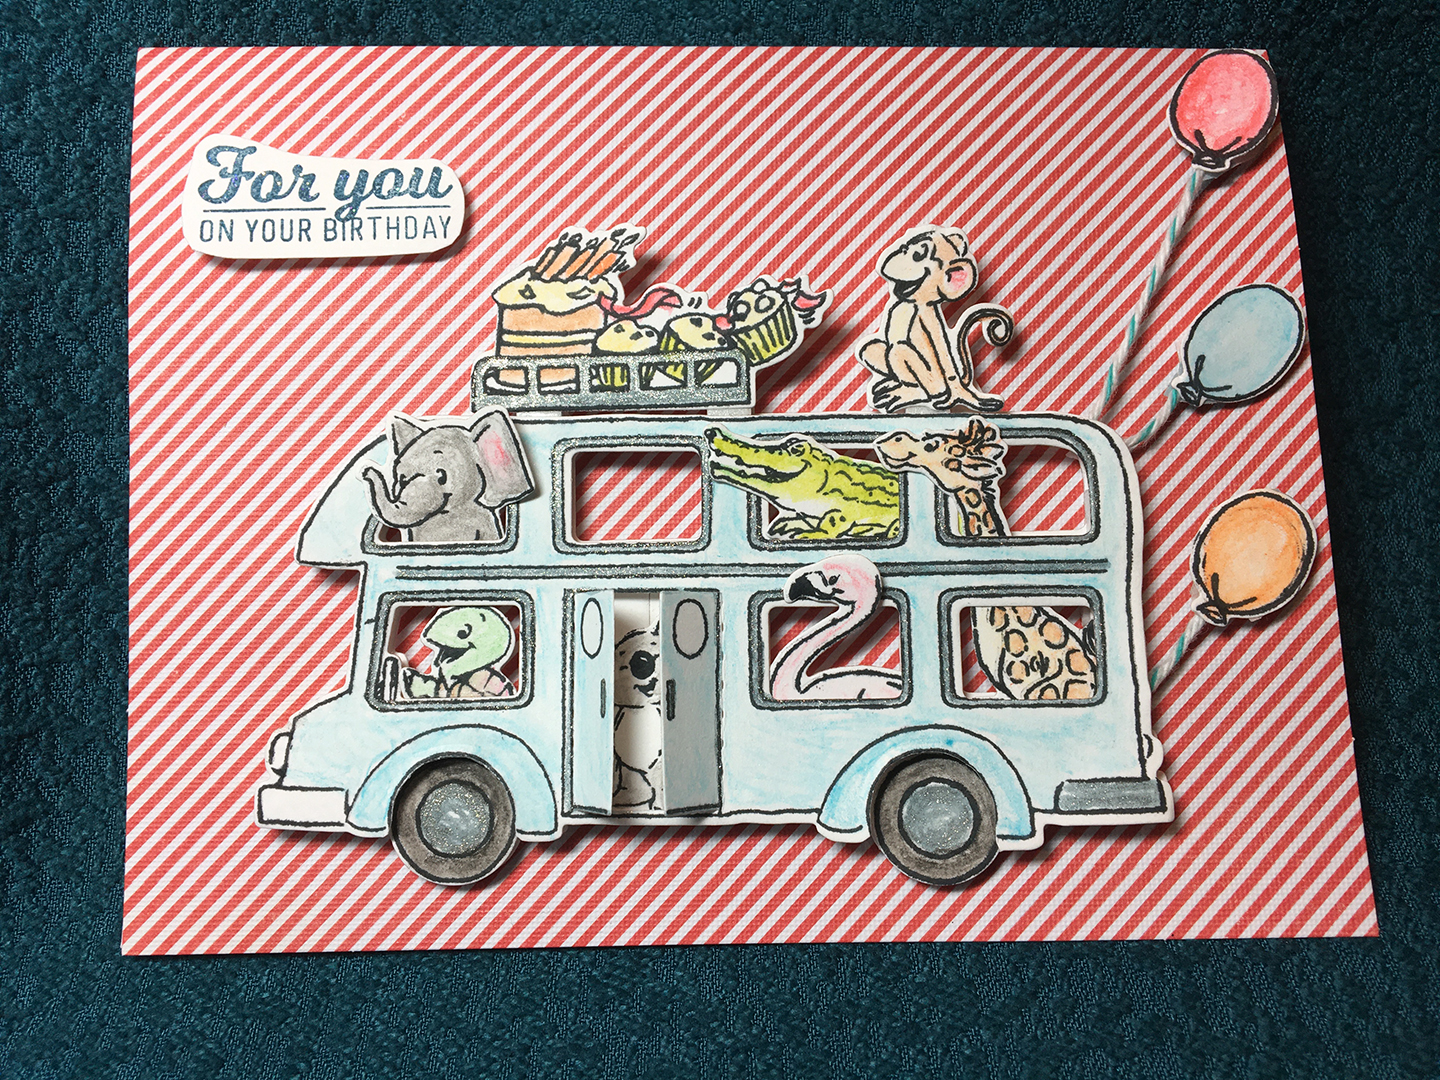 The completed card has the bus doors being able to be opened to shoe the koala bear.