This card was made for Craft Roulette #265 whose parameters included an A7 card, floral wreath colors, lyrics element, and cinco (5). I used a Funny Bone Stamps by Riley & Co. along with a Karen Burniston die set released by Elizabeth Craft Designs.
Watch the process video to see how I made this card.
___________________________________
Thank you for experiencing this blog post.
I hope this inspires you and makes you smile.
Please like and leave comments
___________________________________
Disclaimer: Karen Burniston products are provided free of charge by the manufacturer for review and use. All other items were personally purchased. Compensated affiliate links used where or when possible, meaning I will receive a small percentage commission from these manufacturers at no cost to you. This will allow me to add more content to my YouTube channel and help out a lot. Thank you.
Materials Used:
Dies
Elizabeth Craft Designs – Karen Burniston Pop It Ups – Oval Pull Card – 1109
Stamps
Riley & Co. – Funny Bones – Clear Stamp – A Year Older – RWD-1144
Riley & Co. – Funny Bones – Rubber Stamp – Happy Birthday To You – RWD-1251
Papers
Stampin’Up – 12×12-inch Designer Series Paper – Masterfully Made
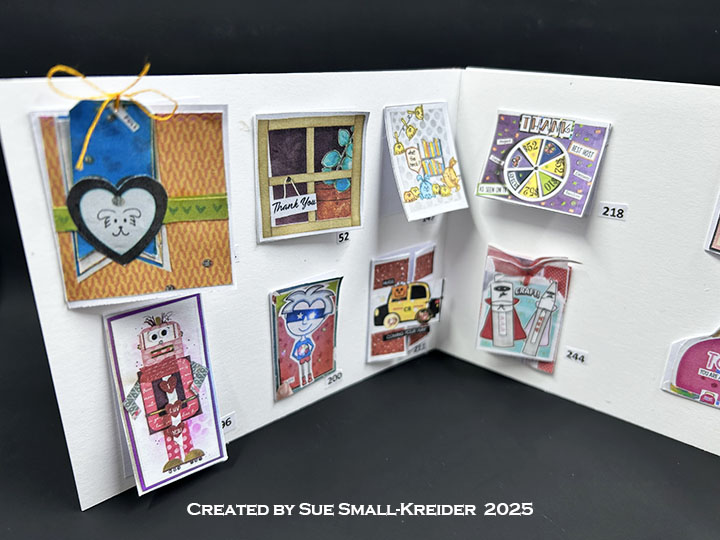
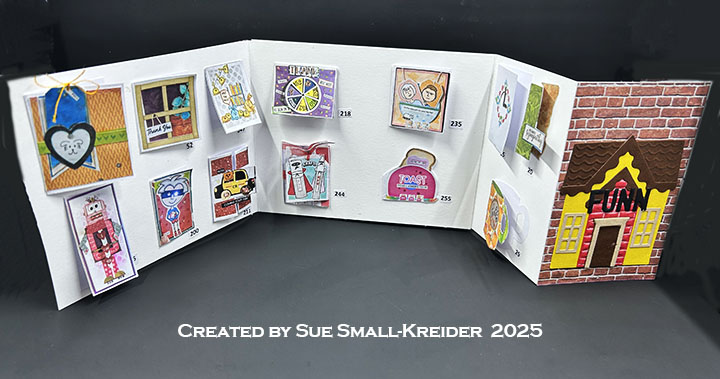
This card was made for Craft Roulette #264 whose parameters included a card for an influencer, dreamy colors, crafts/crafters, and off center.
Watch the process video to see how I made this card.
Cardbase: Cut an 8.5×11-inch piece of heavy white cardstock into two pieces that at 4.25×11-inches. Score and fold in half at 5.5-inches both pieces. On one piece score and fold at 2.75-inches. Glue the two cards together with the large rectangle panels overlapping as shown in the video. Cards: Because this card is going to Mary Gunn, I used images from her Craft Roulette Community Showcase gallery, picking cards that are iconic to the show. I tried to recreate some of the fun folds and bookmark cards.
Guide Sheet to Cards: This sheet is folded and tucked in a pocket on the back of the card.
Envelope: The card fits into an A2 (4.25x 5.5-inches) size envelope.
________________________________
Thank you for experiencing this blog post.
I hope this inspires you and makes you smile.
Please like and leave comments 😊
______________________________
Disclaimer: Karen Burniston products are provided free of charge by the manufacturer for review and use. All other items were personally purchased. Compensated affiliate links used where or when possible, meaning I will receive a small percentage commission from these manufacturers at no cost to you. This will allow me to add more content to my YouTube channel and help out a lot. Thank you.
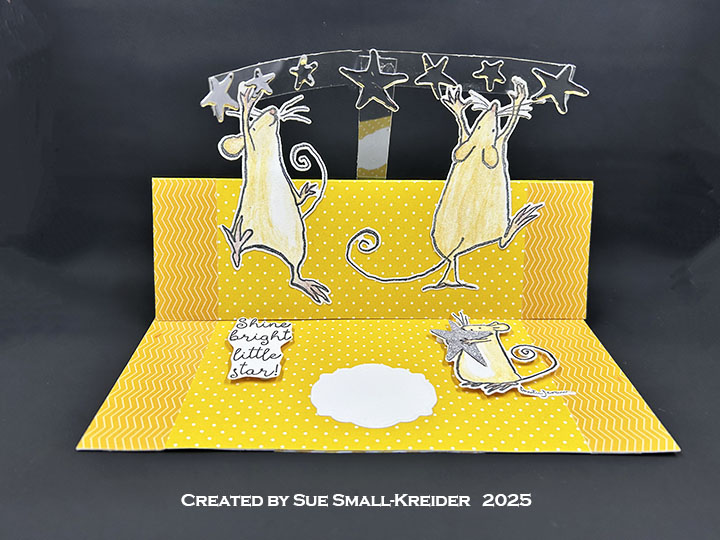
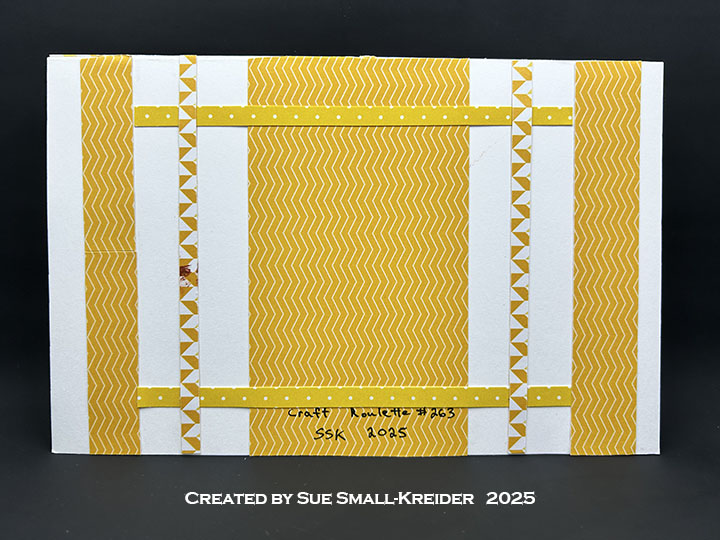
This card was made for Craft Roulette #263 whose parameters included a sending sunshine card, spring colors, rodent(s), and shiny.
Watch the process video to see how I made this card.
Back of Card
Cardbase: Start with an 8.5×11-inch sheet of white cardstock. Score and fold at 5.5-inches and at 2.75-inches. Cover the large inside panel with decorative papers as well as the two long and narrow front panels. use scraps to decorate the back panel.
Mice: Stamp The two large mice and one small mouse holding a star from the two Colorado Craft Company stamp sets – A Star is Born and Falling Star. Color with watercolor pencils and smooth coloring with a water brush. let dry before gluing large mice to bottom half of easel. Stamp a second small mouse to cut out star as a pattern to cut star from silver glitter paper. Cut out small mouse’s hand to slide silver star under it. Glue star in place. Attach mouse to card base with foam dots.
Stars: Using two pieces of clear plastic cut from packaging, make a T or cross shape using glue dots. Cut stars from silver foil cardstock using coordinating dies from the stamp sets and attach with glue dots to plastic. Attach cross to back of card easel base with double-sided tape. Glue on three stars to decorate front of card.
Sentiments: The sentiments were all stamped in black ink using the two Colorado Craft Company stamp sets and fussy cut around. The small fancy label was cut from white cardstock using Karen Burnston’s Rectangles and Labels – Crosshatch die set.
Envelope: The card fits into a catalog (6×9-inch) size envelope stamped with a sentiment and stars from the Colorado Craft Company’s A Star Is Born stamp set.
_______________________________________
Thank you for experiencing this blog post.
I hope this inspires you and makes you smile.
Please like and leave comments 😊
____________________________________
Disclaimer:Karen Burniston products are provided free of charge by the manufacturer for review and use. All other items were personally purchased. Compensated affiliate links used where or when possible, meaning I will receive a small percentage commission from these manufacturers at no cost to you. This will allow me to add more content to my YouTube channel and help out a lot. Thank you.
Stamps • Colorado Craft Company – Clear Stamps & Metal Dies by Anita Jarem – A Star Is Born – AJ587 • Colorado Craft Company – Clear Stamps & Metal Dies by Anita Jarem – Falling Star – AJ585
Papers • Impression Obsession – 6×6-inch Double-Sided Paper Pack – Basics 1 – Yellows • Silver Foil and Glitter Cardstock • White Cardstock • Catalog Envelope – White • Clear Plastic Packaging
Ink • Memento – Fade Resistant Dye ink – Tuxedo Black • Sharpie – Permanent Marker – Ultra Fine Tip – Black • Sharpie – Permanent Marker –Fine Tip – Yellow • Nuvo – Watercolour Pencils – Hair & Skin Tones
I played with the March 2025 Spellbinders’ Stencil of the Month set – Mosaic & Quilted Memories and the Embossing Folder of the Month – Mosaic Memories to create some birthday cards.
Watch the process video to see how I made these cards.
All cards are A2 size (4.25×5.5-inches).
Voilet Mosaic: This card used – Stencil of the Month – Mosaic Memories – SOM-MAR25, Embossing Folder of the Month – Mosaic Moments – EOM-MAR25, BetterPress Press Plate & Die Set – Cheers To You Sentiments, BetterPress Press Plate & Die Set – Make A Wish Sentiments, Distress Inks – Shaded Lilac & Wilted Violet, Purple gems, Lilac cardstock and White cotton paper.
Blue Violet Mosaic: This card used – Stencil of the Month – Mosaic Memories – SOM-MAR25, Embossing Folder of the Month – Mosaic Moments – EOM-MAR25, BetterPress Press Plate & Die Set – Make A Wish Sentiments, Distress Inks – Shaded Lilac & Wilted Violet, Blue gems, Light Blue & Lilac cardstock and Grey cotton paper. (Blue sentiment strip “Have the best day ever” is a heat embossed with a blue sparkle powder. Stamp set unknown.)
Violet Quilted: This card used – Stencil of the Month – Quilted Memories – SOM-MAR25, BetterPress Press Plate & Die Set – Fancy Sentiment Strips, Distress Inks – Shaded Lilac, Yellow gems, Lilac cardstock and White cotton paper.
Posey Quilted: This card used – Stencil of the Month – Quilted Memories – SOM-MAR25, BetterPress of the Month Press Plate & Die Set – Paint The Town-BPOM-NOV24, Distress Inks – Milled Lavender, Yellow gems, Lilac & Purple cardstock and White cotton paper. (Purple sentiment banner is hot foiled in black foil using an unknown “Happy Birthday” Glimmer plate but cut using Fancy Sentiment Strips die.)
Red Quilted: This card used – Stencil of the Month – Quilted Memories – SOM-MAR25, BetterPress Press Plate & Die Set – Make A Wish Sentiments, Distress Inks – Lumberjack Plaid, Mustard Seed & Spiced Marmalade, Yellow cardstock, White cotton paper and a red satin bow.
___________________________________
Thank you for experiencing this blog post.
I hope this inspires you and makes you smile.
Please like and leave comments 😊
___________________________________
Disclaimer: Karen Burniston products are provided free of charge by the manufacturer for review and use. All other items were personally purchased. Compensated affiliate links used where or when possible, meaning I will receive a small percentage commission from these manufacturers at no cost to you. This will allow me to add more content to my YouTube channel and help out a lot. Thank you.
Materials Used:
Press Plates & Dies
Spellbinders – BetterPress Press Plate & Die Set – Cheers To You Sentiments
Spellbinders – BetterPress Press Plate & Die Set – Fancy Sentiment Strips
Spellbinders – BetterPress Press Plate & Die Set – Make A Wish Sentiments
Spellbinders – BetterPress of the Month Press Plate & Die Set – Paint The Town-BPOM-NOV24
Stencils
Spellbinders – Stencil of the Month – Mosaic & Quilted Memories – SOM-MAR25
Embossing Folders
Spellbinders – Embossing Folder of the Month – Mosaic Moments – EOM-MAR25
Papers
Blue, Lilac, Purple, White and Yellow 65 lb. Cardstock
Crafter’s Companion – 4.25×5.5 250 gsm Cotton Paper – Cream, Grey, White
Scrapbook.com – 8.5×11 110 lb. Cardstock – Neenah Solar White
Fraser Papers for William House – A2 Envelope – Genesis Text Milkweed Smooth
Watch the process video to see how I made this card.
Cardbase: Start with a 4.25 x 11-inch piece of cardstock and fold in half to form a side-fold A2 (4.25×5.5-inch) card. Cover the four panels with decorative papers.
Pop-Up: Watch the assembly videos for the Boat Pop-Up and Cruise Ship Add-ons. Cut out one of the back trim piece from the Cruise Ship Add-ons and two of the ship’s wheels from the Cruise Charms in red. Trim the ship’s wheels as directed in the video above.
Sentiments: All the sentiments used on the card come from the Sail Away stamp set except for the “Happy Birthday” which is from the Belated Birthday set.
Envelope: The card fits into an A2 (4.25x 5.5-inches) size envelope stamped with a sentiment used on the card on the back flap in dark brown ink.
___________________________________
Thank you for experiencing this blog post.
I hope this inspires you and makes you smile.
Please like and leave comments 😊
___________________________________
Disclaimer: Karen Burniston products are provided free of charge by the manufacturer for review and use. All other items were personally purchased. Compensated affiliate links used where or when possible, meaning I will receive a small percentage commission from these manufacturers at no cost to you. This will allow me to add more content to my YouTube channel and help out a lot. Thank you.
This pun themed card is a pop-up card that has a piece of toast that moves up when the card is opened. It is a top-fold A2 (4.25×5.5-inch) cardbase That uses Karen Burniston’s Parcel Pop-Up mechanism to make the toast and lever move when you open it.
The frame around the inside sentiment is from Karen Burniston’s Frame Pull Pop-Up and the sentiment is from her Photo Memories stamp set. The HBD! stamped on the toast is by Craft Roulette.
The toaster and bread were of my own design. The black decorative design on the toaster comes from a previously released die set by Karen Burniston. The doily is from Paper Discovery.
The letters on the card front are by PoppyStamps.
___________________________________
Thank you for experiencing this blog post.
I hope this inspires you and makes you smile.
Please like and leave comments 😊
___________________________________
Disclaimer: Karen Burniston products are provided free of charge by the manufacturer for review and use. All other items were personally purchased. Compensated affiliate links used where or when possible, meaning I will receive a small percentage commission from these manufacturers at no cost to you. This will allow me to add more content to my YouTube channel and help out a lot. Thank you.
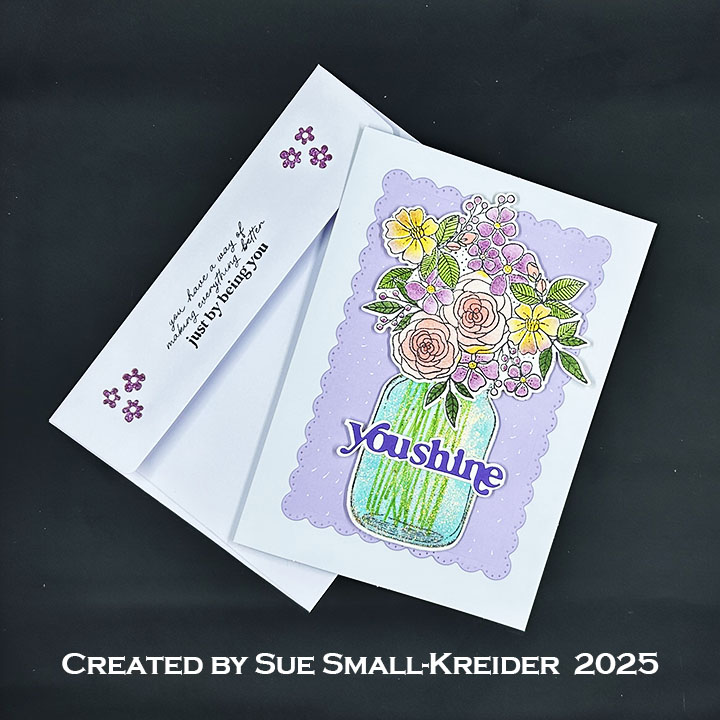
This card was made using stamps and dies from the February 2025 Scrapbook and Cards With Love event. I designed this card before the event as a birthday card for someone who loves lavender.
Cardbase: I used a purchased A7 (5×7-inch) cardbase and envelope to create this layered floral card with positive vibes. The background of Lavender cardstock was cut with the scalloped edged rectangle from Karen Burniston’s Rectangles & Labels die set and covered with dots from a white gel pen.
Jar: Stamping the jar on a lightweight white cardstock I drew green stems in the jar with an alcohol marker and then inked in the jar using the stencil as a mask with a light green-blue ink. Again using the jar stencil, I covered the jar with a light coating of a glitter paste and let dry. Die cut out the jar once it is thoroughly dried.
Flowers: Stamp the floral bouquet onto lightweight white cardstock and color using the stencil set and sponge daubers to color with Distress Inks. Die cut out the bouquet.
Sentiments: Die cut the “You Shine” from dark purple and its shadow from white. Glue together. Stamp on the outside envelope flap “you have a way of making everything better just by being you” in black ink. Stamp the tiny trio of flowers in purple ink to match flowers on the card. Using the same purple ink to stamp “Happy Birthday” inside the card using the Craft Roulette sentiment stamp.
Envelope: The card fits into an A7 (5x 7-inch) envelope.
___________________________________
Thank you for experiencing this blog post.
I hope this inspires you and makes you smile.
Please like and leave comments 😊
___________________________________
Disclaimer: Karen Burniston products are provided free of charge by the manufacturer for review and use. All other items were personally purchased. Compensated affiliate links used where or when possible, meaning I will receive a small percentage commission from these manufacturers at no cost to you. This will allow me to add more content to my YouTube channel and help out a lot. Thank you.
This card was made using stamps and dies from the February 2025 Scrapbook and Cards With Love event. I designed this card before the event as a thank you card.
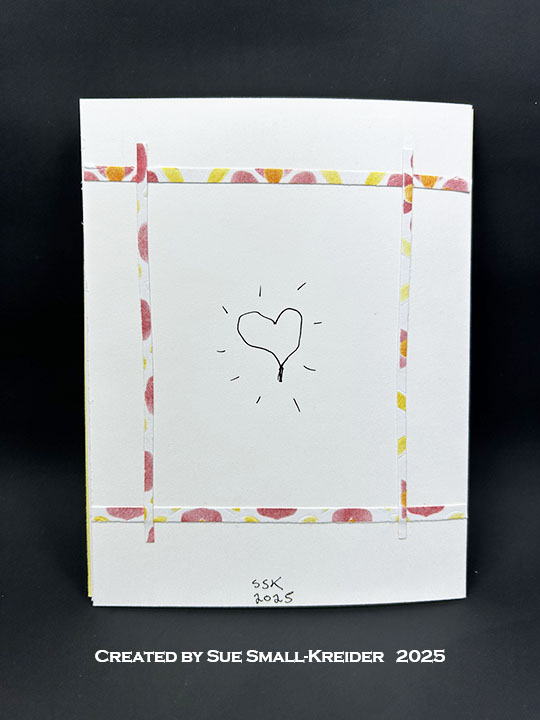
Cardbase: Cut a 8.5×5.5-inch rectangle from white cardstock. fold to make a side-fold A2 (4.25×5.5-inch) card base. Cut a 4.25×5.5-inch rectangle of white cardstock and emboss it using the brick stencil.
(Use the embossing sandwich for a die as recommended for your die cutting machine.) Then glue the brick panel to the front of card.
Coffee Cup: Stamping the coffee cup on a lightweight white cardstock in red ink. Stamp the dots on the lower half of the cup also in red. Using a blending brush and stencils, color in the handle and shade the top, sides and bottom of the cup leaving most of the center white. Die cut out the cup. Adhere to card front using thin foam squares (or one layer of foam tape.)
Flowers: Stamp the floral bouquet onto lightweight white cardstock and color using the stencil set and sponge daubers to color with Distress Inks. Die cut out the bouquet. Adhere to card front using thick foam dots (or two layers of foam tape.) Add highlights to the bouquet with a glitter gloss pen.
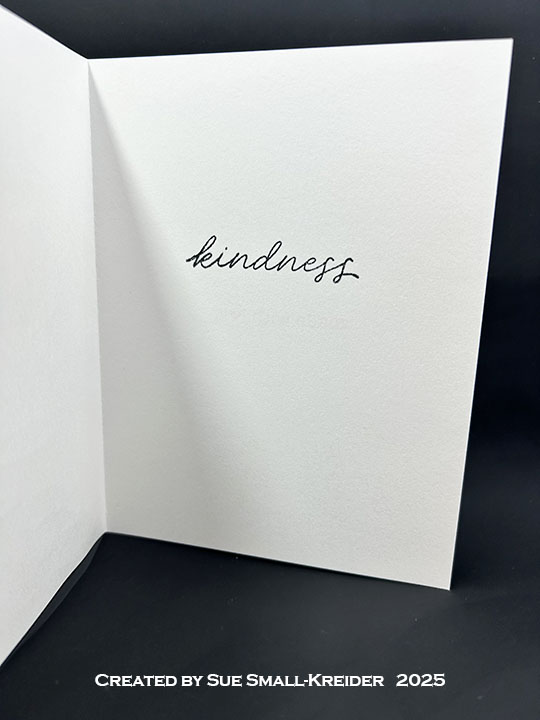
Sentiments: Die cut the “You are” from dark purple and its shadow from white. Glue together. Stamp on the inside “kindness” in black and “made with love” on the card back in red.
Envelope: The card fits into an A2 (4.24×5.5-inch) envelope with flowers stamped on the back flap.
___________________________________
Thank you for experiencing this blog post.
I hope this inspires you and makes you smile.
Please like and leave comments 😊
___________________________________
Disclaimer: Karen Burniston products are provided free of charge by the manufacturer for review and use. All other items were personally purchased. Compensated affiliate links used where or when possible, meaning I will receive a small percentage commission from these manufacturers at no cost to you. This will allow me to add more content to my YouTube channel and help out a lot. Thank you.
Materials Used:
Dies
Scrapbook and Cards Today’s With Love Feb. 2025 workshop kit – Dies
Stamps
Scrapbook and Cards Today’s With Love Feb. 2025 workshop kit – Clear Stamps
Stencil
Scrapbook and Cards Today’s With Love Feb. 2025 workshop kit – Stencils
Papers
Recollections – 8.5×11 65 lb. Cardstock – White
Purple Cardstock
Fraser Papers for William House – A2 Envelope – Genesis Text Milkweed Smooth
Ink
Memento – Fade Resistant Dye ink – Rose Bud, Tuxedo Black
Ranger – Tim Holtz – Distress Ink- Abandon Coral, Fossilized Amber, Mowed Lawn, Rustic Wilderness, Saltwater Taffy, and Seedless Preserves
This card was made for Craft Roulette #250 whose parameters included a funn fold card, nostalgic colors, blanket element and buttons.
Watch the process video to see how I made this card.
Details and supplies used are below.
Cardbase: Cut a 5.5×12-inch piece of light pink cardstock. Score at 2-inches, 4-inches, 8-inches and 10-inches. Fold as shown in video. On the gate fold panels, place heart die with center points over the fold and die-cut. Repeat on other side lining up the die to make a mirror image. I used the third largest die in Karen Burniston’s Hearts – Crosshatch set.
Buttons: I cut 70 buttons from four shades of pink cardstock. Using thin cotton string, thread the buttons’ holes and hand-tied knots to all of the card front buttons. The buttons were cut using Karen Burniston’s Sewing Charms die set.
Sentiments: All sentiments stamped in black ink on two rectangular panels cut using Karen Burniston’s Rectangles Crosshatch die set. “Happy Birthday is by Rubbernecker Stamps and the other two sentiments are Riley and Company’s Funny Bones stamps.
Envelope: The card fits into an A2 (4.25×5.5-inch) size envelope. A die-cut button was glued to back flap to hint at whats to come.
___________________________________
Thank you for experiencing this blog post.
I hope this inspires you and makes you smile.
Please like and leave comments 😊
___________________________________
Disclaimer: Karen Burniston products are provided free of charge by the manufacturer for review and use. All other items were personally purchased. Compensated affiliate links used where or when possible, meaning I will receive a small percentage commission from these manufacturers at no cost to you. This will allow me to add more content to my YouTube channel and help out a lot. Thank you.