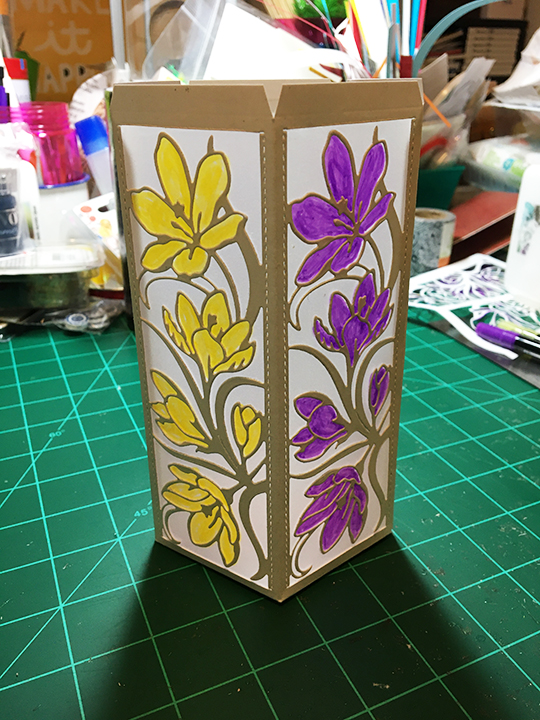
When the crocus start blooming in their purples and yellows, spring can not be far behind. This tall tealight holder is reminder that spring is coming.

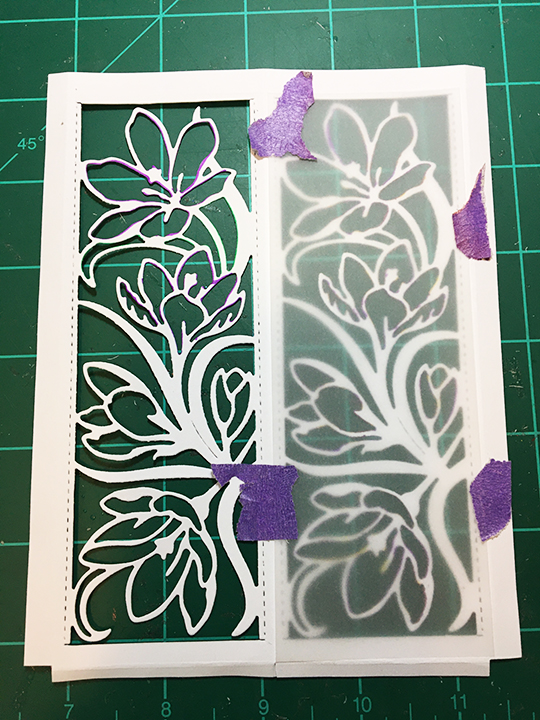
Th intricate die cut is a design by Christina Griffiths of Card Making Magic that was the free gift in Die-cutting Essentials issue 73. The pentagon base is from a Tonic Craft Kit 25. Colored vellum panels behind the die-cut cardstock sides defuse light.

Materials: Cut two 5 inches x 6 ¾ inches (12.5 cm x 17 cm) rectangles, one 2 ¾ inches x 6 ¾ inches (7 cm x 17 cm) rectangle from heavy white cardstock, and five vellum rectangles 2 ¼ inches x 6 ¼ inches (5.5 cm x 15.75 cm). Die-cut a sixth panel from scrap cardstock to use as a stencil. Die-cut one pentagon from heavy white cardstock.
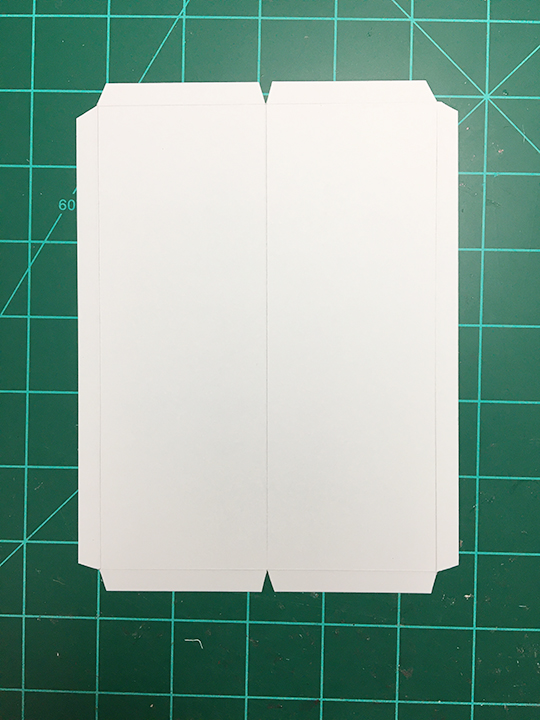
Die-cut Sides: Score all three white rectangles along all four sides at ¼ inch (3 cm). On the two larger rectangles score down the center at 2 ½ inches (6.25 cm). Place die centered inside score lines on all five sections and cut. (Hint: Because this an intricate die, you may need to add cardstock shims to get a good sharp cut throughout the die. I rolled the die through three times to cut the thick cardstock.) Using fine tipped scissors or a craft knife and metal ruler, trim off the attached top and bottom pieces of the die-cut.

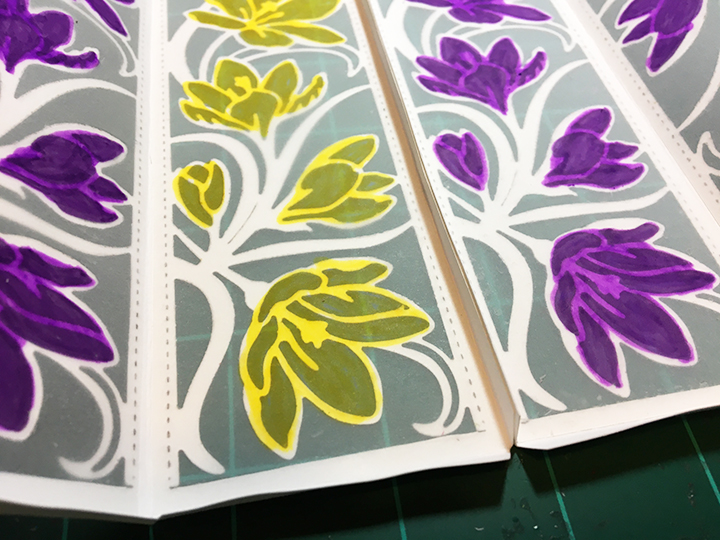
Vellum Panels: Tape a vellum panel to the front of the stencil and turn the vellum and stencil over to color the crocus flowers through the stencil onto the backside of the vellum. Once all panels are colored, glue to the back of the die-cut panels. Once glued, touch-up the coloring on the backside of the panel. (Hint: Depending on what type of markers are used to color the vellum, ink can transfer to the white cardstock, so coloring the backside away from the cardstock is best.)


Assembly: Trim away the squares created by the score lines on the white cardstock pieces and cut the tab corners off as shown in photograph. Fold the two double panel pieces down the center score line and burnish with a folding tool. Fold the five bottom tabs and burnish. Fold and burnish the six long side tabs.
With two of the panels lying flat on your work surface, align the panels and glue the two tabs together. Pinch until the glue sets. Repeat until all but the last set of tabs are glued. Allow glue to dry. Gently fold the glued sides and burnish by pinching the sides together to have crisp folds. Glue the final tabs laying panels flat and reaching in, to pinch tabs until glue sets. Allow glue to dry. Fold and burnish the last corner. Drop pentagon base into center of holder and work under the three seams. Glue tabs to bottom of pentagon.

Add your battery powered tealight. (Note: because this light holder is made from flammable paper, do not use candles with real flames.)
Thank you for reading this blog post. Please like and leave a comment. 😊
Materials Used:
Dies
- Card Making Magic by Christina Griffiths – Between the Lines – Intricate Crocus 2-die set – free gift in Die-cutting Essentials issue 73, December 2020.
- Tonic Studios – Tonic Craft Kit 25 – Blue Blossom – Pentagon die with 2 ¼” sides
Colors
Papers
- Hobby Lobby – Printable Vellum Paper – 8 1/2″ x 11″
- Hobby Lobby – Heavy White Cardstock 110# weight 8 ½ x 11 inches
Miscellaneous
- Cosmic Shimmer Acrylic Glue
- Scissors
- Craft knife
- Die-cutting machine
- Scoring board and tool

This is so pretty. I love that it’s a pentagon. Going to look into Die Cutting Essentials. Sounds good. Keep your beautiful creations coming.
LikeLiked by 1 person