A Tiger Thank You

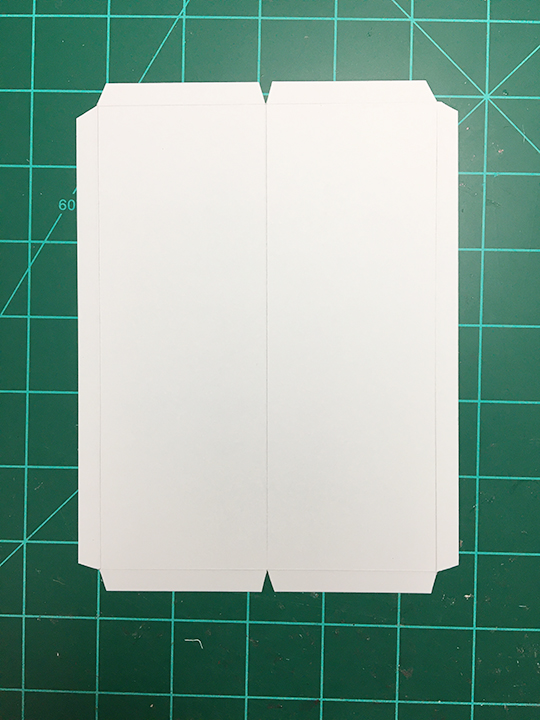
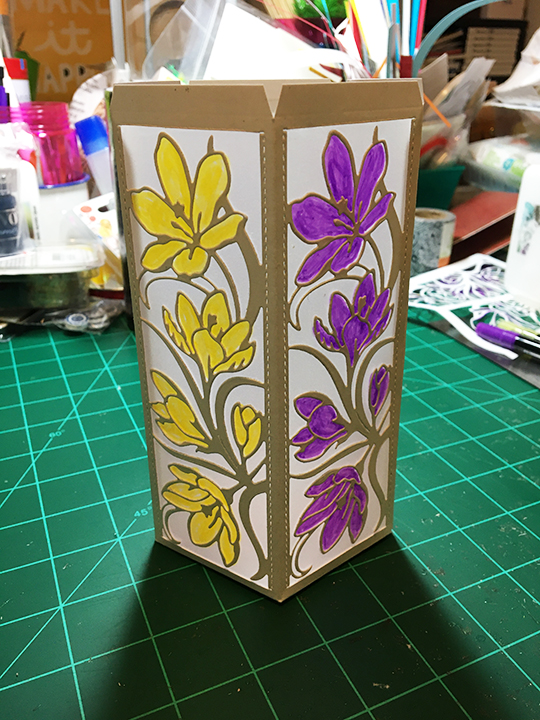
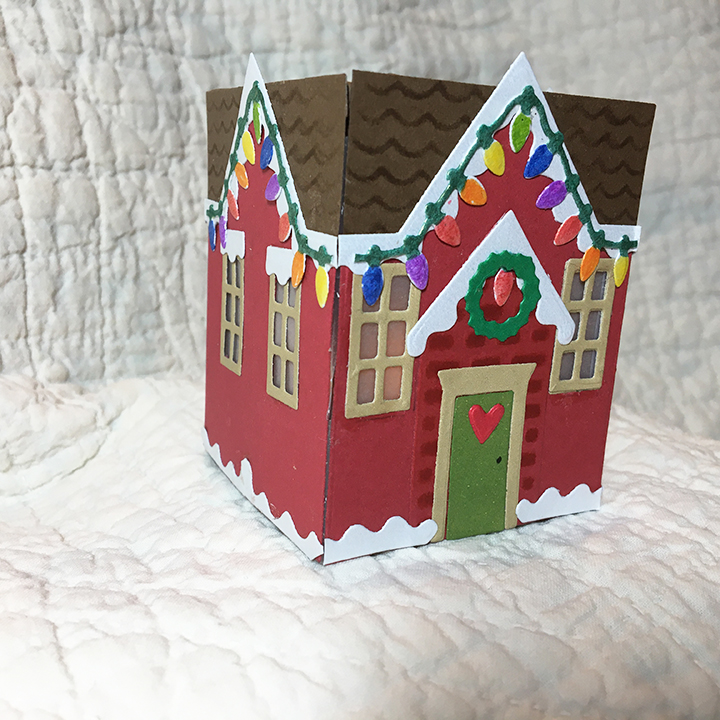
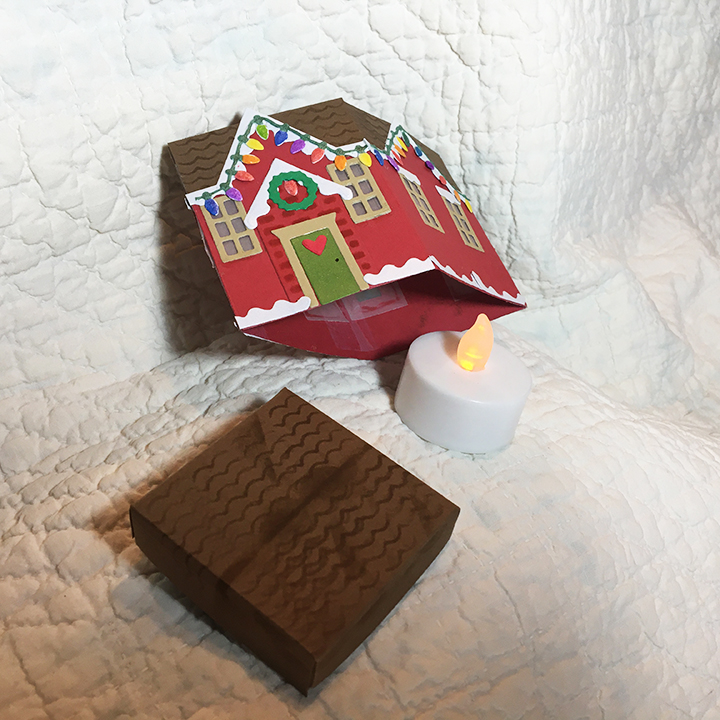
What kind of a thank you card do you make for someone who has sent an amazing gift and loves tigers? You make them a four-panel card that can act as a candle shade or screen.

Tonic Studios Tropical Rainforest silhouette die set was a perfect match for the card that cats as something more than a card. I had seen on Pinterest a lantern made from some of the Tonic Studios other forest silhouette dies sets and knew from my experience of making a house luminary Christmas card, that this die set would be easy to make a four-panel card/candle shade.

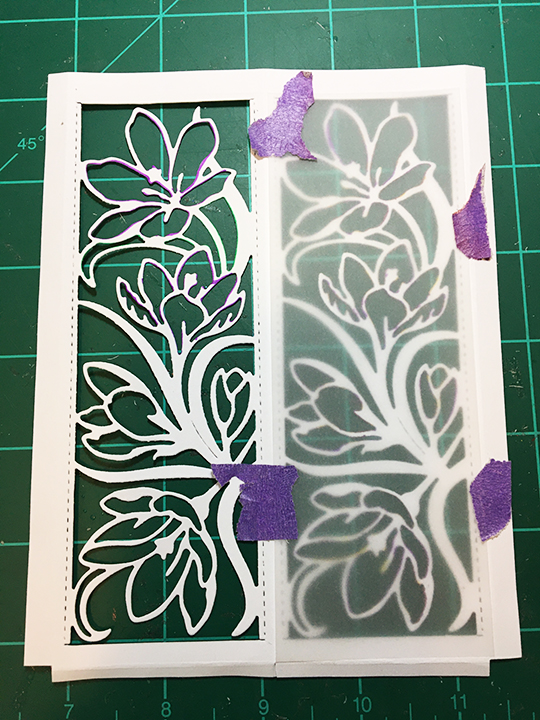
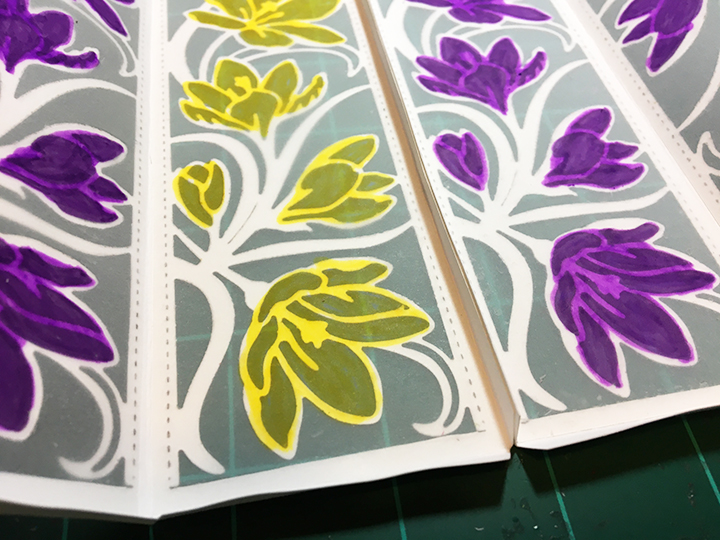
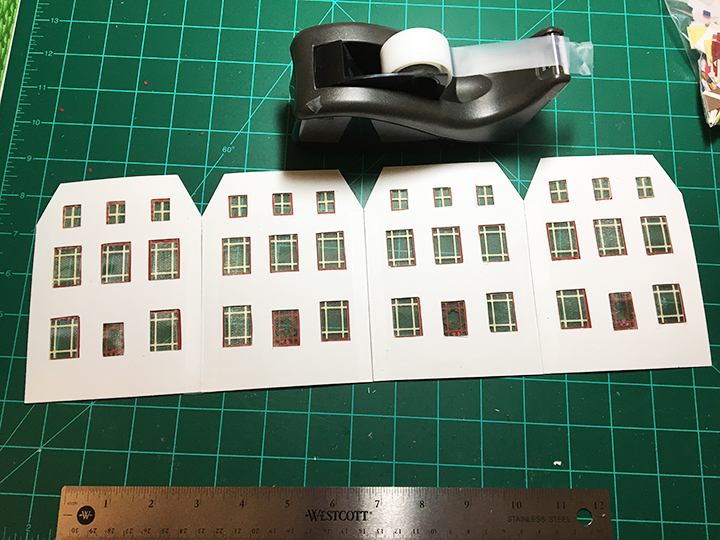
I cut four vellum panels and then using three shades of green cardstock and a sheet of brown, I cut the silhouette frames using the lightest shades for the front panels and the darkest as the panels at the back. I cut the panel with the tiger and toucan bird from white scrap cardstock and colored with markers. Next, I fussy cut them and glued in place on their panel. I also cut and colored a butterfly from white cardstock scrap.

The vellum panels were laid out in a row and taped together using clear removable tape on the back side of the vellum. Next the silhouette panels were glued on to the vellum.

As a finishing touch, I die cut the words “Thank You” to glue to card. Next, I pieced together from words in the same Moonstone word die set the name of the recipient. The card fits into a mini slim envelope.

Thank you for reading this blog post. Please like and leave comments. 😊

If you enjoyed this Luminary card, check out some of my other luminaria:

The First Sign of Spring – Crocus Tealight

Victorian Trim House Luminaria

Holiday House Luminaria

House Luminary

Materials Used:

Dies

Papers

Inks

Miscellaneous

The First Sign of Spring – Crocus Tealight

When the crocus start blooming in their purples and yellows, spring can not be far behind. This tall tealight holder is reminder that spring is coming.

Th intricate die cut is a design by Christina Griffiths of Card Making Magic that was the free gift in Die-cutting Essentials issue 73. The pentagon base is from a Tonic Craft Kit 25. Colored vellum panels behind the die-cut cardstock sides defuse light.

Materials:  Cut two 5 inches x 6 ¾ inches (12.5 cm x 17 cm) rectangles, one 2 ¾ inches x 6 ¾ inches (7 cm x 17 cm) rectangle from heavy white cardstock, and five vellum rectangles 2 ¼ inches x 6 ¼ inches (5.5 cm x 15.75 cm). Die-cut a sixth panel from scrap cardstock to use as a stencil. Die-cut one pentagon from heavy white cardstock.

Die-cut Sides:  Score all three white rectangles along all four sides at ¼ inch (3 cm). On the two larger rectangles score down the center at 2 ½ inches (6.25 cm). Place die centered inside score lines on all five sections and cut. (Hint: Because this an intricate die, you may need to add cardstock shims to get a good sharp cut throughout the die. I rolled the die through three times to cut the thick cardstock.) Using fine tipped scissors or a craft knife and metal ruler, trim off the attached top and bottom pieces of the die-cut.

Vellum Panels:  Tape a vellum panel to the front of the stencil and turn the vellum and stencil over to color the crocus flowers through the stencil onto the backside of the vellum. Once all panels are colored, glue to the back of the die-cut panels. Once glued, touch-up the coloring on the backside of the panel. (Hint: Depending on what type of markers are used to color the vellum, ink can transfer to the white cardstock, so coloring the backside away from the cardstock is best.)

Assembly:  Trim away the squares created by the score lines on the white cardstock pieces and cut the tab corners off as shown in photograph. Fold the two double panel pieces down the center score line and burnish with a folding tool. Fold the five bottom tabs and burnish. Fold and burnish the six long side tabs.

With two of the panels lying flat on your work surface, align the panels and glue the two tabs together. Pinch until the glue sets. Repeat until all but the last set of tabs are glued. Allow glue to dry. Gently fold the glued sides and burnish by pinching the sides together to have crisp folds. Glue the final tabs laying panels flat and reaching in, to pinch tabs until glue sets. Allow glue to dry. Fold and burnish the last corner. Drop pentagon base into center of holder and work under the three seams. Glue tabs to bottom of pentagon.

Add your battery powered tealight. (Note: because this light holder is made from flammable paper, do not use candles with real flames.)

Thank you for reading this blog post. Please like and leave a comment. 😊

Materials Used:

Dies

Colors

Papers

Miscellaneous

Victorian Trim House Luminaria

Warm and cozy is this small brick house with its white ornate Victorian trim as light streams through its windows. This is the third house luminaria in my blog posts using a battery powered candle.

Made with Impression Obsession’s house die set, this 3-inch tall by 2 3/4 inch square has slight modifications made to original two-dimensional design. I cut two of the brick house die as well as two partial die cuts with the same die to make the side walls. I cut a total of eight square windows and one arched window as well as two doors. The L shaped eaves die I cut twice from white cardstock and the twice more from thicker scrap cardstock. The ornate trim pieces I cut two from regular cardstock, but the ornate porch roof piece I cut once from regular cardstock and twice from thicker cardstock. I also cut two pieces of vellum 2 ¾ inches x 1 inch and five additional 1 inch squares of vellum.

Partial die cutting of side walls by placing die over the edge of cardstock.

I made two templates from purple scrap cardstock of the front and side of the house and using window die cuts I fingered out the window placement. Once I had the placement, I traced around the window frames with a pencil.  I cut the windows with the dies. Using the templates, I traced the window placement on to my red die-cut pieces and cut them out with a craft knife and metal ruler cutting inside the pencil lines. For the door I only cut out a rectangle where the windowpanes would be. Next, I glued the vellum pieces to the back of the red sides of the house.   

Once the vellum is adhered to the back of the window cut outs, you can turn the house pieces with their fronts facing up and decorate them by gluing on the window frames and doors. I used a gold gel pen to make the doorknobs.

For the L shaped eave pieces, I glued the regular white cardstock to the thicker scrap cardstock. I did similar for the porch roof piece, but I glued two of the thicker scrap cardstock pieces together before adhering the top regular cardstock piece.

To assemble the house sides, I laid all the pieces side by side and tape them together on the back side.

The roof is a 5 inch by 3 inch rectangle of brown cardstock stenciled with a stencil in my stash with Distress Ink and folded in the middle.  I taped the roof to inside of my house for stability.

The house and roof will fold to mail in an A2 envelope if the white eaves pieces are trimmed to fit by an 1/8 inch.

Thank you for reading about this little house. Please like and leave a comment. 😊

Links to other house luminaria and houses.

Also see the series of “A Week of Christmas Houses”

Day 1 – From Our House to Your House

Day 2 – Santa is Coming

Day 3 – A Baby is Coming

Day 4 –Keeping the Home Fires Burning

Day 5 – Red Four-Square

Day 6 – Santa Delivers to the Tropics

SUPPLIES

Dies

Ink

Paper

Miscellaneous

Holiday House Luminaria

Colorful holiday lights fill up the long winter nights. This little holiday house luminaria would be perfect as a holiday table decoration or a child’s nightlight. (Note: Use battery powered candles only.)

Made with Karen Burniston’s recent release of her holiday house die set, this 3-inch tall by 2 ½ inch cube has slight modifications made to original two-dimensional design. I cut four of each of the die pieces, (except for the smaller house shape and door pieces, of which I cut two each.) I stenciled the roof pieces and brick pieces first and then assembled two houses exactly as shown on the package with one modification, I used a craft knife to cut out the windows on the red house piece.

To cut the windows I used two of the window frame pieces to decide on placement and then I traced with a pencil around them. Using a metal ruler and craft knife I cut an 1/16 inch inside the pencil marks, so that the window frames would still have an edge to glue onto the red house. For the sides of the house without a door, I made sure the tops of the windows lined up with the tops on the front and back of the house. (HINT: If you are going to make a lot of these houses, make templates from heavy cardstock to trace where the window cut-outs would be.) Glue strips of vellum to the back side of the house pieces to act as window glass.

I cut the snowy roof edging and string of lights from white shimmer paper. The lights were colored using markers before assembling the house. The snow on the ground around the house were scraps from the die cutting of the roof edging pieces.

To assemble, trim the roof sides to be the same as the house sides. Next, lay all the pieces side by side and tape them together on the back side.

The roof top is a 3-inch by 3-inch square that was stenciled moving the roof die across the square. Using a score board score ¼ inch from all four sides of the square. Snip on of one the scored sides of the tiny squares to form tabs. Fold on all four score lines to form a square tray shape. You can push this tray up inside the house cube. No glue needed.

The house and roof will fold to mail in an A2 envelope.

Thank you for reading about this little house. Please like and leave a comment. 😊

Links to other luminaria and houses:

Victorian Trim House Luminaria

House Luminary

Victorian Christmas Parlor

Also see the series of “A Week of Christmas Houses”

Day 1 – From Our House to Your House

Day 2 – Santa is Coming

Day 3 – A Baby is Coming

Day 4 –Keeping the Home Fires Burning

Day 5 – Red Four-Square

Day 6 – Santa Delivers to the Tropics

Day 7 – House Luminary

SUPPLIES

Dies/Punches

Ink

Paper

Miscellaneous

House Luminary

Building off of the red four-square house, this four-panel card becomes a wrap-around screen for a battery powered candle. This is the seventh house card in my series of “A Week of Christmas Houses” using Poppy Stamps 2020 Winter House Pop-Up Easel die set.

The house goes together easily by looking at the photos on the Poppy Stamps packaging. It does involve a lot of die cutting as there is only one die of each window type.  (I cut lots of the small pieces and store the extras in a tiny plastic bags that I keep with the die set.) To add depth to the porch and dormer windows I cut those pieces four times and glued together. The snowy pieces are cut from glitter paper.

Papers Used: The house is cut from a dark red cardstock with the windows and porch posts cut from cream. Note that two matting layers to each house panel – one pale yellow and one on heavy weight white cardstock. The red, cream and pale yellow come from monotone color packs of cardstock by Recollections.

Once again, peach organza ribbon to create some sparkly interest at the windows of the house. I masked off the front door with sticky notes and used Walnut Stain Distress ink to darken the door and frame. A wreath cut with a Tonic Studios die set to complete the door. (See Day 2 for details.)

Once the four houses were assembled, I glued together the pale yellow and white matting layers and then used the solid house die to trace where the windows needed to be cut out on to the pale yellow with a pencil. Because the tracing was inside the window, I had to cut 1/8 inch away from the outer edge of the pencil lines to make the window opening as large or slightly larger than the die cut window openings. I used a metal ruler and a craft knife to do this.

Once all the window openings were cut, I could glue the house fronts on to their matting layer panels. Lining the four completed panels up, I then used clear tape to hinge the panels together.

The panels can accordion fold to fit in an A2 envelope which I stamped with a greeting since the card has no greeting on it. I expect this will be a hand delivered card with a boxed candle.

Free PDF of display instructions.

See more house luminaria:

Victorian Trim House Luminaria

Holiday House Luminaria

See the more the series of “A Week of Christmas Houses”

Day 1 – From Our House to Your House

Day 2 – Santa is Coming

Day 3 – A Baby is Coming

Day 4 –Keeping the Home Fires Burning

Day 5 – Red Four-Square

Day 6 – Santa Delivers to the Tropics

Day 7 – House Luminary

An Old-Time Christmas Parlor

2019 – 12 Days of Christmas Trees

Supplies

Dies

Stamps

  • Kaisercraft – Clear Stamps – Sentiments -Traditional – CS313

Paper

Ink

Miscellaneous