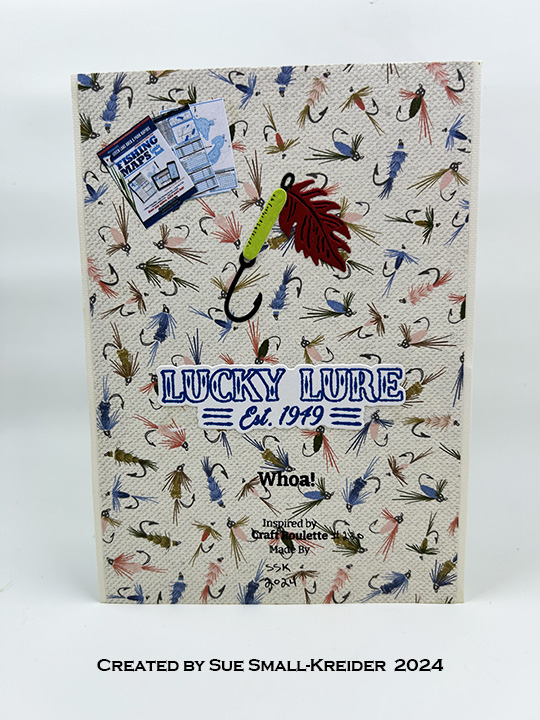
This card was made for Craft Roulette #220 whose parameters included for a card for a dude, dragon colors, basket(s) and chart(s).
I chose to make a fishing lure pop-up birthday card using stamp and dies by Stampin’ Up, HoneyBee Stamps, Karen Burniston and Waffle Flower.
Cardbase: I started with an A6 (4 1/2 x 6 1/4-inches) sized purchased cardbase with matching envelope.
Pop-up Mechanism: Watch the assembly video and tips video located towards the bottom of the linked page for Karen Burniston’s Photo Collage Pop-Up. These will help you understand where catchpoints can happen with this mechanism.
Today’s card is a simple one using Spellbinder’s BetterPress to create letterpress stamping elements.
I used press plates from two companies. The intricate zig-zag frames are from PinkFresh Studio and come with coordinating dies. I used the largest two printed frames in the set using Spellbinders BetterPress Ink in French Blue. (I ended up having to use bubble wrap packaging to get a good die-cut through the thick white watercolor paper that I printed them on.)
For the cardbase I used a purchased one with envelope from American Crafts. Stamped on the back flap of the envelope is a pincushion image from Fun Stampers Journey using Stampin’ Up Crumb Cake ink.
It’s time for the Karen Burniston June 2024 Design Team Challenge with the theme of using border dies.
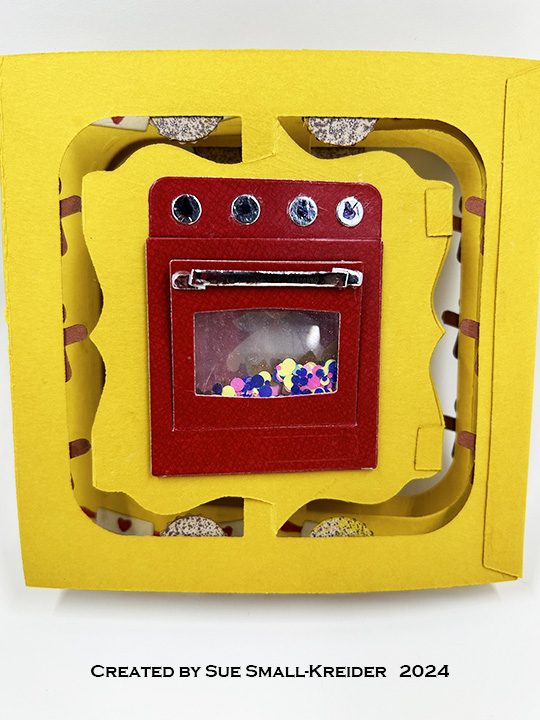
I wanted to get a jump on my end-of-the-year holiday cards by making a baking themed card with pies and gingerbread men from the Baking Borders and Christmas Borders 1 set. The rolling pin and chef’s hat are also in the Baking Borders set. Additional die sets used were: Oven Pop-Up, Tiny Gnomes, and the Fancy Label Accordion. (A 1 3/4-inch square die was used from the Frame Pull Pop-Up set, but any 1 3/4-inch square die could be used. This was the one I had handy.)
Watch my tutorial YouTube video to see how the card was made.
(TIP:Access the assembly videos for any of the dies used by clicking on the die link and scrolling towards the bottom of the linked pagefor the video.)
Cardbase: Cut three of the largest die in the Fancy Label Accordion set from a butterscotch-colored heavy cardstock. Work the scored fold-lines. Wait to until after making and attaching the oven shaker to glue the frames together.
Shaker Oven: Cut ten ovens from red cardstock and two additional ovens from coated red cardstock using the oven die from the Oven Pop-Up set. Trim off stove top section on all 12 pieces. From the two coated cardstock stove top pieces, trim off the back where knobs go and save. Layout oven with stove back on one panel of the cardbase. Mark the outside edges of oven lightly with pencil. Center 1 3/4-inch square die within the oven square and die cut. (You may want to use a ruler to find the center of the fancy label and center the die left to right with the center line. The die will be below the true center up and down because of the stove back piece.)
Glue five of the plain cardstock oven pieces to either side of the cardbase over the square opening. This will form the shaker base. Cut two 2-inch square pieces of clear acetate/plastic. Attach one piece of acetate/plastic with double-sided tape to the top of stacked oven pieces. Turn over and fill shaker with confetti and tiny cookie shapes from the Oven Pop-Up set. Attach the second piece of acetate/plastic with double-sided tape to seal up the oven shaker.
Cut two 1 1/2-inch square pieces of clear acetate/plastic. Adhere to the back of oven doors on the remaining two coated oven pieces using double-sided tape. With more double-sided tape added to the outer edges of the oven pieces, attach them over the shaker acetate/plastic. Glue the stove back with knobs attached to the cardbase above the ovens on both sides.
Pies, Gingerbread Men and Rolling Pins: Cut two strips of pie bases from the Baking Borders set. Color one strip all red .(I used a red glitter brush.) Color four orange and four baked apple yellow on the other strip. Cut out four of each of the pie tops. Ink the pie top to look like browned crusts with maybe some burnt tips of the crusts. Glue lattice pie crust to apple yellow pies, the open ring crust onto the pumpkin orange pies and the flower shaped crusts onto the red pies. Cut all the pies into separate circular pieces. Glue pies to the top and bottom of the front and back panel frames of the card base.
Cut two strips of gingerbread men using the die in the Christmas Borders 1 set. Using a white gel pen with a fine tip, trace the icing onto the men using the stencil feature of the die. Cut men apart and glue to sides of the front and back panel frames of the card base.
Cut two strips of the rolling pins from a kraft colored cardstock using the die from the Baking Borders set. With a red fine-tipped marker stencil on the hearts and color all the handles. Trim the strips to fit the top and bottom of the middle panel frame. Save one of the leftover rolling pins for the chef to hold.
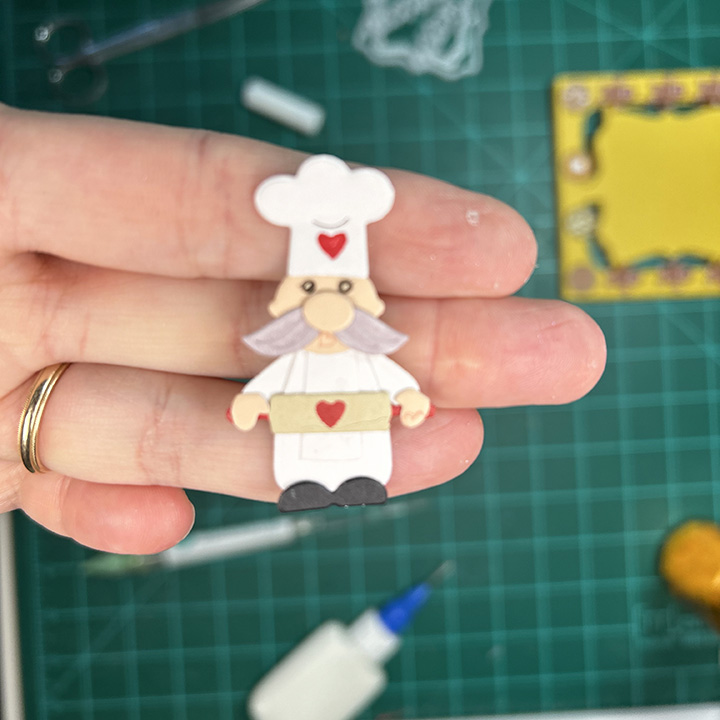
Chef: From the Tiny Gnomes set, cut two of the body piece and one mustache from white cardstock. From flesh colored cardstock cut the head, nose and hands. From black cardstock cut the shoes. With a fine tipped pen, trace the eyes using the stencil feature of the head die. Color the mustache brown or gray. Cut one chef’s hat from white using the die in the Baking Borders set. Using the rolling pin die to stencil a red heart onto the chef’s hat.
To assemble, cut one body piece to have an apron in the center and an arm on either side. (See video for visuals of this.) Glue apron onto other body piece and then head. Added mustache then nose to head. Glue arms onto back of body wide enough to hold a rolling pin. Glue rolling pin to end of arms and then add hands on top of rolling pin handles. Attach shoes and hat.
Sentiments: “Happy Holidays” comes from Word Set 3-Holidays. The labels behind it and the chef are from the decorator dies in the Fancy Label Accordion set. Personal messages can be written on the back of the panels.
Envelope: The card fits into an A7 size envelope decorated with leftover pies and rolling pins on the back flap.
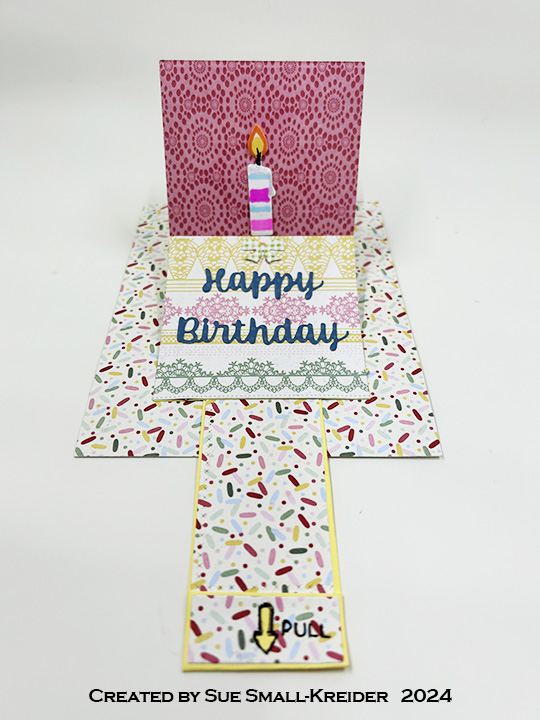
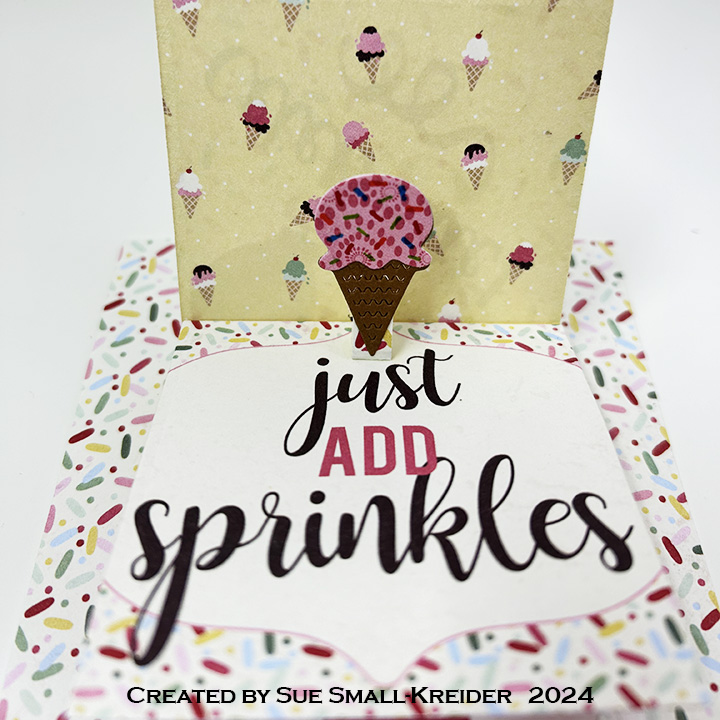
Cardbase: Use a 5.5 x4.25-inch white piece of cardstock and cover front with confetti sprinkles patterned paper. Die cut half round notch from Waterfall Card die set at center bottom of short side of card.
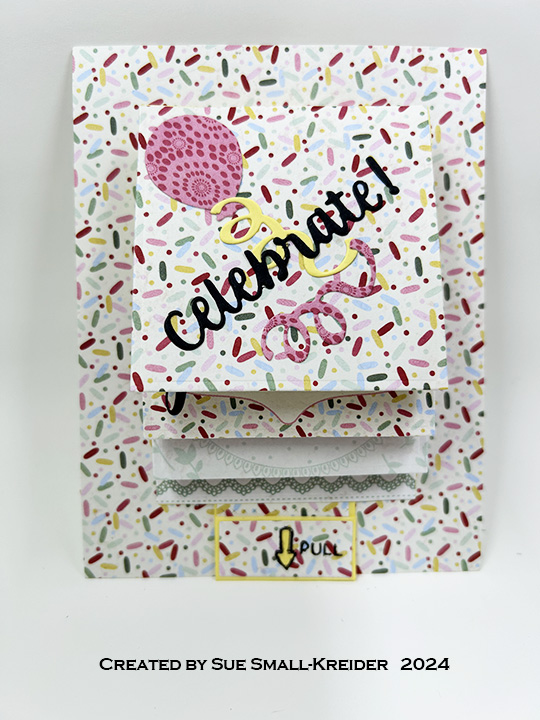
Waterfall: Watch the assembly video at the bottom of the linked page for the Waterfall Card. I cut the mechanism pieces (pull strip and base) from yellow cardstock. The largest square die was used to cut four double-sided patterned paper pages. Assemble waterfall as shown in video.
Food Pop-Ups: Cut and assemble the ice cream cone from the Sweet Treats Charms set. The slice of cake and large candle are made using the Big Birthday Charms set. Cut off the charm loops on both. Cake icing has Glossy Accents clear gel on it. Candle flames have glitter gloss on them.
Cut small strips of patterned cardstock and fold in half and then fold the ends to the center fold to form a pop-up cube to glue into the first two pages. Once these pop-up cubes’ glue has dried, attach the food elements to cubes. The large candle is popped-up with two strips of cardstock behind it.
Sentiments: “Celebrate!” and “Happy Birthday” are from Word Set 2. The balloons and streams are from the Big Birthday Charms set. The quote by Iris Murdoch was in the paper collection. The back of the pull tab was stamped with “Inspired by Craft Roulette. Made by” and signature and CR episode listed.
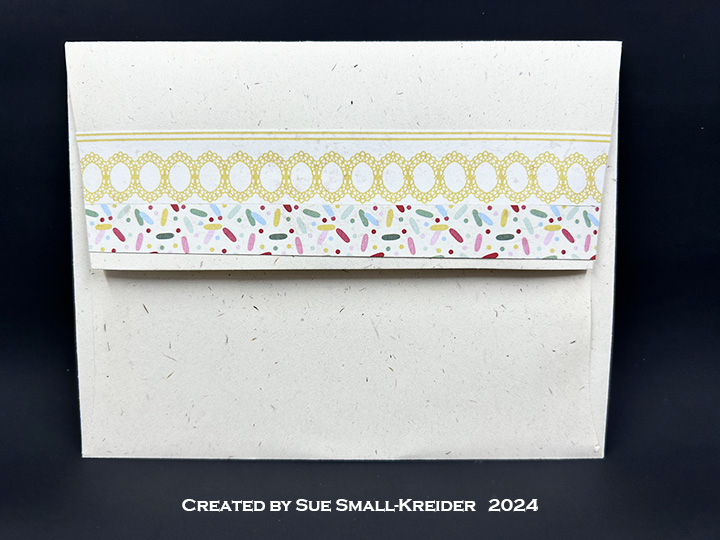
Envelope: The back flap of the envelope is decorated with leftover strips of patterned paper.
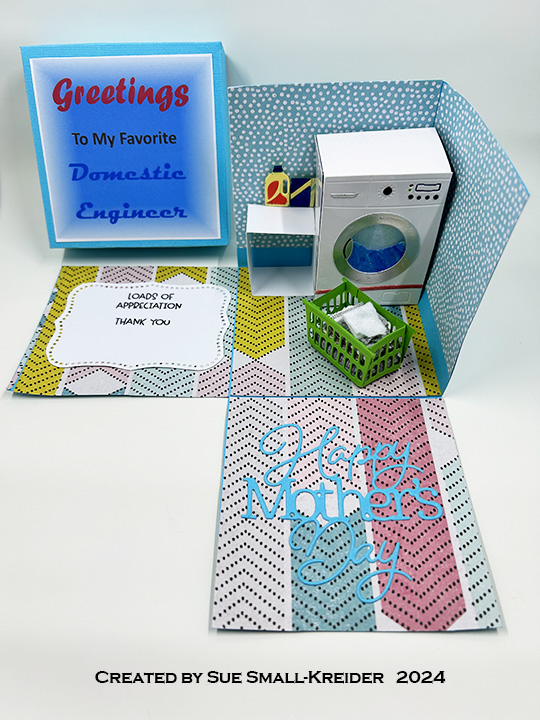
This card was made for Craft Roulette #213 whose parameters included for hello project, robust colors, workplace element and mixed media. It is intended for young children to give to their mother.
Box: From a 12 x12-inch square of cardstock, draw lines every 3 7/8-inches on all sides. Draw a 1/4-inch tab on one side flap. Cut as shown on video. On a 6-inch square of cardstock draw lines 1-inch from edge on all sides. Cut lid as shown on video. Assemble as directed on video.
Washing Machine: Cut from glossy white cardstock one washing machine from the laundry die set. Cut the knobs and buttons from black and silver and glue in place. For the box piece the forms the 3D washing machine, cut a piece 8 1/2 x 2-inches. Fold at 3 1/8-inches, 4 1/2-inches and 7 1/2-inches. Cut a piece that will cover the side of the box from glossy white cardstock. Cut another piece of glossy cardstock the width of the top of the washing machine and the length of the top of the box, plus 1/2-inch for the two 1/4-inch tabs. Assemble as shown in video.
Table: Cut a piece of white cardstock 1×6-inches. Score and fold at 1/4-inches, 1 5/8-inches, 3 1/4-inches, and 4 5/8-inches. Glue tab to other end to form cube. Glue onto washer side and floor. Die-cut, color and assemble laundry soap bottle and box. Using foam squares, attach them to wall atop table.
Basket: Cut four of the laundry basket from the laundry die set in green. Trim off the sides from two of the baskets, fold sides into tabs and glue onto sides of other two basket pieces to form a four-sided box. Cut fabric scraps and form into folded laundry. Glue laundry onto box base and then add glue to inside of basket before placing around folded laundry.
Sentiments: “Loads of Appreciation” and “Thank You” were stamped in black on a white die cut fancy label before being glued onto a box flap. “Happy Mother’s Day” was die cut from a scrap of the blue box cardstock. The “Greetings To My Favorite Domestic Engineer” on the box lid was computer generated.
____________________________________________
Thank you for experiencing this blog post.
I hope this inspires you and makes you smile.
Please like and leave comments 😊
____________________________________________
Materials Used:
Dies
Papertrey Ink – Wafer Thin Metal Dies – Happy Mother’s Day
This card was made for Craft Roulette #211 whose parameters included good tidings, summer colors, mechanical element and tie closure.
This is a retirement card for someone who loves working with mechanical action.
(Please note that the Tonic Craft Kit 59 used in this card is no longer available. The Karen Burniston dies however are still available and links are provided to them.)
Cardbase: I used a purchased A7 (5×7-inch) cardbase and matching envelope. Each of the four panels were covered with coordinating papers in either watermelon pink or rind green. The circle was cut thru the front panel using the clock dial circle die.
Clock: Using three different green cardstock, they were cut with the main clock base die from the Tonic Craft Kit 59. The darkest green was trimmed to just the bottom and side trims, while the green patterned paper had the clock dial circle cut out and two bottom art-deco corner die-cut as well. Matching up the patterned green piece with the light green piece, the clock dial circle was cut in the light green piece. The dark green trim was attached to the patterned green piece before having a piece of clear plastic packaging adhered with thin double-sided tape to its backside. Sandwiching the plastic between the patterned green piece and light green piece by using double-sided tape again. The clock was glued onto the card front matching up the circle apertures.
Moving Gears: I watched Karen Burniston’s Double Spinner video at the bottom of her Mailbox Pop-Up page before adding the spinning gears pop-up to my card. I switched out gear dies from the Tonic Craft Kit 59 set for her fancy labels and gardening charms, but I followed her technique exactly to create the spinning gears. Gears were cut from steel blue and cooper oxidized foil cardstock.
Sentiments: All the sentiments on the front of the card “Time flies when you’re having fun,” and “Happy Retirement” are from the Tonic Craft Kit 59. All stamped in black ink. The sentiments were stamped before the inside mechanical pop-ups were added. The personal message circle uses a large gear cut in blue oxidized metal foil cardstock (Tonic Craft Kit die) and a circle of pale gray cardstock using Karen Burniston’s Crosshatch Circles die set.
Envelope: The back flap was stamped in black ink “TIME to celebrate.”
Thank you for reading this blog post. I hope this inspires you and makes you smile. Please like and leave comments 😊
This card was made for Craft Roulette #210 whose parameters included Project must include action, Northern Lights colors, blackboard element(s) and oval(s).
Below is a recorded live video (37 minutes) that demonstrates how the inside-out card is made.
For a shorter experience watch the Craft Roulette process video below.