
This Christmas card/ornament is a prototype for a shaker card. The car and Santa are part of the Spellbinder’s Sunday Drive collection and the pierced circles is also a Spellbinders nesting circle die set.
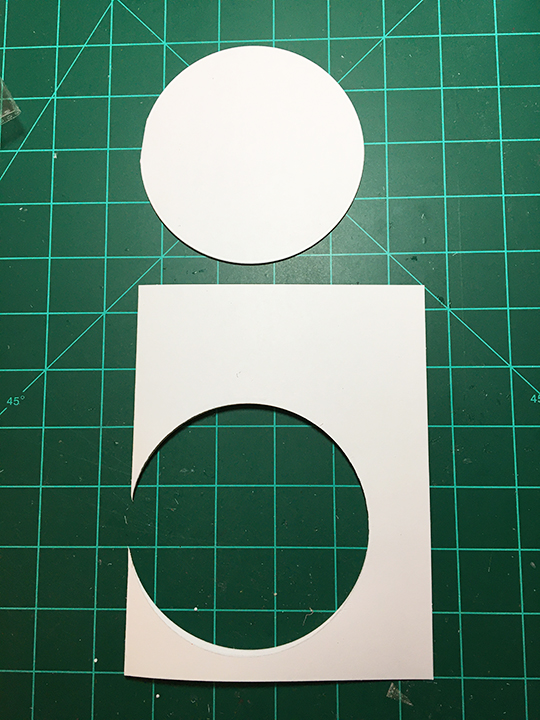
To make this bauble card, I cut a circular card base using the largest nesting die placing it just off the edge of a 6 ½ x 5 inches white card base.

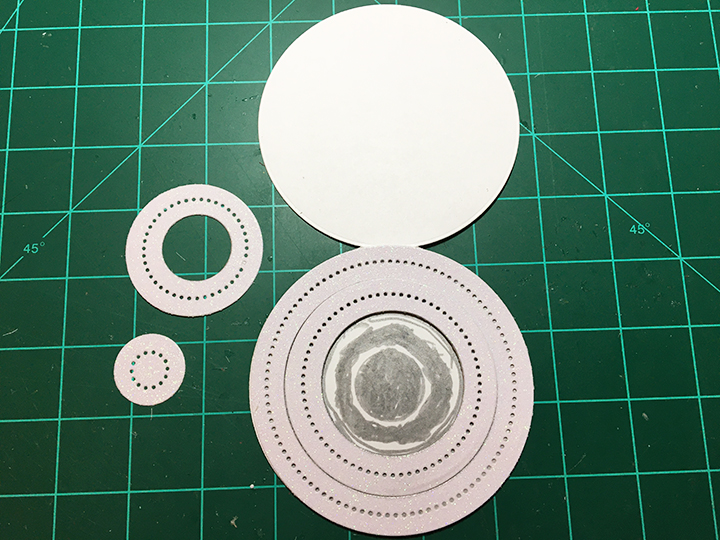
I cut the series of pieced holed circles on white glitter cardstock and colored the front of the card base with silver metallic ink to show through the pierced holes. I also cut a piece of acetate between tissue interleaves so as not to have the cutting plates leave marks. Two strips of silver foiled cardstock ½ x 1 ¼ inches and a piece of thin silver wire 3 inches long were cut as well.

Next I cut a circular frame using the largest nesting die and the next size down circular die out of glitter cardstock. (I used a stitched circle die from another set to get a narrow border, but you could use the Spellbinders circle set and have a wide pierced border frame too.)

At this point I should have stamped and heat embossed the inside greeting before assembling the card. I like to use a stamping platform and the assembled card was too thick to get a good stamped impression. (My improvised solution was to stamp and heat emboss a tissue circle and glue it inside which is not as professional a finish as I would like.)
Previously I had cut and assembled a number of the Santa in the car and assembled them. (See Sunday Drive with Santa post.)
The whole process should be:
- Cut card base, acetate circle, nesting circles, silver foiled strip, all parts for Santa, reindeer and car.
- Stamp and heat emboss inside card sentiment. (If in inking back of license plate with distress ink, clear heat emboss it now.)
- Add any colored ink or paper to go behind pierced circles to front of card base now.
- Assemble Santa, reindeer and car
- Glue down pierced circles
- Glue Santa and car to top of circle frame and place foam tape on back side of car
- Using a thin line of glue at outer edge of circle frame, glue acetate circle on top of circle frame and car
- On the back side of the circle frame place short, thin strips of foam tape with no gaps. This will hold your shaker contents from escaping. (I cut ¼ inch wide stripes of foam tape.)
- Place a small amount of craft snow in the middle of the front card base and then peel off backing paper on foam tape and adhere the acetate circle assembly to card base.
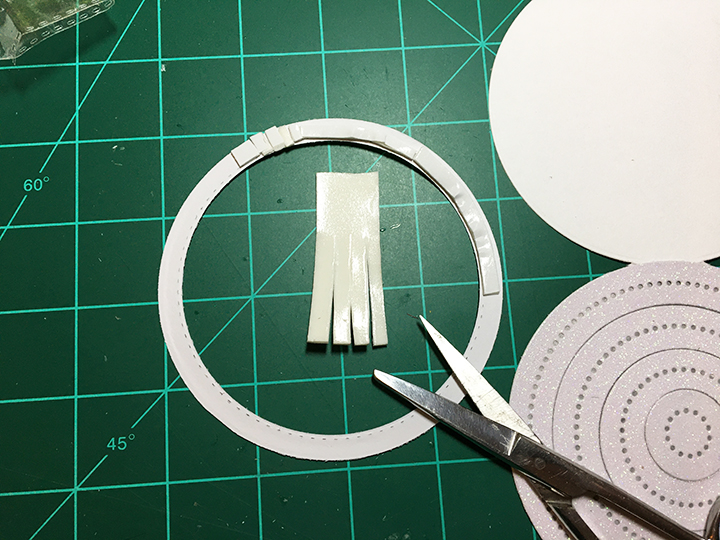
- Score on backside of foil strips every 1/8 inch and accordion fold both strips and flatten out again. Cut two strips of foam tape ¼ x 1 inch and adhere at top edges of foiled strips on back.
- Make a loop from the thin wire.
- Glue one of the foil strips to the top of the card base over fold so that foam tape is above the fold. Remove backing paper from foam tape on this piece.
- Place wire loop on foam tape. And add a drop of glue to secure wire.
- Remove backing paper on other foil strip foam tape and glue in place on backside of card.
- Tie ribbon through wire loop.


To finish the card, I stamped its envelope with a hint of what’s inside using a “Believe in the Magic of Christmas” sentiment in red ink.
Other Sunday Drive cards:
A Snowy Sunday Drive with Santa
SUPPLIES:
Dies
- Spellbinders – etched die set –Sunday Drive – S4-1053
- Spellbinders – Sunday Drive with Santa Etched Dies – S3-401
- Spellbinders – Essential Circles – S4-1039
- Art Impressions – Steel Dies – Circles – Double Stitched – 5064
Stamps
- Kaisercraft – Clear Stamps – Sentiments -Traditional – CS313
Papers
- Scraps of card stock from stash
- Matte silver cardstock
- Dura-Lar .0005 Clear Film acetate
- Reflections 6 ½ x 5 inch card base and envelope
Inks/Watercolors
· VersaMark – Watermark Stamp Pad
· Recollections Pearl Embossing Powder – Sapphire
· Recollections Detail Embossing Power- Clear
· Stampin’ Up Classic Stamin’ Pad – Real Red
Miscellaneous
- Foam tape
- Cosmic Shimmer Acrylic Glue/PVA Glue
- American Crafts – Metallic Marker – M – Silver -62212
- Blue Snowflake satin ribbon
- Thin silver wire (I used 26 gauge round medium temper silver plated jewelry wire)
- Craft snow (I got my package years ago from a hobby shop that sold materials for making model train scenes)

Great instructions Sue. Thanks, Clare x
LikeLiked by 2 people