Dress-Shaped Card

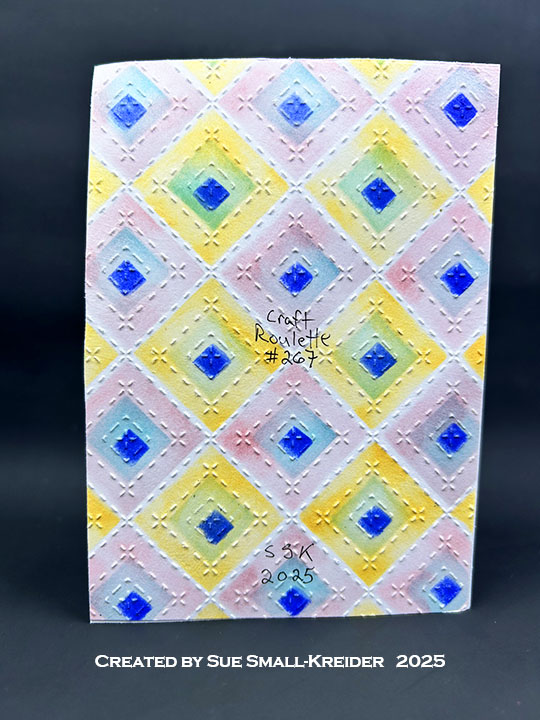
This card was made for Craft Roulette #268 whose parameters included a card for a student, modern colors, clothing element, and abstract blob(s). I made an A9  shaped-card of encouragement for a student of life.

Watch the process video to see how I made this card.

Cardbase:  Using a 5.5×8.5 sheet of paper fold in half- long ways and draw one side of a dress. Cut the dress out and use as a pattern to trace for two dresses on an 8.5×11 sheet of cardstock. Add tabs to shoulders of one dress as hinges to create the shaped card.   

Sentiments:  All the sentiments are stamped using rubber stamps from Riley & Company’s Funny Bones collection, except for the “Go Girl Go” which was die cut using Karen Burniston’s Mini Alphabet die set.

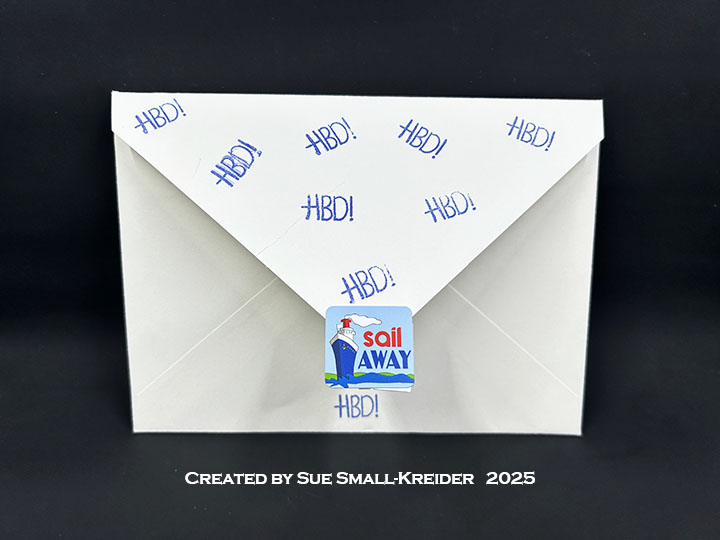
Envelope:  The card fits into a catalog envelope (6×9-inches).

___________________________________

Thank you for experiencing this blog post.

I hope this inspires you and makes you smile.

Please like and leave comments 😊

___________________________________

Disclaimer: Karen Burniston products are provided free of charge by the manufacturer for review and use. All other items were personally purchased. Compensated affiliate links used where or when possible, meaning I will receive a small percentage commission from these manufacturers at no cost to you. This will allow me to add more content to my YouTube channel and help out a lot. Thank you.

Materials Used:

Dies

Stamps

  • Riley & Co. – Funny Bones – Rubber Stamp – Whatever You Do – RWD-822
  • Riley & Co. – Funny Bones – Rubber Stamp – Life is Better – RWD-464

Stencils

  • Honey Bee Stamps – Stencil set – Winter Wonder Scene Builder – HBSL-11

Papers

  • White 80lb. Cardstock

Ink

  • Sunbird Spark – Velvety Dye Ink – Ochre, Olive Grove, Puya

Adhesives

Tools

  • Die Cutting Machine

Miscellaneous

  • Mint Green Ribbon

Small Quilt Themed Pop-Up Birthday Card

This card was made for Craft Roulette #267whose parameters included a 4 Bar card, craft store colors, se(s)/(ing)/sewn element, and stencil. I made a birthday card using dies by Karen Burniston and PinkFresh and sentiment stripes by Waffle Flower

Watch the process video to see how I made this card.

Cardbase:  Score and fold a 7×5-inch piece of heavy white cardstock into 3.5×5-inch side fold card. 

Stenciled Quilt Top Background:  Follow directions in video to stencil the background. To create the stencils use 6×8.5-inch sheets of 100lb cardstock that have the stitched diamond die cut into the center of each of the four sheets. Using the stitch marks as your guide, cut the stencils using a craft knife and a metal straight edge or ruler.

Pop-up Twist Panel:  Watch the assembly video at the bottom of the linked page. Stamp the quilt stamp onto medium weight cardstock. Die-cut the large mechanism from the Little Twist Panel Pop-Up set out of the stamped cardstock. Cut the panel from white cardstock. Cut decorative panels using the dies in set with your stamped cardstock.

Sewing Charms:  Assemble as directed in Karen’s assembly video located at the bottom of the linked page for the Sewing Charms.

Envelope:  The card fits into an A2 (4.25x 5.5-inches) size envelope.

___________________________________

Thank you for experiencing this blog post.

I hope this inspires you and makes you smile.

Please like and leave comments 😊

___________________________________

Disclaimer: Karen Burniston products are provided free of charge by the manufacturer for review and use. All other items were personally purchased. Compensated affiliate links used where or when possible, meaning I will receive a small percentage commission from these manufacturers at no cost to you. This will allow me to add more content to my YouTube channel and help out a lot. Thank you.

___________________________________

Materials Used:

Dies

Stamps

  • Spellbinders – Cling Stamp Set – Stephanie Low – Designer Series – Cool Vibes – SBS-150

Papers

  • Waffle Flower – Sentiments – Birthday Die Cut– SCP240
  • Waffle Flower – Sentiments  – View Die Cut – SCP253
  • White 100lb. Cardstock

Ink

  • Ranger – Tim Holtz – Distress Ink – Blueprint Sketch, Dried Marigold, Saltwater taffy, Salvaged Patina

Adhesives

Tools

  • Die Cutting Machine
  • Paper Trimmer
  • Scissors
  • Paper Masking Tape
  • Tweezers
  • Blending Brushes
  • Craft Knife
  • Metal Ruler or Straight Edge

Pop-Out Birthday Tag Card

This card was made for Craft Roulette #265 whose parameters included gift card, train colors, science element, and add a flower. I used a Craft Roulette stamp set and three Karen Burniston dies die sets.

Watch the process video to see how I made this card.

Cardbase:  Using Karen Burniston’s Tag Book Pop-Up die set, I cut two of the large tag frames from oxidized blue mirror cardstock and two more from oxidized copper-colored mirror cardstock. The rectangular hinge die I cut once from white cardstock.

Pop-Up Panels: I glued my thin decorated paper to a piece of thin white cardstock and let dry before cutting out the Flower Pivot Panels piece. (Follow the assembly instructions in her video on the die set’s linked page.) The six small flowers are cut from solid colored cardstock scraps using the dies from the same die set as the panels.

Sentiments:   The framed “Happy Birthday” on the tag front is from the Happy Birthday Lorna Add-Ons die set. The stamped “itty bitty gift” on the back tag pocket is in brown ink using the Craft Roulette Funn Sentiments #01 stamp set.

Envelope:  The card fits into a purchased A6 (4.5x 6-inches) size envelope or larger.

___________________________________

Thank you for experiencing this blog post.

I hope this inspires you and makes you smile.

Please like and leave comments

___________________________________

Disclaimer: Karen Burniston products are provided free of charge by the manufacturer for review and use. All other items were personally purchased. Compensated affiliate links used where or when possible, meaning I will receive a small percentage commission from these manufacturers at no cost to you. This will allow me to add more content to my YouTube channel and help out a lot. Thank you.

Materials Used:

Dies

Stamps

  • Craft Roulette – Funn Sentiments Clear Stamps – #01

Papers

  • Hunkydory – A4 Mirri Sheets of Cardstock – Oxidised Metals Collection
  • Hot Off The Press – Paper Pizazz – 12×12 Single-Sided Paper – Burgundy Collage
  • My Favorite Things – 8.5×11 65 lb. Cardstock – White
  • Green, Orange, Red and Yellow Cardstock

Ink

  • Memento – Fade Resistant Dye ink – Rich Cocoa
  • Pigma – Mircon 005 Fine Tip Pen – Black
  • Sharpie – Permanent Marker – Fine Tip – Black

Adhesives

Tools

  • Spellbinders – Platinum Die Cutting Machine
  • Scrapbook.com – Magic Mat
  • i-crafter – Shim
  • Paper Trimmer
  • Stamping Platform
  • LDRS – Stampendable Stamping Tool
  • Stamping Blocks used as paperweights
  • Scissors
  • Paper Masking Tape
  • Tweezers
  • We R Memories – QuickStick

Miscellaneous

  • Cording or Twine 8-inches long

FUNN Museum of Cards Zoyfold Card

This card was made for Craft Roulette #264 whose parameters included a card for an influencer, dreamy colors, crafts/crafters, and off center.

Watch the process video to see how I made this card.


Cardbase: Cut an 8.5×11-inch piece of heavy white cardstock into two pieces that at 4.25×11-inches. Score and fold in half at 5.5-inches both pieces. On one piece score and fold at 2.75-inches. Glue the two cards together with the large rectangle panels overlapping as shown in the video.
Cards: Because this card is going to Mary Gunn, I used images from her Craft Roulette Community Showcase gallery, picking cards that are iconic to the show. I tried to recreate some of the fun folds and bookmark cards.


Guide Sheet to Cards: This sheet is folded and tucked in a pocket on the back of the card.


Envelope: The card fits into an A2 (4.25x 5.5-inches) size envelope.

________________________________


Thank you for experiencing this blog post.

I hope this inspires you and makes you smile.

Please like and leave comments 😊

______________________________


Disclaimer: Karen Burniston products are provided free of charge by the manufacturer for review and use. All other items were personally purchased. Compensated affiliate links used where or when possible, meaning I will receive a small percentage commission from these manufacturers at no cost to you. This will allow me to add more content to my YouTube channel and help out a lot. Thank you.

____________________________


Materials Used:
Dies

Karen Burniston in cahoots with Riley and Company – Holiday House – 1144
Karen Burniston in cahoots with Riley and Company – Mini Alphabet and Numbers – 1197
• Riley and Company – Cool Dies – Speech Bubbles


Papers
• Craft Consortium – 6×6 Double-Sided Cardstock – Brick Texture
• Brown, Red, Tan and Yellow Cardstock
• White 100lb. Cardstock
• White Computer Printer Paper


Adhesives
Neutral PH Adhesive by LINECO
Fine-Tip Glue Bottle
• Foam Dots


Tools
• Die Cutting Machine
• Paper Trimmer
• Scissors
• Paper Masking Tape
• Tweezers

A February Birthday Card

This card was made for Craft Roulette #255 whose parameters included an A2 card, Valentine colors, February element, and metallic/foil.

Watch the process video to see how I made this card.

Cardbase: I used a purchased cardbase and envelope. The cardbase had a pink plaid exterior with was covered with decorative paper on the card back and a frame mat was cut from red using the Karen Burniston rectangle die so that some of the pink plaid would show.

Sentiments:  The “Sweet” sentiment on the card front is front a journaling card from the 12×12 Memory Place paper collection. Inside, a Craft Roulette sentiment stamp was used for “Happy Birthday.”

Envelope:  The card fits into an A2 (4.25x 5.5-inches) size envelope with decorative paper strips glued to the back flap.

___________________________________

Thank you for experiencing this blog post.

I hope this inspires you and makes you smile.

Please like and leave comments 😊

___________________________________

Disclaimer: Karen Burniston products are provided free of charge by the manufacturer for review and use. All other items were personally purchased. Compensated affiliate links used where or when possible, meaning I will receive a small percentage commission from these manufacturers at no cost to you. This will allow me to add more content to my YouTube channel and help out a lot. Thank you.

Materials Used:

Dies

Stamps

  • Craft Roulette – Clear Stamps – The Basics
  • Craft Roulette – Clear Stamps – Funn Sentiments #01

Papers

  • Memory Place – 12×12 inch Double-Sided Paper – Peter’s Garden
  • Memory Place – 6×6 inch Double-Sided Paper – Peter’s Garden
  • Memory Place – 6×6 inch Collage Origami Paper – Peter’s Garden
  • Craft Smart – A2 Printed Card and Envelope – Pastel Plaids

Ink

  • Memento – Fade Resistant Dye ink – Tuxedo Black
  • Pigma – Mircon 01 Fine Tip Pen – Black
  • Nuvo – Aqua Shimmer Brush Marker – Glitter Gloss
  • Nuvo – Glitter Marker – Lemon Drizzle

Adhesives

Tools

  • Die Cutting Machine
  • Paper Trimmer
  • Stamping Platform
  • Stamping Blocks
  • Detail Scissors
  • Trimming Scissors
  • Paper Masking Tape

Cruising On Your Birthday!

This card was made for Craft Roulette #252 whose parameters included a card for a teenager, morning colors, fairy (fairies), and bow(s). I choose to interpret fairy as fairy lights and bow as a bow of a ship.

Watch the process video to see how I made this card.

Cardbase: My double sided paper from Carta Bella was cut into a 6.5×10-inch rectangle and folded in-half. The wave decorations were cut using Karen Burniston’s Ocean Edges die set.

Cruise Ship Pop-Up: The cruise ship is made with two die sets by Karen Burniston – Boat Pop-Up and Cruise Ship Add-ons. (You can watch assembly videos for both sets by clicking on their links and going to the bottom of the linked pages.)

Pear Blossom Press Twinkle Lights were used to light-up the ship and the ship’s wheel (from Karen Burniston’s Cruise Charms die set with Pear Blossom Press’ “push” stamp) covers the battery and indicates where to press to turn on the lights.

Sentiments:  The “Wishing you…” sentiment is from Karen Burniston’s Cruise Greetings stamp set and the “HBD!” is from Craft Roulette’s Funn Friends #02 stamp set. The sentiments are stamped in black ink on labels cut from Karen Burniston’s Rectangles and Labels – Crosshatch and Labels – Crosshatch die sets. You can download the paperclip slip.

Envelope:  The card fits into an A7 (5x 7-inches) size envelope with “HBD!” stamped all over the back flap and sealed with a sticker from the paper collection.

___________________________________

Thank you for experiencing this blog post.

I hope this inspires you and makes you smile.

Please like and leave comments 😊

___________________________________

Disclaimer: Karen Burniston products are provided free of charge by the manufacturer for review and use. All other items were personally purchased. Compensated affiliate links used where or when possible, meaning I will receive a small percentage commission from these manufacturers at no cost to you. This will allow me to add more content to my YouTube channel and help out a lot. Thank you.

Materials Used:

Dies

Stamps

Papers

  • Carta Bella – 12×12 inch Double-Sided Textured Cardstock – Bon Voyage by Steven Duncan
  • Bazzill – 8.5×11 Cardstock – Tiara -18-1002
  • Your Paper Insider – 8.5×11 Cardstock 100# Smooth – UltraWhite
  • Yellow Vellum
  • Blue Cardstock
  • Recollections – A7 Envelope – Cream

Ink

Adhesives

Tools

  • Die Cutting Machine
  • Paper Trimmer
  • Bone Folder
  • Score Board
  • Stamping Platform
  • LDRS – Stampendable Stamping Tool
  • Stamping Blocks used as paperweights
  • Scissors
  • Craft Knife
  • Pencil
  • Paper Masking Tape
  • Metal Ruler

Miscellaneous

  • Pear Blossom Press – Twinkle Lights

Triple The Fun With Mini Mini Slimline Pop-Up Cards

This card was made for Craft Roulette #251 whose parameters included for a slimline card, lumberjack colors, hat(s) or cap(s), and lace or doily.

Watch the process video to see how I made this card.

Cardbase:  Each card is made from a 2×6-inch piece of double-sided patterned paper, folded into a top-fold 3×2-inch card.  The box to hold them is made using Karen Burniston’s Candy Hearts Box die.

Sentiments:  The sentiments were all stamped in black ink using the Craft Roulette Funn Sentiments #01 set except for the “Hats off to you” which was handwritten.

Envelope:  The flatten box with three cards will fit into an A2 (4.25x 5.5-inches) size envelope.

___________________________________

Thank you for experiencing this blog post.

I hope this inspires you and makes you smile.

Please subscribe, like and leave comments 😊

Follow my YouTube channel, Instagram and Pinterest as well.

___________________________________

Disclaimer: Karen Burniston products are provided free of charge by the manufacturer for review and use. All other items were personally purchased. Compensated affiliate links used where or when possible, meaning I will receive a small percentage commission from these manufacturers at no cost to you. This will allow me to add more content to my YouTube channel and help out a lot. Thank you.

Materials Used:

Dies

Stamps

  • Craft Roulette – Clear Stamps – Funn Sentiments #01

Papers

  • Scrapbook.com – 6×8 Double-Sided Cardstock – Noel Patterned Collection
  • Simple Stories – 6×8 Double-Sided Cardstock – What’s Cookin’?
  • Black, Brown, Red, White and Yellow Cardstock Scraps
  • Fraser Papers for William House – A2 Envelope – Genesis Text Milkweed Smooth

Ink

  • Memento – Fade Resistant Dye ink – Tuxedo Black
  • Crafter’s Squares – Metallic Markers .05 in – Blue and Silver
  • Pigma – Mircon 01 Fine Tip Pen – Black
  • Pigma – Mircon 005 Fine Tip Pen – Black
  • Sakura – Gelly Roll Pen – Medium – White
  • Sharpie – Permanent Marker – Ultra Fine Tip – Black, Blue, Brown, Red

Adhesives

Tools

Miscellaneous

  • Nuvo – Aqua Shimmer Brush Marker – Glitter Gloss
  • Ranger – Glossy Accents
  • Cotton String

Button Heart Gate Fold Aperture Birthday Card

This card was made for Craft Roulette #250 whose parameters included a funn fold card, nostalgic colors, blanket element and buttons.

Watch the process video to see how I made this card.

Details and supplies used are below.

Cardbase: Cut a 5.5×12-inch piece of light pink cardstock. Score at 2-inches, 4-inches, 8-inches and 10-inches. Fold as shown in video. On the gate fold panels, place heart die with center points over the fold and die-cut. Repeat on other side lining up the die to make a mirror image. I used the third largest die in Karen Burniston’s Hearts – Crosshatch set.

Buttons: I cut 70 buttons from four shades of pink cardstock. Using thin cotton string, thread the buttons’ holes and hand-tied knots to all of the card front buttons. The buttons were cut using Karen Burniston’s Sewing Charms die set.

Sentiments: All sentiments stamped in black ink on two rectangular panels cut using Karen Burniston’s Rectangles Crosshatch die set. “Happy Birthday is by Rubbernecker Stamps and the other two sentiments are Riley and Company’s Funny Bones stamps.

Envelope: The card fits into an A2 (4.25×5.5-inch) size envelope. A die-cut button was glued to back flap to hint at whats to come.

___________________________________

Thank you for experiencing this blog post.

I hope this inspires you and makes you smile.

Please like and leave comments 😊

___________________________________

Disclaimer: Karen Burniston products are provided free of charge by the manufacturer for review and use. All other items were personally purchased. Compensated affiliate links used where or when possible, meaning I will receive a small percentage commission from these manufacturers at no cost to you. This will allow me to add more content to my YouTube channel and help out a lot. Thank you.

Materials Used:

Dies

Stamps

  • Riley and Company – Funny Bones Stamps – Red Rubber Stamp – RWD-1119- Do Something
  • Riley and Company – Funny Bones Stamps – Clear Stamp – RWD-1259-You Are Far Too Special
  • Rubbernecker Stamps – Red Rubber Stamp – 0218 SO – Happy Birthday

Papers

  • DCWV – 12×12 Textured Cardstock Stack – Brights
  • Core’dinations – 12×12 80lb. Textured Cardstock – Candy Shop Canvas
  • Recollections – 8.5×11 65 lb. Cardstock – White
  • Fraser Papers for William House – A2 Envelope – Genesis Text Milkweed Smooth

Ink

  • Memento – Fade Resistant Dye ink – Tuxedo Black
  • Pigma – Mircon 005 Fine Tip Pen – Black

Adhesives

Tools

  • Die Cutting Machine
  • Paper Trimmer
  • Bone Folder
  • Score Board
  • Scissors
  • Paper Masking Tape
  • Tweezers
  • Pencil
  • Art Gum Eraser

Miscellaneous

  • Thin Cotton String

A Pop-Up Zoyfold Birthday Card

This card was made for Craft Roulette #249 whose parameters included a zoyfold card, elegant colors, front door and three circles. (This is my second zoyfold card. Click here to see my first.)

Watch the process video to see how I made this card.

Details and supplies used are below.

Cardbase: The cardbase is really a blend of two cardbases together. The larger card is a 5×7-inch landscape/horizontal z-fold card with an almost square 4 1/2x 5 1/2-inch card for a joyfold card Hence the newly coined card fold – the zoyfold (The term was coined by Mary Gunn Funn and Irene “Hattrick” Smith on the Craft Roulette Members Show #244.) Watch the process video for assembly instructions. The back of the card is covered with striped paper and a scalloped rectangle from the Karen Burniston’s Rectangles and Labels – Crosshatch die set.

Gingerbread House: (Watch the assembly videos for the Tiny House Pop-Up and Gingerbread Tiny House Add-ons at the bottom of each of the linked pages.) I used Nuvo Jewel Drops, Nellie’s Choice Snow Effects and adhesive backed peppermint candies to decorate the gingerbread house before attaching the house to the card with hot glue.

Sentiments: All sentiments are by Karen Burniston. ”You’re Sweet!” and “Happy Birthday” die cuts. The envelope sentiment is from the Sweet Treats stamp set.

Envelope: The card fits into an A7 (5x 7-inch) size envelope.

___________________________________

Thank you for experiencing this blog post.

I hope this inspires you and makes you smile.

Please like and leave comments 😊

___________________________________

Disclaimer: Karen Burniston products are provided free of charge by the manufacturer for review and use. All other items were personally purchased. Compensated affiliate links used where or when possible, meaning I will receive a small percentage commission from these manufacturers at no cost to you. This will allow me to add more content to my YouTube channel and help out a lot. Thank you.

Materials Used:

Dies

Stamps

Papers

  • PinkFresh Studio – 8.5×11 Essential Glitter Cardstock 250 GSM – Glacier
  • Stampin’ Up – 12×12 Double-Sided Cardstock – Marbled Elegance
  • Matte Gold Hammered Fabric Paper
  • Brown, Green, Red and White Cardstock
  • Recollections – A7 Envelope – Cream

Ink

  • Memento – Fade Resistant Dye ink – Tuxedo Black
  • Pigma – Mircon 01 Fine Tip Pen – Black
  • Sharpie – Permanent Marker – Ultra Fine Tip – Red

Adhesives

Tools

  • Die Cutting Machine
  • Paper Trimmer
  • Bone Folder
  • Score Board
  • Stamping Blocks
  • Scissors
  • Paper Masking Tape
  • We R Memories – QuickStick
  • Tweezers
  • Hot Glue Gun

Miscellaneous

  • Kat Scrappiness – Rainbow Dot Sprinkles
  • Nellie’s Choice – Snow Effects
  • Nuvo – Aqua Shimmer – Glitter Gloss
  • Nuvo – Jewel Drops – Strawberry Coulis
  • Scrapbook.com – Pops of Color – Glitter-Champagne
  • Stampin Up – Real Red & White Adhesive-Backed Peppermints
  • 2-inch-wide Red Organza Heart-Edged Ribbon