This is the third in a series of cards that have shelves as the main element of the card.
Today’s card is a tri-fold house card with a cozy room scene with a bookcase made using dies by My Favorite Things.
Watch the process video to see how I made this card.
Cardbase: The cardbase is a slimline size made from a 7 .75×8.5-inch rectangle folded in half and a 4.25×6.5-inch rectangle. Watch the tutorial video to see the details of the cardbase assembly.
Sentiment: The “hello” on the card front is a die in the Concord & 9th On Display Pop-Up die set. There is a third panel that a personal message can be added to the card.
Envelope: The card fits into a #10 business envelope. The back flap is decorated with a coffee mug from the My Favorite Things Be Your Own Barista die set.
___________________________________
Thank you for experiencing this blog post.
I hope this inspires you and makes you smile.
Please like and leave comments 😊
___________________________________
Disclaimer: Karen Burniston products are provided free of charge by the manufacturer for review and use. All other items were personally purchased. Compensated affiliate links used where or when possible, meaning I will receive a small percentage commission from these manufacturers at no cost to you. This will allow me to add more content to my YouTube channel and help out a lot. Thank you.
Materials Used:
Dies
Concord and 9th – Metal Dies – On Display Pop-Up
My Favorite Things – Premium Steel Die – Be Your Own Barista
My Favorite Things – Premium Steel Die – Décor and More
My Favorite Things – Premium Steel Die – Fundamental Furnishings
My Favorite Things – Premium Steel Die – Picture Window
My Favorite Things – Premium Steel Die – Potted Plants
My Favorite Things – Premium Steel Die – Room Decor
My Favorite Things – Premium Steel Die – Take A Seat
This is the second in a series of cards that have shelves as the main element of the card.
Today’s card is a pop-up set of shelves made with On Display Pop-Up die set by Concord and 9th.
Watch the process video to see how I made this card.
Cardbase: The cardbase is an A2 (4.25×5.5-inch) side-fold made by folding an 8.5×5.5-inch rectangle in half.
Sentiments: The “hello” on the card front is a die in the On Display Pop-Up die set.
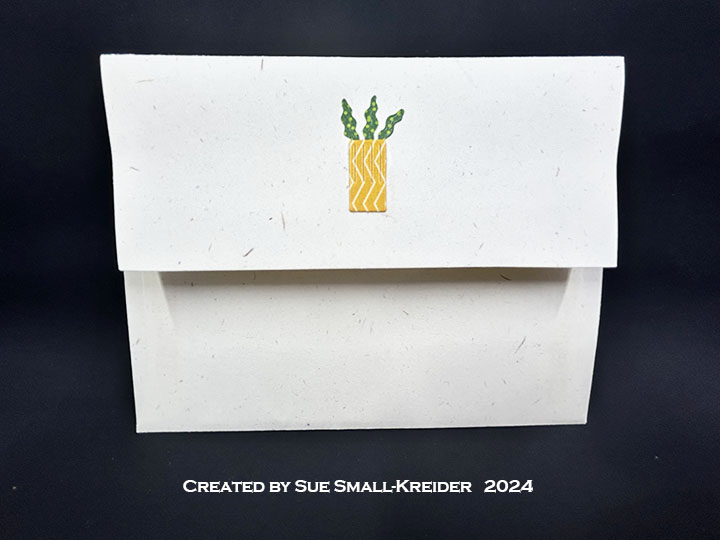
Envelope: The card fits into an A2 (4.25x 5.5-inches) size envelope with a die-cut plant on the back flap.
___________________________________
Thank you for experiencing this blog post.
I hope this inspires you and makes you smile.
Please like and leave comments 😊
___________________________________
Disclaimer: Karen Burniston products are provided free of charge by the manufacturer for review and use. All other items were personally purchased. Compensated affiliate links used where or when possible, meaning I will receive a small percentage commission from these manufacturers at no cost to you. This will allow me to add more content to my YouTube channel and help out a lot. Thank you.
This card was made for Craft Roulette #240 whose parameters included a card for a helper, cereal box colors, jungle element, and a paper sack.
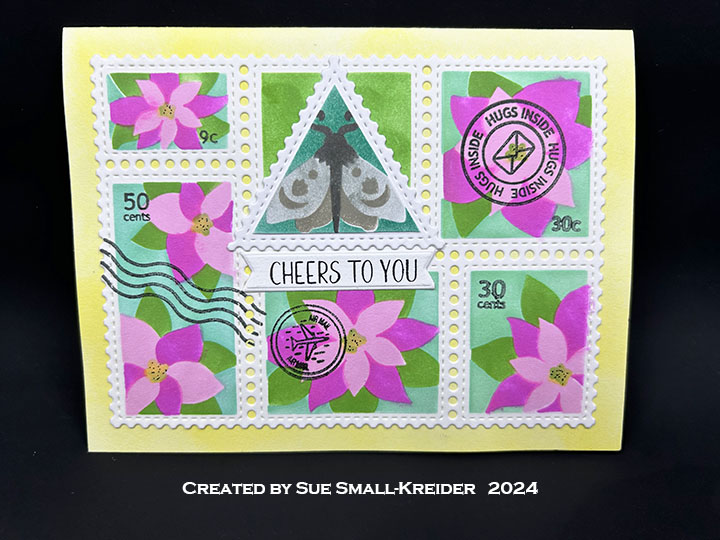
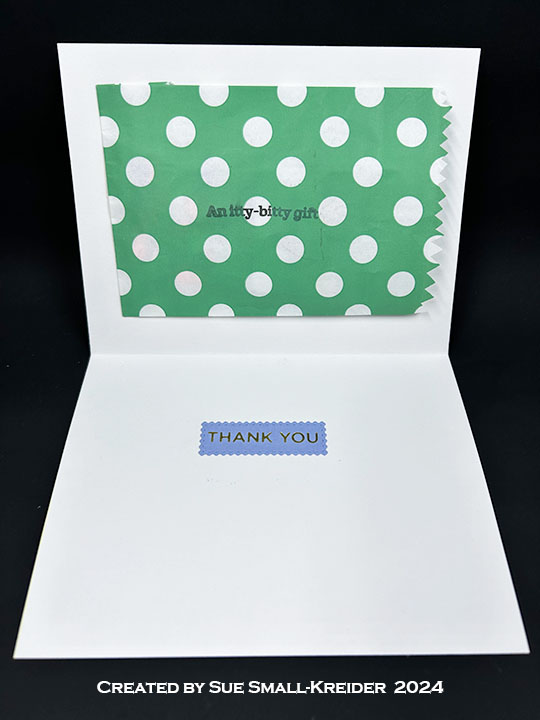
I choose to make a thank you card with a paper sack for an itty-bitty gift, stenciling tropical flowers and a large moth that you might see in a jungle. (Please note that after I completed the process video, I decided to add some cancellation stamps to the front of the card. So they are not mentioned in the video, but they are Waffle Flower stamps.)
Watch the process video to see how I made this card.
Cardbase: Cut a 5.5 x 8.5-inch piece of white cardstock and fold in half to form a 4.25×5.5 top-fold A2 size card.
Sentiments: The front sentiment “Cheers to you” is from a BetterPress plate and die set while the inside foiled “Thank You” is a Spellbinders Glimmer plate die cut with a Waffle Flower Postage Collage rectangle die. The “Itty-bitty gift stamped on the paper sack is from the Craft Roulette Stamp set.
Envelope: The card fits into an A2 (4.25x 5.5-inches) size envelope with an extra moth stamp on the back flap.
___________________________________
Thank you for experiencing this blog post.
I hope this inspires you and makes you smile.
Please like and leave comments 😊
___________________________________
Disclaimer: Karen Burniston products are provided free of charge by the manufacturer for review and use. All other items were personally purchased. Compensated affiliate links used where or when possible, meaning I will receive a small percentage commission from these manufacturers at no cost to you. This will allow me to add more content to my YouTube channel and help out a lot. Thank you.
This card was inspired by a pun on the Bing Crosby classic “I’m Dreaming of a White Christmas” song. It uses dies by Karen Burniston and stamps by Riley and Company.
Watch the process video to see how I made this card.
Cardbase: Cut an 8.75 x7.5-inch rectangle of 65lb. white cardstock and score and fold in half to form an 8.75 x3.25-inch top-fold slimline card base. Cover using decorative papers.
Pop-Ups: Watch the assembly videos for the Lorna Label Pop-Up and the Piano Keys Pop-Up by click on the links and looking for the videos at the bottom of each link’s page.
Decorations: For the musical notes and piano are from the Music Charms set while the shark inside is from the Sea Animals set. The shark border on the card back is from the Beach Borders set. The sharks were cut in white and colored with a gray marker.
Envelope: The card will need to be mailed in a bubble wrap envelope because of its size and thickness.
___________________________________
Thank you for experiencing this blog post.
I hope this inspires you and makes you smile.
Please like and leave comments 😊
___________________________________
Disclaimer: Karen Burniston products are provided free of charge by the manufacturer for review and use. All other items were personally purchased. Compensated affiliate links used where or when possible, meaning I will receive a small percentage commission from these manufacturers at no cost to you. This will allow me to add more content to my YouTube channel and help out a lot. Thank you.
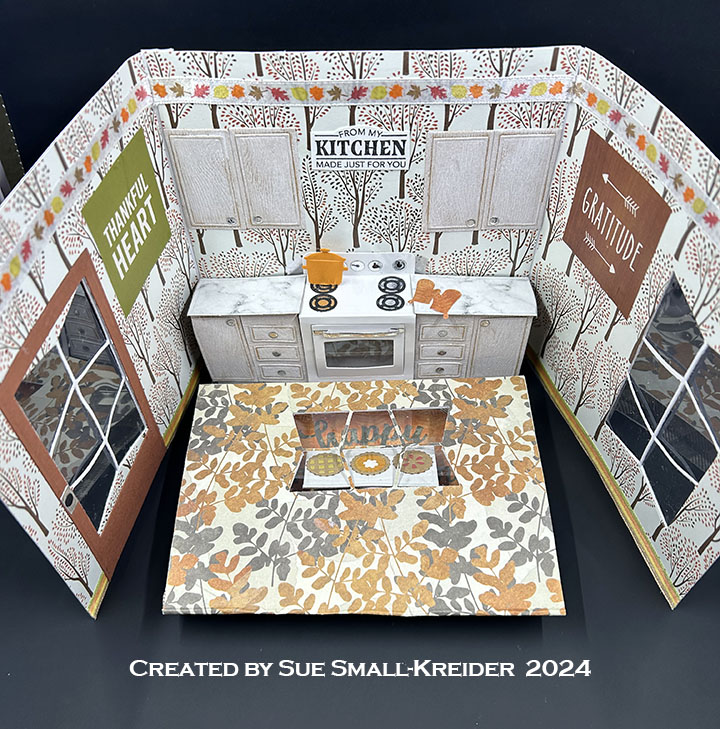
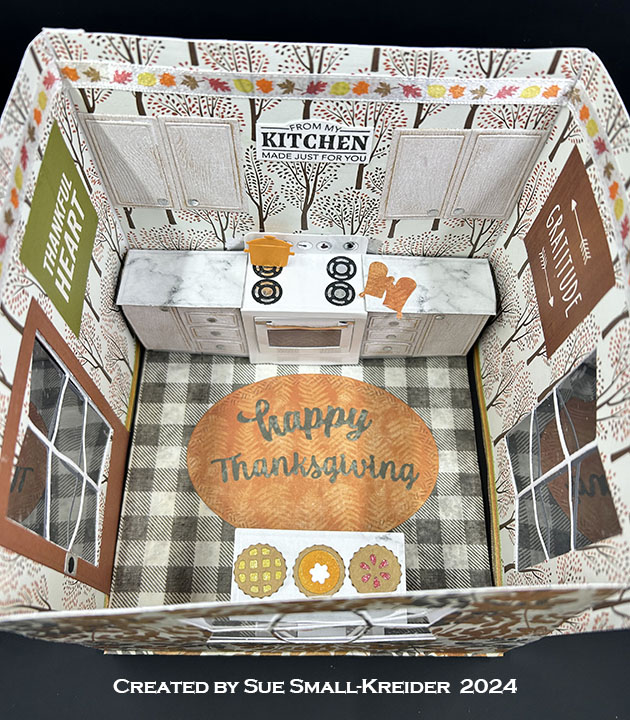
Cardbase: From 100 lb. cardstock cut two 6 x 6 1/2-inch rectangles, one 6 x12-inch rectangle, and one 6 x 5-inch rectangle. Watch video to see the order of assembly of pieces and when to cover pieces with decorative paper.
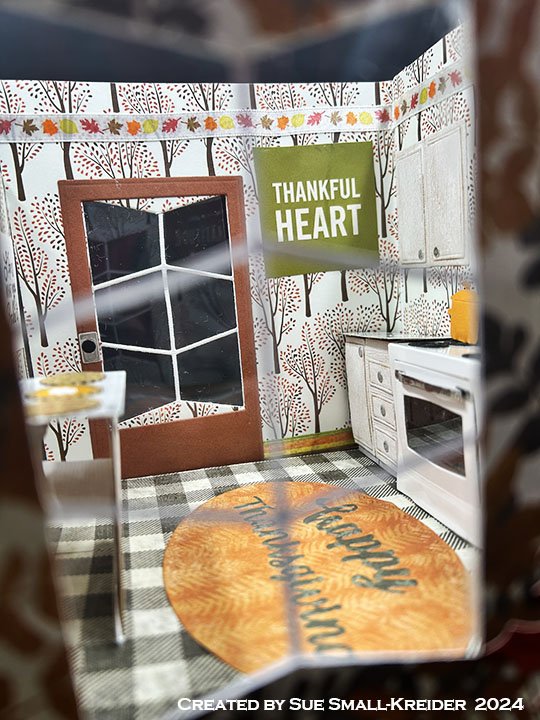
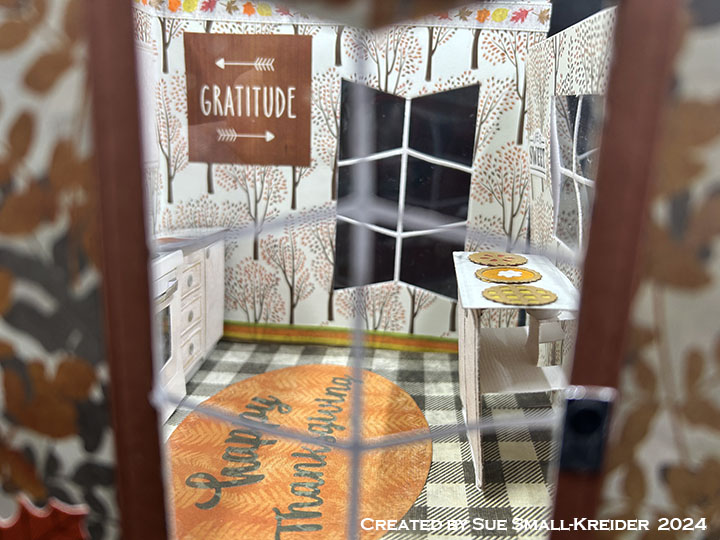
Windows: Using the Bitty Ball Double-Ups large die, cut windows into the two 6 x 6 1/2-inch rectangles of the card base. Use the Mini Ball Double-Ups to cut the rear window in the 4 1/2-inch tall wall panel. The door uses the Rectangles–Crosshatchand the Long Rectangles–Crosshatch as well as the leftover rectangles from the oven rack and black circle from the oven burner in the Oven Pop-Up set.
Oven: Cut two of the Oven Pop-Up base and cut one in half and assemble the base pieces as shown in the tutorial video above. Complete as shown in Karen Burniston’s assembly video. (Watch assembly video on the dies’ linked page.)
Cabinets: Cut eight of the cabinet doors from the Oven Extras set. (Watch assembly video on the dies’ linked page.) Add to the scene as shown in the tutorial video above. The double cabinet counter tops are cut using the second smallest rectangle in the Short Rectangles-Crosshatch. (While the tutorial video shows using the Explosion Pop-Up for the base of the island cabinets, you could just use a cut down oven base for this island.)
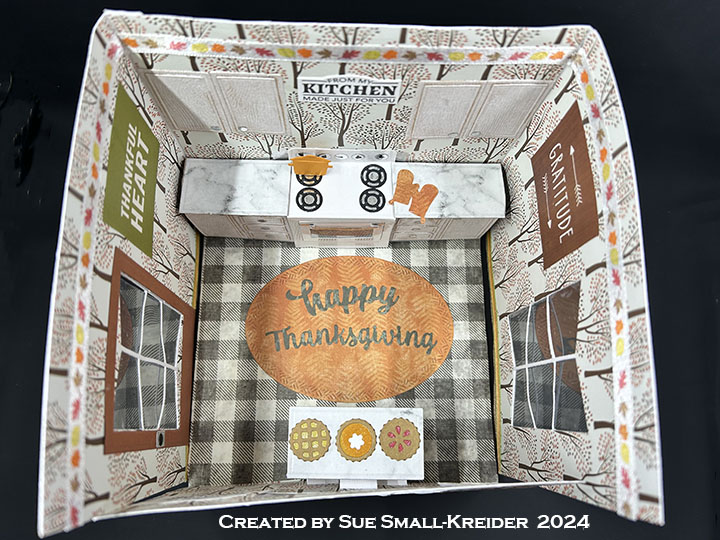
Decorations: The pies come from the Baking Borders set while the oven mitts are from the Oven Pop-Up set. The turkey in the roasting pan in the oven as well as the orange pot on the stove are from the Oven Extras set as is the pop-up cubes that animate them as the card opens. The pumpkins and leaves on the outside panels are from the Autumn Elements set.
Sentiments: The card uses two sentiments from an American Crafts journaling card paper sheet as well as the Sweet Treats stamped sentiments. Die-cut “Happy Thanksgiving” and “Welcome Autumn” come from Word Set 7- Autumn.
Envelope: The card is thick, so a special padded envelope is needed to mail it.
Disclaimer: Karen Burniston products are provided free of charge by the manufacturer for review and use. All other items were personally purchased. Compensated affiliate links used where or when possible, meaning I will receive a small percentage commission from these manufacturers at no cost to you. This will allow me to add more content to my YouTube channel and help out a lot. Thank you.
This card was made for Craft Roulette #239 whose parameters included an interactive card, picnic colors, farm element, and paper strips.
Watch the process video to see how I made this card.
Cardbase: I used a purchased A6 (4.5 x 6.25-inch) cardbase and envelope.
Stable & Reindeer: Using the Reindeer Stable die set by Scrapping Cottage, cut the stable base from red cardstock and inked the edges with brown ink. All the other pieces were cut from white cardstock and colored. The weathervane was cut twice and glued together to reinforce the tiny piece. I made my own wire wobbler springs using thin florist wire and gluing them in place.
Flying Reindeer Mechanism: Using dies by Whimsy Stamps kinetic collection, I eventually figured out how to make the reindeer fly over the stable using the die cut paper strips and foam dots. (Watch the tutorial to see how I made it.)
Snow: Avry Elle white ink spray was used to cover the card with splatters of snow. (I had to color over the facial details and shading on the reindeer after spraying.) The trees have white gel pen to place snow accumulation at the end of the branches.
Sentiments: All the winter sentiments stamped in black ink are from Waffle Flower. The “Pull” and arrow are tiny stamps from My Favorite Things.
Envelope: The card fits into an A6 (4.5x 6.25-inches) size envelope With “Let It Snow” on the back flap.
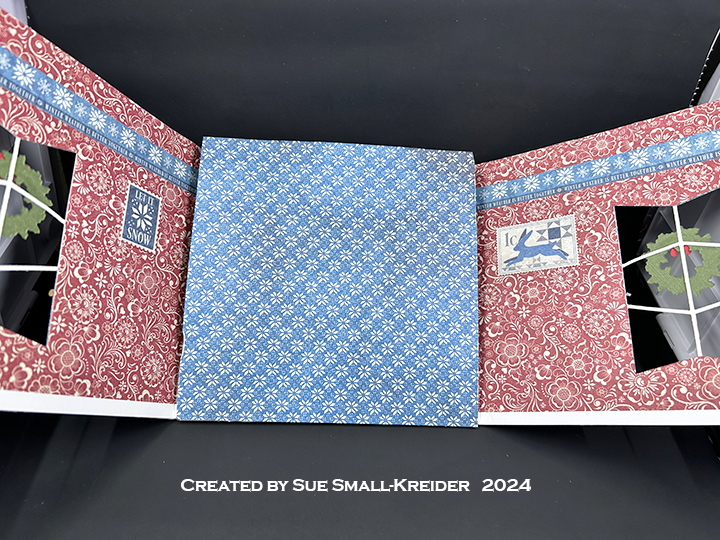
Welcome to our Karen Burniston Products – KB Riley LLCOctober 2024 Release Blog Hop. (See GIVEAWAY details at the end of this post for blog hop list.) The Design Team have come together with Karen today for a fun blog hop to celebrate the release of 10 new dies and 5 new stamp sets. Sneak peeks of the new release started last week, and the dies are available to order NOW!
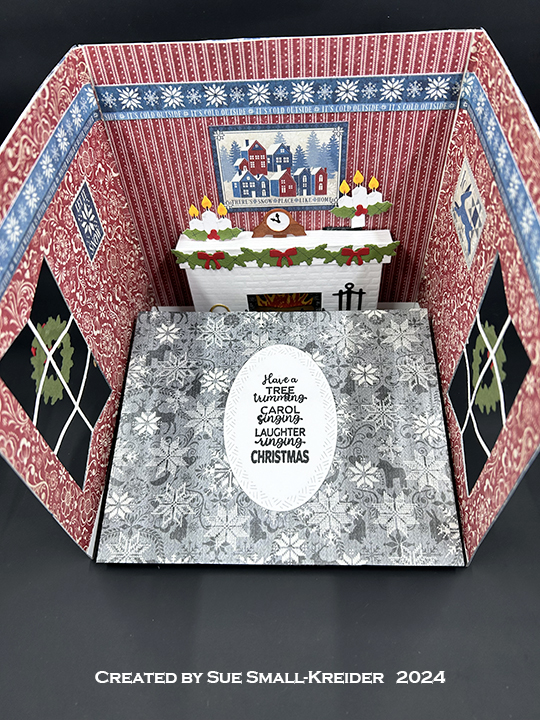
This is a special card that creates a 6×6-inch miniature scene of trimming the Christmas tree. (I think the people must have stepped out to get some hot cocoa.) There are dangling ornaments (or baubles) along with a colorful paper chain and a strand of lights. These are all created with dies from the new release – Christmas Tree Add-Ons,Charm Rings, Snow Charms andPenguin and Reindeer Snowman Add-Ons. The stamped sentiment is from the new Season of Cheer stamp set.
(While it uses multiple die sets, you could make a smaller card with the tree and furniture or the tree next to the fireplace.)
Watch the process video to see how I made this card.
Cardbase: From 100 lb. cardstock cut two 6 x 6 1/2-inch rectangles, one 6 x12-inch rectangle, and one 6 x 5 1/2-inch rectangle. Watch video to see the order of assembly of pieces and when to cover pieces with decorative paper.
Sofa and Table: The sofa and table are made using the Family Room Pop-Up die set and modifying the chair into a table by not adding the chair seat and back piece. The tabletop is the waste piece from the sofa section of the base. For the plate of gingerbread men, cut the plate using the smallest circle die in the Crosshatch Circles die set. There are three different die sets that have gingerbread men of about the same size. Any set will work – Gingerbread Tiny House Add-Ons, Winter Charms or Christmas Borders 1. (Watch assembly videos on the dies’ linked pages.)
Sentiments: The card uses many sentiments from the Graphic 45 paper collection, but the main inside sentiment comes as the card is opened to reveal the fireplace with “Have a tree trimming, carol singing, laughter ringing Christmas“ stamped on an oval rug using the Season of Cheer stamp set.
Envelope: The card is thick, so a special padded envelope is needed to mail it.
Disclaimer: Karen Burniston products are provided free of charge by the manufacturer for review and use. All other items were personally purchased. Compensated affiliate links used where or when possible, meaning I will receive a small percentage commission from these manufacturers at no cost to you. This will allow me to add more content to my YouTube channel and help out a lot. Thank you.
To celebrate the release Karen Burniston and each of the Karen Burniston – KB Riley LLC Design Team members will be giving away a $25 Gift Certificate to some lucky person who comments on our blog posts, so make sure you join the hop and comment on everyone’s blog post. Winners will be randomly chosen from ALL of the blog hop comments received on our blog posts by Monday,4th November 2024. Lots of chances to win some goodies, so just leave a comment on this post or any other blog hop posts to enter! Don’t forget to leave some way for us to contact you, in case you are a lucky winner!
This card was made for Craft Roulette #238 whose parameters included collage, Italian restaurant colors, short element and diagonal lines.
Watch the video to see how I made this card.
Cardbase: I used a 11 x 4 1/4-rectangle folded in half to form a top-fold A2 (4 1/4 x 5 1/2-inch) card. The top panel was folded in half to form the easel.
Lights: Use one Pear Blossom Press Halo Light attaching to the front of the easel cardbase with double-sided tape. Cut a piece of white cardstock to cover the battery and button. Stamp the “Press Here” over where button is and attach with double-sided tape to battery case.
Wreath: Cut at least 20 pine tree branches from different shades of green. Cut a circle frame using the fourth and fifth larges circle dies and glue the pine branches around the circle. Attach the wreath to halo light with foam squares. Decorate with red dots and robin cut from decorative papers.
Card Back
Sentiments: “Wishing you a season of cheer” is from a new Karen Burniston stamps set Season of Cheer. The “Press Here” stamp is from Pear Blossom Press.
Envelope: The card fits into an A2 (4 1/4 x 5 1/2-inch) size envelope.
Disclaimer: Karen Burniston products are provided free of charge by the manufacturer for review and use. All other items were personally purchased. Compensated affiliate links used where or when possible, meaning I will receive a small percentage commission from these manufacturers at no cost to you. This will allow me to add more content to my YouTube channel and help out a lot. Thank you.
It’s Sneak Peak Week for Karen Burniston’s October 2024 release of new dies and sentiment stamps. These dies will be available for purchase on October 28, 2024 on the KB Riley LLC website.
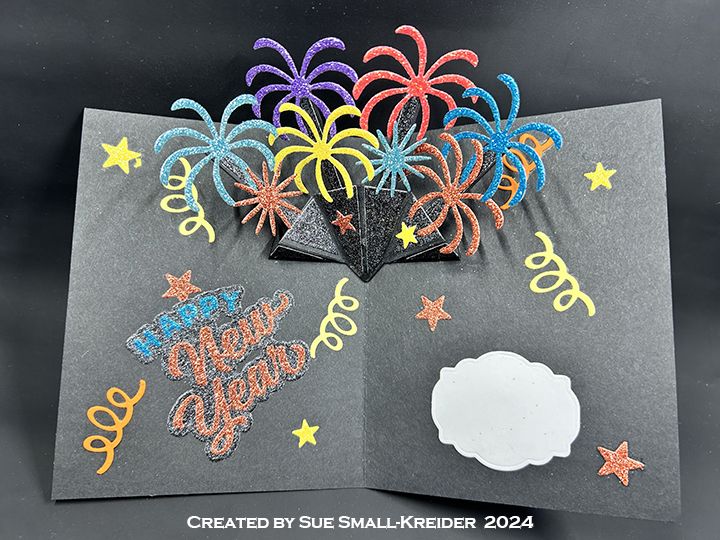
Celebrate the new year early with this glittery card that fills the night sky with fireworks and a fun celebration.
Watch the process video to see how this card was made.
Cardbase: The cardbase is an 8.5x 5.5-inch rectangle of black cardstock that was scored and folded in half to form a side-fold A2 (4.25x 5.5-inches) card.
Fireworks Pop-Up: Inside the card is a fireworks pop-up made with the Fireworks and Photo Fan Pop-Up sets.
Sentiments: “2025” was cut using the Numbers dies set while the “Happy New Year” used the new layered Happy New Year set. The card is decorated with stars from the Fireworks set and confetti streamers from the Photo Fan Pop-Upset.
Envelope: The card fits into an A2 (4.25x 5.5-inches) size envelope.
Disclaimer: Karen Burniston products are provided free of charge by the manufacturer for review and use. All other items were personally purchased. Compensated affiliate links used where or when possible, meaning I will receive a small percentage commission from these manufacturers at no cost to you. This will allow me to add more content to my YouTube channel and help out a lot. Thank you.