This card was made for CRAFT ROULETTE #292 whose parameters included an encouragement card, sophisticated colors, house pet(s) element, and thread or twine. I used the Crafter’s Companion stamp & die set called Best Buddy and Graphic 45 paper to make this card.
Watch the process video to see how I made these cards.
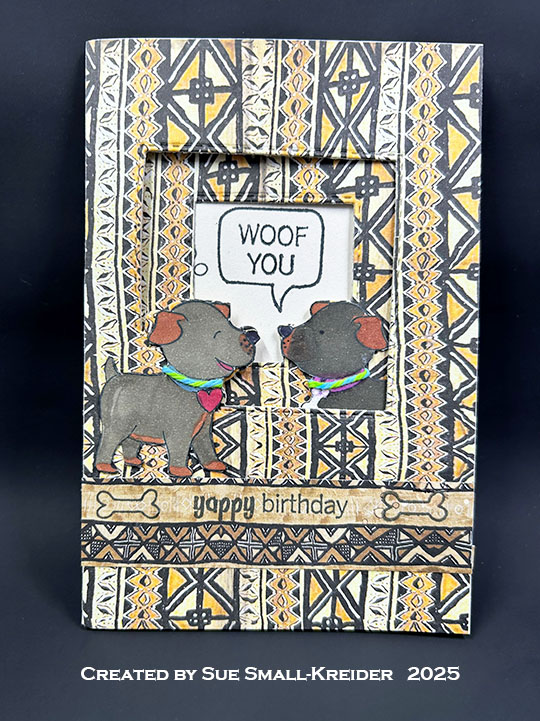
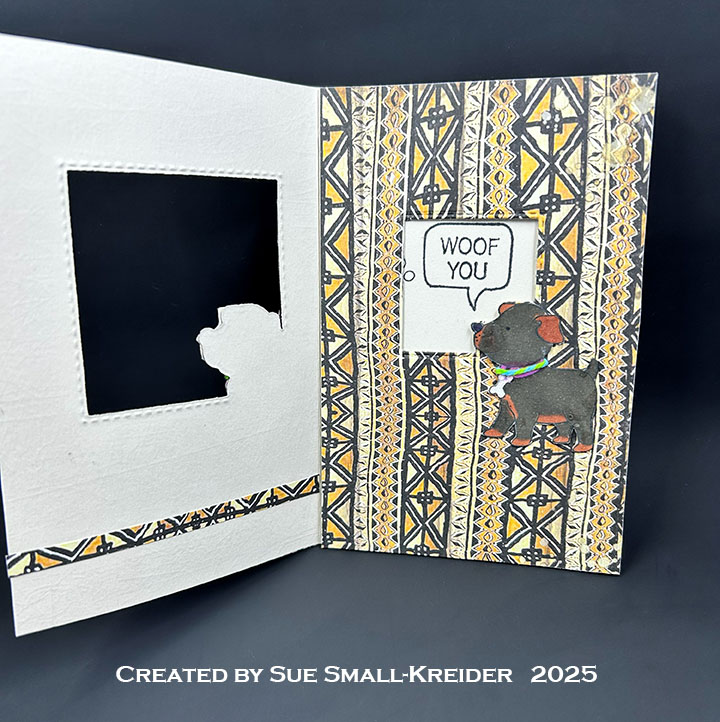
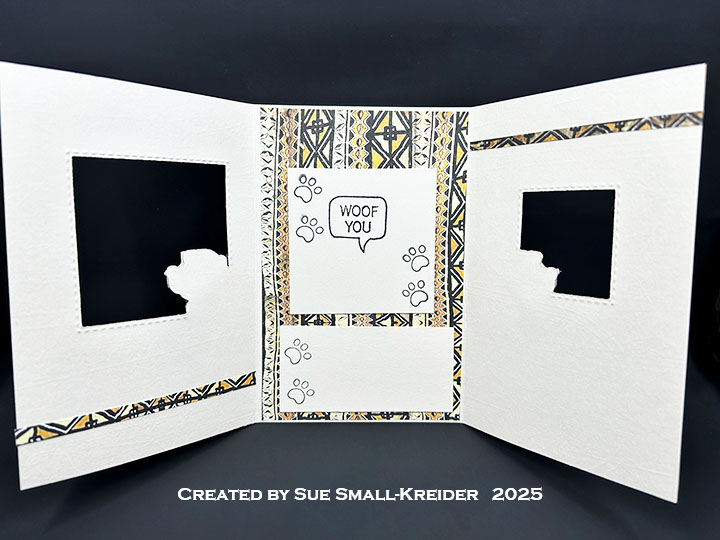
Cardbase: I started with a 5 1/2×11-inch rectangle of heavyweight ivory cardstock. After trimming 1/4-inch from the short side (5 1/2 x10 7/8-inches) I scored and folded the panel at 3 5/8-inches and 7 1/4-inches. Front panel is 1/8-inch wider than the other two panels to help with the opening of card. Follow the directions in the video for decorating and cutting out the two window apertures in the card base.
Dogs: I colored the dogs using various shades of brown and black. For the twine parameter, I glued some green/blue twine as the dogs collars.
Sentiments: “Yappy Birthday” and “Woof You” are from the Best Buddy‘s stamps as is the speech bubble and paw prints.
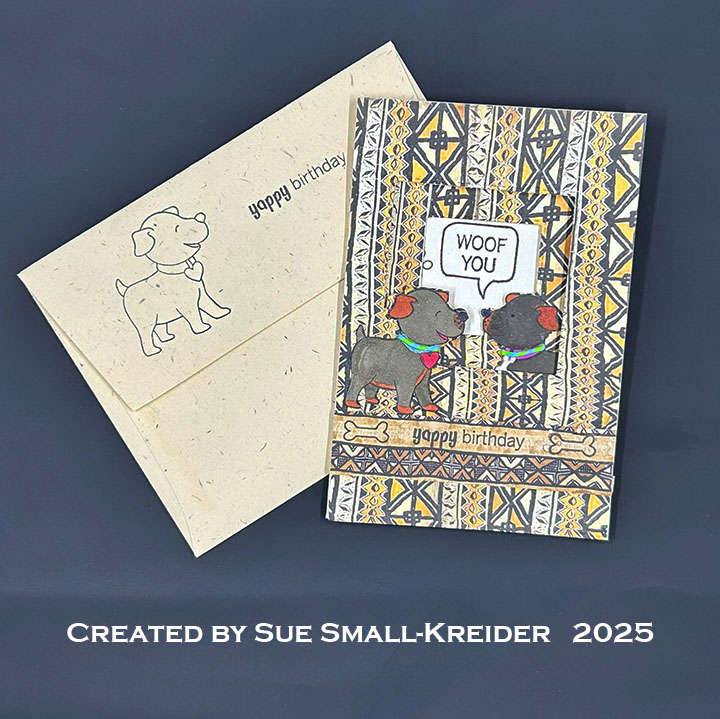
Envelope: The card fits into an A2 (5x 7-inch) size envelope with a dog and “”Yappy Birthday” stamped on the back flap.
___________________________________
Thank you for experiencing this blog post.
I hope this inspires you and makes you smile.
Please subscribe, like and leave comments 😊
___________________________________
Disclaimer: Karen Burniston products are provided free of charge by the manufacturer for review and use. All other items were personally purchased. Compensated affiliate links used where or when possible, meaning I will receive a small percentage commission from these manufacturers at no cost to you. This will allow me to add more content to my YouTube channel and help out a lot. Thank you.
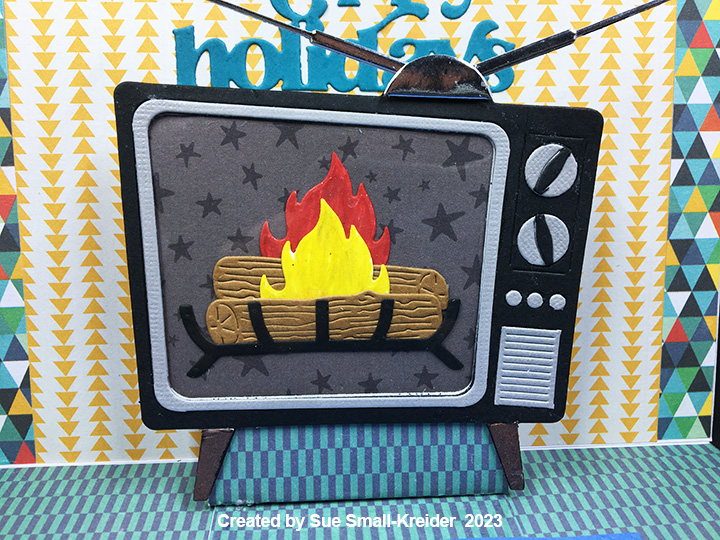
I have been collecting and making fireplace cards for several years now. Here is a collection of all my fireplace blog posts. Click on an image to see details of the fireplace.
___________________________________
Thank you for experiencing this blog post.
I hope this inspires you and makes you smile.
Please like and leave comments 😊
___________________________________
Disclaimer: Karen Burniston products are provided free of charge by the manufacturer for review and use. All other items were personally purchased. Compensated affiliate links used where or when possible, meaning I will receive a small percentage commission from these manufacturers at no cost to you. This will allow me to add more content to my YouTube channel and help out a lot. Thank you.
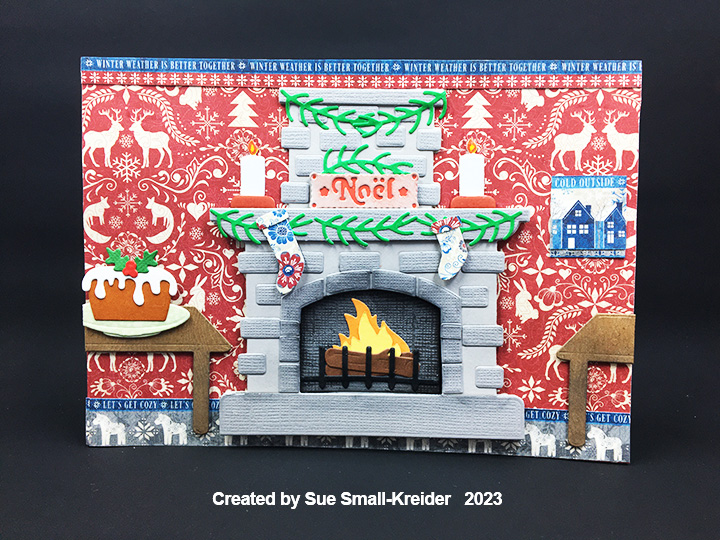
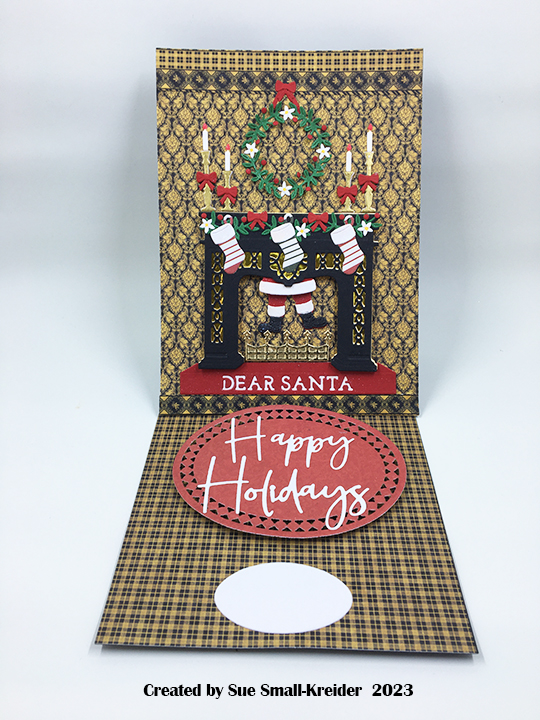
This is the fourth card in the Fireplace Christmas Card series.
Grand rooms to celebrate Christmas evokes feelings of another time that is both formal and cheery.
To create the 3D card front and inside pop-up fireplace, Crafter’s Companion Gemini Create-A-Card die sets were used along with a Paper Discovery embossing folder to create the textured wallpaper and moldings.
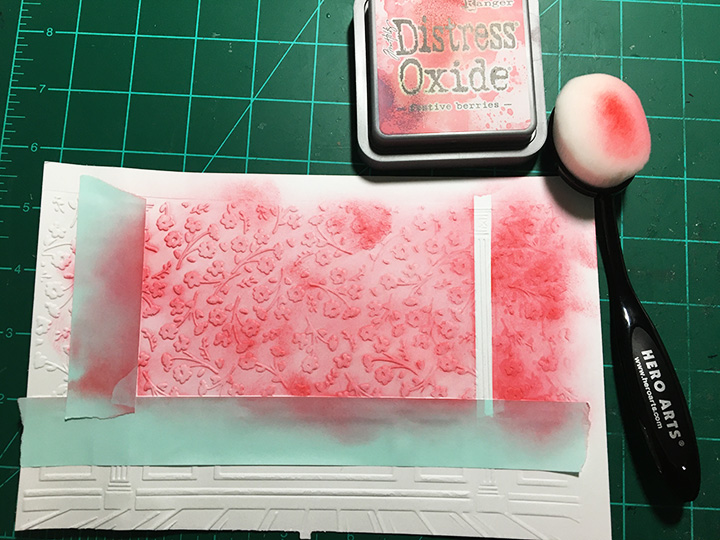
Embossed Walls: I made a room scene card a few years back using the same embossing folder to create the wall. Because I liked the look of the red ink blending and the white woodwork of that earlier card, I repeated it. I cut two pieces of heavy weight white cardstock, spritzed them with water and used the embossing folder with the suggested sandwich of embossing mat and thin plate to emboss in my die-cutting machine. (I used 3M post-It notes the last time I ink blended the wallpaper.) This time with low-tack paper tape, I masked off the columns and wainscoting molding before ink blending.
Cardbase:For the cardbase, I used a purchased ivory A6 (4.5 x 6.25 inch) card with matching envelope.The two embossed wall pieces go on the card front and the inside top panel. Because they are back-to-back, heavy layers of decorative papers need to go on the card back to balance out the weight of the two panels when the card is opened. The advent calendar numbers on the back are to suggest the counting of days until Christmas.
Card Front: I placed the embossed piece with the left column at the left edge of the card. The dies for the staircase are in the tree die set and cut just the banister and stair treads. I embossed a smaller piece of molded wainscoting to adhere the stair treads to with thin foam square. The railing backs-up to the column. Using a brown marker, I colored the hand railing before adding some greenery swags from the accessories die set and ornaments from the yuletide treasure set.
The Christmas tree is popped-up on thicker foam squares. I used some tiny holographic tinsel to create the illusion of a fir tree. More of the ornaments from the stairway are used with a glitter foam star as tree decorations. For the tree stand, I trimmed-down the coal shuttle from the accessories set after die-cutting it from black shinny packaging. The frame of the sentiment is cut from matte gold cardstock and the white sentiment pieced into the frame and glued in place with thin strips of cardstock on the backside, before being adhered to the card with thin foam squares.
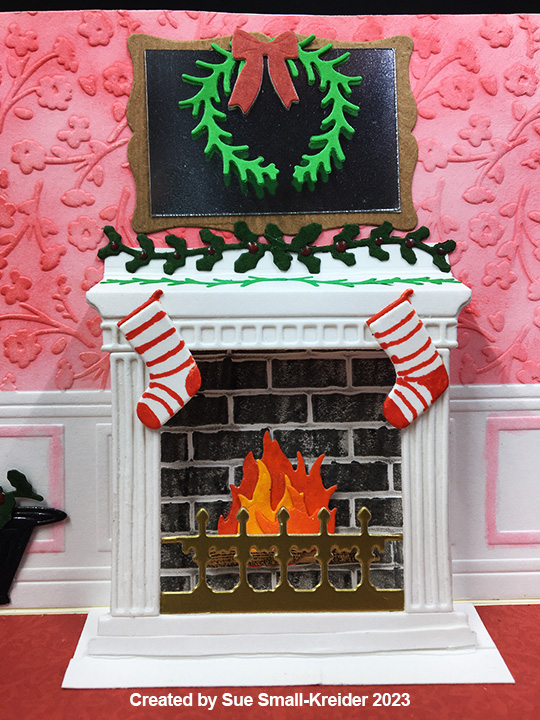
Fireplace: Because the fireplace die is designed to be cut out from the cardbase, I had to modify it by cutting it from a scrape of heavy white cardstock and cutting a .25-inch tab across the top and a similar tab at the base. The four decorative molding pieces need to glued on to the mantel piece. I cut a .5-inch strip to go across the two side flaps of the hearth stone so the firebox has a white floor.
Next, I cut a 2.5-inch square of white cardstock and embossed it in the brick folder. Using gray and back Distress crayons, I colored the bricks to look sooty before gluing them in place to the inside wall of the cardbase. Using the flame and logs from the accessories set, I cut the pieces and then used some glitter inks to color the flames. The logs were cut from brown woodgrain paper. The fender or fire guard piece was cut from gold matte cardstock and glued to the backside of the mantel piece. (Fender is also in accessories set.) The carpet needs to be glued onto the bottom inside card panel before the mantel can be glued in place. Glue goes on the bottom of the hearthstone and the back top tab. I positioned the bottom piece to be a smidge from the cardbase fold. With the fireplace folded flat on the carpet, I lowered the cardbase top panel onto the flattened mantel piece to get the correct placement.
Room Decorations: With in the accessories set, there are the coal shuttle, holly and greenery garlands, a wreath and bow, two stockings and a picture frame. The mirror is a piece of sliver plastic packaging adhered to the woodgrain embossed cardstock frame with double-sided tape. Nuvo Drops were used on the holly strands for berries. A fine-tipped marker was used to create the striped stockings.
Sentiments: There is only one sentiment of “Happy Christmas” on the card front. The cream-colored rug inside the card can be used to write a personal message.
Envelope: To hint at what is to come, “Warm Wishes” has been stamped in red ink onto the back envelope flap.
Thank you for reading this blog post. I hope this inspires you and makes you smile. Please like and leave comments 😊
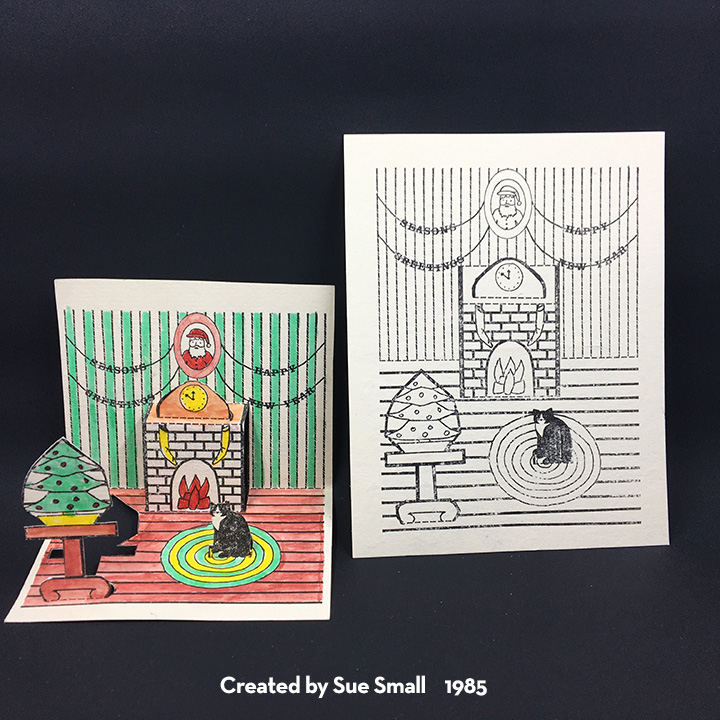
What pops down a chimney and out a fireplace? Santa Kitten!
These cute little kittens jumped out at me while in a Tuesday Morning store. They are on cellophane treat bags. I realized that they were the correct size for one of Karen Burniston’s interactive dies – the Pop ‘n Swap.
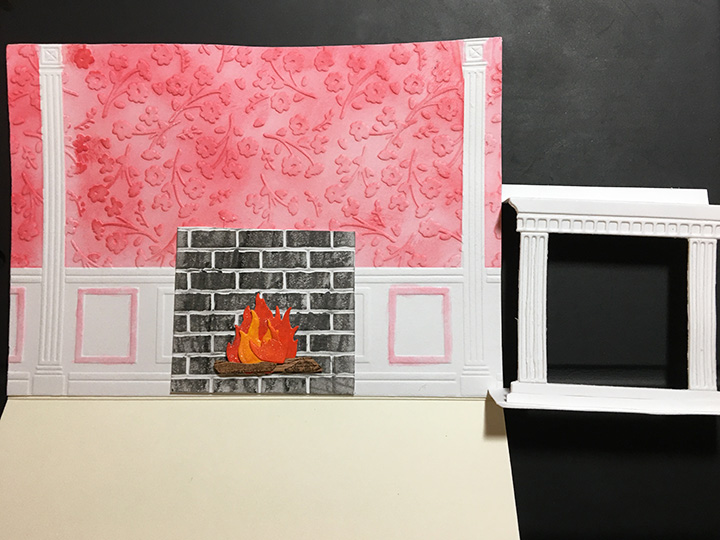
While I would classify this card as a prototype, what I wanted to share is to show how you can make a shallow box like structure to create a fireplace over the pop ’n swap mechanism. Watch Karen Burniston’s assembly video to learn how to put together this mechanism.
For this slimline card, I cut a piece of heavy black cardstock 8 ½ x 8 inches and scored at 4 inches and folded in half to create the card base. (The card needs to be at least 4 inches wide since the mechanism folded flat is 4 inches wide.) Next, I cut from the front top of the card base a rectangle 2 ½ x 4 inches to allow the Santa kitten to show over the chimney top.
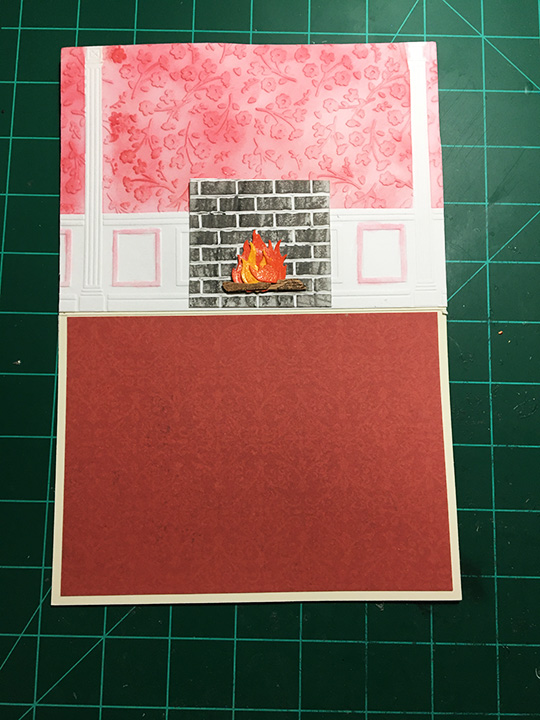
The inside shallow box is a 5 3/4 inches tall by 4 7/8 inches wide rectangle of red cardstock. I scored at ¼ inch, 1 inch and 4 inches. (Because the mechanism is ¾ inches tall, the box side is ¾ inches deep.) All the folds are mountain folds. The narrow tab goes towards the right edge of the card while the wide tab goes towards the inside fold. I glued my mechanism in first, and then using removable tape, I played with the positioning of the box and marked with pencil its placement before removing the box. I cut the widow to show the kitten inside the fireplace, by laying the fireplace frame over the mechanism and seeing where the kitten would best show. Next, I placed a loop of removable tape on the fireplace and positioned the box back into place and got the fireplace to stick to the inside of the box. With the fireplace stuck I removed the box and traced the opening of the fireplace onto the back of the box. With a metal ruler and craft knife, I cut the opening slightly larger than the pencil marks. Now the box is ready to be permanently glued in place. Glue the kittens in place next on the mechanism arms, cutting any corners that show beyond the kittens.
For decorating of the fireplace and mantel refer to my An Old-Time Christmas post. The brick is stenciled on the chimney panel before cutting it for the front. The fireplace was stenciled once the opening was cut for the fireplace, but before the box was glued permanently in place.
I tried a new-to-me product from Cosmic Shimmer called Fluffy Stuff. It is a thick paint-like substance that you can add dimension with for snow. You use a heat gun to get it to bubble up. I tried adding it to the front of the card after I assembled the card and in the heating of the card, I ended up heating the cellophane of the top kitten which shrunk a little. My recommendation is to add the Fluffy Stuff to your front panel before it is glued on to the card so that you can heat it and left it dry for 24 hours before gluing in place. (Here is a video that shows Fluffy Stuff being demonstrated on the Beebaab Youtube channel.)
If you have read this far, I’ll let you in on a secret. There is a free down of the “Naughty or Nice” sentiment in the supplies list.
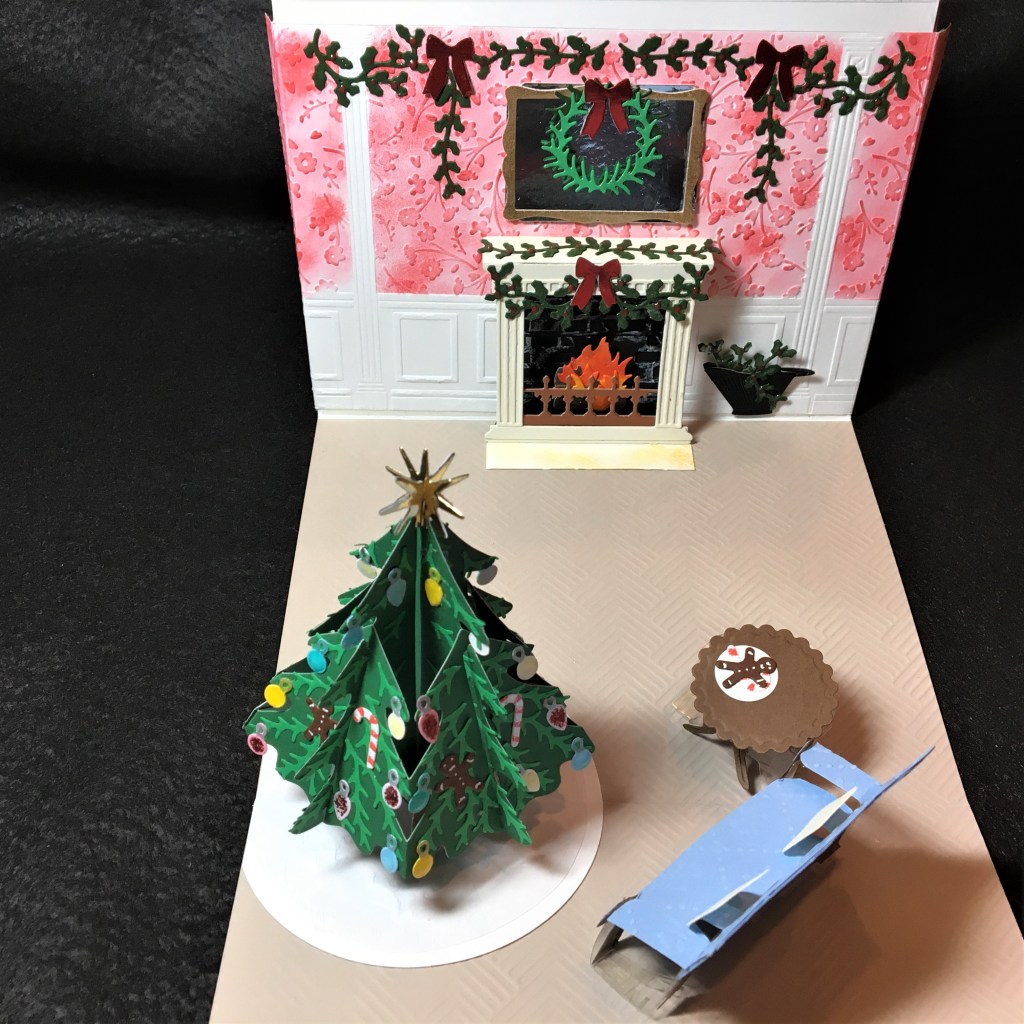
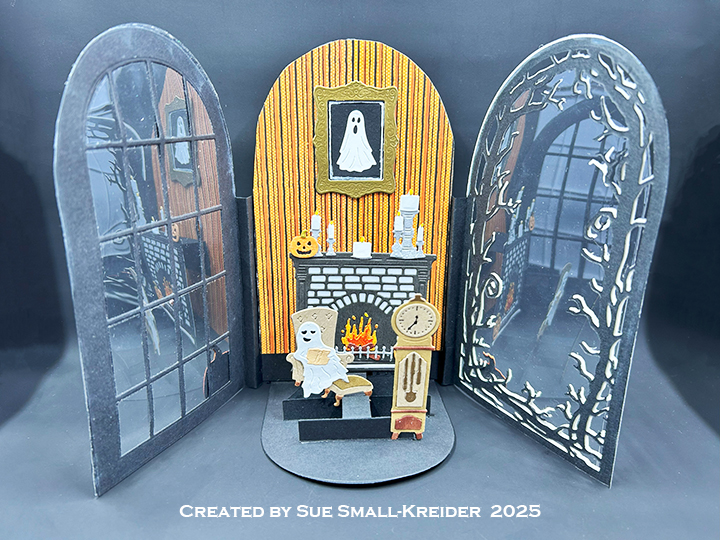
Queen Victoria and Prince Albert are credited with popularizing the idea that families need evergreen trees adorned with babbles and sweet treats at Christmas. This fold-out parlor card is in that tradition.
Christmas Tree: The tree frame and pop-up mechanism were made using Karen Burniston’s Christmas tree pop-up die set. I embossed thin copier paper with the saucer die from Karen Burniston’s Cup Pop Stand die set and then cut a circle of cardstock to back it. Using the tabs cutting die from the Christmas tree set, I cut tabs on the embossed saucer to make the tree skirt. Next, I assembled the tree (an assembly video is on the link to die set below) and decorated it using fir branches from the Gemini fireplace accessories pack, ornaments from the Gemini Yuletide treasures die set, and candy canes and gingerbread men from Sara Davis’ Frosty Christmas die set. (The ornaments have glitter glue, Nuvo Drops and Aqua Shimmer on them.) The two star pieces are cut twice from recycled foil from an envelope liner. Once the tree was decorated, it was attached to its brown tree stand and then glued to the tree skirt tabs. Placement on card was based off where the furniture and tree would be when the card was closed. A portion of the tree skirt was trimmed to fit the card size.
Furniture: Using Karen Burniston’s Family Room Pop-up die set I altered the style of sofa and changed the chair into a table. I cut the base pop-up mechanism from clear acetate and made the chair arms lower by trimming some of the middle arm piece off and adhere the remaining sides together. Next, I embossed some blue cardstock with an embossing folder by Jennifer Ellory to create brocade fabric for the sofa. I used the sofa seat/back piece to cut the basic shape and then trimmed and added an additional sofa back piece cut from Olga Direktorenko’s Elegant Room sofa die. I made my own template for the brown base and legs of the sofa trying to mimic an empire style settee. A separate back sofa piece was also cut with the Elegant Room die. The Family Room die set has the cushions die and pop-out mechanism on the sofa seat. The tea table was created using the table die from the Elegant Room die set and a Spellbinder’s scalloped circle die for the tabletop. The plate was cut using Courtney Chilston’s Birthday Shadow box die set and the candy cane and gingerbread man were made as describe in the tree section above. Placement on card was based off where the furniture and tree would be when the card was closed.
Fireplace: Using a recycled greeting card back in an off-white, cut the fireplace out using the Gemini Fireplace Concept die set. Because the die is designed to pop-up from a folded card, I had to cut the fireplace out with tabs at the back edge of mantle and the floor of the fireplace. I I also cut the trim pieces from the same card back and glued the pieces in place after scoring the tab folds. I also cut a rectangular piece of black cardstock to become the back of the fireplace. Taping the bottom of the black back to the floor tab. I cut two brick pattern pieces from the Gemini Yuletide Treasures die set and then I glued them to the black back piece and created smoke and soot on the brick by rubbing a Tim Holtz Distress Crayon over the bricks. The fire and logs were cut from the Gemini Fireplace Accessories Pack. The flames were cut from cardstock that I had blended two colors of Spectrum Noir Sparkle Glitter Ink on, let dry and then cut. The logs and flames were glued together and then placed in fireplace with foam squares.
Wallcovering: The wallcovering was created using two embossing folders by Olga Direktorenko. The main piece with pillars and molding is the Elegant Room folder and the crown molding is from the Timeless Room folder. I masked the molding and rubbed Distress Ink over the wallpaper. The mirror (cut from recycle mirror card from a box) wreath, bows, holly and coal shuttle were also cut using the Fireplace Accessory Pack. The embossed “wings” on each side are from the Timeless Room embossing folder.
Door: The Front of the folded-up card is an elegant Italianate styled door. I used Olga Direktorenko’s entire Elegant Door die and embossing folder set. The windows are wax paper over pale yellow card stock and red marker. The door hardware is cut from gold foil cardstock and gold gel pen. The wreaths were cut from recycled boxes using lawn Fawn’s mini wreath die set.
Greeting: The greeting is on the front of the second folded-side of this tri-fold card. Merry Christmas is cut from recycled red foil envelop liner using a Card Deco Essentials die. The gold lacy background was cut from foil card using Spellbinders Charming Christmas Boughs die set. The greeting is offset to left to allow room for a personal message.
I wanted to share some of the cards I’ve made for a card ministry that sends cards to those who may need a word of encouragement or thanks. Letting people know that someone cares about them is what greeting cards are about, especially handmade ones. I encourage anyone reading this to think about making at least one card for someone you don’t know, but might appreciate being told they count as a human being.
Both cards were created from many scrap pieces left from other projects as well as flowers and leaves cut from food boxes. I have tried my best to remember all the dies used to produce these pieces.