Pop-Up Chalkboard Birthday Card

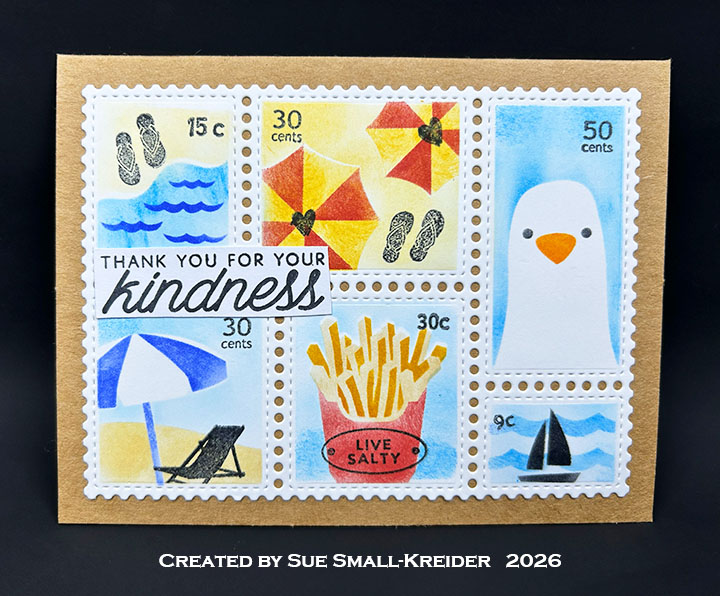
This card was made for Craft Roulette #306 whose parameters were: A7 card, summer dessert colors, chalkboard element and bottom border. I used a variety of dies and stamps from Concord & 9th, Fun Stampers Journey, Hero Arts and Karen Burniston to make this pop-up birthday card.

Watch the process video to see how I made this card.

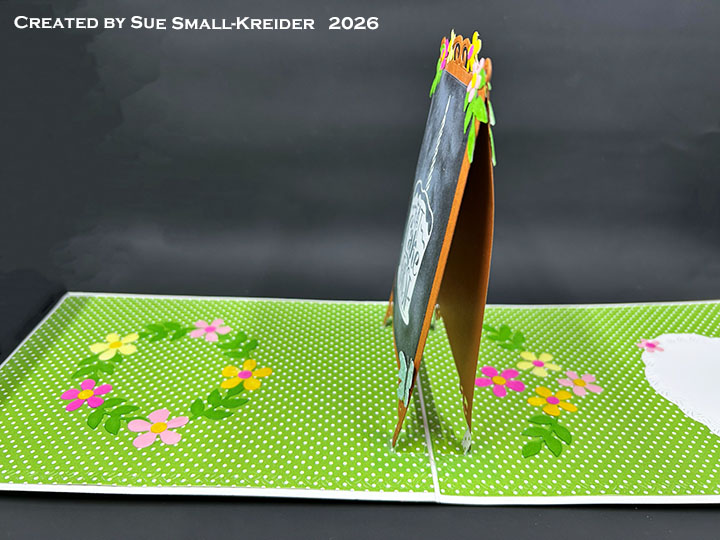
Cardbase: (Watch the video above for assembly instructions.) Cut from 100 lb. cardstock one 5×7-inch rectangle and one 5×7.5-inch rectangle scored at 7-inches. Using Karen Burniston’s Rectangles and Labels – Crosshatch die set, cut four of the largest crosshatch panel from decorative paper. Cut the pop-up tabs from Karen Burniston’s Christmas Trees Pop Stand die set into the inside papers as directed in the video, before gluing them into the card.

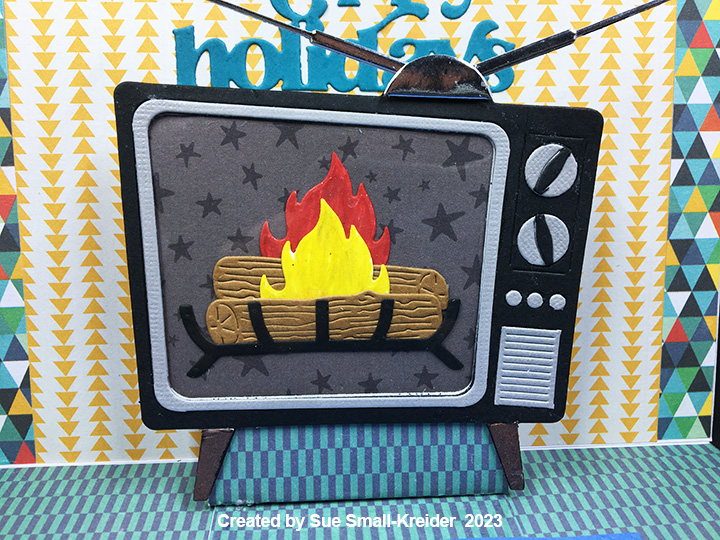
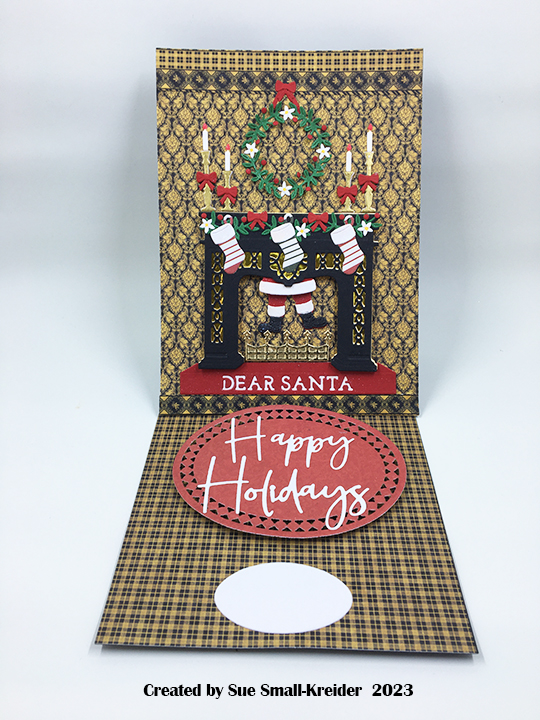
Pop-Up Chalkboard: (Watch the video above for assembly instructions.) Cut two sign board easels from brown heavy weight cardstock and two black panels using the dies in the January 2019 My Hero Arts kit. Stamp with clear ink and heat emboss the sentiment and cake image with white detail embossing powder before assembling the easel.

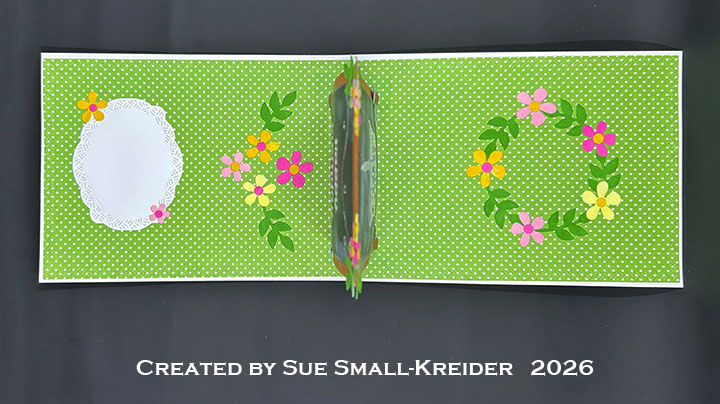
Floral Decorations: (Watch the video above.) My colored cardstock was made by swiping ink pads across white and cream scraps of cardstock. Using Karen Burniston’s Fun Flowers die set, cut out and assemble four sets of flowers in different colors. Cut nine stems of leaves.Cut and decorate two butterflies.

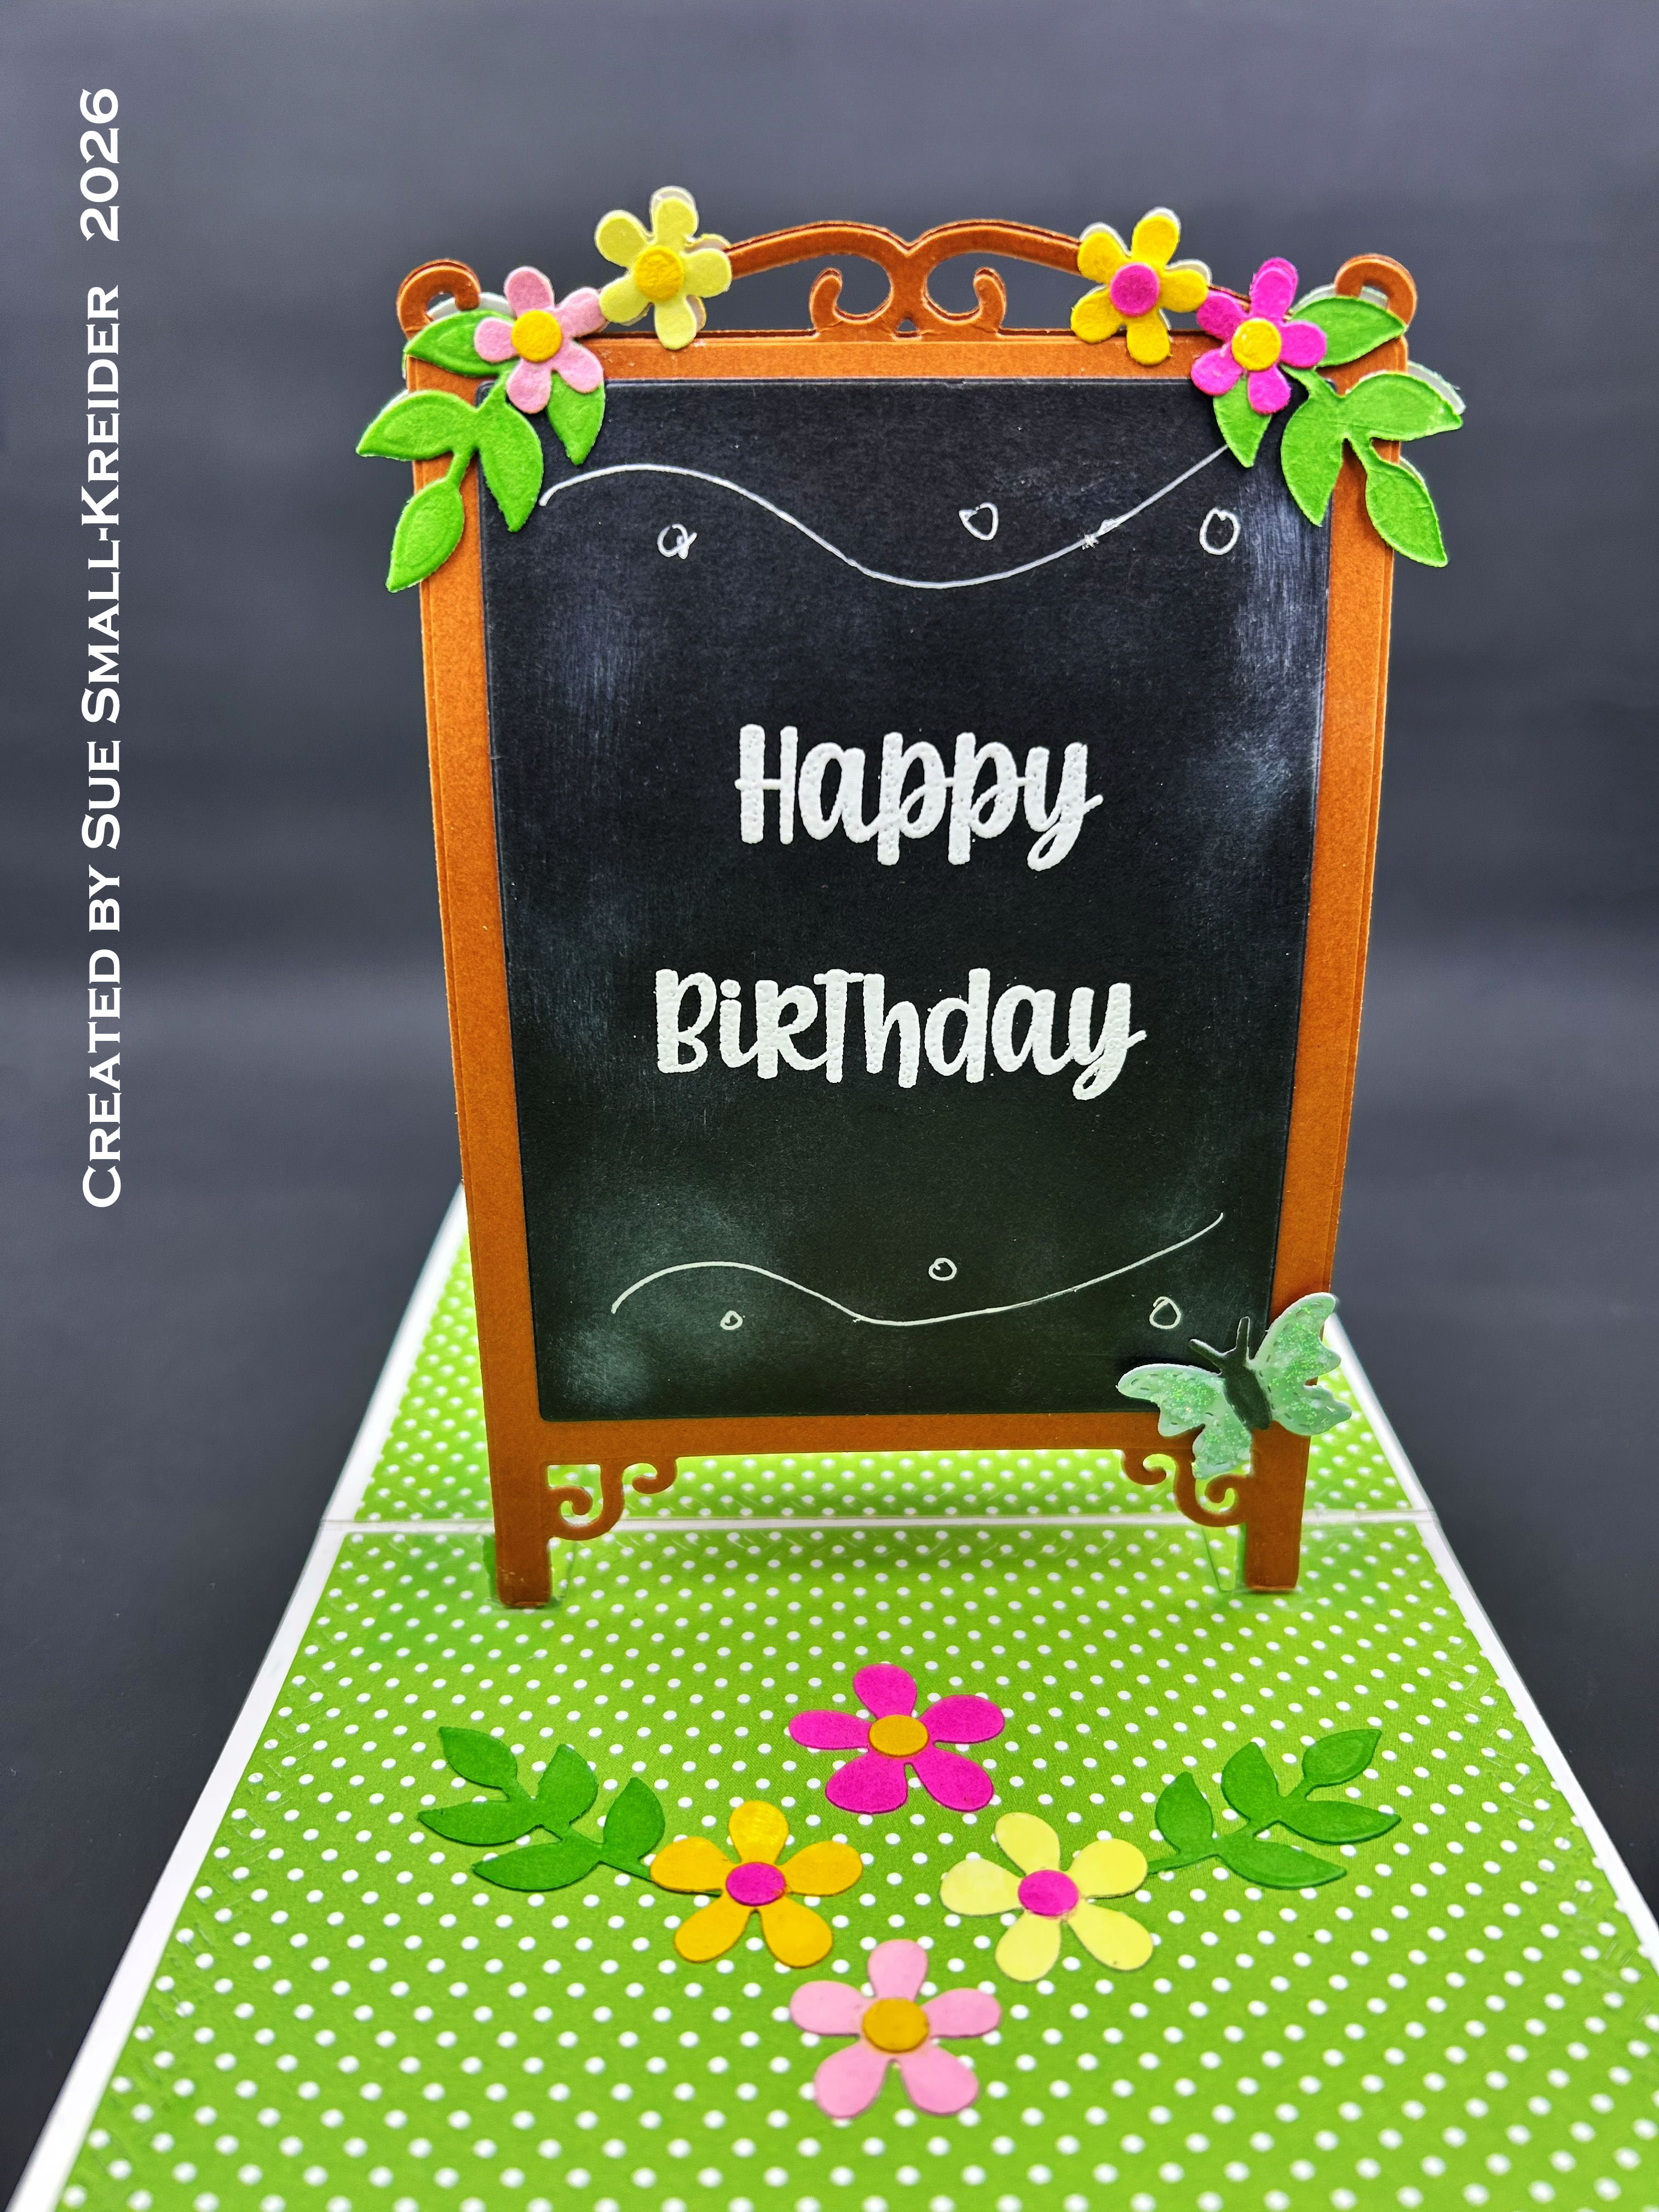
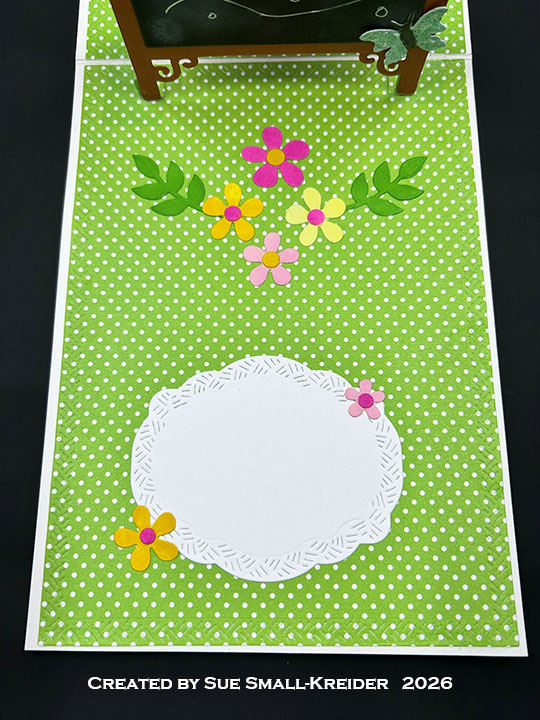
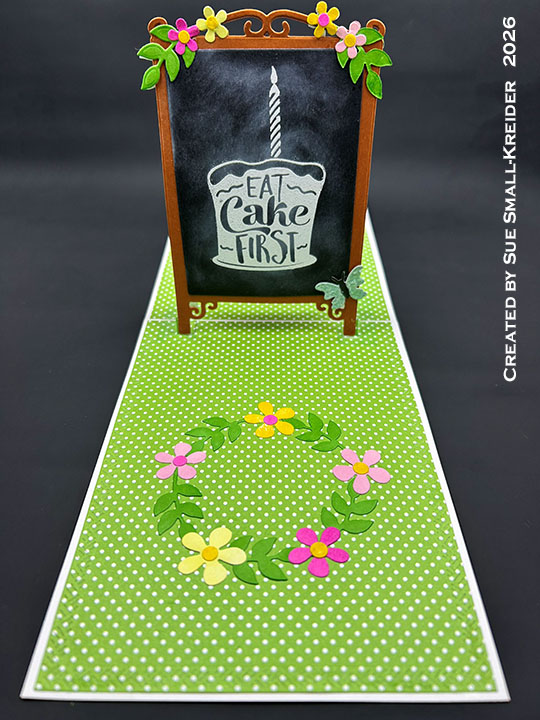
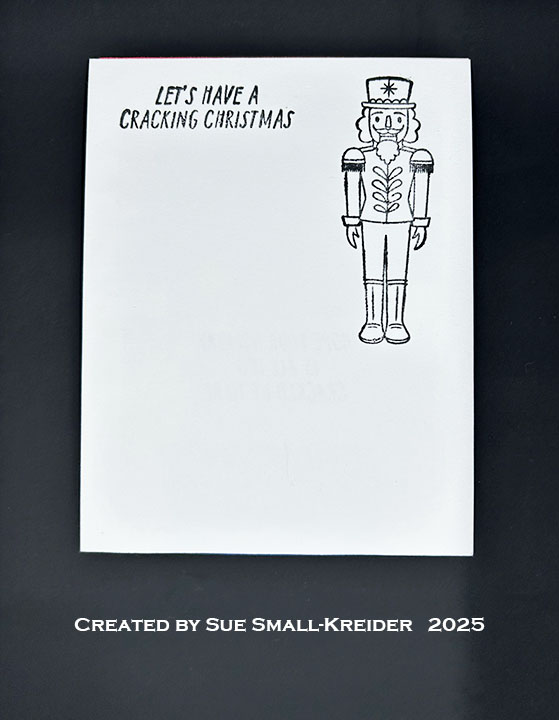
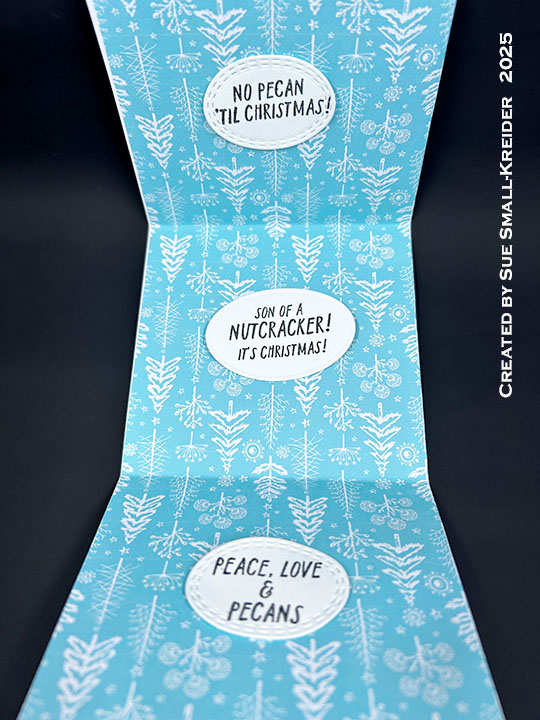
Sentiments: On the card front the newspaper Celebration Times is from the Concord & 9th Happy Headlines stamp set.I printed a generic head shot as a placeholder for the photo of the individual that the card will go to. Inside, the “Happy Birthday is from the Karen Burniston Birthday/Belated stamp set and the “Eat Cake First” is from Fun Stampers Journey’s Birthday Bash set. The white label for a personal message was cut using Karen Burniston’s Rectangles and Labels – Crosshatch die set.

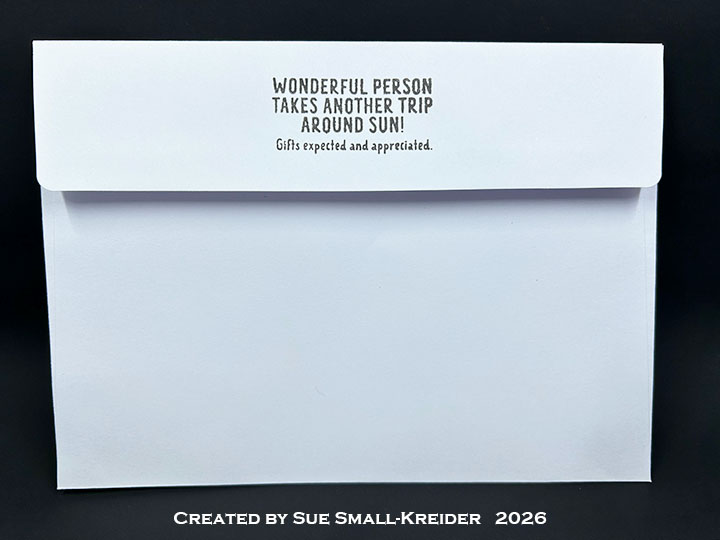
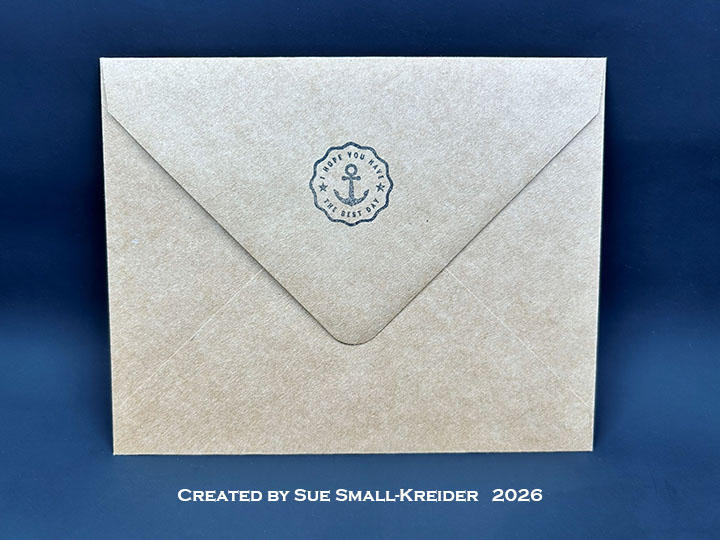
Envelope: The card fits into an A7 (5×7-inch) envelope decorated with a stamped sentiment on the back flap from Concord & 9th Happy Headlines stamp set.

___________________________________

Thank you for experiencing this blog post.

I hope this inspires you and makes you smile.

Please subscribe, like and leave comments 😊

Follow my YouTube channel, Instagram and Pinterest as well.

___________________________________

Disclaimer: Karen Burniston products are provided free of charge by the manufacturer for review and use. All other items were personally purchased. Compensated affiliate links used where or when possible, meaning I will receive a small percentage commission from these manufacturers at no cost to you. This will allow me to add more content to my YouTube channel and help out a lot. Thank you.

Materials Used:

Dies

Stamps

Papers

  • Crafter’s Companion – 5×7-inch 300 GSM Cardstock- Matt Black
  • Doodlebug Design – 12×12 Double-Sided Petite Print Cardstock – At The Zoo
  • Fun Stamper’s Journey – 8.5×11-inch Heavy Cardstock – Pumpkin Bread
  • My Favorite Things – 8.5×11-inch Smooth 100 lb Cardstock – White
  • Cream, Pale Gray, and White Cardstock
  • A7 (5×7-inch) Envelope – White

Embossing Powder & Ink

  • Hero Arts – Embossing Powder – White Detail
  • Memento – Fade Resistant Dye Ink – Tuxedo Black
  • Pigma – Mircon 005 Fine Tip Pen – Black
  • Sakura – Gelly Roll Pen – Medium – White
  • Simon Says Stamp – Pawsitively Saturated Ink – Bubblegum, Citrine, Fairway,Lemonade, Sweets
  • Simon Says Stamp – Premium Pigment Ink – White
  • VersaMark – Watermark Stamp Pad

Adhesives

Tools

  • Die Cutting Machine
  • Heat Tool
  • Kat Scrappiness – Anti-Static Tool
  • Ruler
  • Scissors
  • Scrapbook.com – Magic Mat
  • Scrapbook.com – Mint Tape
  • Stamping Blocks as Paperweights
  • Stamping Platform
  • We R Memories – QuickStick

A Beachy Thank You Card

This card was made for Craft Roulette #301 whose parameters were: an appreciation card, apple farm colors, silhouette element and old [craft] product. I used Waffle Flower Beach Days dies, stencils and stamps along with a Hero Arts sentiment stamp to create this card.

Watch the process video below to learn how this card was made.

Cardbase: I used a purchased American size A2 (4 1/4×5 1/2-inches) kraft cardbase and matching envelope.

Postage Stamps: Using the stamps and stencils from the Waffle Flower Beach Days collection along with their Postage Collage die and stamp set, I created the beached themed postage collage seen in the video above. (See below Materials Used for all the ink colors used.)

Sentiments: “Thank you for your kindness” is from the Hero Arts Kindness stamp set.

Envelope: The panel card fits into an A2 (4 1/4×5 1/2-inches) size envelope with the back flap stamped with an anchor seal “I hope you have the best day” in black.

___________________________________

Thank you for experiencing this blog post.

I hope this inspires you and makes you smile.

Please subscribe, like and leave comments 😊

Follow my YouTube channel, Instagram and Pinterest as well.

___________________________________

Disclaimer: Karen Burniston products are provided free of charge by the manufacturer for review and use. All other items were personally purchased. Compensated affiliate links used where or when possible, meaning I will receive a small percentage commission from these manufacturers at no cost to you. This will allow me to add more content to my YouTube channel and help out a lot. Thank you.

Materials Used:

Dies

  • Waffle Flower – Steel Craft Dies – Postage Collage

Stamps

  • Hero Arts- Clear Stamps – Kindness
  • Waffle Flower – Clear Stamps – Postage Collage Beach Days
  • Waffle Flower – Clear Stamps – Postage Collage

Stencils

  • Waffle Flower – Plastic Stencils – Postage Collage Beach Days

Papers

  • White Cardstock
  • Park Lane Paperie – A2 Cardbase & Envelope – Kraft

Ink

  • Memento – Fade-Resistant Dye Ink – Tuxedo Black
  • Pigma – Mircon 01 Fine Tip Pen – Black
  • Ranger – Tim Holtz – Distress Ink- Antique Linen, Blueprint Sketch, Fossilized Amber, Lumberjack Plaid, Salty Ocean, Spiced Marmalade

Adhesives

Tools

  • Die Cutting Machine
  • Scrapbook.com – Magic Mat
  • Stamping Block
  • Stamping Platform
  • Paperweight
  • Scissors
  • Sponge Daubers
  • Scrapbook.com – Mint Tape
  • Trinity Stamps – Pickup Stick Tool

Frantic Stamper- Nutcracker Trio Card

Welcome to Day 9 of my Nutcracker series using a variety of stamps and die sets to make some nutcracker themed cards. My card today uses dies by Frantic Stamper Inc. – Nutcracker and Spellbinders – Happy Holidays as well as the Hero Arts’ A Little Nuts stamp set.

Watch the process video below to learn how this card was made.

Cardbase: I used a purchased thank you cardbase with matching envelope and covered the card front with a patterned paper.

Nutcracker: Referring to the images of the nutcrackers on the packaging for the Nutcracker die set, cut out all the pieces using your own color scheme. (I cut out the face from pink and colored the eyes green with a white dot. The teeth were cut from white and the bottom colored with a pink marker. The belts, boots, drum and hat visors were colored with markers to change colors or to add trim to the boots.)

Sentiments: Using the Happy Holidays die set, cut from red the words “Happy Holidays” and glue inside the card.

Envelope: The panel card fits into an A2 size envelope with a nutcracker and “Nutcracker is my favorite season” on the envelope back using the Hero Arts’ A Little Nuts stamp set and blue ink.

___________________________________

Thank you for experiencing this blog post.

I hope this inspires you and makes you smile.

Please subscribe, like and leave comments 😊

___________________________________

Disclaimer: Karen Burniston products are provided free of charge by the manufacturer for review and use. All other items were personally purchased. Compensated affiliate links used where or when possible, meaning I will receive a small percentage commission from these manufacturers at no cost to you. This will allow me to add more content to my YouTube channel and help out a lot. Thank you.

Materials Used:

Dies

  • Frantic Stamper Inc. – Precision Cutting Dies – Nutcracker – FRA-DIE-10902
  • Spellbinders –Cutting Dies – Happy Holidays – S2-330

Stamps

  • Hero Arts – Clear Stamps & Dies- A Little Nuts

Papers

  • Matte Gold Cardstock
  • Craft Consortium – 12×12 Double-Sided 200gsm Papers – Tis The Season by Linsey Kelly
  • Black, Blue, Pink, Red and White Cardstock
  • Purchased Gingham A2 (4.25×5.5-inches) cardbase and white envelope

Ink

  • Memento – Fade Resistant Dye ink – Paris Dusk
  • American Crafts – Metallic Marker – Gold
  • OLO – Marker – Cotton Candy
  • Sakura – Gelly Roll Pen – Medium – White
  • Sharpie – Permanent Marker – Fine Tip – Black & Red
  • Sharpie – Permanent Marker – Ultra Fine Tip – Blue & Green

Adhesives

Tools

Spellbinders – Dancing Nutcracker Card

Welcome to Day 4 of my Nutcracker series using a variety of stamps and die sets to make some nutcracker themed cards. My card today uses products by Spellbinders – Dancin’ Nutcracker Fritz and Happy Holidays die sets and Honey Bee Stamps Soulful Season 3D embossing folder as well as Hero Arts’ A Little Nuts stamp set.

Watch the process video below to learn how this card was made.

Cardbase: Emboss a 5.5-8.5 piece of white 65lb. cardstock using the Honey Bee Stamps Soulful Season 3D embossing folder following the directions in the video above. Trim down to a 5×7-inch panel. Glue to the front of an A7 (5×7-inch) cardbase. (I used a purchased cardbase and envelope.)

Nutcracker & Drum: Referring to the image of the nutcracker on the packaging for the Spellbinders Dancin’ Nutcracker Fritz die set, cut out all the pieces using your own color scheme. Cut a black strip to go behind the face for the eyes. (I cut two drums – one for the front and one for the card back along with drum sticks.) Assemble nutcracker and drums as shown in video above.

Sentiments: Using the Spellbinders Happy Holidays die set, cut from red paper. (I upcycled a red envelope.)

Envelope: The panel card fits into an A7 size envelope with a nutcracker and “Nutcracker is my favorite season” on the envelope back using the Hero Arts’ A Little Nuts stamp set and blue ink.

___________________________________

Thank you for experiencing this blog post.

I hope this inspires you and makes you smile.

Please subscribe, like and leave comments 😊

___________________________________

Disclaimer: Karen Burniston products are provided free of charge by the manufacturer for review and use. All other items were personally purchased. Compensated affiliate links used where or when possible, meaning I will receive a small percentage commission from these manufacturers at no cost to you. This will allow me to add more content to my YouTube channel and help out a lot. Thank you.

Materials Used:

Dies

  • Spellbinders –Cutting Dies – Dancin’ Nutcracker Fritz – S5-644
  • Spellbinders –Cutting Dies – Happy Holidays – S2-330

Embossing Folders

  • Honey Bee – 3D Embossing Folder – Soulful Season

Stamps

  • Hero Arts – Clear Stamps & Dies- A Little Nuts

Papers

  • Spellbinders – 8.5×11 100 lb. Cardstock – Cosmic Sky
  • The Paper Studio – 8.5×11 65 lb. Cardstock – White
  • Gold Mirror Cardstock
  • Black, Pinks,Red and Yellow Cardstock
  • Park Lane Paperie – A7 Cardbase and Envelope – White

Ink

  • Memento – Fade Resistant Dye ink – Paris Dusk
  • Pigma – Mircon 01 Fine Tip Pen – Black
  • Ranger – Tim Holtz – Distress Ink- Lost Shadow
  • Stampin’ Up – Stampin’ Blends Marker – Dual Tip – Light Copper Clay
  • Sakura – Gelly Roll Pen – Medium – White

Adhesives

Tools

  • Die Cutting Machine
  • Paper Trimmer
  • Stamping Platform
  • Stamping Blocks
  • Sponge Blending Tool
  • Tweezers
  • Spellbinders – Mighty Mister Spray Bottle
  • We R Memories – QuickStick

Miscellaneous

  • Large Eyed Needle
  • Vivant – Cord/Thread – Gold

Trinity Stamps – Nutcracker Slider Card

Welcome to Day 3 of my Nutcracker series using a variety of stamps and die sets to make some nutcracker themed cards. My card today uses products by Trinity Stamps – Nutcracker Cup Character, Take-Out Coffee Cup Shaped Card and Sundae Swirl Alphabet dies sets and Hero Arts’ A Little Nuts stamp set.

Watch the process video below to learn how this card was made.

Cardbase: Using the large die from the Take-Out Coffee Cup Shaped Card, cut out a card base from a 7.5×5.5-inch piece of black cardstock.

Nutcracker Front: Referring to the image of the nutcracker on the packaging for the Nutcracker Cup Character die set, cut out all the pieces using your own color scheme. (I used black for the eyes, teeth, hat bill/visor and belt, flesh color hands and nose, blue for sleeves, gold for belt buckle, sleeve cuffs, epaulets and button cording, red for jacket and hat, copper brown for hair, eyebrows and mustache, and yellow for the feather in hat.) Cut a white square to fit the back of the teeth. Cut from Flesh color, a cup holder using the die in the Take-Out Coffee Cup Shaped Card set to use as the face. Assemble as shown in video.

Sentiments: Using the Sundae Swirl Alphabet die set, cut from red the words “Happy Holidays” and glue together as directed in the video above. Cut from white a cup holder using the die in the Take-Out Coffee Cup Shaped Card set.

Envelope: The panel card fits into an A2 size envelope with a nutcracker and “Nutcracker is my favorite season” on the envelope back using the Hero Arts’ A Little Nuts stamp set.

___________________________________

Thank you for experiencing this blog post.

I hope this inspires you and makes you smile.

Please subscribe, like and leave comments 😊

___________________________________

Disclaimer: Karen Burniston products are provided free of charge by the manufacturer for review and use. All other items were personally purchased. Compensated affiliate links used where or when possible, meaning I will receive a small percentage commission from these manufacturers at no cost to you. This will allow me to add more content to my YouTube channel and help out a lot. Thank you.

Materials Used:

Dies

  • Trinity Stamps – Dies – Nutcracker Cup Character
  • Trinity Stamps – Dies – Sundae Swirl Alphabet
  • Trinity Stamps – Dies – Take-Out Coffee Cup Shaped Card

Stamps

  • Hero Arts – Clear Stamps & Dies- A Little Nuts

Papers

  • Park Lane – 8.5×11 80 lb. Shimmer Sheets – Gold
  • Recollections – 8.5×11 100 lb. Cardstock – Flesh
  • Recollections – 8.5×11 80 lb. Cardstock – White
  • Stampin’ Up – 8.5×11 80 lb. Cardstock – Copper Clay
  • Black, Blue, Red and Yellow Cardstock
  • Fraser Papers for William House – A2 Envelope – Genesis Text Milkweed Smooth

Ink

Adhesives

Tools

  • Die Cutting Machine
  • Paper Trimmer
  • Stamping Platform
  • Stamping Block
  • Blending Brush
  • Pencil
  • Tweezers
  • Riley and Company – Pick & Poke Tool
  • We R Memories – QuickStick

Miscellaneous

  • Trinity Stamps – Sparkle Spots Embellishments – Sampler

Hero Arts – Nutcracker Slider Card

Welcome to Day 1 of my Nutcracker series using a variety of stamps and die sets to make some nutcracker themed cards. My card today uses products by Hero Arts – Big Mouth Nutcracker Bundle of dies and A Little Nuts stamp set.

Watch the process video below to learn how this card was made.

Cardbase: Cut from white light-to-medium weight cardstock one 4.25 x 5.5-inch rectangle. Also cut one pink 4.25 x 5.5-inch rectangle.

Slider Mechanism: Cut three of the large mechanism from the Big Mouth Slider die set from light-to-medium weight cardstock. Cut one “T” interactive sliding piece from pink. Using the upside-down “U” die cut out an opening as shown in the video above from the center bottom pink panel.

Sentiments: Stamped sentiments are from the Stamp & Cut A Little Nuts set. Inside the mouth is “Hope your holiday is all it’s cracked up to be.” On the card back is a nutcracker and “Let’s have a cracking Christmas.”

Envelope: The panel card fits into an A2 size envelope with a nutcracker and “Peace, Love & Pecans” on the envelope back.

___________________________________

Thank you for experiencing this blog post.

I hope this inspires you and makes you smile.

Please subscribe, like and leave comments 😊

___________________________________

Disclaimer: Karen Burniston products are provided free of charge by the manufacturer for review and use. All other items were personally purchased. Compensated affiliate links used where or when possible, meaning I will receive a small percentage commission from these manufacturers at no cost to you. This will allow me to add more content to my YouTube channel and help out a lot. Thank you.

Materials Used:

Dies

  • Hero Arts – Dies – Big Mouth Nutcracker
  • Hero Arts – Dies – Big Mouth Slider

Stamps

  • Hero Arts – Clear Stamps & Dies- A Little Nuts

Papers

  • Park Lane – 8.5×11 80 lb. Shimmer Sheets – Gold
  • Recollections – 8.5×11 100 lb. Cardstock – Pink
  • Recollections – 8.5×11 80 lb. Cardstock – White
  • Black, Blue, Brown, Pink, Red and Yellow Cardstock
  • Fraser Papers for William House – A2 Envelope – Genesis Text Milkweed Smooth

Ink

  • Memento – Fade Resistant Dye ink – Tuxedo Black & Rose Bud
  • Sharpie – Permanent Marker – Fine Tip – Blue

Adhesives

Tools

map fold nutcracker card

This card was made for CRAFT ROULETTE #295 whose parameters included a map fold, planter colors,  from the sky element, and three in a row. I used stamps and dies by Hero Arts and Karen Burniston to make this card.

Watch the process video to see how I made this card.

Cardbase: Watch the video to see how the card base was made using digital paper by Carnation Crafts into a map fold card.

Nutcrackers were die cut using Hero Arts’ Fancy Dies Toys.

Sentiments were stamped on white cardstock using Hero Arts’ Stamp & Cut A Little Nuts set and cut out using Karen Burniston’s Greeting Labels die set. Three 1-inch circles were cut and marked with an “X” and a center circle to show where to stop when cutting the tabs. The tabs were folded to be inserted through a 3/4-inch hole in each of the card’s panels that will have sentiments. The oval sentiment labels are then glued onto the unfolded tabs and swiveled to make sure they are not glued to the card base.

Envelope: The card fits into an A2 (4.25x 5.5-inches) size envelope.

___________________________________

Thank you for experiencing this blog post.

I hope this inspires you and makes you smile.

Please subscribe, like and leave comments on this site and my YouTube channel. 😊

___________________________________

Disclaimer: Karen Burniston products are provided free of charge by the manufacturer for review and use. All other items were personally purchased. Compensated affiliate links used where or when possible, meaning I will receive a small percentage commission from these manufacturers at no cost to you. This will allow me to add more content to my YouTube channel and help out a lot. Thank you.

Materials Used:

Dies

Stamps

  • Hero Arts – Clear Stamps & Dies- A Little Nuts

Papers

  • Carnation Crafts – Digital Paper – (printed on copier paper)
  • White Cardstock

Ink

Adhesives

Tools

  • Die Cutting Machine
  • Paper Trimmer
  • Bone Folder
  • Stamping Platform
  • Stamping Blocks used as paperweights
  • Scissors
  • Pencil
  • Paper Masking Tape

Fireplaces in Review

I have been collecting and making fireplace cards for several years now. Here is a collection of all my fireplace blog posts. Click on an image to see details of the fireplace.

___________________________________

Thank you for experiencing this blog post.

I hope this inspires you and makes you smile.

Please like and leave comments 😊

___________________________________

Disclaimer: Karen Burniston products are provided free of charge by the manufacturer for review and use. All other items were personally purchased. Compensated affiliate links used where or when possible, meaning I will receive a small percentage commission from these manufacturers at no cost to you. This will allow me to add more content to my YouTube channel and help out a lot. Thank you.

Oven Cards in Review

I have been collecting and making oven cards for several years now. Here is a collection of all my ovens blog posts. Click on an image to see details of the oven.

(Images are posted from the earliest release of dies/stamps/kits 2016 to newest 2023.)

____________________________

Thank you for experiencing this blog post.

I hope this inspires you and makes you smile.

Please like and leave comments 😊

___________________________________

Disclaimer: Karen Burniston products are provided free of charge by the manufacturer for review and use. All other items were personally purchased. Compensated affiliate links used where or when possible, meaning I will receive a small percentage commission from these manufacturers at no cost to you. This will allow me to add more content to my YouTube channel and help out a lot. Thank you.