I’m using Tim Holtz’s Retro Oven to create this tri-fold shaker card.
Watch video above for a tutorial on how to make the card.
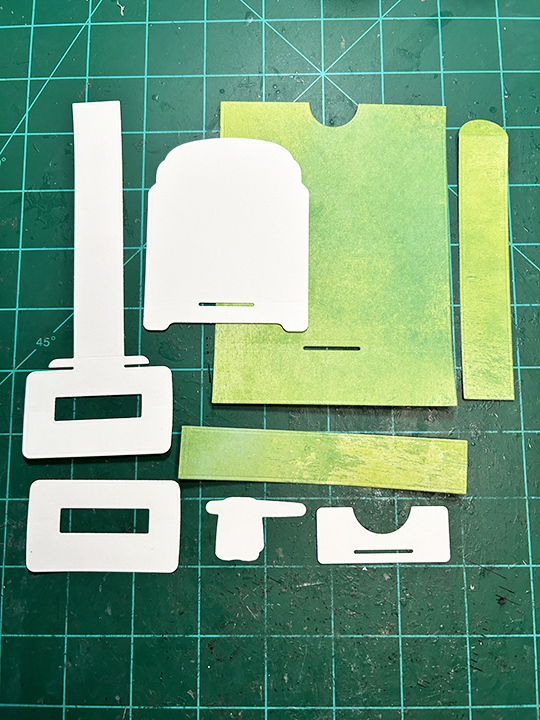
Cardbase: Start with a 9 x 5-inches rectangle of white 65lb. cardstock. Score and fold at 3-inches and 6-inches.
Oven: Cut out two oven base piece from red cardstock covered with clear packing tape. Cut decorative oven pieces for each stove from silver, white and black. (I used cardboard packaging from some Tim Holtz protucts for the white and black pieces.)
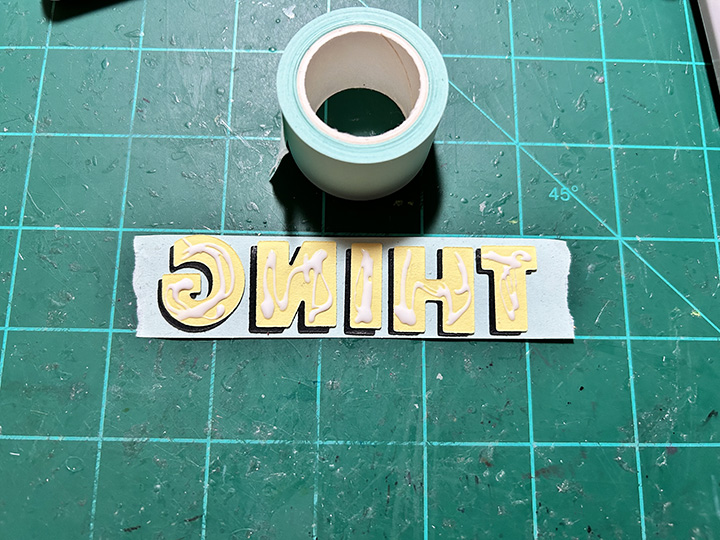
Sentiments: Stamp the Paper Discovery “Eat Drink & be merry” inside the last oven window panel. Use other sentiment stamps on other middle panels. (I used “Fill your heart with joy” from Scrapbook and Cards Today’s Jolly Holiday workshop kit.)
Envelope: The card fits into an A2 envelope.
___________________________________
Thank you for experiencing this blog post.
I hope this inspires you and makes you smile.
Please like and leave comments 😊
___________________________________
Disclaimer: Karen Burniston products are provided free of charge by the manufacturer for review and use. All other items were personally purchased. Compensated affiliate links used where or when possible, meaning I will receive a small percentage commission from these manufacturers at no cost to you. This will allow me to add more content to my YouTube channel and help out a lot. Thank you.
Materials Used:
Dies
Sizzix – Thinlits by Tim Holtz – Retro Oven
Stamps
Paper Discovery – A5 Stamp Set – Cosy Kitchen – Simple Food
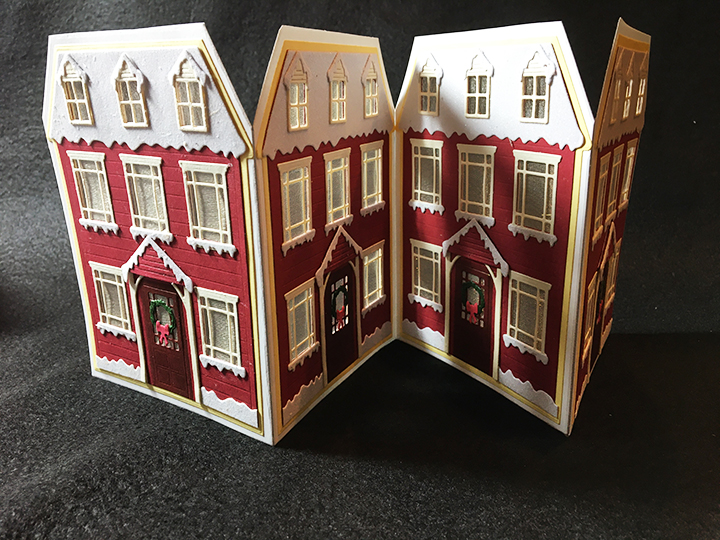
I’m using a stamp and die set by Diamond Press to create this interactive card that lets you pull the tab to open the oven door and reveal a Christmas turkey. (Because this kit doesn’t include any holiday sentiments, I had to use ones by other sources.)
Watch video above for a tutorial on how to make the card.
Cardbase: I used a purchased top-fold A2 size (2.25 x5.5-inch) gray cardbase and punched a half circle opening in the top center for a thumb hole to help with the pull tab. To help with the weight of the front, I added a 4×5.25-inch piece of the same green cardstock I had used for the front matching ups the thumb hole notches.
Oven: I watched an assembly video before I started my card. Then I cut the pieces I needed from green colored cardstock and white 65 lb. white cardstock.
Sentiments: For my original card, the outside “Merry Christmas” sentiment, I cut the words from a commercial Christmas card. For the card in my process video, I used stamps from the Greetery saying “Warmest Winter Wishes.” Inside both cards is “Happy Holidays, a die-cut sentiment by Karen Burniston in black.
Envelope: The card fits into an A2 envelope.
___________________________________
Thank you for experiencing this blog post.
I hope this inspires you and makes you smile.
Please like and leave comments 😊
___________________________________
Disclaimer: Karen Burniston products are provided free of charge by the manufacturer for review and use. All other items were personally purchased. Compensated affiliate links used where or when possible, meaning I will receive a small percentage commission from these manufacturers at no cost to you. This will allow me to add more content to my YouTube channel and help out a lot. Thank you.
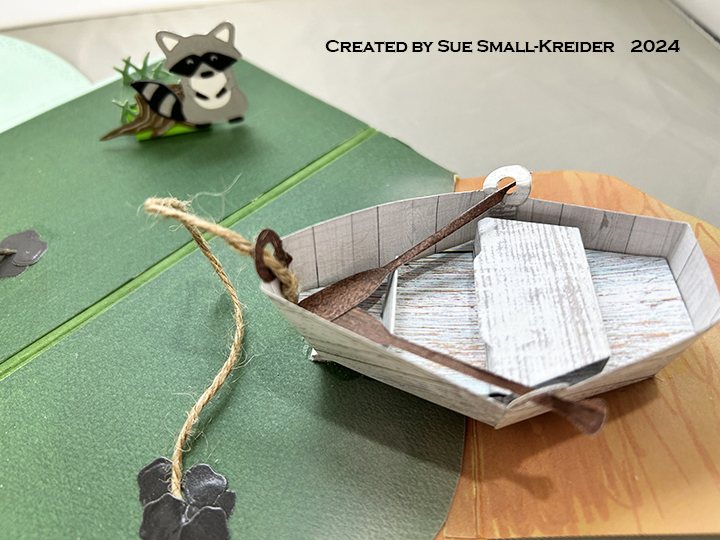
This card was made for Craft Roulette #227 whose parameters included a 4×8 project mountain colors, float(s) or floating element and water.
___________________________________
Thank you for experiencing this blog post.
I hope this inspires you and makes you smile.
Please like and leave comments 😊
___________________________________
Disclaimer: Karen Burniston products are provided free of charge by the manufacturer for review and use. All other items were personally purchased. Compensated affiliate links used where or when possible, meaning I will receive a small percentage commission from these manufacturers at no cost to you. This will allow me to add more content to my YouTube channel and help out a lot. Thank you.
Sometimes you just need to go all out to say thank you to someone. This is one of those cards. It uses dies, stamps and stencils by The Greetery.
I designed this card to unfold and interact with the recipient in layers. First you open the gardening gloves gatefold flaps to reveal the gardening tools. Next you pull the ribbon up to reveal a personal message, but there are also good wishes underneath the slider easel.
Cardbase: Start with an 8 1/2 x – inch rectangle of white cardstock. Score and fold at 2 1/4-inches and 6 1/4-inches. These will be the gatefold flaps.
Sentiments: The stamped sentiment under the slider easel says “May your days be always in bloom.” I comes from the Always In Bloom stamp set. The “Way to Grow” on the envelope flap in from the In Spades stamp set. The Pull and arrow on the CRX tag giving directions on how to open the card, are from a Trinity Stamps set.
___________________________________
Thank you for reading this blog post.
I hope this inspires you and makes you smile.
Please like and leave comments 😊
___________________________________
Materials Used:
Dies
Karen Burniston in cahoots with Riley and Company – Topper Tags – 1253
This card was made for Craft Roulette #222 whose parameters included Dutch door, gnome colors, movie element and building blocks.
Watch the process video for a tutorial on how the card was made.
Cardbase: Starting with an 8 1/2-inch square that is scored at 3 1/2, 7, and 7 1/2-inches. Thin magnets are added to the flap and back of front panel before being covered with decorative paper.
Sentiments: The front “You are the STAR of your Life Story” was computer generated while the “Happy Birthday” inside used two Karen Burniston dies – Happy Birthday and Happy Birthday Shadow.
Card Front: Drive-in movie die cuts and stamps are by My Favorite Things. the 3D embossing folder is by Spellbinders.
Pop-Up Blocks: Watch Karen Burniston’s assembly video for her Surprise Cube Pop-Up before assembling them. (Assembly video near bottom of linked page.)
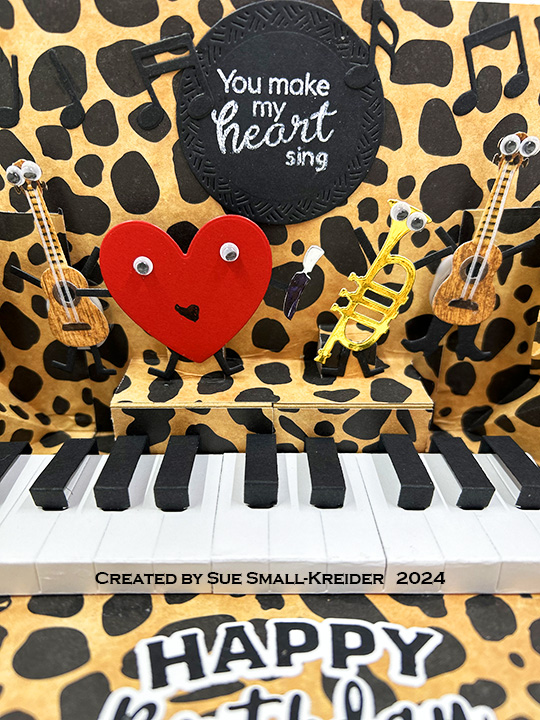
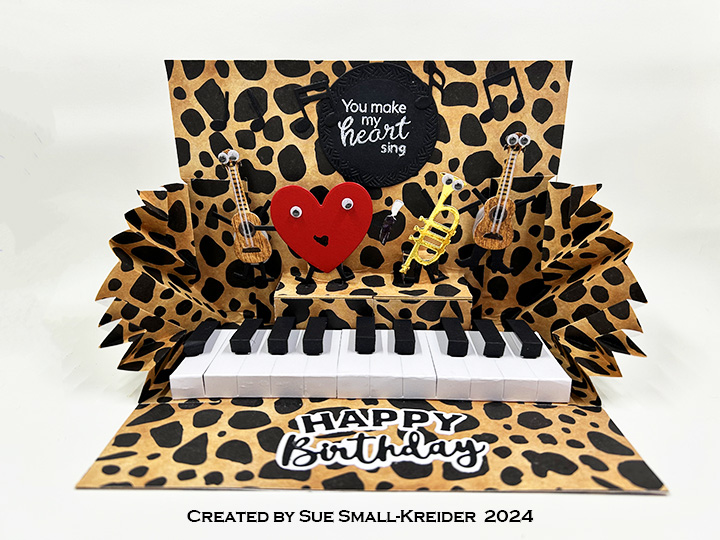
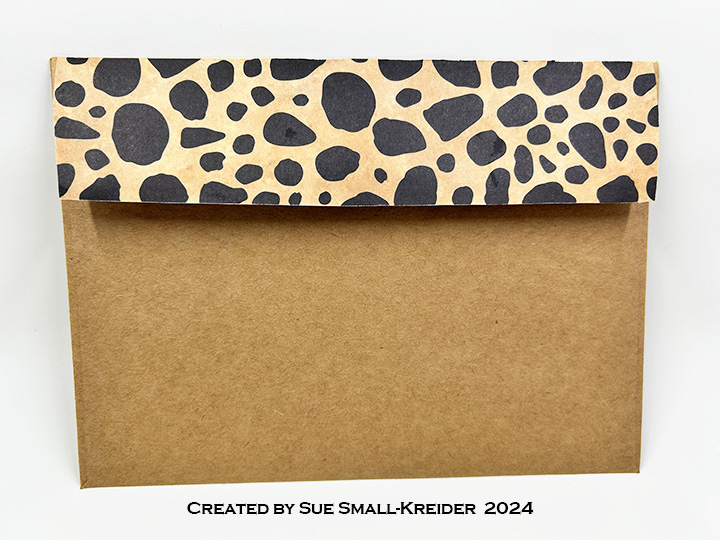
Cardbase: I started with a purchased 5×7-inch kraft cardstock cardbase and covered all sides with leopard spots paper. The inside was covered with two 5×7 pieces. (I covered my inside after I had die-cut the stage and had to fold the stage flat, cut on the die-cut lines and then retrain the folds. This gives you a solid coverage of the stage, hiding the center cut.) I cut the stage pop-ups, before I covered the outside with one 7×10-inch piece so I could hide the stage pop-out.
Pop-up Stage: (Watch the assembly video at the bottom of the linked page for Explosion Pop-Up before starting.) Because the stage in the Explosion Pop-Up set cuts into the card, I had to mark the card center and then die-cut the two parts of the stage on either side of the mark.
Explosion Side Panels: (Watch the assembly video at the bottom of the linked page for Explosion Pop-Up before starting.) Use paper rather than cardstock for the best results. As many times as I have made these panels, I always have to refer to the packaging or the assembly video to fold them correctly. Glue into the card before attaching the keyboard.
Piano Keys Pop-Up: This is a glue-in pop-up with good written directions on the packaging. You glue the black keys to the fold side without a tab with the bottom bar edge of the black keys piece lining-up to the bottom edge of the white keys. I added a second set of keys but had to trim off two white keys and one black key to fit into the Explosion card. (See photo above.) If you connect the two sets of keys inside with leftover strips from cutting the black keys, it will be easier to glue into the card. Attach the keys to stage pop-up and then glue the tab to the cardbase.
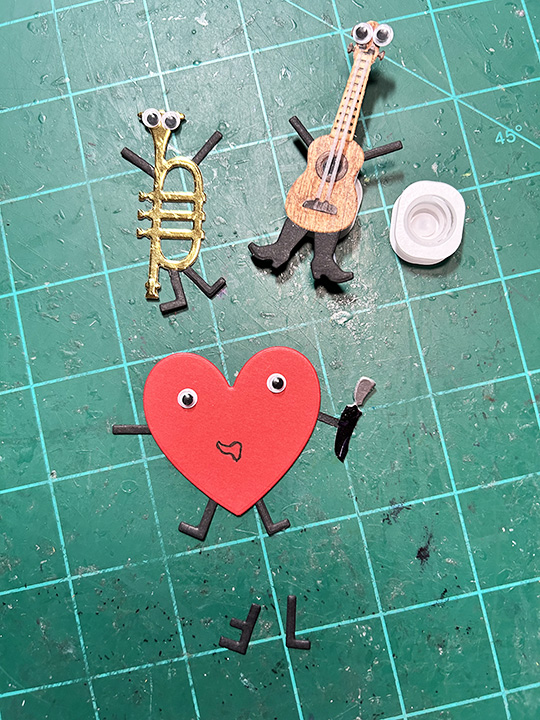
Characters: Assemble the guitar charm from the Music Charms set twice. (I cut the base from a woodgrain cardstock and the neck piece from white cardstock that was then inked with brown and stenciled with a black marker using the die stencil feature. The knobs were colored black, and the strings are cut from clear vellum and ends colored with a black marker.) Attach wiggly eyes, legs and arms. (One guitar I used legs made from the L and F of the Mini Alphabet, and the other I used the cowboy boots from the Tiny Accessories 3 set.) Glue to a mini wobbler spring before attaching to card.
The trumpet and heart are also made with the MiniAlphabet limbs of F, I and L and wiggly eyes. The heart has a hand-drawn mouth, and the microphone is the “i” from the Go Wild! sentiment set. The heart and trumpet are glued to the pop-up cubes atop the stage. The heart was cut from the Candy Hearts Box set.
There is a tiny white paw print on the back of the card that was cut from white cardstock and the paw pads colored with a black marker. This die comes from the Doghouse Tiny House Add-Ons set.
Sentiments: “Wild Thing!” is cut from two separate die sets – Go Wild! and the larger Alphabet set. Both words were cut from black and a pale-yellow cardstock with the layers staggered to create a sense of a shadow and to make them stand out on the dark background. They are glued on a heart cut from the Hearts – Crosshatch set.
My trick for lining up the individual letters is to line them up on my grid mat and place low tack tape over them and then glue them in place while still on the tape. Attach to card and then once dry, peel off the tape.
The inside sentiments included a circle cut from the Circles – Crosshatch set that was stamped with a clear ink and then heat embossed with white detail embossing powder. The stamp is from the Music Sentiments clear stamp set. The die-cut “Happy Birthday” is cut from the Happy Birthday Lorna Add-Onsset with the shadow piece trimmed from its frame.
Envelope: The back flap of the kraft A7 envelope has spotted leopard paper glued to it.
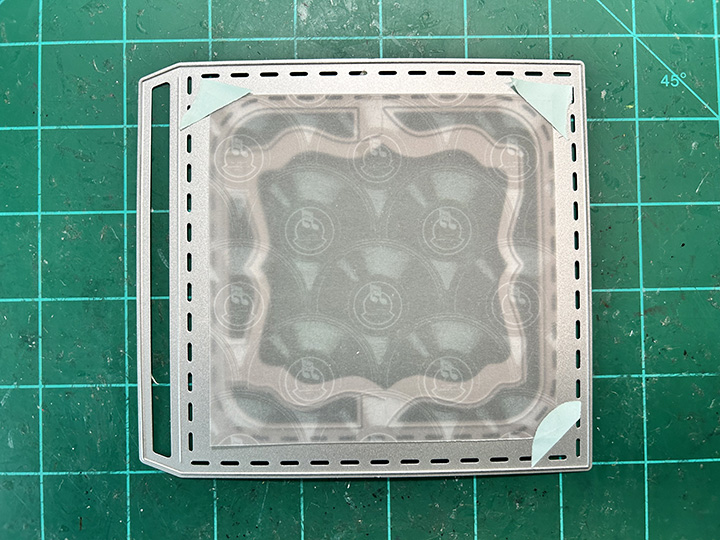
(Watch the assembly video at the bottom of the linked page for the Fancy Label Accordion before starting.)
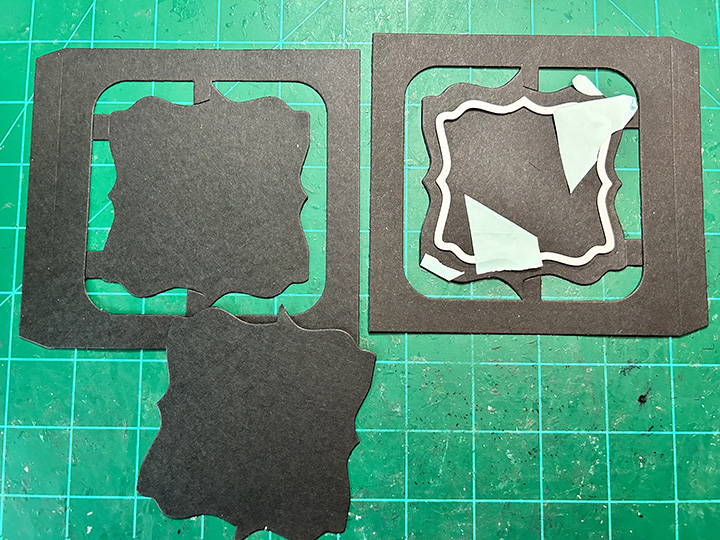
Cardbase: Three Fancy Label Accordion frames were cut from heavy black cardstock and the fronts were decorated with Fancy Solid Framecut from a one-sided paper of records with a definite top and bottom to the pattern. (I cut three sets of frames going horizontal on the decorator paper and three sets going vertical on the paper to have enough frame pieces to have the pattern work.) Don’t glue the back side frames on until the three frames are joined together.
Decoration of Fancy Labels: The labels were cut using the Fancy Label Accordion set’s frame and largest decorator label dies. I used printed vellum on all three panels. The end panels had an additional frame cut out so the vellum could be framed. My original plan was to let light go through them. (I later changed my mind and glued white labels on the back side for personal messages.)
See the photos for how I taped the frame and additional black cardstock label piece together and die-cut matching frame pieces. The center panel was decorated with a full-size label of vellum topped with a smaller label and music staff and notes from the Music Charms set.
Sentiments: There are three sentiments on the card – “Turn up the volume,” “You Rock!” and “Thank You.” The first two were stamped using the Music Sentiments clear stamp set with clear ink and then heat embossed with gold embossing powder onto a piece of vellum and a frame piece of cardstock. (The frame piece is hard to see in the photos. It is in the right-hand corner below the “Thank You.”) The Thank You is die cut using the new Shadow die for it. It is coated with a glitter gloss for more sparkle.
Watch the YouTube video below to learn how the card was made.
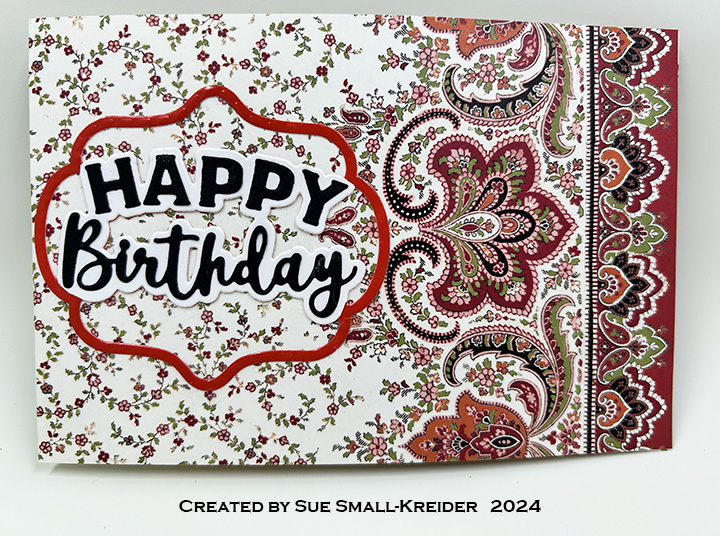
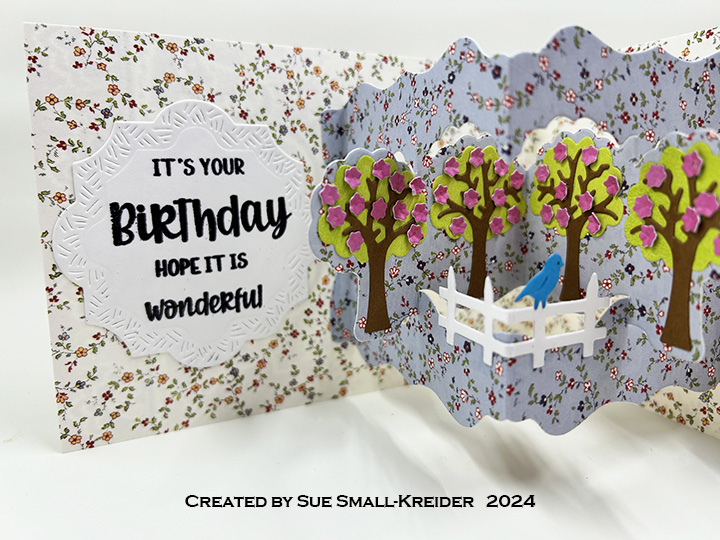
Cardbase: I used double-sided patterned paper and cut a 4 x 12-inch rectangle and folded it in half.
Trees Pop-Up: From coordinating patterned paper, I cut the Tree Add-Onsmain die and scored it at 6-inches from either end. The tabs created by this scoring are what will be glued onto the card. To attach the pop-up, train all the folds and flatten them out. Place the center fold of pop-up over center fold of card. Fold back tabs and glue in place. Decorate pop-up using dies in the set. A white fence was added to the center of the pop-out using a die in the Farm Edges set.
Sentiments: The “Happy Birthday” on the card front is from the new Happy Birthday Lorna Add-Ons die set. Inside is a stamped and heat embossed sentiment “It’s your birthday. Hope it is wonderful” made up of four different stamps in the Birthday/Belated clear stamp set. The middle size crosshatch die in the Labels – Crosshatch set was used to created the inside sentiment and personal message labels.
Envelope: This card fits into an A6 envelope which was decorated with a border strip from the patterned paper collection.