Watermelon Pop-Up Card

Watermelon Pop-Up Card

Inspired by a new Graphic 45 paper collection – Sunshine On My Mind that features watermelon papers, I created this A2 (4.25×5.5-inches) sized card using Karen Burniston’s Ovals and Heart Collage Pop-Up die sets.

Cardbase: Fold an 8.5 x 5.5-inch rectangle of card stock in half to form a top fold 4.24 x 5.5-inch card (or use a purchased A2 cardbase.) Tape the largest oval die so that the top of the die overhangs the fold. Die cut to form an oval folded cardbase. With a red marker color the inside edges of the cardbase. Repeat with green marker to the outside edges.

Using the same oval die, cut two ovals from green watermelon rind paper and two more ovals from red and black watermelon paper. Glue one of the red ovals inside the cardbase, fold cardbase in half and trim off red paper at fold. Repeat with the second red piece. Glue one green oval to the back side of cardbase. Trim at fold. Glue the last green oval to front of card.

The card front will be the only complete oval. All other panels should have been trimmed to allow the cardbase to fold. (Note in photo that a hint of red shows on the back of the card.)

Decorate the outside of the cardbase with sentiments cut from the collection pack papers.

Collage Mechanism: (Watch the assembly video for the Heart Collage Pop-Up located at the bottom of the linked page.) Cut the mechanism from red cardstock. Train folds and glue inside the cardbase. Allow the glue to dry before connecting the locking tabs. Cut sentiment panels from paper collection. Round the corners. Play with positioning of the panels onto the mechanism before permanently gluing in place. (I found that my side arms needed to be thin pieces and the top and bottom arms could handle larger panels.) Take the largest panel and fold in half before gluing over locking mechanism tabs.

Add other decorations to cardbase always checking for catchpoints to avoid.

Envelope: Decorated the back envelope flap with decorative strips from paper collection.

__________________________________

Thank you for reading this blog post.

I hope this inspires you and makes you smile.

Please like and leave comments 😊

__________________________________

Materials Used:

Dies

Papers

  • Graphic 45 – 8×8 Double-Sided Collection Pack – Sunshine On My Mind
  • Red Cardstock
  • A2 (4.25×5.5-inches) Cardbase
  • A2 Envelope – Neon Green

Ink

  • Pigma – Mircon 01 Fine Tip Pen – Black
  • Scrapbook.com – Glitter Brush Marker – Red Shimmer
  • Sharpie – Permanent Marker – Fine Tip – Green
  • Sharpie – Permanent Marker – Fine Tip – Red

Adhesives

Tools

  • Die Cutting Machine
  • Bone Folder
  • Stamping Blocks used as paperweights
  • Scissors
  • Tweezers
  • Corner Punch

Winnie-The-Pooh Card

This card was made for Craft Roulette #216 whose parameters included for A2 project, baseball game colors, number(s) element and charm(s).

After I completed the process video I added thin strips of decorated paper to even out the borders of the front background paper as well as adding a second jump ring to the charm to have it hang more in the center of the frame.

___________________________________

Thank you for experiencing this blog post.

I hope this inspires you and makes you smile.

Please like and leave comments 😊

___________________________________

Materials Used:

Dies

Papers

  • Echo Park – 6×6 Double-Sided 65 lb. Cardstock – Winnie-The-Pooh
  • Echo Park – 12×12 inch Double-Sided Papers and Sticker Sheet – Winnie-The-Pooh Collection Kit
  • Echo Park – Frames and Tags – Winnie-The-Pooh
  • Cardstock Warehouse Paper Co. – 12×12 inch Solid Textured Cardstock Value Pack
  • Fraser Papers for William House – A2 Envelope – Genesis Text Milkweed Smooth

Ink

  • Pigma – Mircon 01 Fine Tip Pen – Black

Adhesives

Tools

  • Die Cutting Machine
  • Bone Folder
  • Stamping Blocks used as paperweights
  • Scissors
  • Pencil
  • We R Memories – Piercing Tool

Miscellaneous

  • Two Round Jump Rings – 6 mm

Birthday Treats

This card was made for Craft Roulette #215 whose parameters included for Project – Happy Birthday, petting zoo colors, scoop element and tab(s).

This card uses Karen Burniston’s die sets of Big Birthday Charms, Waterfall Card, Sweet Treats Charms, and Word Set 2 – Birthday. The Confection paper collection by Authentique is also a star of this card.

Cardbase: Use a 5.5 x4.25-inch white piece of cardstock and cover front with confetti sprinkles patterned paper. Die cut half round notch from Waterfall Card die set at center bottom of short side of card.

Waterfall: Watch the assembly video at the bottom of the linked page for the Waterfall Card. I cut the mechanism pieces (pull strip and base) from yellow cardstock. The largest square die was used to cut four double-sided patterned paper pages. Assemble waterfall as shown in video.

Food Pop-Ups: Cut and assemble the ice cream cone from the Sweet Treats Charms set. The slice of cake and large candle are made using the Big Birthday Charms set. Cut off the charm loops on both. Cake icing has Glossy Accents clear gel on it. Candle flames have glitter gloss on them.

Cut small strips of patterned cardstock and fold in half and then fold the ends to the center fold to form a pop-up cube to glue into the first two pages. Once these pop-up cubes’ glue has dried, attach the food elements to cubes. The large candle is popped-up with two strips of cardstock behind it.

Sentiments: “Celebrate!” and “Happy Birthday” are from Word Set 2. The balloons and streams are from the Big Birthday Charms set. The quote by Iris Murdoch was in the paper collection. The back of the pull tab was stamped with “Inspired by Craft Roulette. Made by” and signature and CR episode listed.

Envelope: The back flap of the envelope is decorated with leftover strips of patterned paper.

__________________________

Thank you for reading this blog post.

I hope this inspires you and makes you smile.

Please like and leave comments 😊

__________________________

Materials Used:

Dies

Stamps

  • Craft Roulette – Clear Stamps – The Basics

Papers

  • Authentique – 12×12 Double-Sided Cardstock – Confection Paper Pack
  • Black, Blue, Brown, White and Yellow Cardstock
  • Silver Mirror Cardstock
  • A2 Envelope – Cream with flecks

Ink

  • Hero Arts – Alcohol-Marker Friendly Ink Pad – Intense Black
  • Creative Craft Products – Dual Tip Alcohol Markers -mWG1 – Warm Grey
  • Pigma – Mircon 01 Fine Tip Pen – Black
  • Sharpie – Permanent Marker – Ultra Fine Tip – Blue, Green, Orange and Red
  • Spectrum – Tri-Blend Alcohol Markers – Bright Pink, Ice Blue and Orange
  • Stampin’ Up – Stampin’ Blends Markers – Light Daffodil Delight
  • Nuvo – Aqua Shimmer – Glitter Gloss

Adhesives

  • Neutral PH Adhesive by LINECO
  • Fine-Tip Glue Bottle

Tools

  • Die Cutting Machine
  • Stamping Blocks
  • Scissors
  • We R Memories – QuickStick
  • Craft Clips

Miscellaneous

  • Nuvo – Cream Drops – Golden Shimmer
  • Ranger – Glossy Accents

Pop-Up Father’s Day Card

This card was made for Craft Roulette #214 whose parameters included for Project – appreciation, candlelight colors, “Leave it to ….” element and retiform.

Cardbase: My finished card only used two rectangles of 9×3 3/4-inches (scored at 1/4-inch) and 8 3/4×3 3/4-inches. (Skip making the small panel.) After decorating front of tabbed rectangle, glue tab to back of smaller rectangle. Cover the card base in patterned paper.

Dancing Letters Mechanism: (Watch Karen Burniston’s Designer Challenge video for my inspiration for my card.) I did not reverse the Tea and Coffee Pop-Up mechanisms as Karen did. I folded all of my mechanisms as they were designed. My strips of plastic were the equivalent of two of the mechanism arm die glued together. Use glue dots or double-sided tape when attaching items to the plastic.

Sentiments:  The front sentiment was computer generated and printed on copy paper. Then fussy cut into two lines of words. And glued in place.

Envelope: This card would fit into a #10 business envelope.

______________________________

Thank you for reading this blog post.

I hope this inspires you and makes you smile.

Please like and leave comments 😊

______________________________

Materials Used:

Dies

Papers

  • Core’dination – 12×12 inch Textured Cardstock – Vintage Collection-Teal Blue
  • Stampin’ Up – 12×12 inch Double-Sided Designer Series Paper – Let’ Go Fishing
  • Stampin’ Up – 8.5×11 Cardstock – Thick Basic White
  • Clear Plastic Packaging

Ink

  • Ranger – Tim Holtz – Distress Oxide Ink- Mustard Seed and tumbled Glass
  • Pigma – Mircon 01 Fine Tip Pen – Black

Adhesives

Tools

  • Die Cutting Machine
  • Bone Folder
  • Scissors
  • Sponge Dauber
  • Blending Brush
  • Stamping Blocks used as paperweights

Cherry Blossoms in the Park

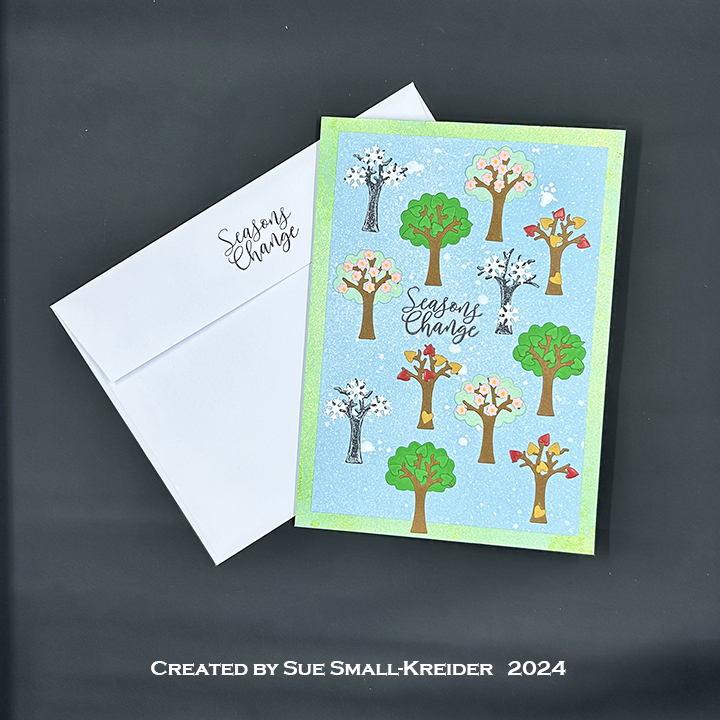
It’s time for the May 2024 Karen Burniston Design Team Challenge with the theme of From the Vault. I used for inspiration a 2021 Thanksgiving card and made it into a spring card.

My new card uses a similar cardbase to the original, but I skipped the foundation and the fourth fold.

Cardbase: Cut from medium-weight cardstock three rectangles 6 1/4 x6-inches and one 6-inch square.  Cut five 6-inch squares of decorative green paper Using double-sided tape on the back of four of the decorative panels adhere to both sides of two of the 6 1/4 x6-inches rectangles. Cut out windows from the center of these two covered panels using the largest Square Crosshatch die. Attach window panels to opposite sides of the 6-inch square. Adhere last 6 1/4 x6-inches rectangle to bottom of the 6-inch square. Cover the hinge flaps with a decorative paper. (This will be the back of the folded close card. On my card it is pink.) Cover the 6-inch square inside with green decorative paper and the bottom square with a grass like paper. On the back side of grass covered square cover with a stone wall patterned paper.

Trees: Use the tree and leaf dies in the Tree Pop-Up set to cut five of each die. Glue leaves to trees. Die-cut 16 times the flower die in the same set from pink. Using a tiny ball flower shaping tool, push each flower into stiff foam to shape petals. Top of trees will be glued to each side of window frame panels and tree trunk will be sandwiched in between the fence pieces. (You will use two trees per window panel.) Wait to glue onto cardbase until one layer of fence is adhered to cardbase.

Fence: From the Iron Fence Pop-Up set, cut eight of the fence die in black. Trim off the end post on one piece and then trim off just before the fifth pence post a section of fence from a second piece to made a fence that is wide enough to span the 6-inch cardbase panels. Made five of theses fence sections. Glue a section to the bottom edge of one of the window panels. Attach a tree. Glue a fence to other side of window panel matching all the scrollwork up. Adhere remaining tree and fence to 6-inch square panel.

Tulips & Tree Flowers: Add six dots of glue to tree leaves on one panel and place tiny pink flowers in glue using the pointed tip of QuickStik to firmly attached to leaves. Continue with each of the five trees until flowers are all attached.

Cut from green cardstock 25 of the tulip base die in the Garden Charms set. Trim off charm loop from flower bases. From yellow cardstock cut 50 tulip flower tops. Glue a yellow top to front and back of all the flower bases. To create the flaming streaks of color, use a red brush marker starting at the bottom of the yellow tulip and drawing up to the points following the curves of the tulip shape.

Sentiments: Both the shadow die and word die were used for the “Happy Birthday.” The inside sentiment of “Happy Spring” is a words-only die.

Envelope: The card will fit in a catalog envelope of 6×9-inches.

Thank you for reading this blog post. I hope this inspires you and makes you smile. Please like and leave comments 😊

Materials Used:

Dies

Papers

  • Core’dinations – 12×12 Single-Sided Textured Cardstock – Light green Crosshatch
  • Honey Bee Stamps – 6×8.5 Double-Sided Premium #65 Cardstock – Grain and Grunge
  • Hot off the Press – 12×12 Double-Sided Paper Pack – Spice Market
  • Colored and White Cardstock

Ink

  • Pigma – Mircon 01 Fine Tip Pen – Black
  • Ranger – Tim Holtz – Distress Ink- Frayed Burlap
  • Scrapbook.com – Glitter Brush Marker – Red, Blush & Mint
  • Sharpie – Permanent Marker – Fine Tip –Green
  • Sharpie – Permanent Marker – Ultra Fine Tip – Green
  • Stampin’ Up – Stampin’ Blends Markers – Light Daffodil Delight

Adhesives

Tools

  • Die Cutting Machine
  • Scoring Board
  • Bone Folder
  • Craft Mat
  • We R Memories – QuickStik
  • Sponge Dauber
  • Stamping Blocks used as paperweights
  • Scissors
  • Pencil
  • Paper tape
  • Flower Shaping Ball Tool
  • Stiff Foam for flower shaping

Flower Pop-Up BeeDay Card

This card was made for Craft Roulette #212 whose parameters included a card for a co-worker, kites in the sky colors, April element and sparkle.

I used products available from Craftstash – USA or –UK

Cardbase: I used thin papers to cover the four panels of the purchase A7 (5×7-inch) cardbase.  The green paper is from the Hot off the Press Pretty Papers. The front mustard yellow paper is from the Hot off the Press Spice Market.

Sentiments: Stamps used on the card front and inside the card are from the Sentimentally Yours – Botanical Bees – gift set in Creative Stamping issue 99, August 2021. The stamps on the back are from Craft Roulette – The Basics.

Pop-Up Flowers: Watch the Sam Calcott assembly video for the Pretty Blooms set.

Envelope: Stamped on the envelope back in black ink are a bee buzzing around a flower and the sentiment “Just bee-cause” from the Sentimentally Yours – Botanical Bees set.

Thank you for reading this blog post. I hope this inspires you and makes you smile. Please like and leave comments 😊

Materials Used:

Dies

  • Made to Surprise by Sam Calcott – Metal Dies – Pretty Blooms

Stamps

  • Sentimentally Yours – Clear Stamps – Botanical Bees – gift set in Creative Stamping issue 99, August 2021
  • Made to Surprise by Sam Calcott – Clear Stamps – Pretty Blooms
  • Craft Roulette – Clear Stamps – The Basics

Papers

  • Keep It Simple – 6×6 Double-Sided Cardstock – Back to Basics Lemon Collection Pack
  • Hot Off The Press – 8.5×11 inch Single-Sided Papers – Pretty Papers
  • Hot Off The Press – 12×12 inch Double-Sided Papers – Spice Market
  • Bazzill – 8.5×11 Cardstock – Gumdrop 5-5154
  • Gold Foil Cardstock
  • White Cardstock
  • Park Lane Paperie – A7 Cardbase and Envelope – White

Ink

  • Memento  – Fade-Resistant Dye Ink – Tuxedo Black
  • Simon Says Stamp – Pawsitivity Saturated Ink – Sunbeam
  • Stampin’ Up – Classic Ink Pad – Tranquil Tide
  • Scrapbook.com – Glitter Brush Marker – Sunshine Yellow
  • Pigma – Mircon 01 Fine Tip Pen – Black

Adhesives

  • Neutral PH Adhesive by LINECO
  • Fine-Tip Glue Bottle

Tools

  • Die Cutting Machine
  • Bone Folder
  • Stamping Platform
  • LDRS – Stampendable Stamping Tool
  • Stamping Blocks used as paperweights
  • Scissors
  • Pencil

Miscellaneous

  • Nuvo – Glitter Drops – Yellow Bird

‘Hole’ Foods

If we could be eating more ‘hole’ foods, what a sweet world it would be. Doughnuts and bagels are tasty carbohydrate treats and a theme for this interactive birthday card which uses Karen Burniston dies and Trinity stamps.

Cardbase:  Cut a 4 1/4 x 11-inch rectangle of a single-sided striped cardstock. Score and fold into a top fold A2 (4 1/4 x 5 1/2-inch.) Cut from kraft cardstock, 13 doughnut charms from the Sweet Treats Charms set and trim off the charm loop. On ten of the doughnuts add black poppy seeds to make into bagels. Glue seven bagels onto the front of cardbase. Cut another bagel in half and save with the last two bagels to complete the decorating of the card front once the Frame Pop-Up is added. (Save the remaining three doughnuts for the doughnut section.)

Frame Pop-Up:  (Watch the assembly video at the bottom of the linked page for the Frame Pop-Up.) From the striped cardstock cut the two square base pieces and pull strip of the Frame Pop-Up set. Assemble as directed, coloring the arrow purple to match the stripes. Attach to the card base with staples. Cover staples with two whole bagels. Add half bagels at the top edge of the frame pop-up.

Doughnuts:  Cut the largest plain circle in the Crosshatch Circles set from kraft cardstock and then using the golf ball circle die in the Sports Charms set, cut the doughnut hole from the larger circle. Trace the large doughnut onto pink cardstock and cut a smear of icing from the pink to cover the doughnut. Glue pink icing onto doughnut. Us a chocolate glitter brush pen to add a drizzle of chocolate. Add dots of glue randomly and add clay colored sprinkles. Cut from pink three icing pieces from the Sweet Treats Charms set. Glue icing to the three remaining doughnut charms cut in the cardbase section.

Attach the large doughnut to the front of the frame pop-up. Add one doughnut inside the frame pop-up with foam squares. Add another doughnut to the inside of card and the remaining one to the envelope flap.

Sentiments:  Stamp “You’re a sprinkle donut in a bagel world” on white cardstock and trim to fit inside the frame pop-up. Stamp inside the card “You’re a year older…but you donut look it” and glue a doughnut between the two lines.  Die cut “Happy Birthday” and its shadow from pink cardstock. Cover the words with a chocolate glitter brush pen. Glue words and shadow together. Attach over the staples inside the card.

Envelope:  The card fits into an A2 envelope with the remaining doughnut on the flap.

Thank you for reading this blog post. I hope this inspires you and makes you smile. Please like and leave comments 😊

Materials Used:

Dies

Stamps

  • Trinity Stamps – Clear Stamps – A-Glaz-ing TPS-298

Papers

  • Dress My Craft – 121×12 Single-Sided Cardstock – Teenie Weenies
  • Kraft, Pink and White Cardstock

Ink

  • Hero Arts – Alcohol-Marker Friendly Ink Pad – Intense Black
  • Scrapbook.com – Glitter Brush Marker – Chocolate and Royal Purple
  • Pigma – Mircon 01 Fine Tip Pen – Black
  • Nuvo – Aqua Shimmer – Glitter Gloss

Adhesives

Tools

  • Die Cutting Machine
  • Score Board
  • Bone Folder
  • Stamping Platform
  • LDRS – Stampendable Stamping Tool
  • Craft Clips
  • Scissors
  • Stapler

Miscellaneous

  • Spellbinders – Clay Shaker Elements – Sweet Sprinkles

Time Flies When You Are Having Fun

This card was made for Craft Roulette #211 whose parameters included good tidings, summer colors, mechanical element and tie closure.

This is a retirement card for someone who loves working with mechanical action.

(Please note that the Tonic Craft Kit 59 used in this card is no longer available. The Karen Burniston dies however are still available and links are provided to them.)

Cardbase: I used a purchased A7 (5×7-inch) cardbase and matching envelope. Each of the four panels were covered with coordinating papers in either watermelon pink or rind green. The circle was cut thru the front panel using the clock dial circle die.

Clock: Using three different green cardstock, they were cut with the main clock base die from the Tonic Craft Kit 59. The darkest green was trimmed to just the bottom and side trims, while the green patterned paper had the clock dial circle cut out and two bottom art-deco corner die-cut as well. Matching up the patterned green piece with the light green piece, the clock dial circle was cut in the light green piece. The dark green trim was attached to the patterned green piece before having a piece of clear plastic packaging adhered with thin double-sided tape to its backside. Sandwiching the plastic between the patterned green piece and light green piece by using double-sided tape again. The clock was glued onto the card front matching up the circle apertures.

Moving Gears: I watched Karen Burniston’s Double Spinner video at the bottom of her Mailbox Pop-Up page before adding the spinning gears pop-up to my card. I switched out gear dies from the Tonic Craft Kit 59 set for her fancy labels and gardening charms, but I followed her technique exactly to create the spinning gears. Gears were cut from steel blue and cooper oxidized foil cardstock.

Sentiments: All the sentiments on the front of the card “Time flies when you’re having fun,” and “Happy Retirement” are from the Tonic Craft Kit 59. All stamped in black ink. The sentiments were stamped before the inside mechanical pop-ups were added. The personal message circle uses a large gear cut in blue oxidized metal foil cardstock (Tonic Craft Kit die) and a circle of pale gray cardstock using Karen Burniston’s Crosshatch Circles die set.

Envelope: The back flap was stamped in black ink “TIME to celebrate.”

Thank you for reading this blog post. I hope this inspires you and makes you smile. Please like and leave comments 😊

Materials Used:

Dies

Stamps

  • Tonic Studios – Tonic Craft Kit 59 – Clocks & Cogs

Papers

  • Bazzill – 8.5×11 Textured Cardstock – Easter Grass and Gumdrop
  • Core’dinations – 12×12 inch Single-Sided Paper – Light Green Crosshatch
  • Craft Consortium – A4 Solid Colour Double-Sided Paper – Gardener’s Delight
  • Hunkydory – A4 Single-Sided Mirri Cardstock – Oxidised Metals Collection
  • Keep It Simple – 6×9 Double-Sided Cardstock – Back To Basics Collection Pack – Ruby
  • Keep It Simple – 12×12 Double-Sided Cardstock – Jade Collection Pack – Spearmint: Linen
  • Gold Foil cardstock
  • Green Cardstock
  • Plastic Packaging
  • Park Lane Paperie – A7 Cardbase and Envelope – White

Ink

  • StazOn – Solvent Ink – Jet Black
  • Scrapbook.com – Glitter Brush Marker – Key Lime Green and Pretty Pink
  • Pigma – Mircon 01 Fine Tip Pen – Black

Adhesives

Tools

  • Die Cutting Machine
  • Bone Folder
  • Stamping Platform
  • LDRS – Stampendable Stamping Tool
  • Tweezers
  • Stamping Blocks used as paperweights
  • Scissors

Miscellaneous

  • Organza Ribbon – 1/4-inch wide – Green

Owl Post Birthday Message

Who doesn’t enjoy receiving mail, but mail by Owl Post is special. This Harry Potter themed birthday card was a commissioned card for a Potter fan.

I used a new die set from Spellbinders for the owl on top of the book and an older die and stamp set from Concord & 9th for the envelope with pull out birthday wishes.

Cardbase: A purchased A7 (5×7-inch) cardbase and envelope was covered on the outside panels with patterned paper from Ciao Bella’ Wizard Academy paper pad. A leftover strip from the back of the card was saved for the small envelope step.

Owl and Book: (Watch assembly video first.) I found it easier to place the glasses on after adding the eyebrows and then adding the eyes. (I cut the black piece of the eyes out of white and colored the bottom “U” shapes yellow and then glued them inside the black pieces.) The beak is popped up on a tiny piece of foam tape so the envelope can fit under it. I cut the scarf from white cardstock and colored the various pieces yellow and red to create the striped scarf. To get the beak, envelope seal and book cover to sparkle, I used glitter brush pens. The book is glued flat to the card front and the owl is popped up on foam tape squares.

Small Envelope and Message: (Watch assembly video first.) Using the small envelope die in the Concord and 9th cut one from light grey cardstock. Fold envelope on score marks and open back up. Using the small slot die in the set cut a slot in the bottom center of envelope for the message piece to slide through. (I made the mistake of putting the slot at the top of the envelope center and had to cover the grey inside of the envelope below the slot with white.) Figure out the placement of the envelope inside the card and mark with a pencil where the slot goes and die cut it. Using the wide “T” shaped die in the set, cut one from white cardstock. Use the birthday sentiment stamp from the coordinating stamp set to get the message onto the strip.

Glue envelope center back onto inside of card panel matching up the slots. Thread message strip through the slot so that the bottom of the strip is on the back side of the card.  Stamp the “Pull Here” on the top of the inside of the envelope just above the white strip. Glue the envelop bottom to its sides making sure that the white strip can move freely though the envelope. Push the white strip so that the envelope can close and on the back side of the card, place a strip of foam tape just below the “T” of the white stripe to act as a stopper for the strip. Add foam tape along the sides of the white stripe to be the channel it will follow. Peel the backing paper from foam. tape Place extra strip of pattern paper over the foam tape. Test message stripe coming out of envelope. Add red ribbon seal from the Spellbinder’s owl set to top flap of envelope.

Card Envelope: The black glasses frame is cut using the owl die set and glued onto the back envelope flap.

Personalization: The recipient’s name was placed above the owl in the archway using Karen Burniston’s Mini Alphabet.

__________________________________________

Thank you for reading this blog post. I hope this inspires you and makes you smile.

Please like and leave comments 😊

__________________________________________

Materials Used:

Dies

Stamps

  • Concord & 9th  – Mail Drop Stamp Set

Papers

  • Ciao Bell Paper Company – 8×8 Double-Sided Paper Pad  – Wizard Academy – CBH071
  • Fun Stampers Journey  – 8.5×11 Cardstock – Tin Pail
  • Blacks, Blues, White and Yellow Cardstock
  • Park Lane Paperie – A7 Cardbase and Envelope – White

Ink

  • StazOn – Solvent Ink – Jet Black
  • Stampin’ Up – Stampin’ Blends Markers – Light and Dark Daffodil Delight
  • Scrapbook.com – Glitter Brush Marker – Yellow
  • Scrapbook.com – Glitter Brush Marker – Red
  • Sharpie – Permanent Marker – Fine Tip – Red
  • Pigma – Mircon 01 Fine Tip Pen – Black

Adhesives

Tools

  • Die Cutting Machine
  • Bone Folder
  • Stamping Platform
  • LDRS – Stampendable Stamping Tool
  • We R Memories – QuickStick
  • Tweezers
  • Stamping Blocks
  • Scissors
  • T-Ruler
  • Pencil
  • Tombow – Mono – Sand Eraser -512A