‘Hole’ Foods

If we could be eating more β€˜hole’ foods, what a sweet world it would be. Doughnuts and bagels are tasty carbohydrate treats and a theme for this interactive birthday card which uses Karen Burniston dies and Trinity stamps.

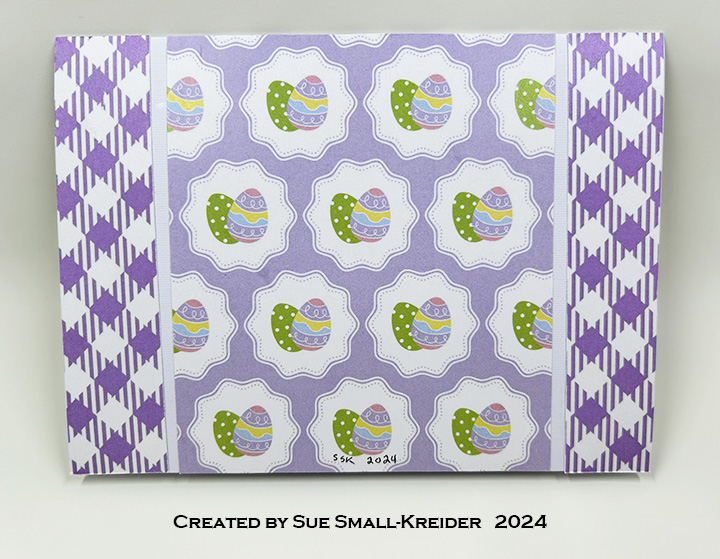
Cardbase:  Cut a 4 1/4 x 11-inch rectangle of a single-sided striped cardstock. Score and fold into a top fold A2 (4 1/4 x 5 1/2-inch.) Cut from kraft cardstock, 13 doughnut charms from the Sweet Treats Charms set and trim off the charm loop. On ten of the doughnuts add black poppy seeds to make into bagels. Glue seven bagels onto the front of cardbase. Cut another bagel in half and save with the last two bagels to complete the decorating of the card front once the Frame Pop-Up is added. (Save the remaining three doughnuts for the doughnut section.)

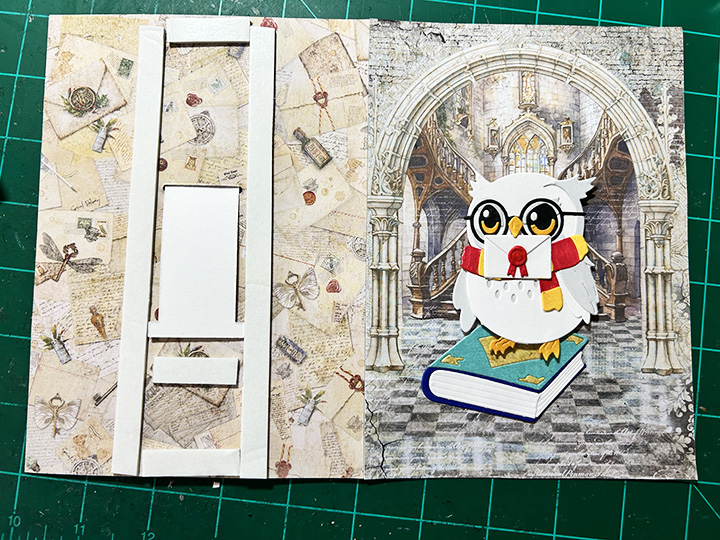
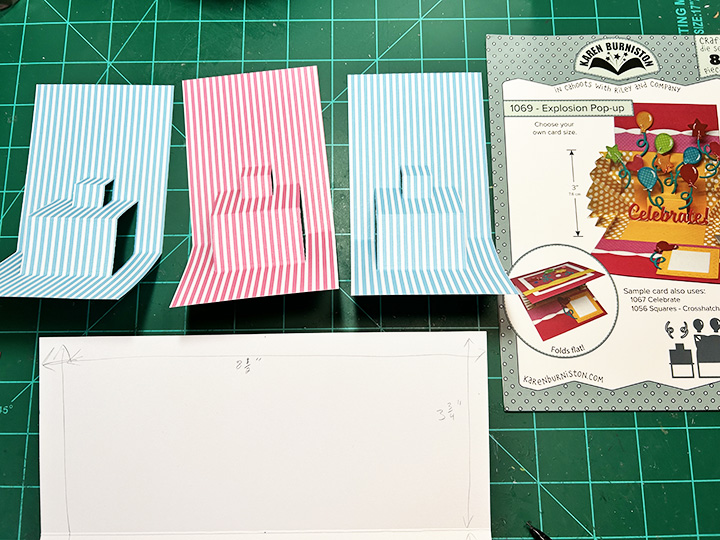
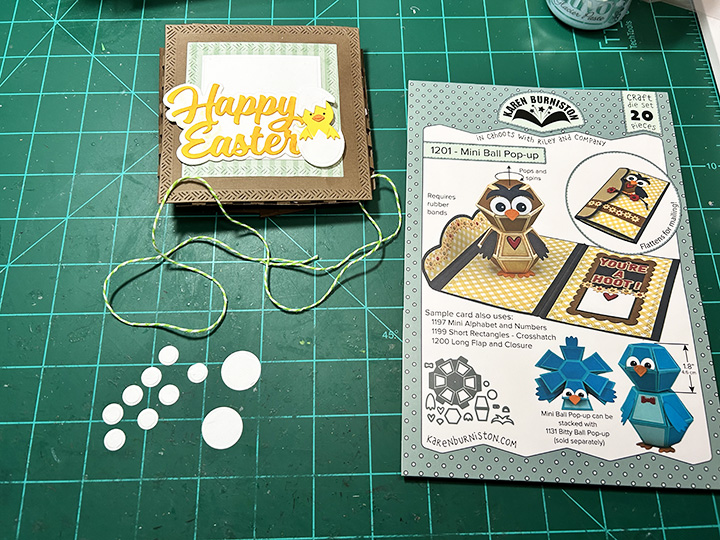
Frame Pop-Up:  (Watch the assembly video at the bottom of the linked page for the Frame Pop-Up.) From the striped cardstock cut the two square base pieces and pull strip of the Frame Pop-Up set. Assemble as directed, coloring the arrow purple to match the stripes. Attach to the card base with staples. Cover staples with two whole bagels. Add half bagels at the top edge of the frame pop-up.

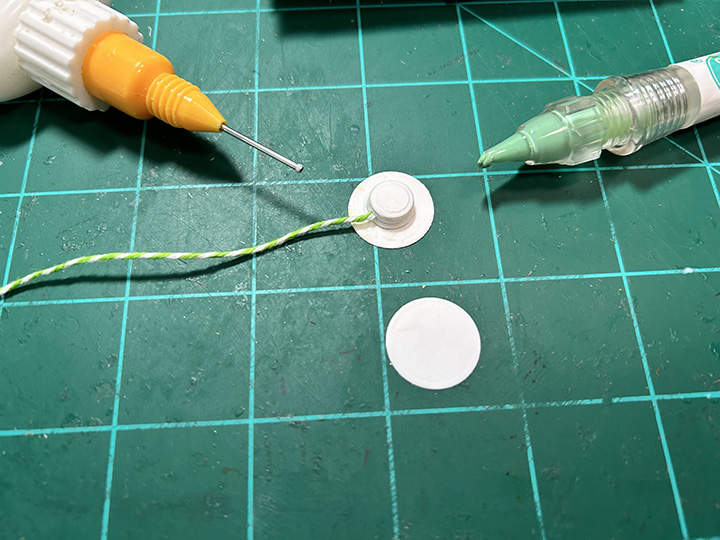
Doughnuts:  Cut the largest plain circle in the Crosshatch Circles set from kraft cardstock and then using the golf ball circle die in the Sports Charms set, cut the doughnut hole from the larger circle. Trace the large doughnut onto pink cardstock and cut a smear of icing from the pink to cover the doughnut. Glue pink icing onto doughnut. Us a chocolate glitter brush pen to add a drizzle of chocolate. Add dots of glue randomly and add clay colored sprinkles. Cut from pink three icing pieces from the Sweet Treats Charms set. Glue icing to the three remaining doughnut charms cut in the cardbase section.

Attach the large doughnut to the front of the frame pop-up. Add one doughnut inside the frame pop-up with foam squares. Add another doughnut to the inside of card and the remaining one to the envelope flap.

Sentiments:  Stamp β€œYou’re a sprinkle donut in a bagel world” on white cardstock and trim to fit inside the frame pop-up. Stamp inside the card β€œYou’re a year older…but you donut look it” and glue a doughnut between the two lines.  Die cut β€œHappy Birthday” and its shadow from pink cardstock. Cover the words with a chocolate glitter brush pen. Glue words and shadow together. Attach over the staples inside the card.

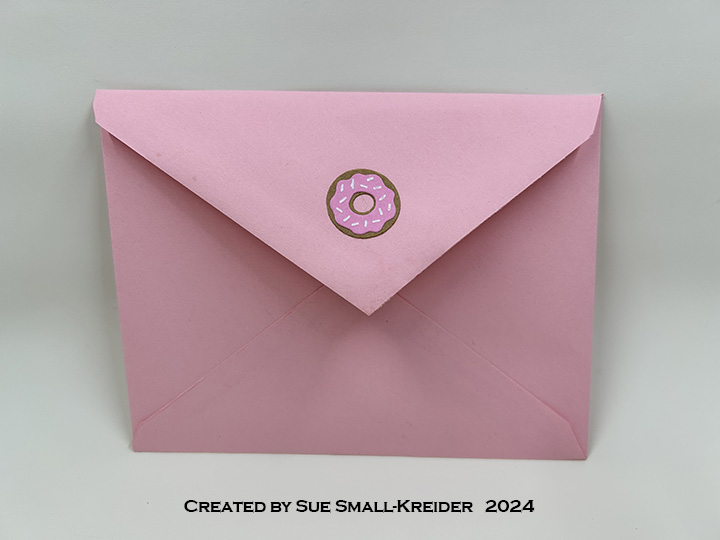
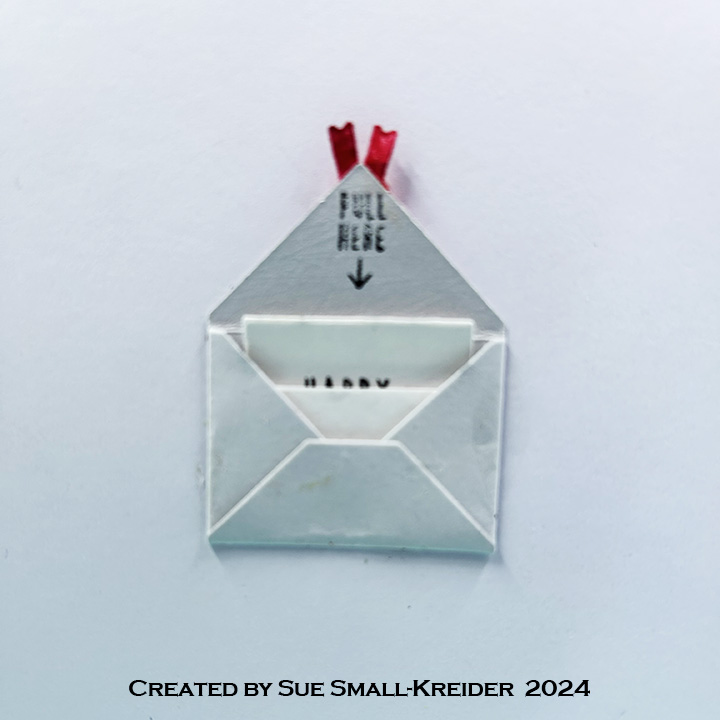
Envelope:  The card fits into an A2 envelope with the remaining doughnut on the flap.

Thank you for reading this blog post. I hope this inspires you and makes you smile. Please like and leave comments 😊

Materials Used:

Dies

Stamps

  • Trinity Stamps – Clear Stamps – A-Glaz-ing TPS-298

Papers

  • Dress My Craft – 121×12 Single-Sided Cardstock – Teenie Weenies
  • Kraft, Pink and White Cardstock

Ink

  • Hero Arts – Alcohol-Marker Friendly Ink Pad – Intense Black
  • Scrapbook.com – Glitter Brush Marker – Chocolate and Royal Purple
  • Pigma – Mircon 01 Fine Tip Pen – Black
  • Nuvo – Aqua Shimmer – Glitter Gloss

Adhesives

Tools

  • Die Cutting Machine
  • Score Board
  • Bone Folder
  • Stamping Platform
  • LDRS – Stampendable Stamping Tool
  • Craft Clips
  • Scissors
  • Stapler

Miscellaneous

  • Spellbinders – Clay Shaker Elements – Sweet Sprinkles

Time Flies When You Are Having Fun

This card was made for Craft Roulette #211 whose parameters included good tidings, summer colors, mechanical element and tie closure.

This is a retirement card for someone who loves working with mechanical action.

(Please note that the Tonic Craft Kit 59 used in this card is no longer available. The Karen Burniston dies however are still available and links are provided to them.)

Cardbase: I used a purchased A7 (5×7-inch) cardbase and matching envelope. Each of the four panels were covered with coordinating papers in either watermelon pink or rind green. The circle was cut thru the front panel using the clock dial circle die.

Clock: Using three different green cardstock, they were cut with the main clock base die from the Tonic Craft Kit 59. The darkest green was trimmed to just the bottom and side trims, while the green patterned paper had the clock dial circle cut out and two bottom art-deco corner die-cut as well. Matching up the patterned green piece with the light green piece, the clock dial circle was cut in the light green piece. The dark green trim was attached to the patterned green piece before having a piece of clear plastic packaging adhered with thin double-sided tape to its backside. Sandwiching the plastic between the patterned green piece and light green piece by using double-sided tape again. The clock was glued onto the card front matching up the circle apertures.

Moving Gears: I watched Karen Burniston’s Double Spinner video at the bottom of her Mailbox Pop-Up page before adding the spinning gears pop-up to my card. I switched out gear dies from the Tonic Craft Kit 59 set for her fancy labels and gardening charms, but I followed her technique exactly to create the spinning gears. Gears were cut from steel blue and cooper oxidized foil cardstock.

Sentiments: All the sentiments on the front of the card β€œTime flies when you’re having fun,” and β€œHappy Retirement” are from the Tonic Craft Kit 59. All stamped in black ink. The sentiments were stamped before the inside mechanical pop-ups were added. The personal message circle uses a large gear cut in blue oxidized metal foil cardstock (Tonic Craft Kit die) and a circle of pale gray cardstock using Karen Burniston’s Crosshatch Circles die set.

Envelope: The back flap was stamped in black ink β€œTIME to celebrate.”

Thank you for reading this blog post. I hope this inspires you and makes you smile. Please like and leave comments 😊

Materials Used:

Dies

Stamps

  • Tonic Studios – Tonic Craft Kit 59 – Clocks & Cogs

Papers

  • Bazzill – 8.5×11 Textured Cardstock – Easter Grass and Gumdrop
  • Core’dinations – 12×12 inch Single-Sided Paper – Light Green Crosshatch
  • Craft Consortium – A4 Solid Colour Double-Sided Paper – Gardener’s Delight
  • Hunkydory – A4 Single-Sided Mirri Cardstock – Oxidised Metals Collection
  • Keep It Simple – 6×9 Double-Sided Cardstock – Back To Basics Collection Pack – Ruby
  • Keep It Simple – 12×12 Double-Sided Cardstock – Jade Collection Pack – Spearmint: Linen
  • Gold Foil cardstock
  • Green Cardstock
  • Plastic Packaging
  • Park Lane Paperie – A7 Cardbase and Envelope – White

Ink

  • StazOn – Solvent Ink – Jet Black
  • Scrapbook.com – Glitter Brush Marker – Key Lime Green and Pretty Pink
  • Pigma – Mircon 01 Fine Tip Pen – Black

Adhesives

Tools

  • Die Cutting Machine
  • Bone Folder
  • Stamping Platform
  • LDRS – Stampendable Stamping Tool
  • Tweezers
  • Stamping Blocks used as paperweights
  • Scissors

Miscellaneous

  • Organza Ribbon – 1/4-inch wide – Green

Owl Post Birthday Message

Who doesn’t enjoy receiving mail, but mail by Owl Post is special. This Harry Potter themed birthday card was a commissioned card for a Potter fan.

I used a new die set from Spellbinders for the owl on top of the book and an older die and stamp set from Concord & 9th for the envelope with pull out birthday wishes.

Cardbase: A purchased A7 (5×7-inch) cardbase and envelope was covered on the outside panels with patterned paper from Ciao Bella’ Wizard Academy paper pad. A leftover strip from the back of the card was saved for the small envelope step.

Owl and Book: (Watch assembly video first.) I found it easier to place the glasses on after adding the eyebrows and then adding the eyes. (I cut the black piece of the eyes out of white and colored the bottom β€œU” shapes yellow and then glued them inside the black pieces.) The beak is popped up on a tiny piece of foam tape so the envelope can fit under it. I cut the scarf from white cardstock and colored the various pieces yellow and red to create the striped scarf. To get the beak, envelope seal and book cover to sparkle, I used glitter brush pens. The book is glued flat to the card front and the owl is popped up on foam tape squares.

Small Envelope and Message: (Watch assembly video first.) Using the small envelope die in the Concord and 9th cut one from light grey cardstock. Fold envelope on score marks and open back up. Using the small slot die in the set cut a slot in the bottom center of envelope for the message piece to slide through. (I made the mistake of putting the slot at the top of the envelope center and had to cover the grey inside of the envelope below the slot with white.) Figure out the placement of the envelope inside the card and mark with a pencil where the slot goes and die cut it. Using the wide β€œT” shaped die in the set, cut one from white cardstock. Use the birthday sentiment stamp from the coordinating stamp set to get the message onto the strip.

Glue envelope center back onto inside of card panel matching up the slots. Thread message strip through the slot so that the bottom of the strip is on the back side of the card.  Stamp the β€œPull Here” on the top of the inside of the envelope just above the white strip. Glue the envelop bottom to its sides making sure that the white strip can move freely though the envelope. Push the white strip so that the envelope can close and on the back side of the card, place a strip of foam tape just below the β€œT” of the white stripe to act as a stopper for the strip. Add foam tape along the sides of the white stripe to be the channel it will follow. Peel the backing paper from foam. tape Place extra strip of pattern paper over the foam tape. Test message stripe coming out of envelope. Add red ribbon seal from the Spellbinder’s owl set to top flap of envelope.

Card Envelope: The black glasses frame is cut using the owl die set and glued onto the back envelope flap.

Personalization: The recipient’s name was placed above the owl in the archway using Karen Burniston’s Mini Alphabet.

__________________________________________

Thank you for reading this blog post. I hope this inspires you and makes you smile.

Please like and leave comments 😊

__________________________________________

Materials Used:

Dies

Stamps

  • Concord & 9th  β€“ Mail Drop Stamp Set

Papers

  • Ciao Bell Paper Company – 8×8 Double-Sided Paper Pad  β€“ Wizard Academy – CBH071
  • Fun Stampers Journey  β€“ 8.5×11 Cardstock – Tin Pail
  • Blacks, Blues, White and Yellow Cardstock
  • Park Lane Paperie – A7 Cardbase and Envelope – White

Ink

  • StazOn – Solvent Ink – Jet Black
  • Stampin’ Up – Stampin’ Blends Markers – Light and Dark Daffodil Delight
  • Scrapbook.com – Glitter Brush Marker – Yellow
  • Scrapbook.com – Glitter Brush Marker – Red
  • Sharpie – Permanent Marker – Fine Tip – Red
  • Pigma – Mircon 01 Fine Tip Pen – Black

Adhesives

Tools

  • Die Cutting Machine
  • Bone Folder
  • Stamping Platform
  • LDRS – Stampendable Stamping Tool
  • We R Memories – QuickStick
  • Tweezers
  • Stamping Blocks
  • Scissors
  • T-Ruler
  • Pencil
  • Tombow – Mono – Sand Eraser -512A

Caffeinated Fun!

This card was made for Craft Roulette #210 whose parameters included Project must include action, Northern Lights colors, blackboard element(s) and oval(s).

Below is a recorded live video (37 minutes) that demonstrates how the inside-out card is made.

For a shorter experience watch the Craft Roulette process video below.

___________________________________

Thank you for experiencing this blog post.

I hope this inspires you and makes you smile.

Please like and leave comments 😊

__________________________________________

Materials Used:

Dies

Stamps

  • Crackerbox Stamps – Rubber Stamp – Coffee Cup
  • Riley & Co. – Funny Bones Rubber Stamps – Coffeeology
  • Riley & Co. – Funny Bones Rubber Stamps – If Your Eyes Hurt After Drinking Coffee

Papers

  • Memory Box – 8.5×11 Woodgrain Embossed Cardstock – Kraft
  • Black Cardstock

Ink

  • Ranger – Tim Holtz – Distress Ink- Walnut Stain
  • VersaMark – Watermark Ink Pad
  • American Crafts Embossing Pen
  • White Gel Pen
  • Hero Arts – Embossing Powder – White
  • Stampendous! – Glitter Embossing Powers Kit –  Mermaid Sea

Adhesives

Tools

  • Die Cutting Machine
  • Bone Folder
  • Stamping Platform
  • LDRS – Stampendable Stamping Tool
  • Dry Brush
  • Tweezers
  • Craft Mat
  • Stamping Blocks used as paperweights
  • Kat Scrappiness – Anti-Static Tool
  • Heat Tool
  • Craft Knife
  • Scissors
  • T-Ruler
  • Metal Ruler/Straight-Edge
  • Pencil
  • Tombow – Mono – Sand Eraser -512A

A Summer Fete Card

It’s time for the Karen Burniston April 2024 Design Team Challenge with the theme of Thirst Quencher. I chose lemonade as my thirst quencher and a card theme of a summer fete (festival or fair).

At a fete, there are generally small booths selling baked goods, drinks and other trinkets or handicrafts, so my card is a slimline (3 3/4 x 8 1/2-inch) card with three food booths using Karen Burniston dies.

Cardbase: Start with an 8 1/2 x 7 1/2-inch rectangle of a thick cardstock. (I used white.) Score at 3 1/2-inches and fold in half to create a top-fold 3 3/4 x 8 1/2-inch card base.

Booths: Cut three 6×3-inch panels of striped paper. (If you have longer than 6-inch striped paper cut them 7 1/2×3-inches.) Score and fold each panel at 3 3/4-inches. Using the pop-up center die from the Explosion Pop-Up, center the die on the fold of each panel. Β Train the folds as directed in the assembly video for the die set located at the bottom of the linked page. Glue pop-up panels inside card with the long side attaching to the inside top panel.Β  Cover the bottom panel with grassy patterned paper. (I cut strips of the 6×6-inch patterned paper 1-inch wide to go through the pop-ups and cover over the striped paper.) I used a border print card layer to created the tablecloths on each booth table.

Posts and Banners: The posts are cut from glossy white cardstock using the Street Lantern die with the scrolling arms cut off. The pendant banners are made using the die from the Twist Panel Pop-Up set and threading them onto baker’s twine. The twine was wrapped around the knob top of a post before gluing it in place. (The two ends of twine can be taped to the front of the card to be covered over by the front panel.) The green bows that cover the looped twine on the posts are from the Street Lantern Pop-Up set. (I found it helped with the opening and closing of the card to place a small drop of glue at the top back center of each pendant to keep them from becoming catch-points, but still allowing them some dimension.) I used computer generated β€œPies,” Lemonade” and β€œCakes” printed on coiper paper and cut out with the banner label from the Lorna Label Pop-Up set.

Card Front: You will need to create a panel to hide the banner twine ends under. Cut a 3 3/4 x 8 1/2-inch of blue cardstock and a 3 3/8x 8 1/4-inch rectangle of dotted printed paper. Glue the dotted paper on top of the blue cardstock with an even border all around. Cut ten fishtailed banners from decorative paper using the die from the Twist Panel Pop-Up set. Cut the letters and shadows to spell out β€œSUMMER FETE” using the Mini Alphabet die set. Glue the letters onto the shadows and shadows onto the banners being careful not to cover the holes at the top of the banners.

Thread the two words on two separate pieces of twine. Die cut the β€œEnjoy the” from different colors using the Enjoy The Ride set. Once the placement of the words and banners have been established, tape the banner twine ends to the back of the panel. Glue the words and banners down onto the panel. Attach panel to cardbase front. (I used glue and double-side Β½-inch tape.)

Pies: I created four pies using two different die sets. The top view lattice cherry pie and the key lime pie were created using the pie dies in the Baking Borders set. (I brushed the cherry pie red with a red glitter brush pen for some shine.) The horizontal pies were made with the pie die from the Picnic Elements set with the base piece cut from red and the crust cut from brown. All pie crust were inked with a light brown ink. The horizontal pie crusts had their slits inked red with an ultra-fine tipped red marker. I attached the horizontal pies using a foam square and a pop-up cube from a strip of white cardstock. (You could use the pop-up cube from the Oven Extras die set instead of making your own.)

Lemonade: The pitcher and glasses of lemonade were created from clear vellum with yellow cardstock behind. All the pieces were cut using the Picnic Elements die set. The pitcher is adhered to the pop-up base with a foam square and a drop of glue. The glasses are attached to a strip of clear packaging plastic with double sided tape all along the strip. The strip was threaded through the pop-up base and attached to the backside of the pop-up. (I covered the exposed adhesive on the strip with anti-static powder.)

Cakes: For these small cakes, I used the cupcakes in the Baking Borders set. I left the border base layer attached and trimmed off the excess behind the frosting. The bottom row has its center cake glued to the pop-up base while the upper row is attached to a pop-up cube.

Message Labels: The two white scalloped labels inside the card are for a personal message and are cut using the die from the Twist Panel Pop-Up set. (I did two to hide the seams of my patterned paper.)

Envelope: The card will fit into a #10 business size envelope.

_______________________________________

Thank you for reading this blog post.

I hope this inspires you and makes you smile.

Please like and leave comments 😊

_______________________________________

Materials Used:

Dies

Papers

  • Ink N’ Splatter – 6×6 Double-Sided Paper Pack – Strawberry Fields
  • Queen & Co. – 6×6 inch Double-Sided Papers – Simple Stripes
  • Stampin’ Up – 8.5×11 Thick Cardstock – Basic White
  • The Paper Cut – 8.5×11 Glossy 10 PT Kromekote Cardstock – White
  • The Paper Studio – 8.5×11 Printed Paper – Random Dot – Robin’s Egg Blue
  • The Paper Studio – 8.5×11 Clear Vellum
  • Anna Griffin – All Occasion Pretty Paintings Card Making Kit – Layer Card
  • Clear Plastic Packaging
  • Colored Cardstock
  • #10 Business Envelope

Ink

  • Ranger – Tim Holtz – Distress Ink- Frayed Burlap
  • Scrapbook.com – Glitter Brush Marker – Red
  • Sharpie – Permanent Marker – Fine Tip – Red
  • Sharpie – Permanent Marker – Ultra Fine Tip – Red
  • Pigma – Mircon 01 Fine Tip Pen – Black

Adhesives

Tools

  • Die Cutting Machine
  • Scoring Board
  • Bone Folder
  • Craft Mat
  • Paper Trimmer
  • We R Memories – QuickStick
  • Craft Clips
  • Sponge Dauber
  • Stamping Blocks used as paperweights
  • This Calls For Confetti – It’s No Secret – Anti-Static Powder Tool
  • Scissors
  • T-Ruler
  • Pencil
  • Tombow – Mono – Sand Eraser -512A

Miscellaneous

  • Baker’s Twine – Yellow and White

Egg Shaker Card for Easter

I saw a side-fold of like this card on social media and decided to make my own version using a top fold A6 (4 1/2 x 6 1/4-inches) purchased card base and the egg die from Karen Burniston’s Spring Animals die set.

Cardbase: Using a purchased A6 card base, I used double sided patterned paper from Kat Scrappiness to make a mat frame on the front panel, piecing it together as the patterned paper was 1/2-inch smaller than the card height. Added a yellow 5 3/4 x 4 1/4-inches panel over mat frame. On the back panel, I used the leftover pieces to make an interesting symmetrical design utilizing both patterned sides of the paper.

Egg Panel: A 4×5 1/2-inches rectangle cut from white cardstock, I lightly marked in pencil lines at 1 1/8-inches, 2 3/4-inches and 4 3/8-inches. Along the tops and bottoms of these lines I marked 5/16-inches from the edge. These β€œT” marks where to center the top or bottom of the egg die. I used the center crack in the egg die to center on the vertical lines.  After die-cutting out the six eggs, I erased the pencil marks. (I found it easier to sketch out the egg placement on the back side of the card, tracing around the die to see if it looked right before die-cutting from the front of the panel.) (I added two clay flower shaker elements to the front of the card.)

Shaker Assembly: Position the white panel over the yellow panel and mark the corners of the white panel on the yellow as well as tracing the egg cut-outs onto the yellow. Using double-sided tape, adhere a 4×5 1/2-inches rectangle of clear acetate/film to the back of the white panel. Add strips of narrow foam tape to create boxes around the traced eggs on yellow panel. Using an anti static tool to apply powder to the inside of each box (including the sides of the sides of the foam tape) and back side of acetate/film on white panel. Add confetti and clay sprinkles to each box, avoid putting too much in each box and level out any high points to below the foam tape level. Holding the card base, carefully peel off the backing paper on the foam tape. Remove any confetti from tape. Using the corner marks on the yellow panel line-up the white panel and adhere to foam tape, sandwiching the confetti inside the boxes. (I like to use the confetti sequins from This Calls For Confetti who have a variety of colors, sizes and finishes and have wonderfully quick customer service/delivery time. They also have the best anti-static tool for making shaker cards.)

Sentiment: I cut out the words only using Karen Burniston’s Happy Easter word die from purple cardstock for the inside of the card.

Envelope: I cut out a sticker from the decorative paper to embellish the back of the envelope flap.

__________________________________________________________

Thank you for reading this blog post. I hope this inspires you and makes you smile.

Please like and leave comments 😊

__________________________________________________________

Materials Used:

Dies

Papers

  • Kat Scrappiness – Slimline Sized Patterned Paper (10.75×4 inches)– Easter on Parade
  • White and Yellow Cardstock
  • Dura-Lar .0005 Clear Film Acetate
  • Park Lane Paperie – A6 Cardbase and Envelope – White

Shaker Elements

  • This Calls For Confetti – Bokeh Bliss Teeny Tiny Mix
  • This Calls For Confetti – Crystal Metallic Aqua Violet
  • This Calls For Confetti – Opaque Iridescent Blue
  • This Calls For Confetti – Opaque Iridescent Blush
  • This Calls For Confetti – Opaque Iridescent Celadon
  • This Calls For Confetti – Opaque Iridescent Scarlet
  • This Calls For Confetti – Opaque Iridescent Vanilla
  • This Calls For Confetti – Opaque Iridescent Blue
  • This Calls For Confetti – Opaque Iridescent Blue
  • Hobby Lobby – Inclusions – Flowers
  • Spellbinders – Sweet Sprinkles

Adhesives

Tools

  • Die Cutting Machine
  • We R Memories – QuickStick
  • Tweezers
  • This Calls For Confetti – It’s No Secret Anti Static Powder
  • Stamping Blocks used as paperweights
  • Scissors
  • T-Ruler
  • Pencil
  • Tombow – Mono – Sand Eraser -512A

Potted Pets Baby Pop-up Card

This card was made for Craft Roulette#206 whose parameters included Project type of card with a heart, vintage colors, plant(s) element and lace on the base.

In honor of Craft Roulette’s host Mary Gunn’s new grandchild, I made a new baby card using the parameters listed above.

Cardbase: I used a 5×7-inch purchase cardbase and covered all four panels with vintage green patterned paper. The decorative stripes and lacy decorations were scraps from the opposite side of the paper.

Potted Plants: I decorated the panels with potted animal planters that were made from solid color cardstock using My Favorite Things Potted Pets die set.

Pop-Up Twist Panel: I used Karen Burniston’s Twist Panel Pop-Up die set. Watch video below for instructions.

Sentiments: I used Karen Burniston Welcome and Baby Charms die sets to create the β€œWelcome Baby.” In the video above I explain how I used Karen Burniston’s Connectors word set dies to perform β€œword surgery” to create the phrase β€œoh baby.”

_____________________________________

Thank you for experiencing this blog post. I hope this inspires you and makes you smile.

Please like and leave comments 😊

____________________________________________

Materials Used:

Dies

Papers

  • Hot Off The Press – 12×12 Double-Sided Paper Pack – Spice Market
  • Bazzill – 8.5×11 Textured Cardstock – Tiara -18-1002
  • Black, Browns, Greens, Pink and White Cardstock
  • Park Lane Paperie – A7 Cardbase – White

Ink

  • Sharpie – Permanent Marker – Ultra Fine Tip – Black
  • Spectrum Noir – Tri-Blends – Orange Blend
  • Stampin’ Up – Stampin’ Blends Marker – Dark Daffodil Delight

Adhesives

Tools

  • Die Cutting Machine
  • Bone Folder
  • We R Memories – QuickStick
  • Tweezers
  • Craft Clips
  • Stamping Blocks used as paperweights
  • Corner Punch
  • Scissors
  • T-Ruler
  • Pencil

Bunny Cake Easter Card

It’s time for the Karen Burniston March 2024 Design Team Challenge with the theme of Bunny Ears.

I decide on a pop-up bunny cake using the Cake Pop-Up with the Animal Add-Ons 5 and Easter Borders along with the new Happy Easter sentiment and paper doilies.

______________________________________________________________________

Thank you for watching and reading this blog post. I hope this inspires you and makes you smile.

Please like and leave comments 😊

______________________________________________________________________

Materials Used:

Dies

Papers

  • Hot off The Press – Paper Pazazz – 12×12 Single-Sided Paper – Soft Tints Green Stripes
  • Keep It Simple – 12×12 Double-Sided Cardstock – Jade Collection Pack – Random Dot & Solid
  • Black, Green, Orange, Pink and White Cardstock
  • Park Lane Paperie – A7 Cardbase and Envelope – White

Ink

  • Ranger – Tim Holtz – Distress Ink- Vintage Photo
  • Sizzix – Luster Wax – Lilac Rainbow
  • Sharpie – Permanent Marker – Ultra Fine Tip – Black
  • Pigma – Mircon 01 Fine Tip Pen – Black

Adhesives

Tools

  • Tweezers
  • Sponge Dauber
  • Stamping Blocks used as paperweights
  • Scissors
  • Tweezers
  • Ruler
  • Pencil

Miscellaneous

  • 6 Heart Shaped Paper Doilies

Pop-Up Chick In A Basket

Wanting a basket to put a hatching chick pop-up ball in, I came up with a collapsible basket card for Easter using several of the new die sets in Karen Burniston’s February 2024 release.

How to make this interactive card:

Chick: Make two Mini Pop-up Balls – one entirely yellow and the other half yellow, half white. Assemble chick following Karen Burniston’s assembly video located at the bottom of the Mini Pop-up Balls page. Cut six of the top and bottom eggshell jagged pieces and one hexagon for the top of the egg from white cardstock using the dies from the Animal Add-on 5 die set.

Basket: Cut four of the basket pieces from the Wide Woven Basket Box Card set and assemble as shown in the KB assembly video at the bottom of the linked page. Trim off the side tabs on the four basket pieces. Watch the following video. Cut two of the largest crosshatch squares from brown.

Closure Sentiment: Cut the Shadow from the Happy Easter word set from white. Cur the words from yellow and ink bled to a darker yellow. Die cut eggshell and chick pieces following assembly video for Spring Animals.

Glue assemble chick to sentiment.Β  Cut eight of the smaller eye circles and two of the larger eye circles from the Mini Pop-up Balls die set. Glue four of the small circles onto one of the large circles. Cut a piece of string at least 24-inches long and glue one end on top of small circle stack. Glue the last four circles on top of the string end, thus sandwiching the string in center of the small circles stack of eight. Attach to top of stack the last large circle. Once the stack is dry, glue to the back of the sentiment and then onto top basket flap. Let dry with a weight on top of it.

Envelope: This card would either be hand delivered or mailed in a bubble pack envelope.

_______________________________________

Thank you for reading this blog post. I hope this inspires you and makes you smile.

Please like and leave comments 😊

_______________________________________

Materials Used:

Dies

Papers

  • Hot off The Press – Paper Pazazz – 12×12 Single-Sided Paper – Soft Tints Green Stripes
  • Black, Blue, Brown, Orange, White and Yellow Cardstock

Ink

  • Ranger – Tim Holtz – Distress Ink- Fossilized Amber and Vintage Photo
  • Pigma – Mircon 01 Fine Tip Pen – Black

Adhesives

Tools

  • Stamping Blocks used as paperweights
  • Scissors
  • Tombow – Mono – Sand Eraser -512A

Miscellaneous

  • 24-inches of Baker’s Twine