It’s Sneak Peak Week for Karen Burniston’s October 2024 release of new dies and sentiment stamps. These dies will be available for purchase on October 28, 2024 on the KB Riley LLC website.
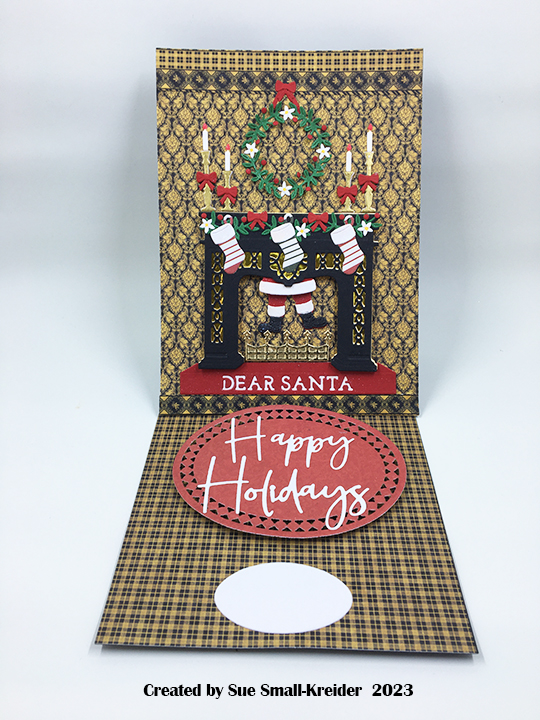
Today’s card is an A2 size Christmas card that uses the new die sets of Poinsettia and Merry Christmas Lorna Add-Ons along with Season of Cheer stamp set.

CARDBASE: Cut an 8×6-inch rectangle of a double-sided patterned paper and fold in half to form a top-fold 4×6-inch cardbase.
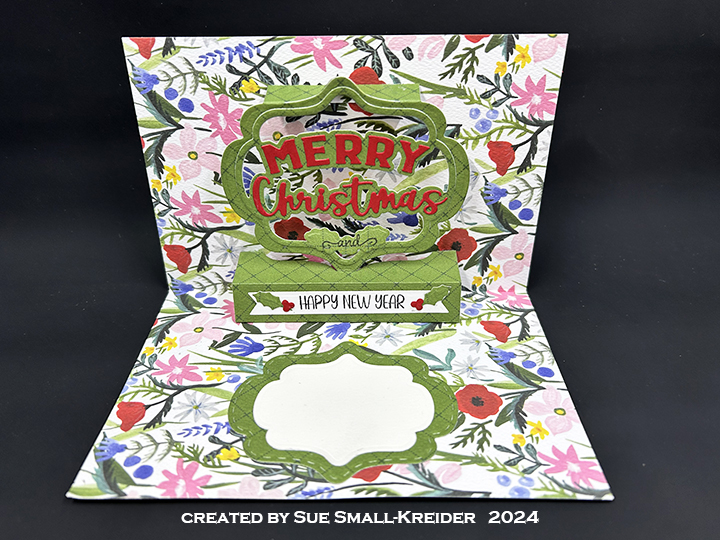
LORNA LABEL: Follow the assembly video for the Lorna Label Pop-Up but cut out a frame by sandwiching the largest decorator label inside the Lorna Label die. Glue the Merry Christmas Add-Ons frame to the Lorna Label frame and decorate with words from add-on set before gluing the Lorna label pop-up into the card.
POINSETTIA: From the Poinsettia die set, cut one of the large leaves die from green and another from red. Cut one red from smaller leaves die. Brush the edges of the leaves with ink slightly darker than the cardstock. Cut the small, dotted center piece once from red and once from yellow. Save the yellow dots to inlay into the red center. Glue the large red piece onto the large green piece and then top with smaller red piece. Make sure to alternate the leaves for full coverage. Adhere red and yellow flower center. Die cut five pine branches and two of the berry stems to add around the large flower.
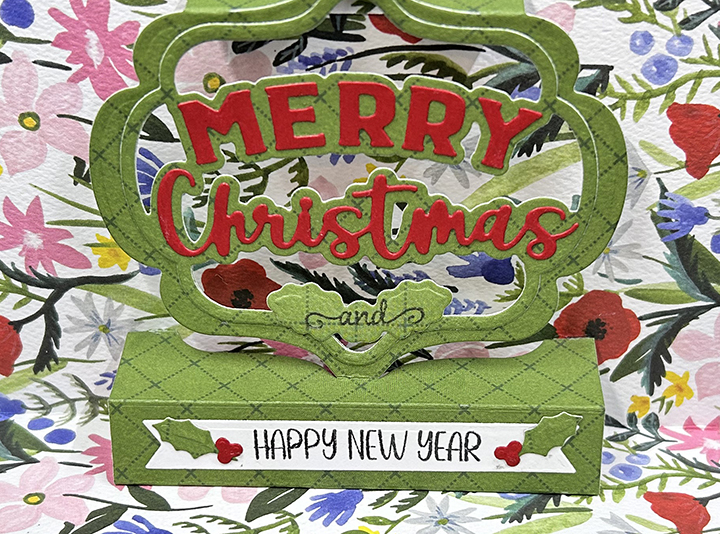
SENTIMENTS: The Merry Christmas Lorna Add-On set has a holly leaves shadow die that is just the right size to stamp the word “and” onto and glue to the bottom tip of the Lorna Label frame. The “and” and “Happy New Year” are from the Season of Cheer stamp set. The fishtail banner is a die in the Lorna Label Pop-Up set. The holly leaves and berries are in the Merry Christmas Lorna Add-On set.
___________________________________
Thank you for reading this blog post.
I hope this inspires you and makes you smile.
Please like and leave comments 😊
___________________________________
Disclaimer: Karen Burniston products are provided free of charge by the manufacturer for review and use. All other items were personally purchased. Compensated affiliate links used where or when possible, meaning I will receive a small percentage commission from these manufacturers at no cost to you. This will allow me to add more content to my YouTube channel and help out a lot. Thank you.
Materials Used:
Dies
- Karen Burniston in cahoots with Riley and Company – Merry Christmas Lorna Add-Ons – 1245
- Karen Burniston in cahoots with Riley and Company – Poinsettia – 1286
- Karen Burniston in cahoots with Riley and Company – Lorna Label Pop-Up – 1266
Stamps
Papers
- Bazzill – 8.5×11 Cardstock – Gumdrop -5-5154
- Carta Bella – 12×12 Double-Sided Cardstock – Flora No. 4 – Bold Stems
- Fun Stampers Journey – 8.5×11 Cardstock – Cranberry Bliss
- Cream and Yellow Cardstock
Ink
- Hero Arts – Alcohol-Marker Friendly Ink Pad – Intense Black
- Ranger – Tim Holtz – Distress Ink- Forest Moss and Lumberjack Plaid
- Sakura – Gelly Roll Pen – Medium – White
Adhesives
Tools
- Die Cutting Machine
- Bone Folder
- Stamping Block
- Scissors
- We R Memories – QuickStick
- Sponge Daubers
- Paper Masking Tape
Miscellaneous
- Red Organza Ribbon 1/4-inch wide