Bon Voyage and Smooth Seas

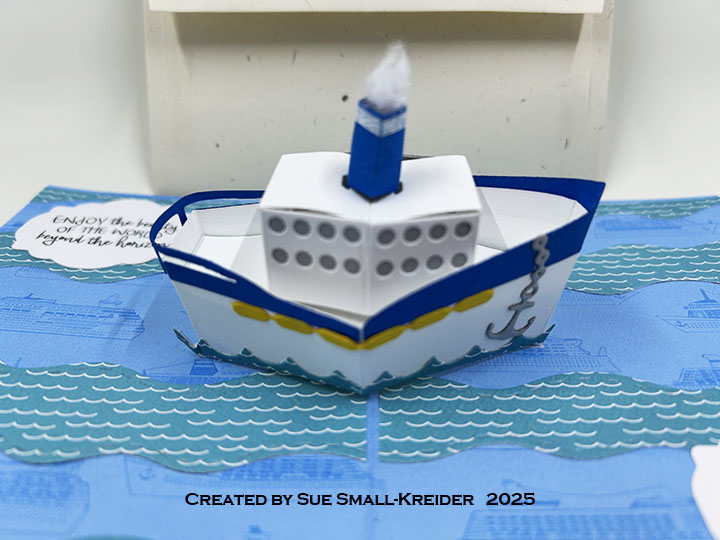
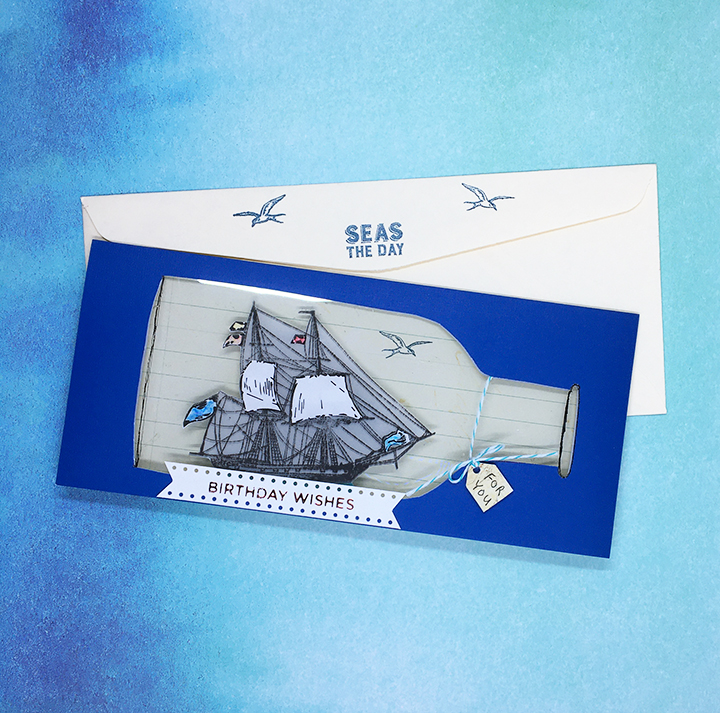
It’s Sneak Peek Week for Karen Burniston’s January 2025 release of eight new dies and four new clear stamps sets. For this Bon Voyage card I used several of the new sets including: Ocean Edges and Cruise Ship Add-On along with the previously released Boat Pop-Up and Rectangles and Labels – Crosshatch die sets and the new Cruise Greetings stamp set. The new release will be available on January 27, 2025.

Watch the process video to see how I made this card.

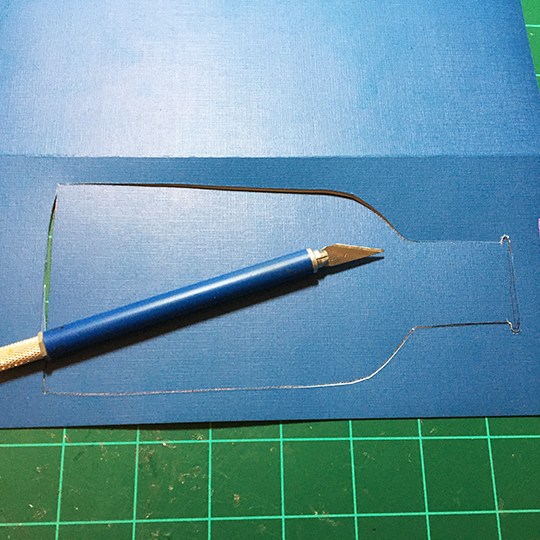
Cardbase: Using a 8.5×5.5-inch rectangle of double-sided patterned cardstock, fold rectangle in half to form a 4.25-inch wide by 5.5-inch tall side fold card. Decorate the inside with wavy ripples using the Ocean Edges dies. (I choose to let the cardbase paper pattern be one shade of the ocean waves while the other waves are cut from decorative cardstock with white water ripples on them. If you make several layers of waves the card will be very thick and hard to close. If this happens use the special die in the Cruise Ship Add-On set to cut two slots on either side of the fold to slide a paper clip through to hold the card open.)

Cruise Ship: Follow the directions to assemble the basic Boat Pop-Up (Assembly video at the bottom of the die set’s linked page.) Watch the video above for how to assemble the Cruise Ship Add-Ons. (I had an issue the first time I glued in the ship to the card. So, there are also tips on how to fix bent U-support pieces and ship’s tabs in the video.)

Sentiments: The inside stamped sentiments are from the Cruise Greetings stamp set and the fancy labels are the smaller label die in the Rectangles and Labels – Crosshatch set. Decorative paper journaling cards are the outside card sentiments.

Envelope: The card fits into an A2 (4.25x 5.5-inches) size envelope with an anchor and chain glued to the back flap. The anchor is from the Cruise Add-Ons die set.

___________________________________

Thank you for experiencing this blog post.

I hope this inspires you and makes you smile.

Please like and leave comments 😊

___________________________________

Disclaimer: Karen Burniston products are provided free of charge by the manufacturer for review and use. All other items were personally purchased. Compensated affiliate links used where or when possible, meaning I will receive a small percentage commission from these manufacturers at no cost to you. This will allow me to add more content to my YouTube channel and help out a lot. Thank you.

Materials Used:

Dies

Stamps

Papers

  • Carta Bella – 12×12 inch Double-Sided Cardstock – Bon Voyage – Bouy Bash
  • Carta Bella – 12×12 inch Double-Sided Cardstock – Bon Voyage – Journaling Cards
  • Bazzill – 8.5×11 Cardstock – Tiara -18-1002
  • Recollections – 8.5×11 65 lb. Cardstock – White
  • Blue and Yellow Cardstock
  • Fraser Papers for William House – A2 Envelope – Genesis Text Milkweed Smooth

Ink

Adhesives

Tools

  • Die Cutting Machine
  • Paper Trimmer
  • Bone Folder
  • Stamping Platform
  • LDRS – Stampendable Stamping Tool
  • Stamping Blocks used as paperweights
  • Scissors

Miscellaneous

  • Cotton Ball

Charting A Nautical Birthday

I often make cards with my father in mind. Growing up I visited a lot of historic sailing ships around the world with him. This is a birthday card in his honor.

For this pop-up 3D card, I used products from Scrappy Tails’ new Nautical 2023 June Collection.

Base: Stamp on kraft paper the Caribbean Map Stamp. Cut two of the Pop Up Stand from the map. Train the folds on each piece and glue tabs with slot for rubber band together. Add rubber band. (I used a #12 band.)

Wheel: Cut two wheels from embossed woodgrain paper and two wheels from brown cardstock using the large die from the Ship Wheel die set. Using sponge daubers, ink the woodgrain wheels with browns and black. Glue the brown cardstock wheels to the back of the woodgrain wheels. Die cut from gold cardstock the “Seas the day” sentiment letters included in the Ship Wheel set. (I cut a letter placement guild from scrap cardstock. Putting a drop of glue on the back of my hand to drip the letters in before placing them on the wheel.)

Add from gold cardstock the center wheel tuning bearings and screw heads to wheel. (While the set comes with tiny circles to cover the screws on the wheel, I elected to use Nuvo Drops for the screw heads.) Glue top handles of the two wheels together before gluing wheels to base.

Sentiment Banners: Three of the six hot foil banners in the Nautical Banner hot foil plates set were used – “Lets sail-ebrate!” “Happy Birthday” and “Just for You.” (I usually do batch hot foiling with my Spellbinders’ Glimmer Foil System because it takes time to set-up, heat-up and cool-down.)

Envelope: The card folds flat to fit into an A7 envelope that I decorated the back flap with the “Let’s Sail-ebrate!” banner in red foil.

Thank you for reading this blog post. I hope this inspires you and makes you smile. Please like and leave comments 😊

Want to see more of the Scrappy Tails nautical collection? Check out my blog posts:

Materials Used:

Dies & Foiling Plates

Stamps

Papers

  • MemoryBoxCo.com – 8.5×11 Embossed Cardstock – Woodgrain
  • Kraft Cardstock
  • Matte Gold Cardstock
  • Brown, White and Cream Cardstock
  • A7 ivory Envelope

Foils:

  • Spellbinders – Glimmer Hot Foil – Red
  • Spellbinders – Glimmer Hot Foil – Polished Brass

Ink

  • Memento – Fade-Resistant Dye ink – Tuxedo Black
  • Ranger – Tim Holtz – Distress Ink- Vintage Photo, Walnut Stain and Black Soot

Adhesives

Tools

  • Die Cutting Machine
  • Stamping Platform
  • LDRS – Stampendable Stamping Tool
  • Stamping Cloth
  • Sponge Dauber
  • Craft Mat
  • Scissors
  • Spellbinders -Glimmer Hot Foil System
  • Spellbinders – Quick Trimmer

Miscellaneous

  • #12 Rubber Band
  • Nuvo – Crystal Drops – Bright Gold

Ship-In-A-Bottle II

This card can be for a birthday or another special day for a nautical person.

Ship -in-the-Bottle:  Using the Tutti Designs Ship in A Bottle die, cut four times from light blue, brown, white, and oatmeal. Only cut the whole die from blue. The other colors cut the sections needed from scraps. Using distress inks, color the various die-cut sections of the bottle and paper piece as needed. Glue bottle outline to a piece of acetate on the front side. Cut out the bottle shape. Glue rope to outside of bottle neck.

Background:  Die cut the rope background from oatmeal cardstock making such al the chads are removed from the image. Glue to a dark piece of wood grained cardstock cut to 4 inches x 5 ¼ inches.

Assembly of Card:  Position sentiment strip, ship and then the bottle on to rope background. Glue ship down followed by bottle. Adhere sentiment strip with foam squares. Attached front panel to bard base with foam squares.

Sentiments:  The foiled sentiment strip was one I had made during a batch foiling session using up scraps. It was die-cut into a ribbon. The inside stamp sentiment is from a favorite nautical stamp set by Sara Davies.

As is my style, I stamped the back of the envelope with the lighthouse image from the Sara Davies stamp set to hint as to what is inside.

Thank you for reading this blog post. Please like and leave a comment. 😊

Materials Used:

Dies

Stamps

Ink

Papers

Foiling Plates

Miscellaneous

A Ship In -A Bottle Birthday

Inspired by an image of a ship in a bottle, I set out to create a schooner in a bottle birthday card for a retired Navy officer.

Bottle:  Because I didn’t have a bottle die large enough or in the shape I desired, I made a template from a 9 inches x 4 inches scrap piece of paper folded long-ways and drew a bottle and cut it out. (See Materials Used list to download a bottle template.) Next, I traced the bottle onto my navy-blue card base (9 inches x 8 inches folded to 4 inches by 9 inches.) In order for the inside paper to match the outside bottle cut-out, I positioned the inside paper (8 ¾ inches by 3 ¾ inches) and taped it to the front with low tack tape. Using a craft knife, I cut out the bottle through both layers of paper. I cut two sheets of acetate 8 ½ inches x 3 ¾ inches for the “glass” of the bottle and set aside until the assembly of the card.

Ship:  I made the schooner stamp into a digital stamp that I could flip into a mirror image and slightly enlarge the size to fill the bottle better. You could still stamp the ship and using a mirror stamping technique to make a smaller ship. (Here is a video demonstrating the mirror stamping.) Once I had my two images stamped onto vellum, I fussy cut them out and glued them together where the sails and flags matched up since I knew the glue would show through the vellum. I also stamped the ship and its mirror image onto white copier paper and watercolored the flags. The sails and flags were fussy cut and using my fingers I curled them. Using tiny pieces of foam squares behind the sails and glue on the flags, they were adhered to the front and back sides of the vellum ship. I cut a small stand from green scrap for the stand on which the ship rests in the bottle.

Assembly of Card:  The baker’s twine was taped to the back side at the neck of the battle. Using double sided-tape I adhered one sheet of acetate to the back or inside of the bottle cut panel. Next, I glued the ship to its stand and then glued the stand to the inside/backside of the bottle cut-out. Again using double-sided tape, I glued the last sheet of acetate over the other piece of acetate sandwiching the ship in between. Finally, I adhered the inside paper over the acetate using double-sided tape. The lower inside piece was adhered in the same manner. I drew the lip and bottom of the bottle on the acetate with a black gel pen.

Sentiments:  The foiled sentiment strip was one I had made during a batch foiling session using up scraps. It was die-cut into a doted ribbon. The inside stamp sentiment and two sea gulls were placed so that the ship hid all but the one gull when the card is closed. It was easy to get the position correct using a stamping platform. The final embellishment to the front of the card is a tiny handwritten tag that says “FOR YOU” with a twine bow tied to it. The tag is adhered with a foam square.

As is my style, I stamped the back of the envelope with a sentiment and two gulls flying to hint as to what is inside.

Thank you for reading this blog post. Please like and leave a comment. 😊

Materials Used:

Stamps

Ink/Watercolors

Papers

Dies/Foiling Plates

Miscellaneous

Seaside Vacation

Seaside vacation - front

Need a break? Jump-into this vacation card and get away, hear the waves gentling coming ashore, the occasional seabird crying out overhead, smell the sea air and feel the grit of the sand beneath your feet.

This fun, A7 sized card came from my desire to make a nautical themed card from my stash of underwater, fishy, and nautical stamps, dies, papers and embossing folders. The papers and embossed/inked background came from one of early papercrafting magazines I purchased – Love Cardmaking issue 4 and its the “By the Shore” embossing folder, stamps and digi papers. I love these papers and have used them for to make a number of cards in years past. Two small stamp sets from Prima Marketing’s Seashore collection at some point made their way into my stash, but never used. Some new to me Stampin’ Up inkpads gave me the excuse to try stamping the small nautical stamps.

After pulling together all the various elements that I might use and having noticed a trend of shapes being layered askew on card fronts, I decided to try the trend. I played with the layout and began by gluing the blue background over the front and back of card. Next, I glued edges of inked embossing folder piece and trimmed off the overlaps that went off the edges. The top is wrapped over the fold and glued on the back.

Seaside vacation - front-cu

Using two different thicknesses of foam squares/dimenisionals, I adhered the stamped pieces to the front. The rectangular card needed somethings to hide the fact the rope border didn’t fully meet-up at the corners. In digging around in my elements caddy, I found some K & Company die-cut sea life images which were all too big for my purposes, but on the packaging were just the right size of images which I fussy cut and adhered to the rope corners. The addition of a puffy orange starfish and a foiled rising sun sticker and, voila, the front was finished.

I had one tiny multi-colored masked and stamped image with the word “Enjoy” which I glued inside the card.  The blue paper on the back of the card didn’t come completely down to the bottom edge so I pieced together a sandy beach to complete the card.

Seaside vacation -inside-envelope

The sailing ship was stamped in blue ink on the back of the envelope.