Sleigh Bells Pop-Up Christmas Card

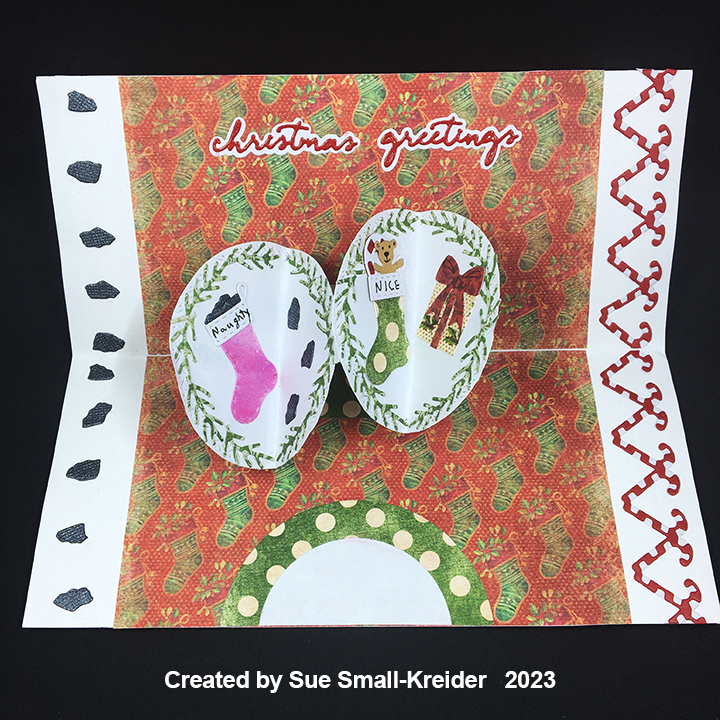
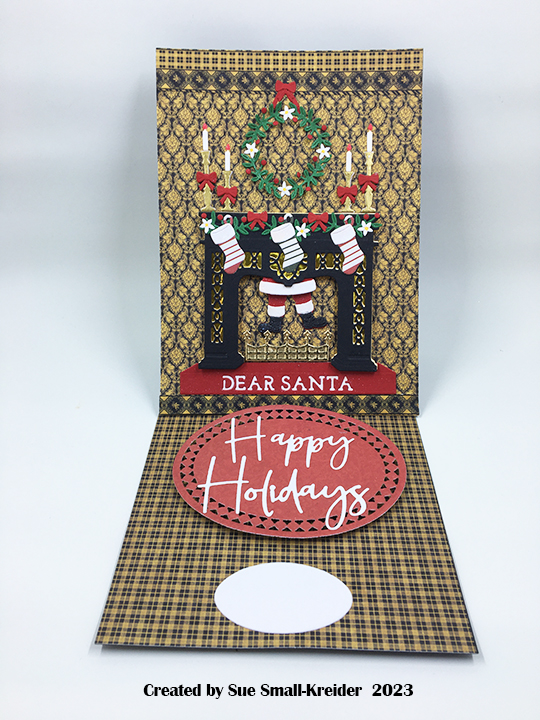
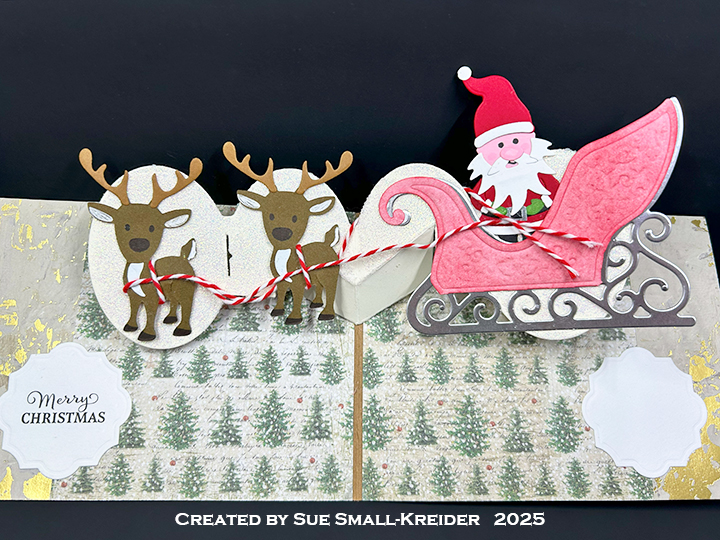
There’s a new mini release of five new stamp sets from Karen Burniston. For this card I’ve used the new Christmas Wishes sentiment stamps along with previously released die sets – Sleigh Pop-Up, Christmas Animals, Oval Frames Pop-Up, Gnome and Santa, Labels -Crosshatch, Squares- Crosshatch and Church & School Tiny House Add-Ons.

Watch the video below to learn how I made this card.

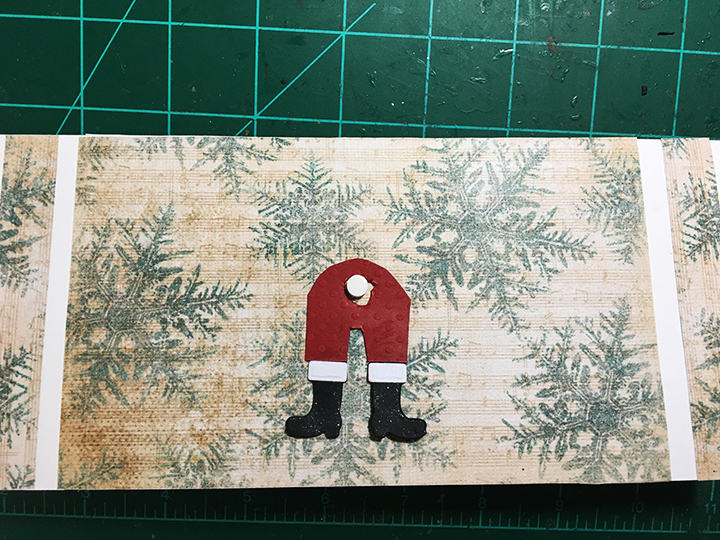
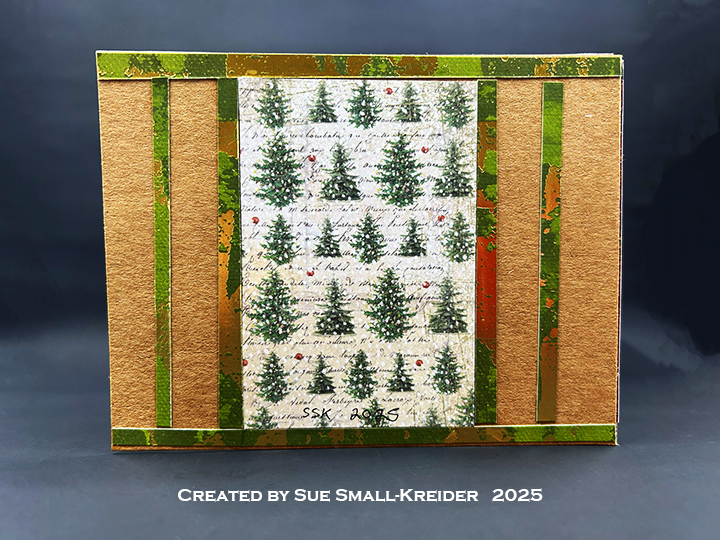
Cardbase: Start with an 11×4.25-inch rectangle of kraft colored cardstock. Score and fold at 5.5-inches to form an A2 (4.25×5.5-inch) side-fold card. Cover the four panels with decorative papers.

Card Back

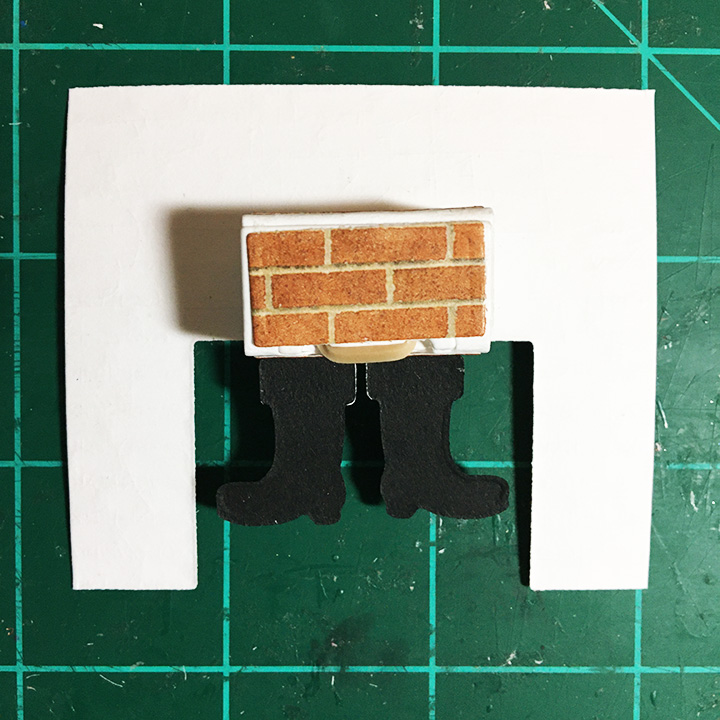
Santa, Reindeer and Sleigh: Watch the assembly videos at the bottom of each of the dies’ linked pages. Santa was made using the Gnome and Santa die set and has the possibility to have his face stamped using the new Fun Faces stamp set. The reindeer were made using the Christmas Animals die set and made on the reverse side of normal die cut. (See the video above to learn how the harness was made.) Using just the sleigh die from the Sleigh Pop-Up, cut once in white and again in silver, Use the stencil die to emboss the sleigh body. Trim off the runner on the white embossed piece and ink with red. Place the red sleigh body slightly offset on top of the silver to give sleigh some dimension.

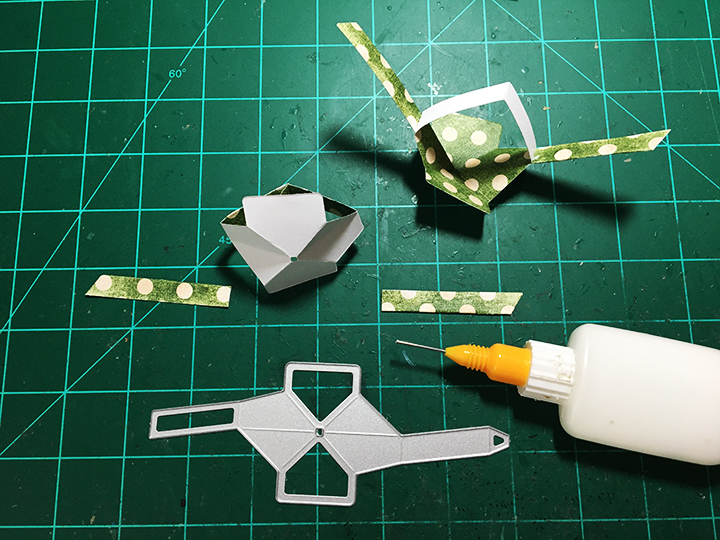
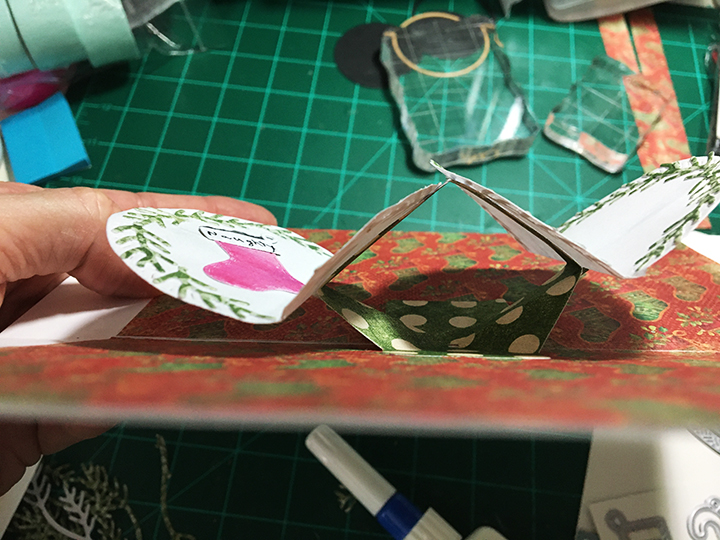
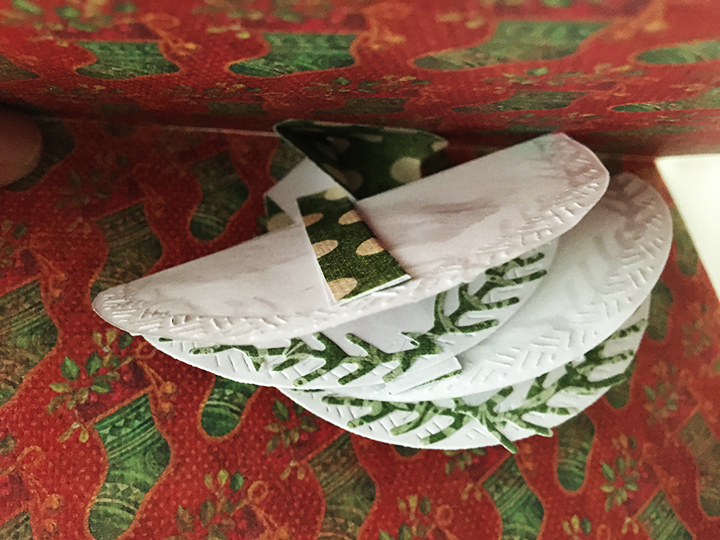
Pop-Up Platform: Use only the largest die in the Oval Frames Pop-Up set to cut from cream cardstock. train the folds as directed in the die’s assembly video (located at the bottom of the linked page.) Using a glitter paste, add a thin coat to the main platform and let dry before gluing the sleigh onto it. Follow the steps in the video above for the order to glue the various pieces into the card.

Card Front

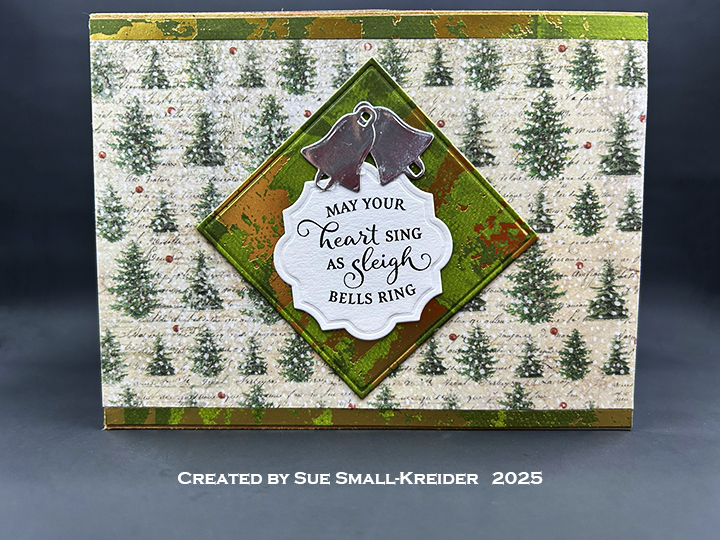
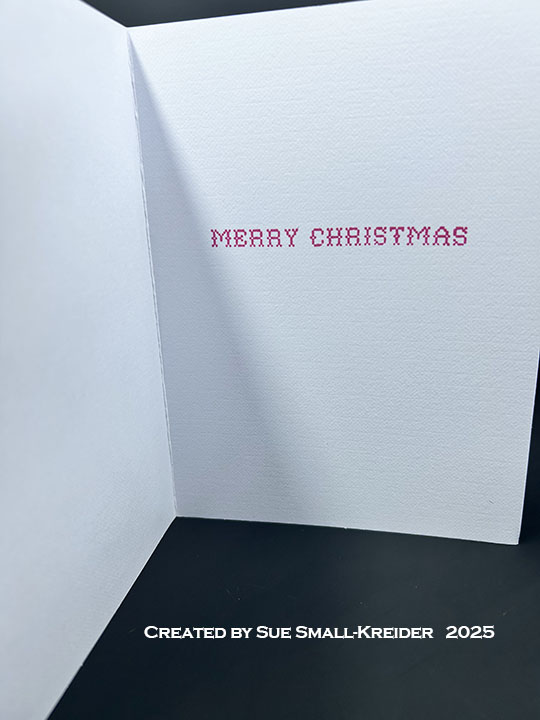
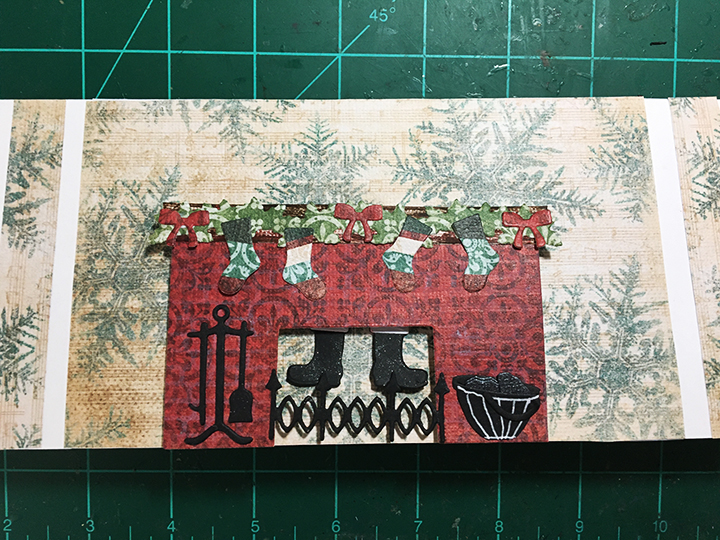
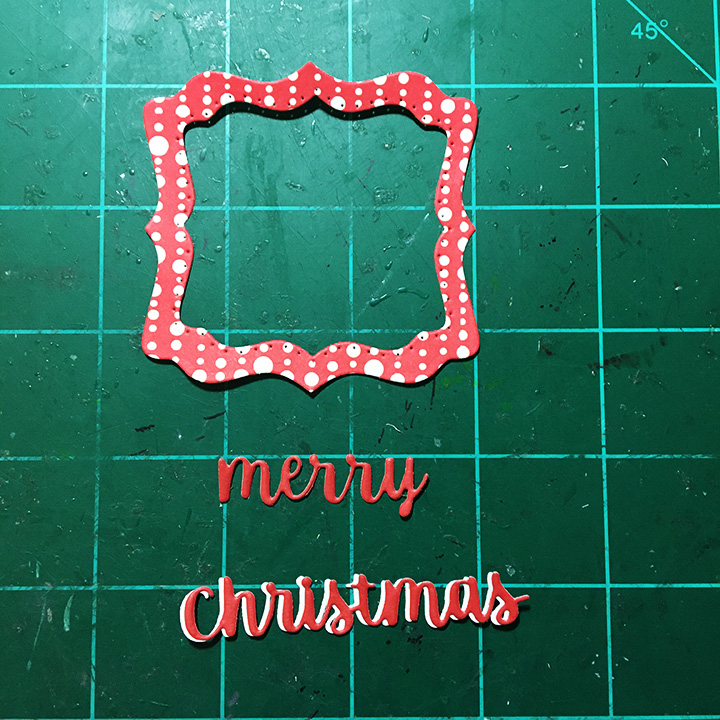
Sentiments: All the sentiments were stamped in black ink using the Christmas Wishes stamps set. They were cut using the smallest plain die from the Labels -Crosshatch set. For the card front a square decorative paper background and two silver bells were made using the Squares – Crosshatch and Church and School Tiny House Add-Ons die sets.

___________________________________

Thank you for experiencing this blog post.

I hope this inspires you and makes you smile.

Please subscribe to the email notices, like and leave comments 😊

___________________________________

Disclaimer: Karen Burniston products are provided free of charge by the manufacturer for review and use. All other items were personally purchased. Compensated affiliate links used where or when possible, meaning I will receive a small percentage commission from these manufacturers at no cost to you. This will allow me to add more content to my YouTube channel and help out a lot. Thank you.

Materials Used:

Dies

Stamps

Papers

  • Stamperia – 8×8-inches Double-Sided Paper – Classic Christmas
  • Stampin’ Up – 8.5×11-inches Cardstock – Tea Room
  • Stampin’ Up – 12×12-inches Specialty Designer Series Paper – Season of Elegance
  • Black, Browns, Kraft, Pink, Red, Silver and White Cardstock

Ink

  • Cricut – Metallic Marker – Medium Tip 1.0 – Silver
  • Memento – Fade Resistant Dye ink – Tuxedo Black
  • OLO – Marker – RVO.1 – Cotton Candy
  • Ranger – Tim Holtz – Distress Ink – Lumberjack Plaid
  • Sakura – Gelly Roll Pen – Medium – White
  • Sharpie – Permanent Marker – Fine Point – Green
  • Sharpie – Permanent Marker – Ultra Fine Point – Black

Adhesives

Tools

  • Die Cutting Machine
  • Paper Trimmer
  • Stamping Platform
  • LDRS – Stampendable Stamping Tool
  • Stamping Blocks used as paperweights
  • Palette Knife
  • Scissors
  • Altenew- Small Blending Brush Set (Flat Bristles)
  • Paper Masking Tape

Miscellaneous

  • Red and White Baker’s Twine – 12-inches
  • Nuvo – Glimmer Paste – Moonstone

Day 7 – Week of Good Cheer Christmas Cards

This is Day 7 in the Week of Good Cheer Christmas Card series featuring cups and mugs of winter cheer as beverages. Today’s card features Trinity Stamps’ Trini-Tea Cup Card die set made up as a Santa mug of cocoa. (GIVEAWAY opportunity near end of post.)

Watch the video below to see how the card was made.

Cardbase:  I started with an 8.5×11-inch sheet of red cardstock of at least 80lb. weight and cut out the shaped card base using the Trinity Stamps’ Trini-Tea Cup Card die set.

Santa:  Santa is created using a Spellbinders’ set of scalloped circles and an i-Crafter’s set of nested circle dies. Watch the video above to see how it was made. The mustache, eyes, mouth and eyebrow come from the Spellbinder’s Cocoa Wonderland die set.

Sentiments:  The die-cut sentiments of “Christmas Greetings” and “ho, ho, ho” are from Karen Burniston’s Small Script- Christmas die set. Another Karen Burniston product, her Winter Hugs stamp set, was used to stamp “Stay warm and drink Hot Cocoa” in brown ink on the catalog (6×9-inches) envelope’s back flap.

___________________________________

Thank you for experiencing this blog post.

I hope this inspires you and makes you smile.

Please subscribe to the email notices, like and leave comments 😊

___________________________________

GIVEAWAY

I’m cleaning out my dies and stamps and will be giving away crafting bundles to 8 lucky crafters who follow, subscribe and comment on my Week of Good Cheer Christmas Cards posts on Facebook, Instagram, YouTube and my website. (If you comment on all 4 platforms, each day, you have over 28 opportunities to be picked for a crafting bundle.)

Tell me why you like each cup or which is your favorite cup. Winners will be picked by September 2, 2025.

___________________________________

Disclaimer: Karen Burniston products are provided free of charge by the manufacturer for review and use. All other items were personally purchased. Compensated affiliate links used where or when possible, meaning I will receive a small percentage commission from these manufacturers at no cost to you. This will allow me to add more content to my YouTube channel and help out a lot. Thank you.

Materials Used:

Dies

Stamps

Papers

  • Astrobrights – 8.5×11-inches 65lb Cardstock Grocer Kraft
  • Fun Stampers Journey8.5×11-inches Cardstock – Cranberry Bliss
  • White Cardstock

Ink

  • Nuvo – Aqua Shimmer – Glitter Gloss
  • Sharpie – Permanent Marker –Fine Tip – Pink
  • Stampin’ Up – Stampin’ Blends – Dark Copper Clay
  • Sunbird Spark – Velvety Dye Ink – Canyon

Adhesives

Tools

  • Die Cutting Machine
  • Paper Trimmer
  • Stamping Blocks
  • Scissors
  • Scrapbook.com – Mint Paper Tape
  • Riley and Company – Pick & Poke Tool
  • Microfiber Cloth

Day 3 – Week of Good Cheer Christmas Cards

This is Day 3 in the Week Of Good Cheer Christmas Card series featuring cups and mugs of winter beverages like hot cocoa, tea and coffee. Today’s card uses Karen Burniston’s Tea and Coffee Pop-Up and Topper Tags die sets. (GIVEAWAY opportunity near end of post.)

Watch the video below to see how this card was made.

Cardbase:  The card base is four tags cut using the Topper Tags die set. Each tag has a clear packing tape hinge at the bottom edge. Watch the video above for tape placement. Use decorator pieces from the tag die set. Add baker’s twine once the card is fully decorated to each tag hole.

Mug Pop-Up:  Watch the assembly video for the Tea and Coffee Pop-Up located at the bottom of the linked page. Cut one mug from a decorative cardstock. From cardstock that matches the base tag, cut one mechanism piece. Cut a spoon from silver mirror cardstock. Cut the steam from clear vellum. Assemble as shown in the video above.

Sentiments:  All the sentiments are fussy cut from the Stamperia Classic Christmas paper collection.

Envelope:  The tags card fits into a #10 business envelope whose back flap is covered with leftover strips from the paper collection.

___________________________________

Thank you for experiencing this blog post.

I hope this inspires you and makes you smile.

Please subscribe to the email notices, like and leave comments 😊

___________________________________

GIVEAWAY

I’m cleaning out my dies and stamps and will be giving away crafting bundles to 8 lucky crafters who follow, subscribe and comment on my Week of Good Cheer Christmas Cards posts on Facebook, Instagram, YouTube and my website. (If you comment on all 4 platforms, each day, you have over 28 opportunities to be picked for a crafting bundle.)

Tell me why you like each cup or which is your favorite cup. Winners will be picked by September 2, 2025.

___________________________________

Disclaimer: Karen Burniston products are provided free of charge by the manufacturer for review and use. All other items were personally purchased. Compensated affiliate links used where or when possible, meaning I will receive a small percentage commission from these manufacturers at no cost to you. This will allow me to add more content to my YouTube channel and help out a lot. Thank you.

Materials Used:

Dies

Papers

  • Red #10 Business Envelope
  • Silver Foil Cardstock
  • Stamperia – 8×8 Paper Collection – Classic Christmas
  • The Paper Studio – 8.5×11 Vellum – Clear

Ink

  • Pigma – Mircon 05 Fine Tip Pen – Black

Adhesives

Tools

  • Die Cutting Machine
  • Paper Trimmer
  • Scissors
  • Paper Masking Tape

Miscellaneous

  • Red and Yellow Baker’s Twine

Day 2 – Week of Good Cheer Christmas Cards

This is Day 2 in the Week Of Good Cheer Christmas Card series featuring cups and mugs of winter beverages like hot cocoa and mulled cider. Today’s card uses Spellbinders’ Mugs & Mittens die set and Stay Snuggly stamp set. (GIVEAWAY opportunity near end of post.)

Watch the video below to see how this card was made.

Cardbase:  I started with an A6 sized (4.625×6.25-inches) purchased cardbase and matching envelope.

Card Front:  Cut a white panel 4.375×6-inches and ink blend around the edges in a snowy blue ink. Splatter with white paint for snowflakes. Cut and assemble mitten, sweater and mug pieces as shown in video.

Sentiments:  The front sentiment is debossed using the banner and sentiment dies in the Mugs & Mittens die set and the letters colored with a white gel pen.  The inside sentiment and card back snowflake star are stamped in red ink using the Stay Snuggly stamp set.

Envelope:  The back flap is stamped in red ink using the snowflake and “Winter Cheers” from the  Stay Snuggly stamp set.

These are two additional Christmas mugs of good cheer that I made with the July 2025 Spellbinder’s Small Die of the Month – Cocoa Greetings, Ginger Sip die, Starry Snowfall 3D embossing folder and Nordic Noel embossing folder.

___________________________________

Thank you for experiencing this blog post.

I hope this inspires you and makes you smile.

Please subscribe to the email notices, like and leave comments 😊

___________________________________

GIVEAWAY

I’m cleaning out my dies and stamps and will be giving away crafting bundles to 8 lucky crafters who follow, subscribe and comment on my Week of Good Cheer Christmas Cards posts on Facebook, Instagram, YouTube and my website. (If you comment on all 4 platforms, each day, you have over 28 opportunities to be picked for a crafting bundle.)

Tell me why you like each cup or which is your favorite cup. Winners will be picked by September 2, 2025.

___________________________________

Disclaimer: Karen Burniston products are provided free of charge by the manufacturer for review and use. All other items were personally purchased. Compensated affiliate links used where or when possible, meaning I will receive a small percentage commission from these manufacturers at no cost to you. This will allow me to add more content to my YouTube channel and help out a lot. Thank you.

Materials Used:

Dies

  • Spellbinders – Large Die of the Month – Mugs & Mittens – DOML-JUL25

Stamps

  • Spellbinders  – Clear Stamp of the Month – Stay Snuggly – CSOM-JUL25

Papers

  • Red – Scrap Envelope
  • Coated White Cardboard Packaging
  • Cream, Red and White Cardstock
  • Park Lane Paperie – A6 (4.625×6.25-inches) Cardbases and Envelopes – Textured White
  • Recollections – 8.5×11-inch Shimmer Cardstock -White Gold
  • The Paper Studio – 8.5×11-inch – Clear Vellum

Ink

  • Blue Gel Pen
  • Hero Arts Acrylic Spray – Opaque White
  • Memento – Fade Resistant Dye ink – Rose Bud
  • Nuvo – Highly Pigmented Watercolour Pencils – Pink Flamingo
  • Pigma – Mircon 005 Fine Tip Pen – Black
  • Ranger – Tim Holtz – Distress Ink – Fired Brick, Walnut Stain
  • Sakura – Gelly Roll Pen – Medium – White
  • Stampin’ Up – Classic Stampin’ Pad – Balmy Blue

Adhesives

Tools

  • Die Cutting Machine
  • Paper Trimmer
  • Stamping Platform
  • LDRS – Stampendable Stamping Tool
  • Stamping Blocks used as paperweights
  • We R Memories – QuickStick
  • Scissors
  • Heat Gun
  • Blending Brush
  • Sponge Dauber
  • Paper Masking Tape

Day 1 – Week of Good Cheer Christmas Cards

This is Day 1 in the Week Of Good Cheer Christmas Card series featuring cups and mugs of winter beverages like hot cocoa and mulled cider. Today’s card uses Karen Burniston’s Flower Pot Pop-Up die set and Winter Hugs stamp set. (GIVEAWAY opportunity near end of post.)

Watch the video below to see how this card was made.

Cardbase:  I started with a purchased A6 sized (4.625×6.25-inches) cardbase and matching envelope. Use the large journaling cards in the paper collection to cover the front and back panels of the cardbase. Die cut two scalloped rectangles from the Rectangles and Labels – Crosshatch die set for the inside of the card.

Cocoa Mug Pop-Up:  Watch the assembly video for the Flower Pot Pop-Up located at the bottom of the linked page. Cut and emboss the napkin from the Coffee Cup Pop-Up. Tape napkin pieces together to form a square, leaving a thin gap between the pieces. Die cut the tabs in the Flower Pot Pop-Up into the napkin. Cut two sets of the candy cane (reversing the paper on one set) from white and red cardstock using the dies from the Stocking Pop-Up. Cut several large marshmellows using the Camping Charms die set. Cut a spoon from silver mirror cardstock using the die in the Tea and Coffee Pop-Up set. Using the same set, cut the mug handle twice positioning the die so that it cuts just a thin strip of the mug.

Sentiments:  The front sentiment is a journaling card from the paper collection. Inside are Fancy labels die using the Rectangles and Labels – Crosshatch die set. The smaller label is stamped in pink and brown ink using the Winter Hugs stamp set.

Envelope:  The back flap is covered with stickers from the Simple Stories Paper Collection.

These are two additional Christmas mugs of good cheer that I made using the same technique for the Flower Pot Pop-Up.

___________________________________

Thank you for experiencing this blog post.

I hope this inspires you and makes you smile.

Please subscribe to the email notices, like and leave comments 😊

___________________________________

GIVEAWAY

I’m cleaning out my dies and stamps and will be giving away crafting bundles to 8 lucky crafters who follow, subscribe and comment on my Week of Good Cheer Christmas Cards posts on Facebook, Instagram, YouTube and my website. (If you comment on all 4 platforms, each day, you have over 28 opportunities to be picked for a crafting bundle.)

Tell me why you like each cup or which is your favorite cup. Winners will be picked by September 2, 2025.

___________________________________

Disclaimer: Karen Burniston products are provided free of charge by the manufacturer for review and use. All other items were personally purchased. Compensated affiliate links used where or when possible, meaning I will receive a small percentage commission from these manufacturers at no cost to you. This will allow me to add more content to my YouTube channel and help out a lot. Thank you.

Materials Used:

Dies

Stamps

Papers

  • Brown Cardstock
  • Echo Park – 12×12 A Perfect Christmas Collection – Snowflake Swirl
  • Park Lane Paperie – A6 (4.625×6.25-inches) Cardbases and Envelopes – Textured White
  • Silver Foil Cardstock
  • Simple Stories – 12×12 Collection Kit – Snow Pine Lodge
  • White Cardstock

Ink

  • Memento – Fade Resistant Dye ink – Rich Cocoa & Rose Bud
  • Pigma – Mircon 005 Fine Tip Pen – Black

Adhesives

Tools

  • Die Cutting Machine
  • Paper Trimmer
  • Stamping Platform
  • LDRS – Stampendable Stamping Tool
  • Stamping Blocks used as paperweights
  • We R Memories – QuickStick
  • Scissors
  • Plastic Knife
  • Paper Masking Tape

Miscellaneous

  • Cotton Ball

Tropical Santa Card & Ornament

This card was made for Craft Roulette #218 whose parameters included for a holiday project, tropical colors, wheel(s) element and geometric shape(s).

Envelope: This card fits into an A7envelope.

See other Cards made with the Spellbinder’s Sunday Drive die sets:

___________________________________

Thank you for experiencing this blog post.

I hope this inspires you and makes you smile.

Please like and leave comments 😊

___________________________________

Materials Used:

Dies

Stamps

  • Rubbernecker – Clear Stamps – Winter Wonderland – 3338
  • Craft Roulette – Clear Stamps – The Basics

Papers

  • Spellbinders – 8.5×11 inch Color Essentials 100 lb Cardstock  – Peridot
  • Silver Foil Cardstock
  • Coated Colored Packaging
  • Colored Cardstock Scraps
  • A7 Envelope – Ivory

Ink

  • Ranger – Tim Holtz – Distress Ink- Mowed Lawn
  • Simon Says Stamp – Pawsitivity Saturated Ink – Doll Pink
  • StazOn – Solvent Ink – Jet Black
  • Creative Craft Products – Alcohol Markers – 183 Phthalo blue
  • Pigma – Mircon 01 Fine Tip Pen – Black
  • Sharpie – Permanent Marker – Chisel Tip – Black

Adhesives

Tools

  • Die Cutting Machine
  • Bone Folder
  • Stamping Blocks
  • Scissors
  • We R Memories – QuickStick
  • Craft Mat
  • Sponge Dauber

Naughty or Nice?

It’s the Karen Burniston design team challenge for December 2023 with the theme of “Naughty or Nice” using Christmas stockings and the idea that naughty persons get coal in their stockings while people who have been good/nice will get presents and sweet treats in their stockings.

While I used Karen’s Fireplace Pop-Up and Fireplace Extras 1 dies I did not make it a pop-up, but I did have Santa’s boots swing in the fireplace.  Inside, two greenery wreaths pop-up using the Twist Flower Pop-up and Crosshatch Circles, Christmas Borders 2, Holiday Charms, Big Birthday Charms, Adirondack Chair Pop-Up and Small Script – Christmas were used for decorations and sentiments.

Before starting, I recommend watching the assembly videos of the pop-ups which are usually near the bottom of the linked pages for the various dies used.

Cardbase: I folded a 7 3/4-inch by 8 3/4-inch rectangle of white cardstock long-wise in half for the cardbase. Because my decorative papers were 4 1/2-inch by 6 1/2-inch, I centered the papers on each of the four panels.

Fireplace: The fireplace main piece was cut using white ink rubbed on the die before cutting. The mantel piece was die cut and folded in half and glued together to add dimension. Christmas decorations – candles, stockings, greenery, bows, fireplace guard and tools are all in the Fireplace Extras 1 set. I cut down the pail from the Adirondack Chair Pop-Up set to be a coal shuttle next to the fireplace. For the picture of Father Christmas, I fussy cut it from the decorative paper collection I used.

Santa’s Boots: The boots are cut from black and white cardstock using the dies in the Fireplace Pop-Up set. Use the tab atop the boots to attach red pants that were cut free-handed with a holed punched and widened to accommodate a small foam dot. The boots were coated with glitter gloss before attaching to the card. Follow the pictures above for order of assembly of fireplace and Santa’s pants and boots. The fireplace was attached with two layers of foam tape to be slightly taller than the foam dot so that the boots would swing freely.

Wreaths: Using the second largest crosshatch circle, I cut two from heavy white paper. The greenery was made by cutting off the fir needles from the branch piece in the Holiday Charms set. Stockings and their coal, teddy bear and candy cane come from the same charms set. The wrapped gift is from the Big Birthday Charms set.

Inside Pop-Up Mechanism: I added extension arms onto the Twist Flower Pop-up mechanism to form a “W” shape. (Watch this Halloween card video to see how to make the mechanism.) The circle wreaths were folded in half and glued to the two “V” arms, playing with the positioning of the circles so there are no catchpoints.

Borders: The inside border of candy canes comes from the Christmas Borders 2 die set while the coal comes from the Holiday Charms. For the back borders, the branch die from the Holiday Charms set was used. Leftover strips of decorative papers were added to the card front as borders.

Sentiments: Clear tape over red cardstock is the secret to the glossy script letters with plain white cardstock shadows. The sentiments all come from the Small Script – Christmas die set. On the front is “ho ho ho” with “Christmas greetings” inside the card.

Envelope: The stocking border from the Christmas Borders 2 set was cut from the same striped paper that was used on the fireplace stockings and glued to the back envelope flap to hint at what’s to come.

Thank you for reading this blog post. I hope this inspires you and makes you smile. Please like and leave comments 😊

Materials Used:

Dies

Papers

  • The Paper Studio – 4.5in x 6.5in Single-Sided Textured Paper Pad – Old World Winter
  • Bazzill – 8.5×11 Embossed Polka Dots – Phoenix
  • My Colors – 12×12 Textured Metallic Cardstock – Black Bear
  • White and Black Cardstock
  • #10 Business Envelope

Ink

  • Craft Smart – White Ink Mini Cube
  • Sharpie – Permanent Marker – Ultra Fine Tip – Red, Orange and Yellow
  • Pigma – Mircon 01 Fine Tip Pen – Black
  • Sakura – Gelly Roll Pen – Medium – White
  • Nuvo – Aqua Shimmer – Glitter Gloss

Adhesives

Tools

  • Die Cutting Machine
  • We R Memories – QuickStick
  • We R Memories – Scoring Board and Trimmer
  • Craft Mat
  • Scissors
  • Hole Punch – 1/4-inch
  • Clamping Reverse Tweezers

Dear Santa I Can Explain…

With Santa shimmering down the chimney with his legs swinging left and right, this card became my submission for Craft Roulette episode #191 whose parameters were a drop-down card, supper table colors, seasons element, and shiny.

I had started this card earlier in the week after discovering Spellbinders Large-Die-Of-the-Month set for October 2021, but hadn’t finished the easel stop/sentiment. It is part of my Fireplace series.

Cardbase: Cut one 5×7-inch rectangle from heavy black cardstock. Cut another piece from black using the template pictured below. Train the folds of the larger piece. This will be the bottom base with easel arm. Glue the tab on the easel arm to the back of the 5×7 piece making sure when the card is folded shut that the top 5×7’s edges are aligned with the bottom piece. Cover the card front with decorative paper as well as the bottom panel. I added decorative borders for quarter floor molding and picture rail near the ceiling top.

Fireplace and Santa: Watch the assembly video. I used two layers of cardstock for the fireplace and four layers for the candlesticks. The foam dot I used was thick, so I used two layers of foam tape to keep the fireplace higher than Santa. Glitter gloss was brushed over all of Santa as well as the fur on the stockings’ tops. The gold foil in the fireplace decorative panels is from an envelope liner.

Decorations: The set comes with dies for the greenery, tiny flowers and berries as well as the bow. I used a red glitter pen for the candle flames and a yellow marker for the flower centers.

Sentiments: The fireplace set comes with four messages. I choose “Dear Santa” to die-cut into the red hearth piece which is backed with a solid white hearth piece. Glitter gloss was applied to the red hearth. To create the easel stopper, cut an oval rug and pop it up on foam dots. Glue die-cut “Happy Holidays” onto oval. Because of my dark background paper, I added a smaller white oval for a personal message.

Envelope: I decorated the back flap of the envelope and the card back with decorative paper scraps.

Thank you for reading this blog post. I hope this inspires you and makes you smile. Please like and leave comments 😊

Materials Used:

Dies

Papers

  • Graphic 45 – 8×8 Double-Sided Paper Pad – Warm Wishes Collection – Glad Tidings and Winter Wonder
  • My Mind’s Eye – 6×6 Double-Sided Paper Pad –Cozy Christmas
  • White, Black, Red and Cream Cardstock
  • Gold Foil Cardstock from packaging
  • Gold Foil from envelope liner

Ink

  • Stampin’ Up – Stampin’ Blends Marker – Dark Daffodil Delight
  • Scrapbook.com – Glitter Brush – Red
  • Nuvo – Aqua Shimmer – Glitter Gloss

Adhesives

  • Neutral PH Adhesive by LINECO
  • Fine-Tip Glue Bottle
  • Foam Dots
  • Foam Tape

Tools

  • Die Cutting Machine
  • Pokey Tool
  • We R Memories – QuickStick
  • We R Memories – Scoring Board and Trimmer
  • Scissors

Santa Coming Down The Chimney

This is the eighth card in the Fireplace Christmas Card series.

Santa’s coming. Can you hear him on the rooftop? He’s sliding down the chimney.

For this card I used Karen Burniston dies to create an accordion card with a pop-out fireplace with Santa’s boots dangling in the fireplace opening. (Before starting, please watch the assembly video for the Fancy Label Accordion located near the bottom of the linked page.)

Cardbase: I cut three Fancy Label Accordion panels from heavy white cardstock. I also cut four of the same panels from red decorative paper and two panels from green decorative paper. The green paper panels I adhered to a cardstock panel. (I realized I needed to cut one more green panel to cover the tabs when all the panels are glued together.)

The red panels I trimmed out the center label at the pivot points. Using the largest and second largest label dies in the set to cut a frame, I cut borders from two of the red center labels. For the back personal message label I used the largest of the label dies to cut a frame that went to the edge of the white label.

Fireplace: I cut the fireplace front and mantel pieces using the Fireplace Pop-Up. For the fireplace I glued a brick decorative paper to white cardstock and die-cut it using the embossing feature. I then trimmed off a 5/8-inch from each side of the fireplace so it would fit into the card. The mantel piece was cut from white and ink blended.

Bam Box and Boots: Because I was using a different mechanism than the fireplace mechanism, I recommend watching the assembly video for the small bam box. I tried both sizes of bam box, but you need to use the smaller one to get the fireplace to fit on the label and not catch when the card is folded closed. Glue three of the four decorative panels to the bam box. Before you add the rubber band to the bam box, cut the teardrop shaped holes for the boots (circled in red in photo below) using a sharp pointed piercing tool and scissors. (I used an old ice pick or awl.) If you plan to glue the bam box arched side to the fireplace, cut the holes in the panel just below it as shown in the photo circled in red. Attach the boots by slipping the tabs through the holes.

Assemble the bam box as usual.

I did not attach the fourth decorative panel on my card since I knew the arched side would be glued to the back of the fireplace. Test the placement of the bam box on both the fireplace and the pivot label before the glue sets.  Once the fireplace is attached to the panel, attach the mantel with the wider side glued to the fireplace.

Card Back: Every time I make an accordion card, I forget to save the decorative frame papers to glue on last, to cover the tabs that get glued as the card is assembled. This time I did it to the middle green panel.

Sentiments: “Ho Ho Ho” comes from cutting down the “Hooray!” in Word Set 4 while “Merry Christmas” is from Word Set 3. The Santa face is from the Gnome and Santa die set.

To get the word” Christmas” to stand-out from the red border paper I cut an additional “Christmas” in white and off set it behind the red word.

Envelope: The red “Merry Christmas” on the envelope flap and its green border are stamps from Anna Griffin.

CRX Sheet: The card recipient experience (CRX) sheet explains how to close the fireplace. it is a free download.

Thank you for reading this blog post. I hope this inspires you and makes you smile. Please like and leave comments 😊

Other Holiday Fireplace Cards by designer/brand

Materials Used:

Dies

Stamps

  • Anna Griffin – Treasury of Stamps & Dies – AG691T

Papers

  • Carnation Crafts – A4 Double-Sided Paper – Merry & Bright
  • Craft Consortium– A4 Solids Double-Sided Paper Pad – Candy Christmas
  • Paper Studio – 8.5×11 Paper – Brick Wall
  • Red, Pink, Black and White Cardstock
  • A7 Envelope – Cream

Ink

  • Ranger – Tim Holtz – Distress Ink- Walnut Stain and Aged Mahogany
  • Stampin’ Up – Classic Stampin’ Pad – Cherry Cobbler and Emerald Envy
  • Marker – Ultra Fine Tip –Blue and Pink

Adhesives

Tools

Miscellaneous