Ticket Shaped, Tri-Fold Easel, Birthday Card

This card was made for Craft Roulette #261 whose parameters included an A2 size card, amusement ride colors, JD element, and ticket(s).

Watch the process video to see how I made this card.

Cardbase: Start with a 4.25 x 11-inch piece of heavy cardstock, score at 5.5-inches and fold in half to form a top-fold A2 (4.25×5.5-inch) card. Cut a 4.25×6-inchpanel of heavy cardstock and score and fold at .5-inch to form a narrow tab. Glue the tab to one end of the A2 cardbase to form a tri-fold card. Using a 1-inch circle hole punch, cut notches out of each panel’s corners. Create a gold and white ticket for the front of the card as show in video.

Box of Chocolates: The easel stop is a heart shaped box of chocolates made using Trinity Stamps’ Bon Bon Box stamps & dies, colored using glitter markers and popped up on thin foam tape.

Sentiments: The “Ticket to Funn” was computer generated while the inside sentiments were stamped in dark brown ink using Craft Roulette’s Funn Sentiments #01 stamp set. All the stamping on the card back comes from Craft Roulette’s The Basics stamp set.

Envelope: The card fits into an A2 (4.25x 5.5-inches) size envelope stamped with a sentiments from Craft Roulette’s The Basics stamp set on the back flap in dark brown ink.

___________________________________

Thank you for experiencing this blog post.

I hope this inspires you and makes you smile.

Please like and leave comments 😊

___________________________________

Disclaimer: Karen Burniston products are provided free of charge by the manufacturer for review and use. All other items were personally purchased. Compensated affiliate links used where or when possible, meaning I will receive a small percentage commission from these manufacturers at no cost to you. This will allow me to add more content to my YouTube channel and help out a lot. Thank you.

Materials Used:

Stamps

  • Craft Roulette – Clear Stamps – The Basics
  • Craft Roulette – Clear Stamps – Funn Sentiments #01
  • Trinity Stamps – Clear Stamps & Dies – Bon Bon Box

Papers

  • Scrapbook.com – 8.5×11 inch 110lb Cardstock – White
  • Matte Gold Cardstock
  • White Computer Paper

Ink

  • Stampin’ Up – Classic Stampin’ Pad – Copper Clay & Early Espresso
  • Nuvo – Glitter Marker – Lemon Drizzle
  • Pigma – Mircon 01 Fine Tip Pen – Black
  • Pigma – Mircon 05 Fine Tip Pen – Brown
  • Scrapbook.com – Glitter Brush Markers – Deep Blue, Coral, Red Shimmer

Adhesives

Tools

  • Die Cutting Machine
  • Paper Trimmer
  • Bone Folder
  • Stamping Blocks
  • Scissors
  • Paper Masking Tape
  • 1″ Hole Punch

2025 ATC Calendar – APRIL

I started a new challenge for 2025 – the ATC calendar challenge. With a group of crafty friends, we are making a new image on a 4.25×5.5-inch calendar card for each month.

Watch the process video to see how I made this calendar card.

To see other months’ calendars go to click here.

Click to see Lois Bak’s April calendar.

___________________________________

Thank you for experiencing this blog post.

I hope this inspires you and makes you smile.

Please like and leave comments 😊

___________________________________

Disclaimer: Karen Burniston products are provided free of charge by the manufacturer for review and use. All other items were personally purchased. Compensated affiliate links used where or when possible, meaning I will receive a small percentage commission from these manufacturers at no cost to you. This will allow me to add more content to my YouTube channel and help out a lot. Thank you.

Materials Used:

Dies

  • Spellbinders – Cutting Dies – DIY Easel
  • Spellbinders – Cutting Dies – Reversible Royal Court by Jaycee Gaspar

Press Plates

  • Spellbinders- BetterPress Plates – 2025 DIY Calendar

Papers

  • Spellbinders- BetterPress – 5.5 x 4.25” (A2) Cotton Card Panels – Porcelain & Pebble
  • Blue, Brown, Green, Pink and White Cardstock
  • Heavy Weight Brown Cardstock

Ink

Adhesives

Tools

It’s A Mystery – A Birthday Card for an Avid Mystery Reader

This is a card for the Relatively Thoughtful March 2025 Challenge using the two page free digital download from the Independent Women “AUTHORS” paper set.

Cardbase: Start with a purchased side-fold A7 (7×5-inch) card. Cover the front with two strips of the narrow decorative papers and one 3.5×7-inches of the wallpaper print. Use scrapes to created the tab strips at right top and bottom. (I printed one set out and realized my yellow ink cartridge was empty, so the card back uses that paper. The front of card uses the set printed with all the full color cartridges.)

Oval Opening: I centered my 3.125-inch oval die over the cut out rectangle of Agatha Christie positioned them where I wanted them to go on the card front and carefully taped the die down while removing the picture. With the card open, I cut the oval through just the card front.  Glue the picture to the inside of the card centering it through the oval window.

Decorations: Add floral images fussy cut from the digital papers. Cut out three tags for the back of the card. Use a fine black pen to draw strings on the tags.

Sentiments: Here are the sentiments I used for the card. Free download.

Envelope:  The card fits into an A7 (7×5-inch) size envelope with a fussy cut tag from the papers glued to the back flap.

___________________________________

Thank you for experiencing this blog post.

I hope this inspires you and makes you smile.

Please like and leave comments 😊

___________________________________

Disclaimer: Karen Burniston products are provided free of charge by the manufacturer for review and use. All other items were personally purchased. Compensated affiliate links used where or when possible, meaning I will receive a small percentage commission from these manufacturers at no cost to you. This will allow me to add more content to my YouTube channel and help out a lot. Thank you.

Materials Used:

Dies

  •  Tutti Designs – Stitched Nesting Ovals

Papers

  • 65lb. Smooth White 8.5×11-inch Cardstock
  • White 8.5×11-inch Computer Paper
  • Purchased A7 Cardbase and Cream Envelope

Ink

  • Pigma – Mircon 01 Fine Tip Pen – Black
  • Ink Jet Computer Printer

Adhesives

Tools

  • Die Cutting Machine
  • Paper Trimmer
  • Stamping Blocks used as paperweights
  • Scissors
  • Paper Masking Tape
  • Hole Punch (For tags)
  • We R Memories – QuickStick

Thanks A Latte

I always need Thank You cards and coffee, so what better way than to combining the two into some cute cards.

I used the Concord & 9th Coffee Blend Turnabout stamp set and coordinating dies for these two Thank You cards.

The inks that I used were from Stampin’ Up – Soft Suede, Cinnamon Cider and Real Red.

___________________________________

Thank you for experiencing this blog post.

I hope this inspires you and makes you smile.

Please like and leave comments 😊

___________________________________

A Waterfall Card with Birthday Math

This card was made for Craft Roulette #259 whose parameters included a card with two folds, jelly bean colors, math element, and markers.

Watch the process video to see how I made this card.

Cardbase: Start with a 7 x 10-inch piece of cardstock and fold in half to form a side-fold A7 (7×5-inch) card. Cover the front and back panels with decorative papers. (I used the two largest rectangle dies in the Rectangles and Labels-Crosshatch die set to cut out a frame and two panels for the outside of the card.) Once the panels are covered, die-cut the thumb hole at the bottom center of both front and back panels.

Waterfall Pop-Up: Watch the assembly video for the Waterfall Card located at the bottom of the linked page. Cut four base squares, one base piece and pull strip from heavy solid color cardstock. Cut four large decorative squares, three larger decorative rectangles and one pull strip decorator stripe from decorative papers. Assemble as shown in video.

Sentiments: All the sentiments used on the card Spellbinders BetterPress sentiment strips. Numbers and Happy Birthday are from Karen Burniston’s Numbers, Happy Birthday and Shadow. “Again” is spelled using Karen’s Mini Alphabet.

Envelope: The card fits into an A7 (5x 7-inches) size envelope stamped with a sentiment from Karen Burniston’s Photo Memories stamp set on the back flap in black ink.

___________________________________

Thank you for experiencing this blog post.

I hope this inspires you and makes you smile.

Please like and leave comments 😊

___________________________________

Disclaimer: Karen Burniston products are provided free of charge by the manufacturer for review and use. All other items were personally purchased. Compensated affiliate links used where or when possible, meaning I will receive a small percentage commission from these manufacturers at no cost to you. This will allow me to add more content to my YouTube channel and help out a lot. Thank you.

Materials Used:

Dies

Press Plates & Dies

  • Spellbinders – BetterPress Press Plate & Die Set – Cheers To You Sentiments
  • Spellbinders – BetterPress Press Plate & Die Set – Make A Wish Sentiments

Stamps

Papers

  • Concord and 9th – 8.5×11 inch 100lb Cardstock – Sea Glass
  • Spellbinders – 8.5×11 inch 100lb Cardstock – Saffron
  • Spellbinders – 8.5×11 inch 100lb Cardstock – Terra Cotta
  • Recollections – 8.5×11 inch 100lb Cardstock – Pinks
  • Recollections – 8.5×11 inch 100lb Cardstock – Blues
  • Roobee by Mara-Mi – – 8.5×11 inch Single-Sided Paper – Celebrations
  • Recollections – A7 Envelope – Cream

Ink

  • Memento – Fade Resistant Dye ink – Tuxedo Black
  • Pigma – Mircon 01 Fine Tip Pen – Black
  • Sharpie – Permanent Marker – Ultra Fine Tip – Black
  • Spectrum Noir – Tri-Blend Alcohol Markers – Dark Red Blend & Purple Blend

Adhesives

Tools

Miscellaneous

  • Nuvo – Aqua Shimmer – Glitter Gloss

Stenciling Fun

I played with the March 2025 Spellbinders’ Stencil of the Month set – Mosaic & Quilted Memories and the Embossing Folder of the Month – Mosaic Memories to create some birthday cards.

Watch the process video to see how I made these cards.

All cards are A2 size (4.25×5.5-inches).

Voilet Mosaic: This card used – Stencil of the Month – Mosaic Memories – SOM-MAR25, Embossing Folder of the Month – Mosaic Moments – EOM-MAR25, BetterPress Press Plate & Die Set – Cheers To You Sentiments, BetterPress Press Plate & Die Set – Make A Wish Sentiments, Distress Inks – Shaded Lilac & Wilted Violet, Purple gems, Lilac cardstock and White cotton paper.

Blue Violet Mosaic: This card used – Stencil of the Month – Mosaic Memories – SOM-MAR25, Embossing Folder of the Month – Mosaic Moments – EOM-MAR25, BetterPress Press Plate & Die Set – Make A Wish Sentiments, Distress Inks – Shaded Lilac & Wilted Violet, Blue gems, Light Blue & Lilac cardstock and Grey cotton paper. (Blue sentiment strip “Have the best day ever” is a heat embossed with a blue sparkle powder. Stamp set unknown.)

Violet Quilted:  This card used – Stencil of the Month – Quilted Memories – SOM-MAR25, BetterPress Press Plate & Die Set – Fancy Sentiment Strips, Distress Inks – Shaded Lilac, Yellow gems, Lilac cardstock and White cotton paper.

Posey Quilted:  This card used – Stencil of the Month – Quilted Memories – SOM-MAR25, BetterPress of the Month Press Plate & Die Set – Paint The Town-BPOM-NOV24, Distress Inks – Milled Lavender, Yellow gems, Lilac & Purple cardstock and White cotton paper. (Purple sentiment banner is hot foiled in black foil using an unknown “Happy Birthday” Glimmer plate but cut using Fancy Sentiment Strips die.)

Red Quilted:  This card used – Stencil of the Month – Quilted Memories – SOM-MAR25, BetterPress Press Plate & Die Set – Make A Wish Sentiments, Distress Inks – Lumberjack Plaid, Mustard Seed & Spiced Marmalade, Yellow cardstock, White cotton paper and a red satin bow.

___________________________________

Thank you for experiencing this blog post.

I hope this inspires you and makes you smile.

Please like and leave comments 😊

___________________________________

Disclaimer: Karen Burniston products are provided free of charge by the manufacturer for review and use. All other items were personally purchased. Compensated affiliate links used where or when possible, meaning I will receive a small percentage commission from these manufacturers at no cost to you. This will allow me to add more content to my YouTube channel and help out a lot. Thank you.

Materials Used:

Press Plates & Dies

  • Spellbinders – BetterPress Press Plate & Die Set – Cheers To You Sentiments
  • Spellbinders – BetterPress Press Plate & Die Set – Fancy Sentiment Strips
  • Spellbinders – BetterPress Press Plate & Die Set – Make A Wish Sentiments
  • Spellbinders – BetterPress of the Month Press Plate & Die Set – Paint The Town-BPOM-NOV24

Stencils

  • Spellbinders – Stencil of the Month – Mosaic & Quilted Memories – SOM-MAR25

Embossing Folders

  • Spellbinders – Embossing Folder of the Month – Mosaic Moments – EOM-MAR25

Papers

  • Blue, Lilac, Purple, White and Yellow 65 lb. Cardstock
  • Crafter’s Companion – 4.25×5.5 250 gsm Cotton Paper – Cream, Grey, White
  • Scrapbook.com – 8.5×11 110 lb. Cardstock – Neenah Solar White
  • Fraser Papers for William House – A2 Envelope – Genesis Text Milkweed Smooth

Ink

  • Pigma – Mircon 01 Fine Tip Pen – Black
  • Ranger – Tim Holtz – Distress Ink – Milled Lavender, Shaded Lilac, Wilted Violet
  • Spellbinders – BetterPress Ink – BetterPress Black

Adhesives

Tools

  • Die Cutting Machine
  • Paper Trimmer
  • Gelli Arts – 8×10-inch Gel Plate
  • Bone Folder
  • Score Board
  • Scissors
  • Pencil
  • Paper Masking Tape
  • We R Memories – QuickStick

Miscellaneous

  • Red Satin Ribbon Bow
  • Adhesive Backed Gems- Blue, Purple, Yellow

It’s A Party – Celebrate Your Birthday!

When needing a large number of birthday cards, making multiple inlay die-cut backgrounds is the way to go.

Watch the video below to see how I made these cards.

Cardbase:  I made eight A2 size cardbases by folding 8.5×5.5-inch rectangles of white cardstock in half.
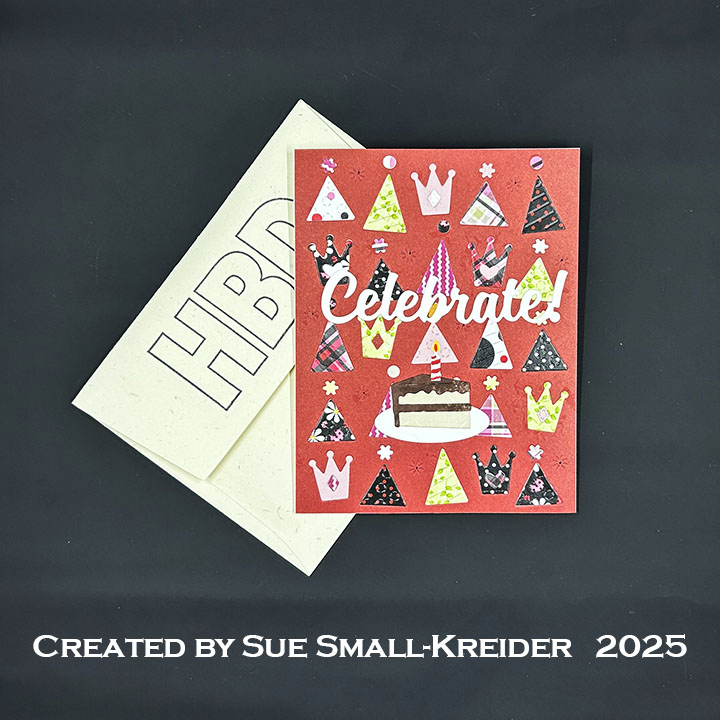
Card Front: The card front uses Concord & 9th’s Party Hats inlay die along with the slice of cake from Karen Burniston’s Big Birthday Charms.

Sentiments:  The sentiments were stamped in black ink using the Craft Roulette’s Funn Sentiments #01 stamp set and Karen Burniston’s Celebrate, Happy Birthday and Shadow dies along with her Katherine Label Pop-Up die set.

Envelope:  The card fits into an A3 (4.25x 5.5-inches) size envelope stamped with a sentiment or a hand-drawn heart.

___________________________________

Thank you for experiencing this blog post. I hope this inspires you and makes you smile. Please like and leave comments 😊

___________________________________

Disclaimer: Karen Burniston products are provided free of charge by the manufacturer for review and use. All other items were personally purchased. Compensated affiliate links used where or when possible, meaning I will receive a small percentage commission from these manufacturers at no cost to you. This will allow me to add more content to my YouTube channel and help out a lot. Thank you.

Materials Used:

Dies

Stamps

  • Craft Roulette – Clear Stamps – Funn Sentiments #01

Papers

  • Craft Consortium – A4 Double-Sided Solid Colored Cardstock – Little Robin Redbreast
  • Craft Consortium – A4 Double-Sided Solid Colored Cardstock – ‘Tis the Season
  • Ink N’ Splatter – 6×6 Double-Sided Cardstock – Ladybug Days
  • Ink N’ Splatter – 6×6 Double-Sided Cardstock – Raspberry Crush
  • White Cardstock
  • Fraser Papers for William House – A2 Envelope – Genesis Text Milkweed Smooth

Ink

  • Memento – Fade Resistant Dye ink – Tuxedo Black
  • Pigma – Mircon 05 Fine Tip Pen – Black
  • Ranger – Letter It – Fineliner Pen – Yellow
  • Sakura – Gelly Roll Pen – Medium – White
  • Sharpie – Permanent Marker – Ultra Fine Tip – Red
  • Stampin’ Up – Stamp Write Marker – Chocolate Chip
  • Nuvo – Aqua Shimmer Brush Marker – Glitter Gloss

Adhesives

Tools

One Layout- Three Cards

Using the Craft Roulette Funn Sentiments #01 stamps and dies sets and Concord & 9th Make Some Noise dies, I created three different birthday cards using the same basic elements, but switched up the papers, card orientation and inside sentiments. All the cards are A2 (4.25×5.5-inches) in size.

Watch the process video to see how I made these cards.

Below are the details for each card.

Blue Stripes Materials Used: Craft Roulette Funn Sentiments #01 stamps and dies sets * Craft Roulette Funn Friends #01 stamps set * Concord & 9th Make Some Noise dies * Taylored Expressions Stencil – Plaid * Bay Blue Velveteen Felt Paper * Stellar White Carnival Groove Cardstock * White Copier Paper * Craft Consortium Little Robin Redbreast Paper * Dark Blue and White Cardstock * A2 Envelope * Memento Paris Dusk Ink * Clear Sequins * Stickles Sunburst * White Gel Pen * Liquid Glue * Foam Squares

Orange Dots Materials Used: Craft Roulette Funn Sentiments #01 stamps and dies sets * Craft Roulette Funn Friends #01 stamps set * Concord & 9th Make Some Noise dies * Photoplay Stencil – Dots * Karen Burniston Crosshatch Rectangle die * Stellar White Carnival Groove Cardstock * White Cardstock * Craft Consortium Little Robin Redbreast Paper * White Copier Paper * Spellbinders Orange Cardstock * A2 Envelope * Sunbird Spark Ink – Canyon, Dahlia, Mulberry & Ochre Ink * Nuvo Glitter Gloss * Stickles Sunburst * White Gel Pen * Liquid Glue * Foam Squares

Teal Tiles Materials Used: Craft Roulette Funn Sentiments #01 stamps and dies sets * Concord & 9th Make Some Noise dies * Paper Discovery Moroccan Nights Background stamps* Karen Burniston Big Birthday Charms Balloon die* Craft Consortium Little Robin Redbreast Paper * Pale Blue and White Cardstock * Your PaperInsider Sliver Holographic Oil Slick Envelope * White Copier Paper * A2 Envelope * Unknown Water Soluble Ink in Teal & Pale Blue* Clear Sequins * Black Fine-Line Pen * Liquid Glue * Foam Squares

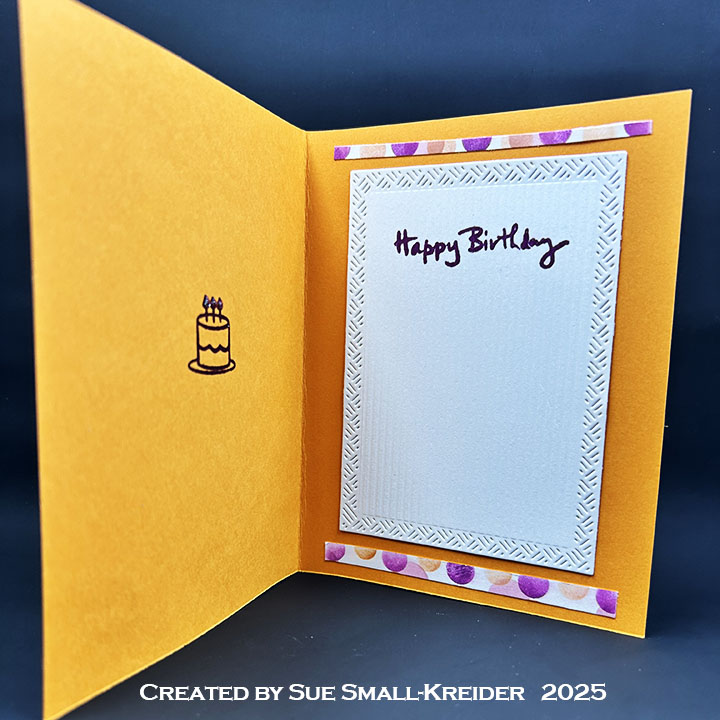
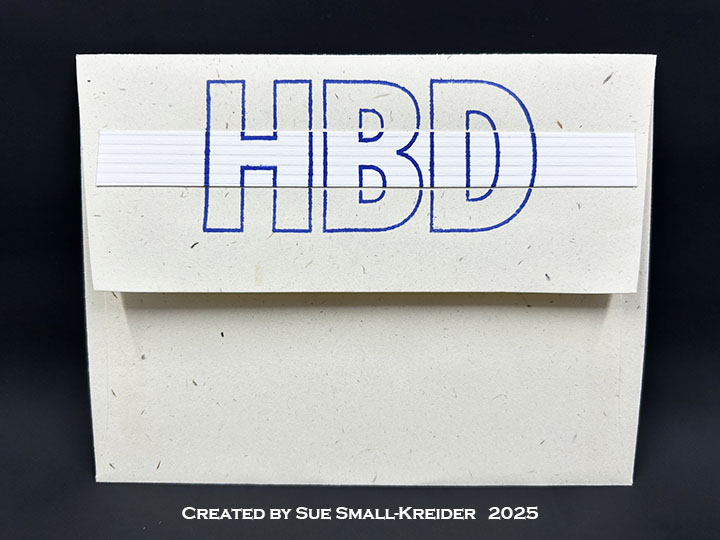
Envelopes:  The cards fit into A2 (4.25x 5.5-inches) size envelopes stamped with “HBD” on the back flap in inks and papers that coordinate with each card’s specific materials.

You can also see another post using a similar layout by clicking here.

___________________________________

Thank you for experiencing this blog post.

I hope this inspires you and makes you smile.

Please like and leave comments 😊

___________________________________

Disclaimer: Karen Burniston products are provided free of charge by the manufacturer for review and use. All other items were personally purchased. Compensated affiliate links used where or when possible, meaning I will receive a small percentage commission from these manufacturers at no cost to you. This will allow me to add more content to my YouTube channel and help out a lot. Thank you.

Materials Used:

Dies

  • Craft Roulette – Metal Dies – Funn Sentiments #01
  • Concord & 9th – Metal Dies – Make Some Noise
  • Karen Burniston in cahoots with Riley and Company – Big Birthday Charms – 1180
  • Karen Burniston in cahoots with Riley and Company – Rectangles – Crosshatch – 1054

Stamps

  • Craft Roulette – Clear Stamps – Funn Sentiments #01
  • Craft Roulette – Clear Stamps – Funn Friends #01
  • Paper Discovery – Clear Stamps – Moroccan Nights – Moroccan Background

Stencils

  • PhotoPlay – Say It With Stamps – Plastic 4×9-inch Stencil – 3-Piece Dots by Becky Moore
  • Taylored Expressions – Plastic 6×6-inch Stencil – Plaid – TESN63

Papers

  • Craft Consortium – 210x297mm – 200gsm Double-Sided Papers – Little Robin Redbreast
  • Spellbinders – 8.5×5.5-inches 100# Cardstock – Persimmon
  • Your PaperInsider – Box 10 – 8.5×5.5-inches 235 gsm – Bay Blue Velveteen Felt Paper
  • Your PaperInsider – Box 10 – 8.5×5.5-inches 100# Cover – Stellar White Carnival Groove
  • Your PaperInsider – Box 10 – 4.25×5.5-inches 60# Text– Sliver Holographic Oil Slick Envelope
  • Blue and White Cardstock
  • Fraser Papers for William House – A2 Envelope – Genesis Text Milkweed Smooth

Ink

  • Memento – Fade Resistant Dye ink – Paris Dusk
  • Sunbird Spark – Velvety Dye Ink – Canyon, Dahlia, Mulberry & Ochre
  • Unknown Water Soluble Ink – Teal & Pale Blue
  • Pigma – Mircon 01 Fine Tip Pen – Black
  • Sakura – Gelly Roll Pen – Medium – White
  • Nuvo – Aqua Shimmer – Glitter Gloss

Adhesives

Tools

  • Die Cutting Machine
  • Paper Trimmer
  • Bone Folder
  • Stamping Platform
  • Stamping Blocks
  • Scissors
  • Paper Masking Tape
  • Tweezers
  • We R Memories – QuickStick

Miscellaneous

  • Clear Sequins
  • Ranger – Stickles (Glitter Gel) – Sunburst

Paddlewheel Boat Pop-Up Birthday Card

It’s the Karen Burniston design team challenge for March 2025 using the theme of Lake or Ocean. I made a birthday card using the Cruise Ship Add-ons, Boat Pop-Up and Cruise Charms to make a pop-up paddlewheel boat. (You can see other boat and ship pop-ups by clicking here.)

Watch the process video to see how I made this card.

Cardbase: Start with a 4.25 x 11-inch piece of cardstock and fold in half to form a side-fold A2 (4.25×5.5-inch) card. Cover the four panels with decorative papers.

Pop-Up: Watch the assembly videos for the Boat Pop-Up and Cruise Ship Add-ons. Cut out one of the back trim piece from the Cruise Ship Add-ons and two of the ship’s wheels from the Cruise Charms in red.  Trim the ship’s wheels as directed in the video above.

Sentiments:  All the sentiments used on the card come from the Sail Away stamp set except for the “Happy Birthday” which is from the Belated Birthday set.

Envelope:  The card fits into an A2 (4.25x 5.5-inches) size envelope stamped with a sentiment used on the card on the back flap in dark brown ink.

___________________________________

Thank you for experiencing this blog post.

I hope this inspires you and makes you smile.

Please like and leave comments 😊

___________________________________

Disclaimer: Karen Burniston products are provided free of charge by the manufacturer for review and use. All other items were personally purchased. Compensated affiliate links used where or when possible, meaning I will receive a small percentage commission from these manufacturers at no cost to you. This will allow me to add more content to my YouTube channel and help out a lot. Thank you.

Materials Used:

Dies

Stamps

Papers

  • Glitz Girls – 12×12 inch Single-Sided Paper –Love Nest by Lisa Rupp
  • The Paper Studio – 12×12 inch Single-Sided Paper – Beach House
  • Blue, Red and White Cardstock
  • Fraser Papers for William House – A2 Envelope – Genesis Text Milkweed Smooth

Ink

Adhesives

Tools

  • Die Cutting Machine
  • Paper Trimmer
  • Bone Folder
  • Score Board
  • Stamping Platform
  • LDRS – Stampendable Stamping Tool
  • Stamping Blocks used as paperweights
  • Scissors
  • Pencil
  • Paper Masking Tape
  • We R Memories – QuickStick

Miscellaneous

  • Cotton Ball