This card was made for CRAFT ROULETTE #291 whose parameters included a postcard, Eastercolors, pack(s)/(ing) element, and shiny.
Watch the process video to see how I made these cards.
Cardbase: I used a 5×7-inch 220lb. cotton card panel to print the snowmen and sentiment onto the postcard front using a light blue ink.
Snowmen: Printed using the BetterPress system with the Spellbinders press plate Made with Snowflakes and colored glitter brush markers in pastel colors.
Sentiments: “Made with love & snowflakes” is in the Made with Snowflakes press plate set. The postmark was stamped in red ink using elements from two Purple Onion Designs red rubber stamp sets.
Envelope: The card fits into an A7 (5x 7-inch) size envelope.
___________________________________
Thank you for experiencing this blog post.
I hope this inspires you and makes you smile.
Please subscribe, like and leave comments 😊
___________________________________
Disclaimer: Karen Burniston products are provided free of charge by the manufacturer for review and use. All other items were personally purchased. Compensated affiliate links used where or when possible, meaning I will receive a small percentage commission from these manufacturers at no cost to you. This will allow me to add more content to my YouTube channel and help out a lot. Thank you.
Materials Used:
Press Plates
Spellbinders – BetterPress Of The Month – Made with Snowflakes– BPOM-OCT25
Stamps
Purple Onion Designs – Red Rubber Stamps – Vintage Birthday Postmark Set
Having just received the new Waffle Flower Cake Time Texture die and stencil set, I decide to make a batch of birthday cards.
I used purchased A2 (4.25×5.5-inch) plaid cardbases with white envelopes to start.
CARD
Front
Taking an 8.5×11-inch sheet of cream cardstock and cut into four 4.25×5.5-inch panels (I used 100 lb cardstock.)
Die-cut two of the panels in the center of panel with the texture die
Die-Cut Texture
Emboss the remaining panels using die-cutting machine’s embossing sandwich to emboss the die into the cardstock (I like the texture this gives to the panel, but it was harder to line-up the stencils.)
Embossed Texture
Using the five layered stencils, color the image with ink (I used a blue/orange/yellow color palette.)
Trim off the panel edges to the embossed die edge
Adhere to the center of card fronts (I used double-sided tape.)
Add black sentiment strips to front
Inside
Die-cut four mechanism arms using Karen Burniston’sKatherine Label Pop-Up L-shaped die from cream colored cardstock (I used 65 lb weight cardstock.)
Watch the assembly video located at the bottom of the linked page for the Katherine Label Pop-Up
Die-cut from blue cardstock four of Karen Burniston’s Happy Birthday
Glue the words to shadow
Stamp the verse from the Craft Roulette’s Funn Sentiments #01 inside the cardbase just below the center of the panel
Glue in the pop-up mechanism
Attach the “Happy Birthday” to the box pop-up making sure there are no catchpoints and that the sentiment stays inside the card when closed
Add glitter gloss to “Happy Birthday” and the word Glitter in the stamped verse
ENVELOPE
Stencil the envelope flap with the pennant using similar colors to the card
Stamp “HBD” over the stenciling using the Craft Roulette’s Funn Sentiments #01
___________________________________
Thank you for experiencing this blog post.
I hope this inspires you and makes you smile.
Please subscribe, like and leave comments 😊
___________________________________
Disclaimer: Karen Burniston products are provided free of charge by the manufacturer for review and use. All other items were personally purchased. Compensated affiliate links used where or when possible, meaning I will receive a small percentage commission from these manufacturers at no cost to you. This will allow me to add more content to my YouTube channel and help out a lot. Thank you.
This card was made for CRAFT ROULETTE #288 whose parameters included a celebration card, on the ground colors, goes well together element, and block(s). Today’s card uses Spellbinders and Karen Burniston dies as well as stamps by Riley and Company. Glitter hearts are from Trinity Stamps.
Cardbase: I used a purchased plaid A2 (4.25×5.5-inch) card base and envelope.
Card Front: The new Spellbinders Fountain Wishes die set was used to make the milkshake and blue bird with a party hat. Many of the tiny pieces were cut from white cardstock and colored with markers. The bird and waffle fan were also inked with Distress Ink for shading. The chocolate sauce was covered in clear packing tape before die cutting.
Sentiments: The inside stamped sentiment is Funny Bones by Riley and Company. The front sentiment is a Spellbinders BetterPress plate Fountain Wishes Sentiments.
Envelope: Back flap is stamped with Funny Bones by Riley and Company and another bird from the Spellbinders Fountain Wishes die set.
___________________________________
Thank you for experiencing this blog post.
I hope this inspires you and makes you smile.
Please subscribe, like and leave comments 😊
___________________________________
Disclaimer: Karen Burniston products are provided free of charge by the manufacturer for review and use. All other items were personally purchased. Compensated affiliate links used where or when possible, meaning I will receive a small percentage commission from these manufacturers at no cost to you. This will allow me to add more content to my YouTube channel and help out a lot. Thank you.
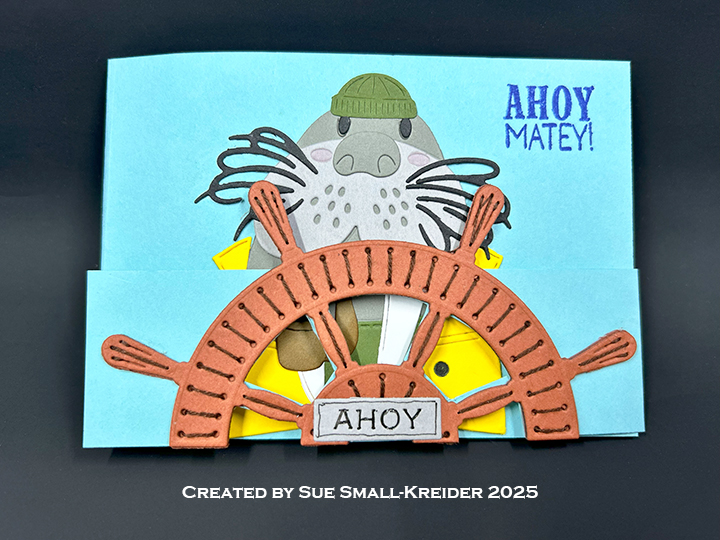
This card was made for CRAFT ROULETTE #286 whose parameters included a dude’s card, sunflower field colors, bird(s) element, and soot. Today’s card uses Spellbinders’ dies and embossing folder and Karen Burniston dies and stamps.
Watch the video below to see how this card was made.
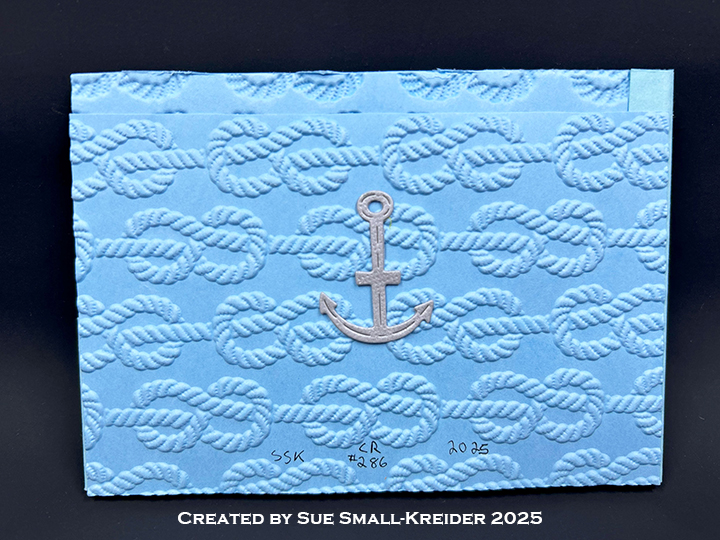
Cardbase: Cut from blue cardstock one 1.5×5.5-inch strip and one 3.5×5.5-inch rectangle. Score and fold .5-inch from the edge on both pieces to form 1.5×5-inch strip and 3.5 x5-inch rectangle. From an 8×6 sheet of heavy blue cardstock spritz with water and use the Spellbinder’s 3D Nautical Knots embossing folder to emboss the piece. Let piece dry flat. Trim down to two pieces that are 3.5×5-inches. (I made the mistake of cutting my cardstock to finished size I wanted before I embossed, forgetting that the embossing would consume some of my cardstock. So it is better to emboss a piece bigger than what you need and then trim down.)
Ships Wheel: Cut two ships wheels with stitching holes – one from black and one from brown cardstock using the Spellbinder’s stitching Ahoy, Matey! die set. Cut one ships wheel without the stitching holes from brown. Glue the two with holes together, keeping the glue from filling the holes. Stitch the pattern using two strands of brown embroidery floss. Glue the last brown wheel to cover over the back threads. Cut one “Ahoy” sign from silver using the die in the same stitching die set. Go over the letters with a thin-tipped black marker. Glue to bottom center of wheel. Using a pencil trace the openings of the wheel onto the blue strip as shown in the video above. Cut the openings out using a kraft knife. Glue wheel to blue strip.
Walrus and Seagull: Follow the directions on packaging of the Spellbinders Shipmates die set to assemble the pair. (I glued black eyes onto the walrus and used a pink marker to color the cheeks on both animals. Also did some shading on pipe with brown ink. ) Attach each creature as shown in the video above.
Card Assembly: Glue the strip with the ships wheel to the lower right side of one of the 3.5×5-inch rope embossed rectangles. Glue the 3.5×5-inch rectangle with the walrus glued to it on the left side of the rope embossed rectangle. Glue the remaining rope embossed rectangle to the back of the card to cover the card flap tabs.
Pop-Up Mechanism: Cut one of the L-shaped mechanisms from blue cardstock using theKaren BurnistonKatherine Label Pop-Up die set. (Watch the assembly video at the bottom of the linked page for the die set.) Attach inside the card as shown in the video above.
Sentiments: Using the Karen Burniston “Happy Birthday” and its Shadowdies, cut the inside sentiment and glue together. Adhere the seagull to the top of the words. Glue entire piece onto the pop-up mechanism, checking that it is hidden inside the card and does not become a catchpoint for the mechanism. Stamp “Ahoy Matey!”to the card front using Karen Burniston’s Pirate Sentiments stamp set.
Please subscribe for email notices, like and leave comments 😊
___________________________________
Disclaimer: Karen Burniston products are provided free of charge by the manufacturer for review and use. All other items were personally purchased. Compensated affiliate links used where or when possible, meaning I will receive a small percentage commission from these manufacturers at no cost to you. This will allow me to add more content to my YouTube channel and help out a lot. Thank you.
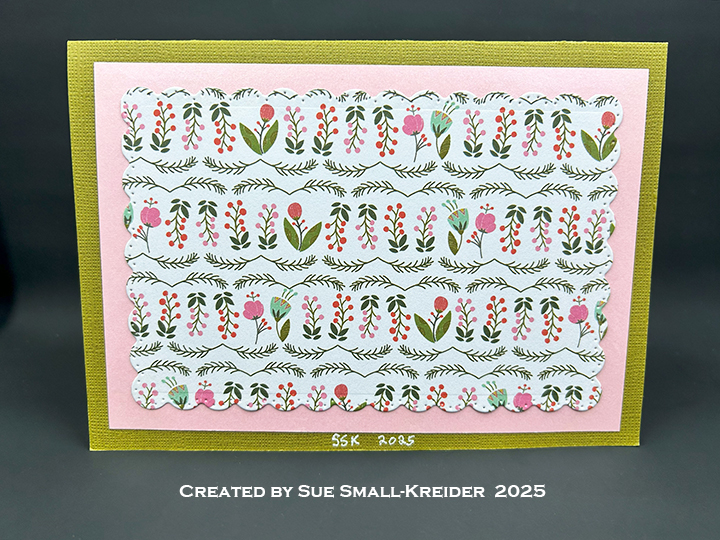
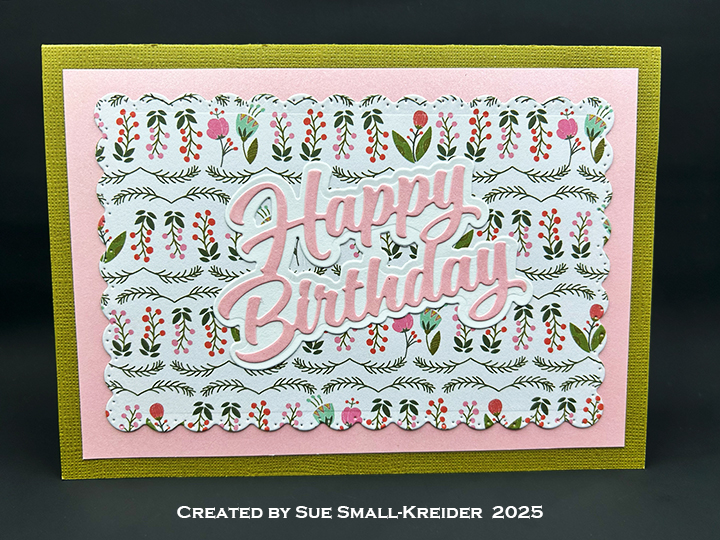
Cardbase: Cut a 10 x7-inch rectangle of olive green cardstock, score at 5-inches, fold in half and burnish with a bone folder. Cover inside with two 4.2×6.2-inch rectangles of patterned paper and the outside panels with two 4.5×6.5-inch rectangles of pink shimmer cardstock followed by the scalloped edged rectangles of patterned paper cut using the Rectangles and Labels – Crosshatchdie set.
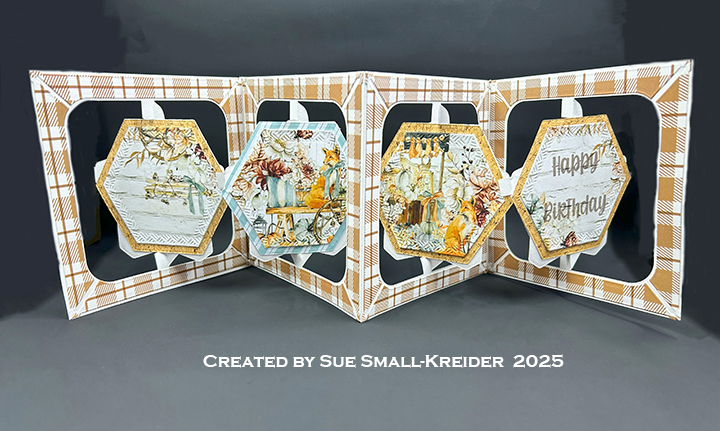
Arch Pop-Ups: Watch the assembly video for the Arch Pop-Up die located at the bottom of the linked page. Watch the video above for the modifications made to the arch for placing two arches in a 5×7-inch card. Decorate with Fun Flowers and Flowers and Bee die sets.
Envelope: This card fits into an A7 (4.25×5.5-inch) envelope with strips of the decorative paper on the back flap.
___________________________________
Thank you for experiencing this blog post.
I hope this inspires you and makes you smile.
Please subscribe to the email notices, like and leave comments😊
___________________________________
Disclaimer: Karen Burniston products are provided free of charge by the manufacturer for review and use. All other items were personally purchased. Compensated affiliate links used where or when possible, meaning I will receive a small percentage commission from these manufacturers at no cost to you. This will allow me to add more content to my YouTube channel and help out a lot. Thank you.
This card was made for CRAFT ROULETTE #285 whose parameters included a square card, birthday dairy aisle colors, leaves element, and hexagon. Today’s card uses Karen Burniston dies and stamps.
Watch the video below to see how this card was made.
________________________________
Thank you for experiencing this blog post.
I hope this inspires you and makes you smile.
Please like and leave comments 😊
___________________________________
Disclaimer: Karen Burniston products are provided free of charge by the manufacturer for review and use. All other items were personally purchased. Compensated affiliate links used where or when possible, meaning I will receive a small percentage commission from these manufacturers at no cost to you. This will allow me to add more content to my YouTube channel and help out a lot. Thank you.
Materials Used:
Dies
Elizabeth Craft Designs – Steel Cutting Dies – Accordion Star by Karen Burniston
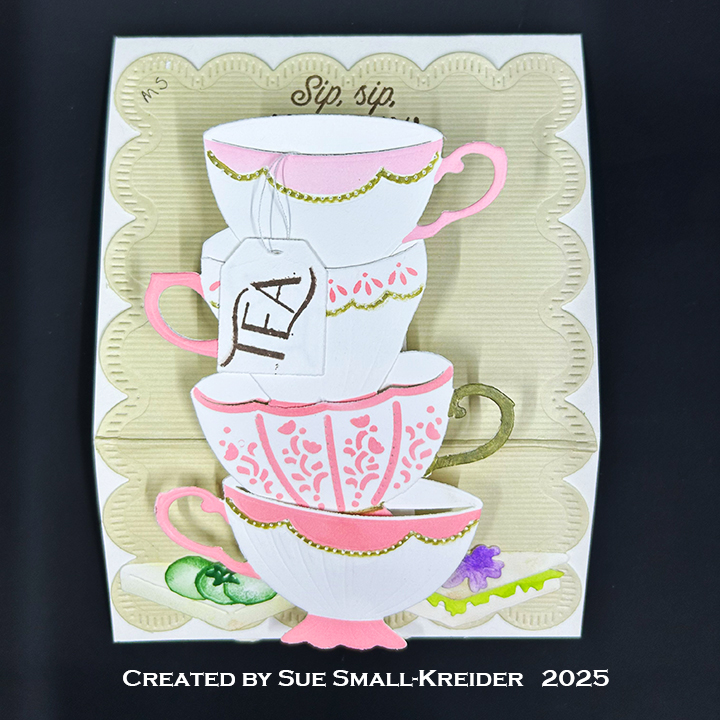
This card was made for CRAFT ROULETTE #284 whose parameters included a Funn fold card, birthday party colors, Maggie Smith element, and spiral (s) (ing). Today’s card uses The Greetery dies and stamps.
Watch the video below to see how this card was made.
Cardbase: I started with a 4.25×11-inch rectangle of 100lb white cardstock that was scored and folded at 5.5-inches and 9-inches to form an A2 (4.25×5.5-inch) easel card.
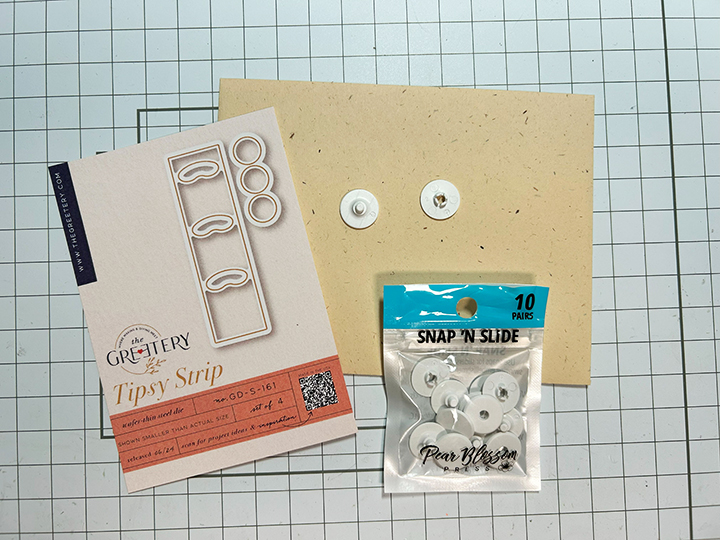
Tipsy Teacups: Watch the video above to see how the cups were created with stencils using pink ink and a gold marker. The tipsy mechanism is a strip with tracks cut into it for penny slider mechanism. I used Pear Blossom Press’s new Snap N’ Slide penny slider plastic pieces which are like snaps that you can use a glue dot to adhere to the back of the teacups.
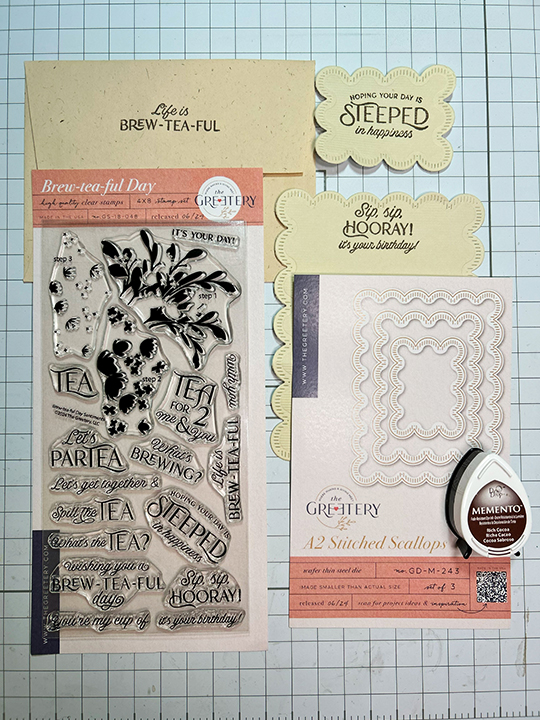
Sentiments: “Sip, Sip HOORAY! It’s your birthday” and Hopping your day is steeped in happiness” are both in the Brew-Tea-Ful Day stamp set. They are stamped onto striped, textured, thin cardstock cut with the larges and smallest of the A2 Stitched Scallops die set.
Envelope: The back flap is stamped with “Life is Brew-TEA-ful” in brown ink.
___________________________________
Thank you for experiencing this blog post.
I hope this inspires you and makes you smile.
Please like and leave comments 😊
___________________________________
Disclaimer: Karen Burniston products are provided free of charge by the manufacturer for review and use. All other items were personally purchased. Compensated affiliate links used where or when possible, meaning I will receive a small percentage commission from these manufacturers at no cost to you. This will allow me to add more content to my YouTube channel and help out a lot. Thank you.
Materials Used:
Dies
The Greetery – Waffer-Thin Steel Dies – Tipsy Strip
The Greetery – Waffer-Thin Steel Dies – Sips Tea
The Greetery – Waffer-Thin Steel Dies – Fancy Finger Foods
The Greetery – Waffer-Thin Steel Dies – A2 Stitched Scallops
Stamps
The Greetery – Clear Stamps – Brew-tea-ful Day
Stencils
The Greetery – Stencil – Sips Tea
Papers
Momenta – 12×12 in Textured Cardstock – Earthtones
Fraser Papers for William House – A2 Envelope – Genesis Text Husk Smooth
Watch the process video to see how I made this card.
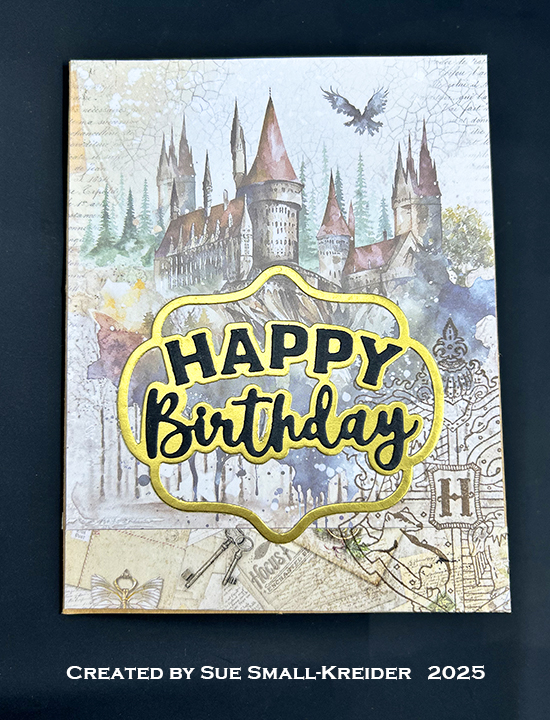
Cardbase: Start with a purchased A2 (4.25×5.5-inch) cardbase of brown kraft paper. Cover the four panels with decorative papers. (I used Ciao Bella’s Wizard Academy paper pad.)
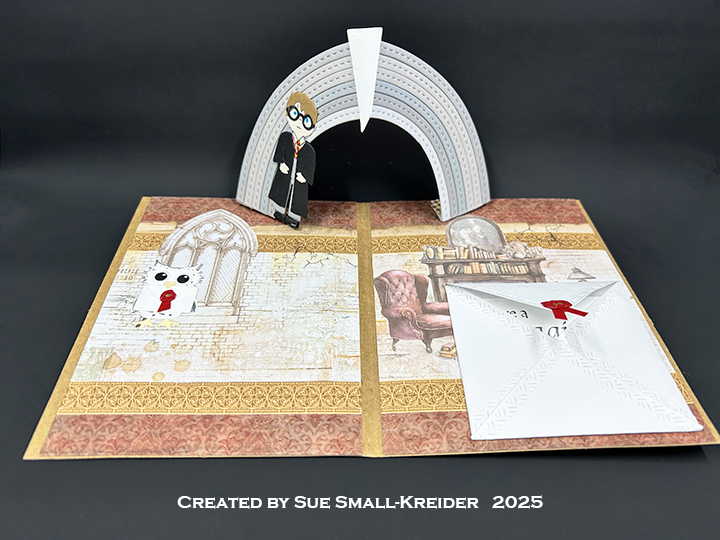
Arch Pop-Up: Watch the assembly videos (located at the bottom of the linked die set pages) for theArch Pop-Upand Rainbow Add-Ons. Use different shades of gray to build up the stone archway. The keystone of the arch is a decorator die in the Photo Fan Pop-Up.
Harry and Hedwig: Harry is made using three die sets – Paper People, Tiny Accessories 1 and Graduation Elements. Hedwig is made using the Feathered Animals set using white card stock and a gray brush tipped marker. (Watch the video above for assembly. Also watch this video for more details on the Hogwarts uniform.) The envelope Hedwig carries is from the Postage Pop-Upset. Watch the video above to learn how the red seal is made.
Sentiments: All the sentiments and Hogwarts crest used on the card are stamped using brown ink and Crackerbox Stamps. Watch the video above for how the large envelope and message card are made from the Squares – Crosshatch die set. “Happy birthday” on the card front is the Happy Birthday Lorna Add-Ons.
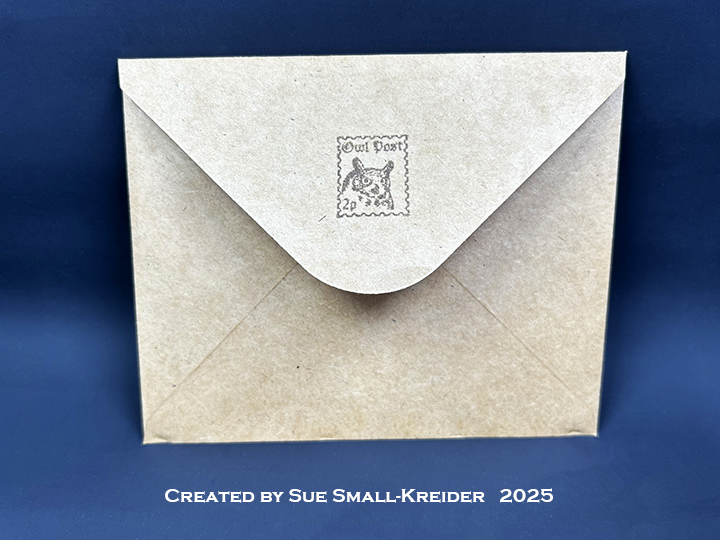
Envelope: The card fits into a brown kraft paper A2 (4.25x 5.5-inches) size envelope stamped with a castle and an owl post stamp on the back flap in brown ink.
___________________________________
Thank you for experiencing this blog post.
I hope this inspires you and makes you smile.
Please subscribe to the email notices, like and leave comments 😊
___________________________________
Disclaimer: Karen Burniston products are provided free of charge by the manufacturer for review and use. All other items were personally purchased. Compensated affiliate links used where or when possible, meaning I will receive a small percentage commission from these manufacturers at no cost to you. This will allow me to add more content to my YouTube channel and help out a lot. Thank you.
This card was made for CRAFT ROULETTE #280 whose parameters included a thinking of you project, hometown colors, cup or glass element, and add a doodle. Today’s card uses Karen Burniston dies and stamps along with a pop-up die set from Paper Discovery.
Watch the video below to see how this card was made.
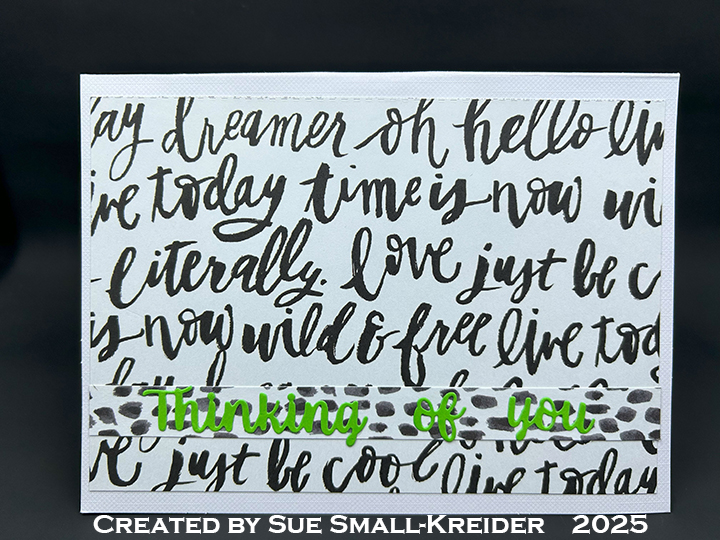
Cardbase: I started with a purchased A6 sized (4.625×6.25-inches) cardbase and matching envelope. I covered the four panels with decorative paper from a 6×8-inch paper pad from American Crafts.
Teacup Pop-Up: Watch the video above to see how the teacup and saucer were assembled. They were die cut from white cardstock using Paper Discovery dies by Olga Direktorenko – Teacup Fairies Timeless Tea Set Pop-Up Die Set. (This die set came out in 2020.) The flowers are from the Flowers and Bee die set.
Sentiments: “Thinking of you” on the card front is die cut in green using Word Set 1 – Greetings. The label for a personal message is the is from the Rectangles – Crosshatchdie set. The smaller label cut using the label die in the Bouquet Bits die set and is stamped in black brown ink using theBouquet Sayingsstamp set.
Envelope: The back flap is stamped with “Craft Roulette”.
___________________________________
Thank you for experiencing this blog post.
I hope this inspires you and makes you smile.
Please like and leave comments 😊
___________________________________
Disclaimer: Karen Burniston products are provided free of charge by the manufacturer for review and use. All other items were personally purchased. Compensated affiliate links used where or when possible, meaning I will receive a small percentage commission from these manufacturers at no cost to you. This will allow me to add more content to my YouTube channel and help out a lot. Thank you.